OneDrive is a cloud storage service offered by Microsoft that seamlessly integrates with Windows 8 and Windows 10. It allows users to save files associated with a Microsoft account on the cloud, making them accessible from any device, including smartphones, tablets, laptops, and computers.
As perfect as it may seem, OneDrive is actually no stranger to errors. Believe it or not, OneDrive users have reported many issues. One is “Error 0x8007016A: The Cloud File Provider Is Not Running.”
NOTE
This guide offers troubleshooting steps for addressing common issues with OneDrive, including error 0x8007016A. While we strive to provide accurate and practical advice, it's important to proceed with caution when making changes to your system or software. Incorrect modifications can lead to unforeseen issues or irreversible damage. If you're uncertain about any steps or their potential impact on your computer, we highly recommend seeking assistance from a professional or consulting official Microsoft support channels. Remember, your data and device's integrity should always be a priority.
What Is the Error 0x8007016A?
The error 0x8007016A is generally triggered by an existing Microsoft Office suite installed on your computer. When the issue surfaces, users may not be able to use some Microsoft Office features and functions, such as Cut, Copy, and Paste.
Other possible culprits behind the problem are the following:
Expert Tip: For smoother PC performance, consider using a PC optimization tool. It handles junk files, incorrect settings, and harmful apps. Make sure it's right for your system, and always check the EULA and Privacy Policy.
Special offer. About Outbyte, uninstall instructions, EULA, Privacy Policy.
- A Bad Windows 10 Update Has Been Installed – Many Windows 10 users reported that a bad Windows 10 update caused the error to appear. Whether it’s true or not, according to them, the installation of the recent update has caused the auto-sync of OneDrive to fail completely.
- OneDrive’s File On-Demand Feature Is Enabled – In other cases, the issue appears when the File On-Demand feature of OneDrive is enabled. Some Windows 10 users have resolved the problem by simply disabling the feature.
- OneDrive Syncing Is Disabled – Sometimes, third-party tools and apps try to conserve your computer’s power. As a result, background system processes like OneDrive syncing are disabled. Re-enabling the syncing feature may often resolve the problem.
- Corrupted Files Exist on OneDrive – File corruption on OneDrive may also cause the error code to appear. In that case, cleaning up your files will fix the problem.
- The Current Power Plan Is Keeping the Sync Feature from Working – Did you activate the Power saver plan on your device? It is possible that you disabled the syncing feature completely by doing so. As a quick fix, all you need to do is switch to the High performance or Balanced power plan.
Of course, knowing what’s causing the problem won’t fix the problem. So, how do you get rid of the error? Well, the first thing you have to do is stay calm and composed. Once you have your composure back, then you can proceed with trying the solutions below on how to fix the error 0x8007016A on Windows 10.
We’ve listed a few possible fixes to the error 0x8007016A on Windows 10 below:
Restart Your Computer
Sometimes, all your computer needs is a complete reboot. A lot of programs and applications may be sharing the same resources, hence the error messages on your PC.
To restart your computer, follow these steps:
- Go to the Start menu.
- Navigate to the Power options.
- Select Restart.
Consult the Event Viewer for OneDrive-Related Logs
How to Use Event Viewer:
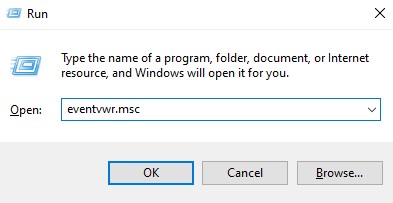
- Press the Windows key + R, type
eventvwr.mscinto the Run dialog, and press Enter.
- In the Event Viewer window, navigate to “Windows Logs” > “Application.”
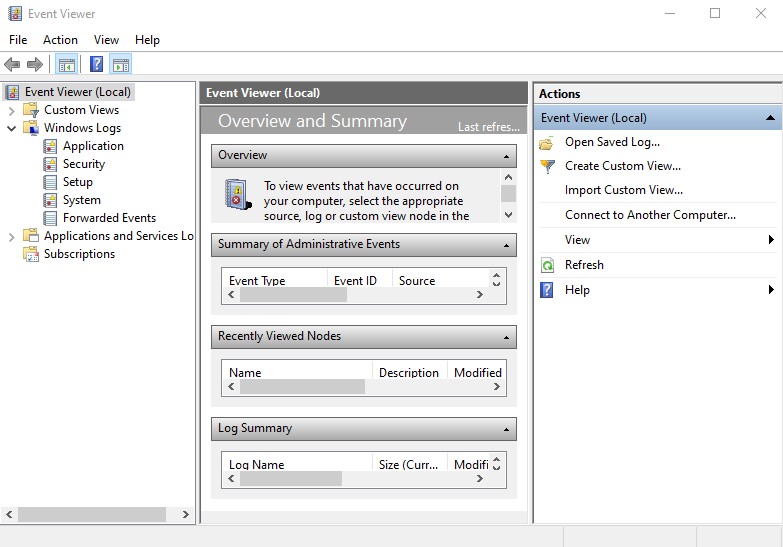
- Look for any recent warnings, errors, or informational events related to OneDrive.
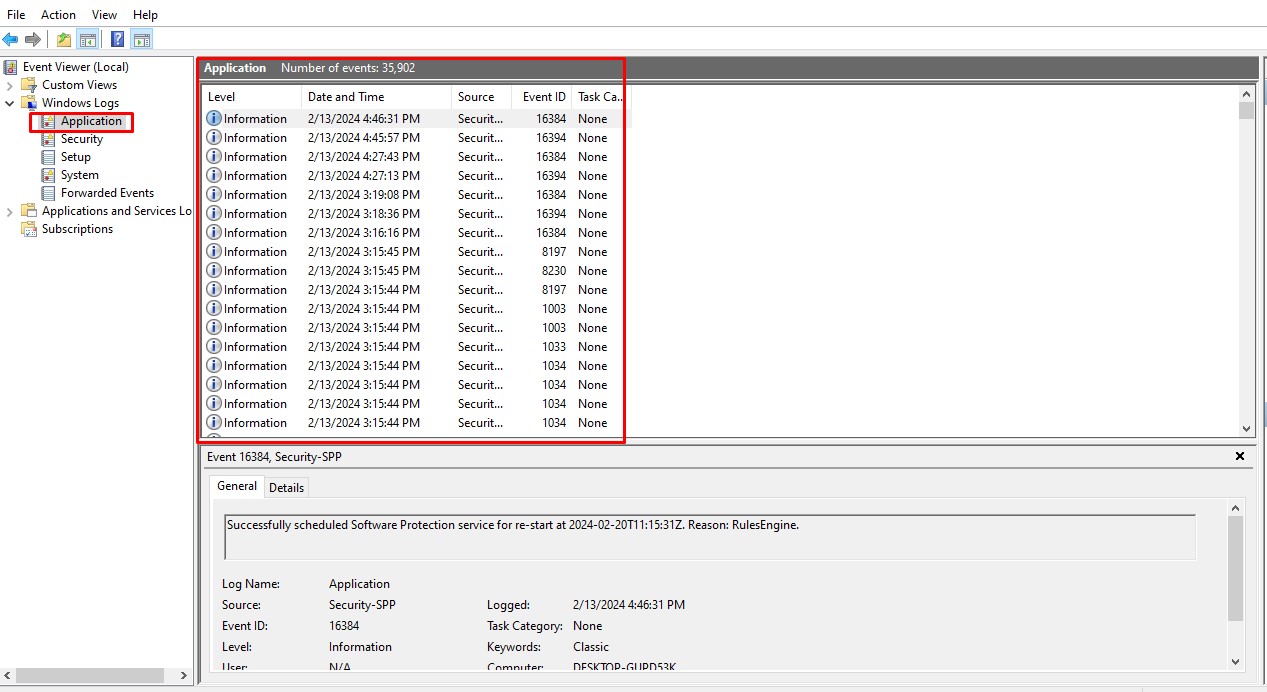
- Double-click on an event for detailed information that might help identify the cause of your OneDrive issue.
Review Update History in Relation to OneDrive Issues
Steps to Review Update History:
- Press the Windows key + I to open Settings, and go to “Update & Security” > “Windows Update.”
- Click on “View your update history.”
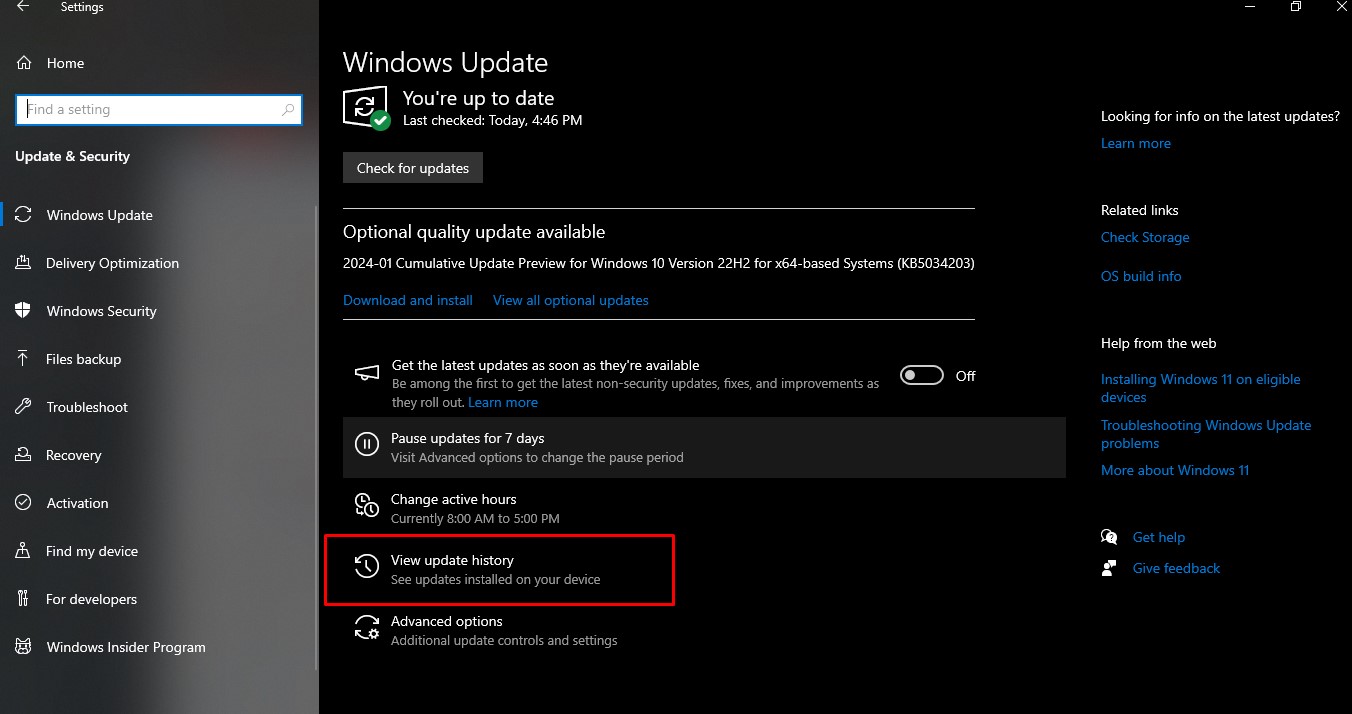
- Review the list of updates to identify any that coincide with the start of your OneDrive issues.
- If a problematic update is found, research it on Microsoft’s support forums for specific solutions or workarounds.
Adjusting File On-Demand Settings
How to Adjust Settings:
- Right-click the OneDrive icon in the system tray and select “Settings.”
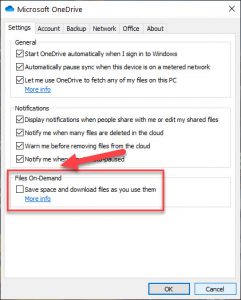
- In the Settings tab, find the “Files On-Demand” section.
- If enabled, consider disabling “Save space and download files as you use them” to see if this resolves your issue. Alternatively, adjust settings to better suit your usage patterns.
- Click “OK” to save changes and restart OneDrive.
Employing System File Checker (SFC) and Deployment Image Service and Management Tool (DISM)
Running SFC and DISM Scans:
- Open Command Prompt as Administrator by right-clicking the Start button and selecting “Command Prompt (Admin)” or “Windows PowerShell (Admin).”
- Type
DISM.exe /Online /Cleanup-image /Restorehealthand press Enter. Wait for the process to complete. - Then, type
sfc /scannowand press Enter. Wait for the system scan to complete and repair any corrupted files. - Restart your computer after the scans are complete.
Fix Microsoft Office
If there are problems with OneDrive, you may try to fix Microsoft Office or uninstall it from your computer. However, take note that the process of fixing or uninstalling Microsoft Office varies depending on your operating system. For a detailed guide on how to do it, refer below:
Windows 7:
- Go to the Start menu.
- Choose Control Panel.
- Open Programs.
- Select Programs and Features.
- Scroll down and select the problematic Microsoft Office product.
- At the top of the Programs and Features window, click Change.
- Click Quick Repair.
- Wait until the problematic Microsoft Office product is repaired.
- If repairing the Microsoft Office product does not work, uninstall it. Repeat steps 1 to 6, but this time, select Uninstall.
- Wait for the program to be uninstalled.
- Restart your computer.
- Once your computer has fully rebooted, reinstall the Microsoft Office product again.
Windows 8 and Windows 10:
- Press the Windows + R combination on your keyboard to launch the Run utility.
- In the text field, input control.
- Hit Enter.
- Go to Programs and Features.
- Scroll down and click on the problematic Microsoft Office product.
- Select Change.
- Click Quick Repair.
- Next, hit Repair.
- Wait for the repair process to be done.
- If the error message still shows up, you might need to uninstall the problematic Microsoft Office product. To do this, repeat steps 1 to 6, but instead of selecting Change, click Uninstall.
- Follow the on-screen prompts to uninstall the Office program.
- Restart your computer.
- Install the Microsoft Office product again.
- Fix #4: Reinstall OneDrive.
If the first three fixes do not work, reinstall OneDrive. You might ask how you can reinstall OneDrive when backing it up seems to be problematic.
On newer Windows versions, your OneDrive data appears as online-only files. These files, although they appear like ordinary files, save local hard drive space as they are simply just placeholders that store thumbnail and metadata information about the actual files. The real files aren’t really on your computer unless you open them.
Once a file is opened and saved to your computer, it automatically becomes available offline. This means it is saved locally on your computer and can be used without internet access. To back up online-only files, you can use third-party apps that you can find on Google.
Alternatively, you can create a backup of your OneDrive files by downloading them to an external storage drive.
Follow the guidelines below to know how:
- Go to https://www.microsoft.com/en/microsoft-365/onedrive/online-cloud-storage and input your login details.
- Make sure that you change the location of the downloaded files to your external drive. You can do so by opening your favorite web browser. And then, click the Tools button and choose View Downloads. Select Options and decide on a default download destination. Set it to your external drive and hit OK.
- Now, select the specific OneDrive files that you wish to back up.
- After selecting the files, click Download.
Once you have created a backup of your OneDrive files, you can proceed with reinstalling OneDrive. Do this by following the instructions below:
- Before you uninstall OneDrive, make sure that you have a backup of your OneDrive files.
- Next, press the Windows and X keyboard keys.
- Choose Command Prompt (Admin).
- Input this command: taskkill /f /im OneDrive.exe.
- Hit Enter.
- Depending on the Windows version you are using, input the following command into the command line:
- 32-Bit: %systemroot%\System32\OneDriveSetup.exe /uninstall
- 64-Bit: %systemroot%\SysWOW64\OneDriveSetup.exe /uninstall
- Install OneDrive again. Do this by entering the appropriate command for your Windows version:
- 32-Bit: %systemroot%\System32\OneDriveSetup.exe
- 64-Bit: %systemroot%\SysWOW64\OneDriveSetup.exe
- Reboot your computer.
Delete System Junk.
There are times when junk files that are hiding on your system may cause errors to occur on your computer. So, it’s a good habit to get rid of them every now and then.
To delete system junk the quick and easy way, use a reliable reliable PC Repair tool. In just a few clicks, all unnecessary files on your system will be identified and deleted.
Update Windows 10 to the Most Recent Build
As mentioned above, a bad update can cause the error 0x8007016A to appear. It is for that reason that Microsoft releases hotfixes and includes them in the latest builds.
If you’ve installed the KB4457128 update, you might have to run Windows Update manually to install the hotfix. Here’s how:
- Open the Run dialog box using the Windows + R combo.
- Into the text field, enter ms-settings:windowsupdate.
- Hit Enter. The Update tab of the Settings app should now open.
- Once you’re inside the tab, hover over the right-hand side of the window and click the Check for Updates button.
- If new updates are available, click the Update button and follow the onscreen prompts.
- Once the update is installed, reboot your computer and check if the problem has been fixed.
Disable the File On-Demand Feature
Some Windows 10 users have reportedly managed to resolve the problem by disabling the File On-Demand feature of OneDrive. After doing it, they deleted the semi-synced files (those that have thumbnails but show 0 KB as their size) on OneDrive and restarted their computers. It’s that easy.
Here’s a quick guide on how to do so:
- Be sure that the OneDrive service is up and running, and skip to step 6. If it isn’t, reboot your computer.
- Next, open the Run dialog box by pressing the Windows + R combination.
- Enter cmd into the text field.
- Hit Enter to launch the Command Prompt window.
- On the command line, input this command:
start %LOCALAPPDATA% \Microsoft\OneDrive\OneDrive.exe /client=Personal - Navigate to the bottom-right section of the active window and look for the OneDrive icon. Click on it and then press More.
- Select Settings.
- Go to Settings and scroll down to the Files On-Demand section.
- Tick the box next to the Save space and download files as you use them option.
- Hit OK to save the changes. Wait until the OneDrive service restarts.
- Now, click the OneDrive icon and select Open Folder.
- Search for the folder that you’re having problems with. Once you find it, right-click on it and hit Delete.
- Restart your computer to completely restart the services associated with OneDrive.
- Once your computer has rebooted, check if the problem persists by trying to delete, rename, or move the files inside your OneDrive folder.
Modify Your Computer’s Power Plan
Is your computer running on a restrictive power plan? It is likely that it’s the culprit behind the error 0x8007016A. Luckily, you can easily modify your power plan settings to ensure nothing blocks OneDrive’s sync feature.
Here’s how to switch to another power plan on a Windows 10 PC:
- Open the Run dialog box by pressing the Windows + R shortcut.
- Into the text field, enter powercfg.cpl.
- Hit Enter.
- The Power Options menu should now open. While in the menu, navigate to the right-most section and switch from your current option to High Performance or Balanced.
- After making a switch, restart your computer.
Contact a Professional Windows 10 Technician
If none of the above fixes worked, then it is time that you seek help from Windows 10 professionals. Let them identify and troubleshoot the problem, and seek expert advice on how to fix it. If the solution is too complicated for you, then leave the work to them. They can resolve the problem on your behalf so as to ensure nothing gets broken in the process.
Preventing OneDrive File Corruption
File corruption within OneDrive can trigger a range of issues, including the 0x8007016A error. Implementing preventive measures, such as regular checks for file integrity, can be invaluable. Tools like the System File Checker (SFC) scan and Deployment Image Service and Management Tool (DISM) can be used to repair corrupted system files that might be affecting OneDrive’s operation. Additionally, understanding the signs of file corruption and taking proactive steps, such as maintaining backups and avoiding abrupt system shutdowns, can mitigate the risk of corruption-related errors.
Maintaining Backups
- Regularly backup important files to an external drive or another cloud service.
- Use OneDrive’s “Version history” feature to recover previous versions of files if you suspect corruption.
- Be alert to signs of file corruption, such as files failing to open, error messages when accessing files, or unexpected application crashes.
- Practice safe computing habits: avoid abrupt shutdowns while files are syncing, and use reliable antivirus software to protect against malware.
Implementing these solutions can help mitigate common OneDrive issues, including error 0x8007016A, and enhance your data management and security strategy.
Conclusion
Hopefully, at least one of the fixes above has helped you get rid of the 0x8007016A error on your Windows 10 computer. If none of them worked, you may always seek help from professionals. This way, you can avoid incurring irreversible damage to your computer, which may cost you a lot.
Do you know other effective solutions on how to fix the 0x8007016A error? Share them with us below.
Still not working. It said I need to uninstall onedrive but first, it has to be backed and backing it up is the problem.
Having trouble on this error to my windows 10 to my old laptop, thanks for sharing this information, gladly i found your article!
Proceed with caution when making changes to your system or software.