Windows Updates primarily consist of feature enhancements and security updates designed to safeguard your machine against malware and virus attacks. Typically, Windows operating systems are configured to automatically check for and install updates through the internal Windows Update service.
If you are running Windows 10/11, know that it is easy to get the latest Windows updates. Simply do the following:
- Click the Start button.
- Go to Settings and select Update and Security.
- Here, click the Windows Update button.
- Restart your computer to complete the update.
You can also schedule the update if you wish to do so. Here’s how:
- Click the Start menu.
- Navigate to Settings and click Update and Security.
- Next, click the Schedule the Restart button.
- You will now be taken to a scheduling window. Toggle on the switch next to the Schedule a Time option.
- Pick a time and day you wish to schedule the update.
However, there are numerous potential errors that a user may encounter when downloading and installing Windows updates. Here are some of the common Windows Update errors that you might encounter:
Expert Tip: For smoother PC performance, consider using a PC optimization tool. It handles junk files, incorrect settings, and harmful apps. Make sure it's right for your system, and always check the EULA and Privacy Policy.
Special offer. About Outbyte, uninstall instructions, EULA, Privacy Policy.
- Windows Update Error 0x800f0900
- Windows Update Error 0xca020007
- Windows 10/11 error code 0x80242016
- Windows Update Error 0x800f0805
- Windows Update Error 0x80246013
- Windows Update Error 8024a000
- Windows 10/11 Error Code 0x8007012F
When these kinds of errors occur, you may experience a number of things that can tell you what steps you need to perform in order to resolve the problem.
There have been reports from users not being able to install pending Windows updates but instead getting an error message with Error code 80240025. The error has been reported not only on Windows 10/11 but in Windows 7 and Windows 8.1 as well. In here, we will talk about the reasons why this error code occurs and the recommended troubleshooting solutions that you can try to fix Windows update error code 80240025 on Windows 10/11.
What Is Windows Update Error 80240025?

While updating the computer, users might suddenly experience a sudden slow processing or a download which fails to complete. The failing computer might also go into a sudden reboot, either a single instance of the computer shutting down or a continuous loop which prevents the user from logging into the computer. Error messages might also come up on the screen.
If you are facing ‘Windows update error 80240025’ while trying to update the Windows operating system in your computer via ‘Settings’ App or ‘Control Panel’, then you are in the right place for the solution. Here, you will be guided with easy steps/methods to resolve the error.
Microsoft releases regular Windows updates as security updates, feature updates, cumulative updates, and creative updates in order to fix known issues and add several new enhancements and performances. It is quite simple to install Windows updates on a Windows 10/11/8.1/8/7 computer via ‘Control Panel’.
To do so, you need to open ‘Control Panel’ and go to ‘System and Security > Windows Update’ and click on ‘Check for updates’ button. Make sure your computer is connected to a stable internet. This will show the available Windows updates and then you need to click on ‘Download and Install’ on the update to update your computer.
However, several users reported that they faced ‘Windows update error 80240025’ while they tried to update their Windows computer. This error indicates Windows update fails to install for some reasons. This Windows Update error usually occurs on Windows 7, Windows 8.1 and Windows 10/11 computers when you try to update Windows operating system. Let’s take a look at the error message.
Windows could not search for new updates. An error occurred while checking for new updates for your computer. Error (s) found: code 80240025. Windows update encountered an unknown error.
The possible reason behind this Windows update error can be corrupted or outdated Windows Update components in your computer. Some type of temporary file corruption associated with Windows update can cause this error. You can perform Windows update component reset in your device in order to fix the issue.
Another possible reason behind this error can be registry key/entry that is preventing the installation of new pending windows updates. In such cases, you can disable, modify or delete registry keys in order to fix the issue. Let’s look at the common causes first.
What Causes Windows Update Error 80240025?
Why are you getting Windows Update error 80240025? There are many possible triggers to this error. Below are just a few of them:
- Corrupt Windows Registry Entries – Corrupt Windows registry entries can trigger the Windows Update Error 80240025. This is because if Windows is unable to find the files needed for the update, it will be unable to boot properly. This will result in an error.
- Damaged Windows File System – If important Windows files get damaged, it may result in the Windows Update Error 80240025.
- Unstable Internet Access – A stable internet connection is required to install a Windows update. If your connection is unstable, then you will likely encounter a Windows update error.
- Disabled Windows Update Service – You need to enable the Windows Update service to be able to download and install a Windows update. Otherwise, an error message will be thrown.
- Misconfiguration – If your Windows Update settings are not properly configured, then there is a chance that you will encounter the Windows Update Error 80240025.
- Malicious Entities – Malicious entities like viruses, malware, and adware are notorious culprits behind different Windows errors, and the Windows Update Error 80240025 is no exemption.
- Windows Update Component Glitch – The Windows Update component is prone to become affected by some type of temporary file corruption that might end up interfering with the installation of new updates. In this case, you can resolve the issue by resetting every relevant Windows Update component.
How to Fix Windows Update Error 80240025
Before you proceed with the solutions below, do the basic Windows Update troubleshooting steps first. Once you complete them, install the Windows update. Hopefully, you can proceed without any problems.
- Check if your computer has enough disk space. Ideally, you will need at least 32 GB of free disk space. If you don’t meet this requirement, then delete unnecessary files on your device manually or by using a third-party PC Repair tool that is capable of removing unwanted files.
- Disable any third-party antivirus program temporarily.
- Check for any bad sectors in your hard disk.
- Connect to a fast and stable internet connection.
If these basic steps do not work to fix the issue, follow the solutions below:
Fix #1: Run the Network Adapter Troubleshooter.
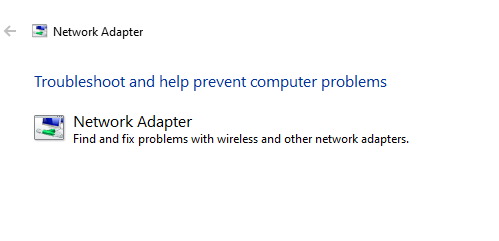
Even if the internet is working fine, the network might be facing other issues thus preventing the Windows Update and causing the error in the discussion. In such a case, we can run the Network troubleshooter to resolve the problem. The procedure to run the Network troubleshooter is as follows:
- Click on the Start button and then on the gear-like symbol to open the Settings menu.
- Go to Updates and Security > Troubleshoot.
- Select the Network Adapter Troubleshooter from the list and run it.
- Run the Network Adapter troubleshooter.
- Restart the system once you are done.
Fix #2: Install the Update Manually
If you are looking for another possible way to install the update without having to find out what’s the culprit, then you may try to download and install the update manually.
To do this, you will have to use the Microsoft Update Catalog. Here’s a guide on how to use it to install the update:
- Launch your favorite browser and visit this website: https://www.catalog.update.microsoft.com/Home.aspx.
- Once you’re here, take advantage of the search function and find the update that you want to install.
- Hit Enter to begin the search.
- From the search results, look for the update that is compatible with your computer’s architecture. If you don’t know your device’s architecture, right-click on This PC and select Properties. Go to System and check the System Type. It should show the bit version that your OS is currently running on.
- After identifying the version that is compatible with your device, click the Download button next to it. Wait for the download process to complete.
- Once done, go to the location where the download is stored. Locate the .inf file and right-click on it. Click the Install button that appears.
- Follow the on-screen prompts to complete the update installation.
- Restart your computer.
- Upon the next startup, the update should be installed.
Fix #3: Run the Windows Update Troubleshooter.
Did you know that Microsoft has created a troubleshooter tool that can be used in case Windows Update issues arise? Use it to resolve the problem.
If you’re facing any issues related to Windows Update, this is the first approach to finding the solution. This is an automated solution that doesn’t require much of your input. Windows Update Troubleshooter is a useful in-built Windows 10/11 utility developed by Microsoft.
The tool is designed to scan and detect any issues that may be the cause of system failure to download and install any pending Windows Updates. The tool is capable of clearing related temporary files, erase SoftwareDistribution folder contents, and check Windows Update Services status. It can also reset or repair any damaged Windows Update components.
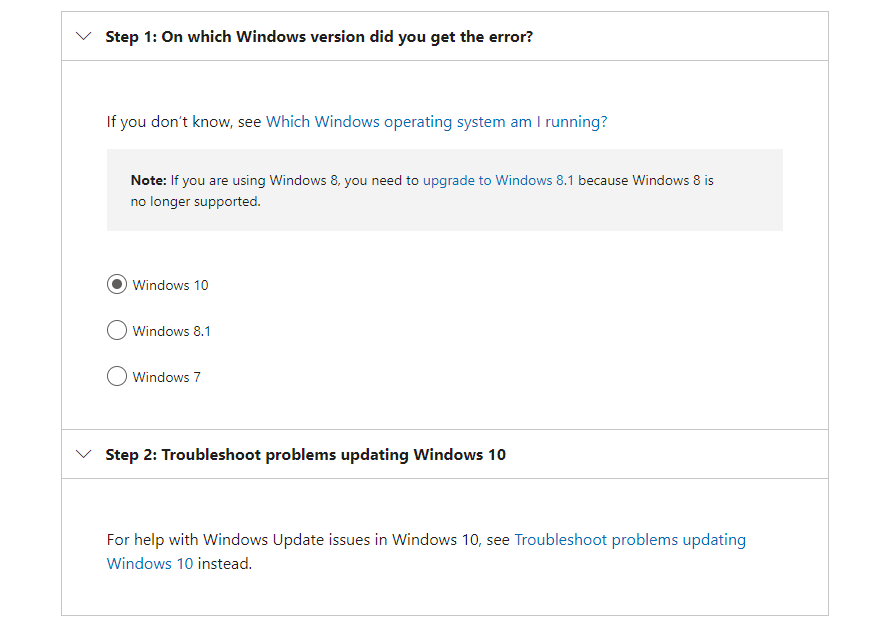
There are two ways of running the Troubleshooter. The first involves using Microsoft’s online Troubleshooter. Microsoft’s online troubleshooter will help you fix the 0x8900002A error and other common ones. To get started:
- Visit the Microsoft official website to run the online troubleshooter.
- Select your version of OS from the list. Your options include Windows 7, Windows 8.1, and Windows 10/11.
- Accept or click Yes when prompted to run the Windows Update Troubleshooter.
- A list of recommendations and the steps to take next will come up. Carry through and work as advised by the Troubleshooter.
The second option, which you can easily control, is to troubleshoot offline using your PC Troubleshooter. Here’s how to run the Troubleshooter manually:
- Launch Troubleshooter by pressing Win+I on the keyboard.
- Navigate to Update & Security > Troubleshoot > Additional Troubleshooters.
- On the page that opens, select Windows Update, and then hit the Run the Troubleshooter button.
- The Troubleshooter will automatically launch and pick up any issues, then start working on resolving them.
Wait for the Troubleshooter to finish working, then restart your Windows PC.
Fix #4: Reset the Windows Update Component
If the troubleshooter was unable to resolve the problem for you, then it is possible that you are dealing with a corruption issue with the Windows Update component. Now, it is worth noting that this issue cannot be easily resolved using conventional methods. So, if you are not that tech-savvy, we suggest that you seek help from professionals.
When it comes to resetting a Windows Update component, you have two methods to choose from:
Use the Automated WU Reset Agent
- Launch your favorite web browser and visit this page: https://gallery.technet.microsoft.com/scriptcenter/Reset-Windows-Update-Agent-d824badc.
- Hit the Download button to download the Reset Windows Update Agent tool.
- Once the download is complete, extract all the contents of the archived file using any decompression utility of your choosing.
- Once done, double-click on the ResetWUENG.exe file and hit Yes.
- Follow the on-screen prompts to proceed.
- After that, restart your computer and check if you can install the update without any problem.
Use the Command Prompt
- Launch the Run utility by pressing the Windows + R keys.
- Into the text field, type cmd and hit CTRL + Shift + Enter. This will launch an elevated command prompt window.
- When the User Account Control prompt appears, hit Yes.
- Into the command line, type the following commands. Make sure to hit the Enter button after each one:
- net stop wuauserv
- net stop cryptSvc
- net stop bits
- net stop msiserver
- At this point, you have already disabled the Windows Update Services, Cryptographic Services, MSI installer, and BITS Services.
- After that, run the following commands to clear the folders that are responsible for holding temporary data of the Windows Update:
- ren C:\Windows\SoftwareDistribution SoftwareDistribution.old
- ren C:\Windows\System32\catroot2 Catroot2.old
- Once these folders have been cleared, run the following commands in the elevated Command Prompt window. Again, don’t forget to hit Enter after each one:
- net start wuauserv
- net start cryptSvc
- net start bits
- net start msiserver
- Finally, restart your computer and try to reinstall the update.
Fix #5: Use the SFC and DISM Commands
If the Windows Update Troubleshooter fails to resolve the issue, proceed with a more advanced solution. That is to use the SFC and DISM commands.
At times, we encounter system file corruption, and that is normal. However, when these corrupt system files get in the way while installing an update, it’s a completely different story. When this happens, you will need the SFC and DISM commands.
The System File Checker or SFC is a tool in Windows 10/11 that checks and resolves problems with your system files. To launch it, follow these steps:
- Click on the Start menu and enter command prompt into the search field.
- Select Run as Administrator and hit Yes.
- When the Command Prompt window appears, input the sfc /scannow command.
- Hit the Enter key to start the scanning process. Wait for the process to complete. You should know that it is done once you see the message “Verification 100% complete.”
- Exit Command Prompt by typing exit.
- Hit Enter.
- Restart your device.
- Check if the error is resolved.
Deployment Image Servicing and Management or DISM, on the other hand, is another command-line tool that is used to fix and service Windows images. To run it, here’s what you should do:
- Click on the Start menu.
- Into the search field, input command prompt and select Run as Administrator.
- When the Command Line window appears, input the DISM /Online /Cleanup-Image /ScanHealth
- Hit Enter to proceed.
- Next, enter the DISM /Online /Cleanup-Image /RestoreHealth command.
- Hit Enter to continue.
- Once the scan is complete, restart your computer.
- Try to update your system once again.
Fix #6: Run Windows Update Under Clean Boot.
Clean Boot is a process used to launch the Windows OS utilizing the minimum set of resources which include drivers and programs. This approach helps prevent software conflicts that may occur during program installation, an update, or when running a particular program.
Note that there is a difference between Safe Mode and Clean Boot with the former engaging an extra mile to troubleshoot and diagnose advanced issues related to the Windows 10/11 system.
Here is how to launch the system under Clean Boot State:
- On the 80240025 search field, type MSConfig and press the Enter key to launch the System Configuration window.
- Under the General tab, enter the Selective Startup field and uncheck the Load Startup Items box. Make sure the Load system services, as well as Use original boot configuration boxes, remain checked.
- Now, go to the Service tab and check the box next to Hide all Microsoft services before clicking on Disable all.
- Click Apply, followed by the OK button before restarting the machine.
In the next startup, Windows will load under Clean Boot State. You may then try to install the pending Windows Updates without experiencing the Error Code 80240025 .
Fix #7: Set the Update Services to Automatic.
Sometimes, a poor services configuration can lead to this Windows update error. Thus, make sure it is set properly. Here’s what you should do:
- Launch the Command Prompt with administrator privilege by pressing the Windows + X
- Select Command Prompt (Admin).
- Next, run the following commands one at a time. Press Enter after each one of them:
- SC config wuauserv start= auto
- SC config bits start= auto
- SC config cryptsvc start= auto
- SC config trustedinstaller start= auto
- net stop wuauserv
- Restart your computer and launch the Command Prompt once again. Run this command: net start wuauserv.
- Navigate to Settings and select Update and Security.
- Click the Check for Updates button.
- The Windows Update utility will then start scanning for any available updates. If it detects any, it will be installed automatically.
Fix #8: Clear the SoftwareDistribution Folder.
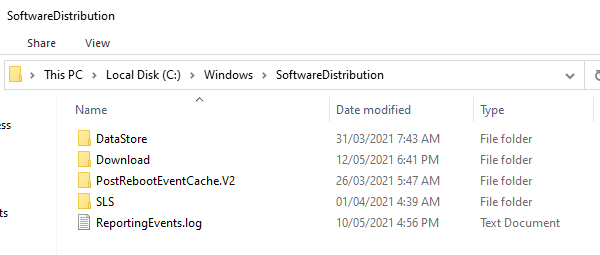
Every Windows 10/11 operating system has a Software Distribution folder located in the Windows directory. This is where files required to install Windows Updates are temporarily stored.
In this solution, you may have to delete the contents of this folder and retry the update process.
Here’s how:
- Click the Start menu.
- Into the search field, input cmd and right-click on the most relevant search result. Select Run as Administrator.
- Once the Command Prompt opens, input this command into the command line: net stop wuauserv. Hit Enter.
- Next, input this command to stop the Background Intelligent Transfer Service: net stop bits. Hit Enter.
- Now, use the Windows + R keys to launch the Run utility.
- Browse this path: C:Windows\SoftwareDistribution.
- Select all the contents and hit the Delete button to remove them.
- Go back to the Command Prompt and input this command: net start wuauserv.
- Hit Enter.
- And then, start the Background Intelligent Transfer Service by entering this command: net start bits. Hit Enter.
At this point, you should have successfully cleared the contents of the SoftwareDistribution folder.
Fix #9: Reset the Catroot2 Folder.
The Catroot2 folder is essential for Windows Updates as it contains critical Windows Update components. In case there are problems with this folder, any Windows Update may fail. Thus, to repair Windows Update-related problems, you may try to reset the Catroot2 folder.
Here’s how:
- Right-click on the Start button.
- Select Command Prompt (Admin). This will open an elevated Command Prompt.
- Into the command line, input the following commands one by one and press Enter:
- net stop cryptsvc
- md %systemroot%\system32\catroot2.old
- xcopy %systemroot%\system32\catroot2 %systemroot%\system32\catroot2.old /s
- Next, delete everything in the Catroot2 folder.
- Into the command line, input this command: net start cryptsvc.
- Hit Enter.
Fix #10: Disable a Registry Key.
If your computer is connected to a public/work server or network, there’s a chance that you’re seeing this error code because a rule (imposed at the Registry Level) is denying new pending Windows Updates from getting installed.
A rule of this kind is common in those situations where the network administrator tries to limit the bandwidth usage whenever a new update is pushed by Microsoft.
In case you suspect that this scenario is applicable, you can fix the issue by identifying the Group Policy setting causing this issue (most likely DisableWindowsUpdateAccess key) and setting its value to 0 in order to prevent it from interfering with the Windows Update component.
For step by step instructions on how to do this, follow the instructions below:
- Press Windows key + R to open up a Run dialog box. Next, type regedit inside the text box and press Enter to open up the Registry Editor. When you see the User Account Control prompt, click Yes to grant administrative privileges.
- Once you’re inside the Registry Editor, use the left-hand pane to navigate to the following location: HKEY_USERS\S-1-5-18\Software\Microsoft\Windows\CurrentVersion\Policies\WindowsUpdate
- You can either navigate to this location manually or you can paste the location directly into the navigation bar and press Enter to get there instantly.
- Once you arrive inside the correct location, look for a Registry value named DisableWindowsUpdateAccess.
- If you see it, double-click on it, set the Base to Hexadecimal, and the Value data to 0.
- Instead of changing the value of DisableWindowsUpdateAccess, you can also delete it completely if you don’t plan on using it ever again to limit the installation of new opening Windows Updates.
- Once this modification is successfully enforced, reboot your computer and see if the issue is now fixed.
If this method was not successful in resolving the Windows Update Error 80240025 or the DisableWindowsUpdateAccess was not present on your computer, move down to the next potential fix below.
Fix #11: Reset the Local Group Policy of Windows.
If you’re working with a custom Windows Group Policy, your settings might prevent Windows Update from performing the necessary updates. Some users have reported that resetting their local group policy settings eliminated the 80072EFE error and allowed Windows to update normally.
Here’s a quick guide on reverting the default local group policy:
- Press Windows key + R to open a Run window. Type gpedit.msc and hit Enter to open the Local Group Policy Editor.
- Browse to Local Computer Policy > Computer Configuration > Administrative Templates and click on All Settings to select it.
- Now, use the panel on the right-side to identify the entries that are either Enabled or Disabled. You can make it easier for yourself by clicking the State button at the top of the column. This will sort the entries and help you spot modified policies more easily.
- Double click every policy that is either Enabled or Disabled and set the state to Not configured. Make sure every entry is set to Not configured when you’re done.
- Once you’ve reverted to the default group policy, restart your machine and force the Windows Update again.
Fix #12: Use System Restore.
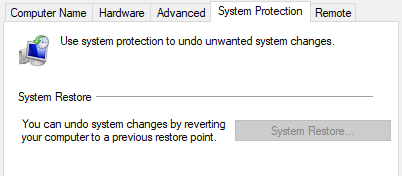
Restoring your computer to an earlier date when it worked without any issue will be necessary in case all the above methods fail.
- Press the combination of Win + Q keys.
- Click on “Settings”.
- Choose “Recovery” icon.
- Select “System Restore” from the resultant open window.
- Choose an earlier date when your computer worked without any issues.
- The tool should start to run before shutting down the computer and restarting it again.
Try accessing Windows Update again to see whether or not the windows 10 update error code 80240025 is resolved.
Conclusion
Updating your Windows 10/11 operating system is an easy way to ensure your system runs smoothly and efficiently. Once your OS is updated, this means you have access to the latest features, error fixes, and most importantly, security patches. But if you are having problems with updating Windows 10/11 due to errors like the Windows update error 80240025, then don’t fret. The solutions above should help you get through this error and install your updates successfully.