Windows 10/11 is pretty robust when it comes to troubleshooting problems that might stop it from functioning normally. But there are moments when you have no option but to revert to a previous working state.
For most people, the first thing that comes to mind when the changes they made on their computers didn’t work as planned is to restore their PCs to an initial working state. The System Restore feature usually comes in handy during such times.
But as useful as it is, there are a lot of misconceptions and ambiguities about this built-in utility. In this post, we will show you what System Restore can do and how to use it on Windows 10/11.
What is Windows System Restore?
System Restore is a built-in tool that helps to reverse specific changes made on the Windows operating system. This feature usually takes a snapshot of the Windows Registry and some system files, and then save them as a restore point. These restore points serve as a fail-safe whenever a significant change occurs on your system. The utility is particularly helpful whenever you want to roll back major changes made before the problem started.
Expert Tip: For smoother PC performance, consider using a PC optimization tool. It handles junk files, incorrect settings, and harmful apps. Make sure it's right for your system, and always check the EULA and Privacy Policy.
Special offer. About Outbyte, uninstall instructions, EULA, Privacy Policy.
A good rule of thumb is to always create a restore point before changing the Registry or installing anything tied to the operating system, for instance, third-party software or drivers. Windows 10/11 usually creates its restore points before installing Windows-based updates, patches, and security fixes.
Think of this built-in recovery tool as an undo feature for critical parts of the Windows OS.
So, What Else Can System Restore Do?
There can be more than one reason you might need to use System Restore in Windows 10/11. Apart from returning your system to a previous working point, you can also use it to recover programs, Windows system files, and registry setting installed on your computer. In some cases, System Restore can come in handy when changing scripts, batch files, and other types of executable files generated by your system.
Note that the System Restore feature may not help you recover personal files like documents, emails, and photos if they are lost. Also, when trying a System Restore, you may get stuck sometimes.
What Happens If System Restore Is Interrupted?
When the Windows operating system creates a System Restore point, it includes different files, such as registry files, system files, and some user files. The System Restore snapshot may include the following:
- The Windows Registry
- Local user profiles
- COM/WMI databases
- DDL Cache
- Drivers, among other elements
Basically, these files are restored during the System Restore process. So, when the process gets interrupted, it could lead to an unbootable system. Windows cannot work with incomplete registry entries.
How to Use System Restore on Windows 10/11?
With a little prior planning, System Restore will always have your back whenever you experience problems with your PC.
Step 1: Enable System Restore on Windows
Unfortunately, for some unknown reason, the System Restore feature comes disabled by default. So, you have to enable it if you intend to make use of it. Here is how:
- Go to Start and search for Create a restore point.
- From the list of results, choose the System Properties experience.
- Navigate to the System Properties tab and select the drive you want to protect.
- After that, hit the Configure button.
- Now, choose Turn on system protection.
- Next, click Apply, then OK.
- From here, Windows will create a restore point automatically.
Step 2: Create a System Restore Point
Once you have activated the System Restore feature, Windows will create checkpoints automatically when it detects system changes. But it is always a good idea to create a restore point, especially if you intend to modify your system.
To create a System Restore point on Windows 10/11, follow the steps below:
- As before, go to Start and type Create a restore point.
- Select the first result to open the System Properties window.
- Under the System Protection tab, tap on the Create button.
- When prompted, give a name to the restore point. Try to make it something descriptive.
- After that, click the Create button, and then click Close > OK.
You now have a way to undo changes if something goes wrong, while editing the Registry or installing a new driver.
Step 3: Restore Your PC – Return to a System Restore Point
If you run into problems after modifying your system, you can return to a previously created restore point, instead of wasting time troubleshooting the issue. If you can still access the desktop, open the System Properties window and follow these steps:
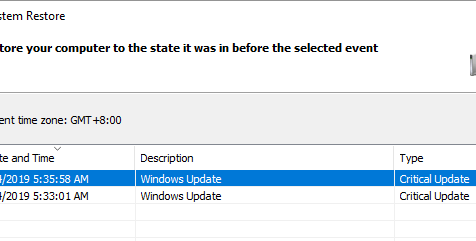
- Highlight the System Protection tab, and then click the System Restore button.
- In the pop-up window, click Next, then select the restore point you manually created. You can also click on the Show more restore points option to see all the available restore points.
- Before you move on, it’s a smart idea to Scan for affected programs to see which apps, programs, and drivers will be affected if you use this restore point.
- After that, hit the Close button and click Next.
- Click Finish to complete the process.
What to do If System Restore Is interrupted?
If your computer gets stuck, while restoring system files, do not panic. The best thing to do is to wait for some time. The process could take longer if you have more data on your PC. If System Restore is still stuck, try the following fixes:
- Run Startup Repair. Windows 10/11 usually triggers the Automatic Repair mode whenever it senses there is something wrong with important files.
- Try an alternative System Restore point.
- Boot your PC into Safe Mode and try running System Restore again.
- Configure the System Restore disk space usage. Preferably, allocate at least 4GB.
- Check if System Restore points are being created. While this may not resolve your current issue, it will help you avoid similar problems in the future.
Other Ways to Fix Computer Issues
As mentioned above, System Restore fails sometimes. If that happens, first, try to fix the issue. One of the suggested methods will coax the System Restore utility back to normalcy, and consequently, the rest of your ailing system. But if you can’t resolve the problem, then you need to find other avenues to resolve your computer issues.
A fail-safe way to repair and restore stability in your system is to use a PC repair tool to scan your PC, then clean it up. A tool like Outbyte PC Repair will not only help you diagnose the Windows operating system, but also remove the junk that usually causes computer errors.
Wrapping Up
System Restore isn’t a cure-all tool, but it can help you fix several computer issues. So, before trying more drastic measures, it is always worth trying System Restore. But if all else fails, you can use other recovery tools.
Whether you need to create a System Restore point, resolve a stuck System Restore, or restore to a previous working state, the process should by now be straightforward. Similarly, you should be able to clean up Windows 10/11 to speed up things and resolve common PC errors.
You may also need to back up your data before modifying your PC. Our guide on the best Windows 10/11 data recovery software will help you out here.
How was your experience using the System Restore feature? Share your thoughts in the comments section.