One of the great things about macOS is that you don’t have to shut it down every time you are not using it. You can simply close the lid and your Mac automatically goes to sleep. If you need to use it again, just open the lid and sign back in. This process is more convenient and eliminates the need for constant booting.
However, several Mac users have complained about various Sleep/Wakeup issues on Mac. It is common for Mac users to be burdened by the apparent failure of the sleep/wake functionality of macOS. And this is not a new thing. Sleep/wake issues have been reported in earlier versions of macOS. If you’re running Catalina or Big Sur, you might be astounded to find yourself stumped with this problem since you’ve probably presumed that this issue, which has affected the previous versions, has been addressed in the earlier updates. Unfortunately, that’s not the case.
 For instance, a lot of MacBook Pro owners reported that their computers restarted when asleep, usually when left alone and plugged in. The problem started to happen after updating their macOS. Others complained about their Macs crashing when waking up from Sleep. For some reason, the computer crashes and restarts, instead of letting the user continue where he or she left. This beats the purpose of leaving your computer in Sleep mode.
In some cases, Mac users encounter crashes when it goes into sleep mode after updating macOS, which could be a power nap-related problem related to the recent update. When Apple first released Catalina 10.10 and 10.14, users experienced the same issue. Apple resolved these bugs but the error seems to recur for some reason.
Pro Tip: Scan your Mac for performance issues, junk files, harmful apps, and security threats
that can cause system issues or slow performance.
Special offer. About Outbyte, uninstall instructions, EULA, Privacy Policy.
The issue seems to present itself slightly differently for different users. We’ve heard of Macs restarting when going to Sleep mode while others restart as soon as the lid is opened after sleeping. Others restart while asleep. Different scenarios, but sleep is absolutely the common denominator.
Even when the laptop does not crash when you wake it up, the graphics seems to appear low-quality and the display loads slowly. This is a problem that is also related to the graphics card, but it is also triggered when the computer is put to sleep.
A more recent Sleep/Wake error that users have encountered is the “Sleep/Wakeup hang detected” on Macbook Pro. Although this article will focus on this problem, the solutions listed here can also work to resolve other Sleep/Wake issues on Mac.
Mac Getting “Sleep/Wakeup hang detected” Error
 Recently, some Mac users have reported encountering the “Sleep/Wakeup hang detected” on Macbook Pro, particularly with macOS Catalina and Big Sur. According to the reports, the error appears every time the user’s MacBook goes to sleep. It restarts like a minute after and throws up the above error.
Some users noted that booting into Safe Mode worked and the issue did not appear. It could be due to a conflicting app but the users swear that they didn’t download any before that. Others encounter the problem even during Safe Mode, causing their Macs to spontaneously reboot itself about once a day. The reboots often occur when the iMac is asleep and the pattern is always the same. When Mac restarts, the startup chime sounds twice in close succession. Then the “Sleep/Wakeup hang detected” on Macbook Pro appears.
In some cases, this error prevents Mac from sleeping, and this ends up draining the battery. The computer often won’t sleep even after logging out and logging in again, or hitting the sleep button.
What Causes “Sleep/Wakeup hang detected” Error on Mac
One of the common reasons for “Sleep/Wakeup hang detected” on Macbook Pro is a broken Power Nap feature. Apple first introduced this feature as part of OS X Mountain Lion way back in 2012. It is usually enabled by default, so you might not be even aware of it. It is a handy feature that lets your Mac wake itself up to deal with tasks like handle Time Machine backups and sync emails. But if it’s causing Sleep?Wake problems for your Mac, then you need to disable it.
Another factor you should look into is the recent changes on your Mac. If you’re recently updated your apps or installed a system update, then those changes might have broken something in your current system. After installing the macOS updates, a user might run into issues with the sleep and wake functions, wherein the computer refuses to wake when expected, the OS fails to launch after going to sleep, or in this case, the “Sleep/Wakeup hang detected” error pops up even after the power button or any button on the keyboard is pressed. In other variations of this issue, the computer might take far too long to wake up. But in most cases, the system doesn’t respond to any clicks or push of any button.
The Sleep and Wake functions of Macs are basically regulated by user settings, app activities, connected devices, and networks. This makes most Mac users who encounter this issue think that it’s a technically intricate task to fix a Mac getting “Sleep/Wakeup hang detected” error. However, that’s not usually the case. There are several workarounds and fixes you can apply when you encounter this error. Check out our list below.
How to Fix “Sleep/Wakeup hang detected” Error on Mac
There are several easy ways to resolve a Mac getting “Sleep/Wakeup hang detected” error. The first thing you can do when you notice your Mac’s sleep and wake functions are malfunctioning is to check if there are certain settings that may have triggered this problem. Ensure that your computer’s screen brightness isn’t turned down, your monitor isn’t turned off, your Mac isn’t in safe sleep, and that the computer isn’t turned off.
It is also useful to run a Mac optimizer, such as Mac repair app, to delete junk files and resolve other issues that might be triggering this error.
If you’re still short of answers as to how to resolve the “Sleep/Wakeup hang detected” on Macbook Pro, you can get cracking on the following solutions to find your way around.
Solution #1: Disable Power Nap.
Apple has released official instructions on how to disable Power Nap in a support document. Doing this should bring things back to normal. Apple is aware of the problem and has been providing patches to resolve the error, but the problem just comes back every time. So if you’re tired of having to deal with this error, you can turn off Power Nap altogether.
This step disables Power Nap from initiating when the screen becomes idle. When in Power Nap mode, the system continues to check new emails, calendars, and other iCloud updates, leading to the Sleep/Wake feature getting messed up. To turn off power nap, follow the instructions below.
- Open Finder or click on the Apple icon, then click on System Preferences.
- Under System Preferences, choose Energy Saver.
- In the Energy Saver window, click on the Battery button before the Power Adaptor button.
- Uncheck the box labeled Enable Power Nap While on Battery Power. This should stop your system from going to sleep when on battery power. You can do the same thing for the Power Adaptor as well.
Solution #2: Reset SMC.
The system management controller is in charge of managing behaviors related to these functions:
- Power, including the power button and power to the USB ports
- Battery and charging
- Fans
- Indicators or sensors, such as status indicator lights, the sudden motion sensor, the ambient light sensor, and keyboard backlighting
- Behavior when opening and closing the lid of a notebook computer
Resetting the system management controller should not affect the contents of NVRAM or PRAM.
Before resetting the SMC, try shutting down your Mac and press/hold the Power button for at least 10 seconds. Release the button and wait a few seconds. Then, press the power button to turn on your Mac. If the problem persists, follow these steps to reset the SMC:
To reset the SMC on computers that have the T2 chip, follow these steps:
- Shut down your Mac.
- Press and hold all of the following keys on your built-in keyboard:
- Control on the left side of your keyboard
- Option (Alt) on the left side of your keyboard
- Shift on the right side of your keyboard
- Keep pressing down the three keys for at least seven seconds, then press and hold the power button. If your Mac is on, it should shut down as you hold the keys.
- Keep holding all the keys for another 7 seconds, then release them after.
- Wait for a few seconds, then press the power button to turn on your Mac. Your Mac’s SMC should now be reset.
To reset the SMC on Desktop computers with the T2 chip, follow these steps:
- Shut down your Mac, then unplug it.
- Wait for 15 seconds, then plug it back in.
- Wait for another five seconds, then press the power button to turn on your Mac.
To reset the SMC on other computers, especially those that don’t have the Apple T2 Security Chip, follow these steps.
For notebook computers with a non removable battery:
- MacBook Pro models introduced in mid-2009 through 2017
- MacBook Air models introduced in 2017 or earlier
- All MacBook models except the MacBook (13-inch, Mid 2009)
- Shut down your Mac.
- Press and hold all of the following keys on your built-in keyboard:
- Control on the left side of your keyboard
- Option (Alt) on the left side of your keyboard
- Shift on the right side of your keyboard
- Keep pressing down the three keys, then press and hold the power button.
- Keep holding all the keys for another 10seconds, then release them after.
- Press the power button to turn on your Mac.
For notebook computers with a battery that can be removed:
- MacBook Pro and MacBook models introduced in early 2009 or earlier
- MacBook (13-inch, Mid 2009)
- Shut down your Mac.
- Remove the battery.
- Press and hold the power button for five seconds.
- Reinstall the battery.
- Press the power button to turn on your Mac.
For Desktop computers:
- Shut down your Mac, then unplug it.
- Wait for 15 seconds, then plug it back in.
- Wait for another five seconds, then press the power button to turn on your Mac.
Solution #3: Disable System Hibernation.
Keep in mind that the hibernation mode is actually a preventive measure to prevent the loss of data during a loss of power. However, this might be interfering with your Mac’s sleep and wake functions so it is better to disable it for now.
To turn off hibernation mode, run the following commands in the Terminal:
- sudo pmset standby 0
- sudo pmset autopoweroff 0
These two commands will disable the settings of the hardware in charge of the hibernation mode. To revert the settings, just reset your Mac’s system management controller using the instructions above. Another method is to run the commands again, this time replacing 0 with 1.
Solution #4: Reset FileVault.
A glitch may be interfering with the storage and retrieval of file contents on the hard disk during sleep mode, causing issues between full disk encryption protocols like FileVault, which in turn prevents the authentication and loading of sleep mode files.This can then lead to a crash or other errors when your system wakes up. To resolve this, you need to disable the full-disk encryption protocols. You can simply re-enable them if the sleep/wake feature works fine after the disk is fully decrypted.
Solution #5: Clear Out the Hibernation Files.
When macOS figures that a hibernation file which was written on the hard disk by the hibernation function is missing, it should automatically recreate that file. But sometimes it does so erroneously, damaging the file in the process and preventing reading from the system when waking up. To fix this, you need to force the system to recreate the files again by the running the following command in Terminal: sudo rm /var/vm/sleepimage.
Solution #6: Reset the NVRAM.
Older Macs had the Parameter RAM or PRAM, while newer Macs use Non-Volatile Random-Access Memory or NVRAM. If resetting the SMC and applying the other solutions above did not work, you can try resetting your Mac’s NVRAM. Here’s how to reset the NVRAM on your Mac:
- Shut down your Mac. You need to do a full shut down, not just logging out.
- Press the power button and then press the Command + Option + P + R keys. Make sure to press these keys before the gray screen appears or it will not work.
- Hold these keys down until your Mac restarts again and you hear the startup chime.
- Release the keys and let your Mac restart normally.
Note: Once you log back in, you might need to readjust some of your system preferences, such as the speaker volume, screen resolution, startup disk selection, time zone information, and other settings.
Solution #7: Boot into Safe Mode.
If the “Sleep/Wakeup hang detected” on Macbook Pro is caused by a conflict between programs on your Mac, the easiest way to determine is by booting into Safe Mode. Follow these steps to test your Mac in Safe Mode:
- Fully shut down your Mac.
- Restart your Mac.
- Immediately press the Shift key and keep it down until your Mac restarts.
- Let go of the Shift key when you see the login window. If you have FileVault enabled, you might need to log in twice.
Observe what happens.Use it normally and then let it go to sleep to check if the “Sleep/Wakeup hang detected” appears. If it works fine, exit Safe Mode by restarting your Mac normally and determine which app is causing trouble. If the error persists, force start your Mac again.
If your Mac is still throwing the same, then it’s time to test your hardware with Apple Diagnostics.
Solution #8: Run Apple Diagnostics.
 To run Apple Diagnostics, follow the steps below:
- Fully shut down your Mac.
- Restart your Mac.
- Immediately press the D key and keep it down until you see the Diagnostics screen appear. If pressing and holding the D key at Step 3 doesn’t work, start again at Step 1 and, at Step 3 press and hold both the OptionD keys instead. This will try and run diagnostics from the internet instead, so you will need to allow more time for it to complete.
- Wait for the Diagnostics to finish, which typically only takes a few minutes.
- Once completed, one of two things should appear on the screen:
- No issues found message
- A brief description of any errors found plus further instructions
- If the diagnostics test does find errors, take a note of what they are.
Solution #9: Perform a System Repair.
If none of the above solutions work, then you can conduct a system repair. Let Apple’s first aid kit do a sweep and automatically troubleshoot the problem. There is a possibility that this will catch what’s causing the bug and fix it for you. Apple’s first aid kit is a repair tool that comes with macOS and it can identify and resolve common hard disk errors.
To perform a system repair, follow the instructions below:
- Turn on your Mac.
- Immediately press and hold down Command + R until the screen starts up.
- When the screen finishes loading, you should see the macOS Utilities window, with options like Reinstall macOS, Get Help Online, and Disk Utility.
- Choose Disk Utility and press Continue.
- A new window should appear with disk sizes.
- Choose the disk you want to repair, which is your main disk.
- Click on First Aid. The first aid button is located at the top of the screen.
- Click the Run button when you are done.
Hopefully, this should run and fix whatever bug is causing your system to throw this error.
Solution #10: Restore from Time Machine Backup.
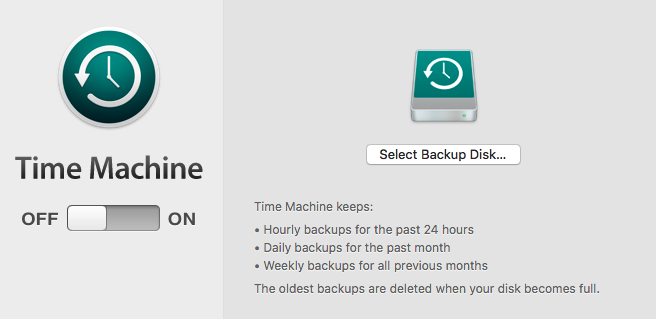 If you’re out of options and nothing is working, then it might be good to revert your Mac to a time before the sleep/wake error started happening. You can do this by restoring from a Time Machine backup.
To do this, turn on your system and immediately press and hold down Command + R until the macOS Utilities screen appears. From here, you can use your Time Machine Backup to restore your macOS to its last setting before the upgrade.
Conclusion
Restarting your system every time it goes to sleep can be quite frustrating. If you find yourself faced with the “Sleep/Wakeup hang detected” on Macbook Pro, the above solutions should help you get your sleep and wake functions back to normal.
