
Microsoft offers numerous apps for increased efficiency, such as Skype for long-distance communication, OneDrive for document organization and backup, and Microsoft Photos for organizing digital memories.
But what if, while opening one of these applications, you encounter an error message saying, “The program can’t start because VCRUNTIME140.dll is missing from your computer,” what would you do?
In this post, we will discuss all there is to know about the VCRUNTIME140.dll is missing error on Windows 10/11.
What Is the VCRUNTIME140.dll File?
Before we delve deep into what the VCRUNTIME140.dll error is all about, let us first understand the role of the VCRUNTIME140.dll file.
Expert Tip: For smoother PC performance, consider using a PC optimization tool. It handles junk files, incorrect settings, and harmful apps. Make sure it's right for your system, and always check the EULA and Privacy Policy.
Special offer. About Outbyte, uninstall instructions, EULA, Privacy Policy.
The VCRUNTIME140.dll file is a part of Microsoft Visual Studio‘s runtime libraries. This means it is among the many DLL files that build up the libraries that are required to run applications using the Microsoft Visual Studio suite.
Just a quick overview of what a DLL file is, it stands for Dynamic Link Libraries, and it may contain data and codes that can be used by more than one program all at once. Its main function is to help the operating system and applications load faster. Simply said, it helps promote efficient memory usage by reusing code.
Here are important bits of information about the VCRUNTIME140.dll:
- Program name: Microsoft Visual Studio (Visual C++) 2015/2017/2019
- Software Developer: Microsoft Visual Studio
- Executable File: vcruntime140.dll
- Operating System: Windows XP, 7, 8, 8.1, and 10
- File Location: C:\WINDOWS\system32
- File Size: 86KB
What Is the “VCRUNTIME140.dll Is Missing” Error on Windows 10/11?
So, what does this error mean? Why is the VCRUNTIME140.dll file missing?
This error sometimes appears when the Microsoft Visual Studio version installed on your device is outdated. If you have recently installed a Windows update, then you may need to update the version of your VCRUNTIME140.dll file as well to ensure compatibility.
Another reason that this error happens is when the VCRUNTIME140.dll file is accidentally deleted or becomes corrupted. It could be deleted while you’re getting rid of junk files or a malware entity has infected your existing file.
It is also possible that the VCRUNTIME140.dll file encountered a problem in the process that caused it to become damaged. And because of that, it can no longer load properly. To resolve this, you need to reinstall the VCRUNTIME140.dll file on your device.
What Causes the “VCRUNTIME140.dll Is Missing” Error on Windows 10/11?
Like other errors on Windows 10/11, the “VCRUNTIME140.dll Is Missing” error has many different causes. And in this article, we have compiled all the common causes of this issue:
- The VCRUNTIME140.dll file is corrupted or has been deleted. Among all causes, this is the most common. Without the VCRUNTIME140.dll file, all other apps that depend on it cannot launch or start. In this case, you have to download it again or restore it.
- There is an existing error with Adobe Creative Cloud. It is known that an issue exists in Adobe Creative Cloud and Adobe has already rolled out a fix. According to reports, the error started showing when they migrated to Visual C++.
- Your system is attacked by malware. It is likely that your system has been attacked by a malware entity or a virus. This has caused the VCRUNTIME140.dll file to be corrupted and you are now seeing the “VCRUNTIME140.dll Is Missing” error.
- Your system files are corrupted. System files are known to be victims of corruption and errors. This normally happens after upgrading your operating system, resetting Windows, or installing a malicious application.
- The essential Visual Studio 2015 files are missing. We know that the VCRUNTIME140.dll file is associated with the Visual Studio 2015 software. If it goes missing or becomes damaged, then you will see the “VCRUNTIME140.dll Is Missing” error.
It is worth noting that these aren’t the only causes of the error message. There are many other possible triggers, too. But the good news is that no matter what’s causing it, the solutions below can resolve it.
What to Do About the “VCRUNTIME140.dll Is Missing” Error on Windows 10/11
If you are getting the “VCRUNTIME140.dll Is Missing” error, then it’s a sign that something is wrong with your computer and it has to be fixed. It could be a malware infection or a program that needs to be reinstalled. Whatever is causing the error to appear, the solutions should resolve it.
But before you do that, try to restart your computer first. It is possible that the DLL error is only temporary and that all your system needs is a restart. If that doesn’t work, then proceed with these solutions:
Solution #1: Repair the Microsoft Visual C++ Software
As mentioned above, the VCRUNTIME140.dll is part of the Microsoft Visual Studio’s runtime library. And it plays a crucial role in compiling software components so they can run on a Windows environment. Now, if this file goes missing, this error will appear.
To resolve this, the first thing you may try to do is repair the Microsoft Visual C++ Studio software. If it doesn’t work, reinstall it instead.
Below is a step-by-step guide on what to do:
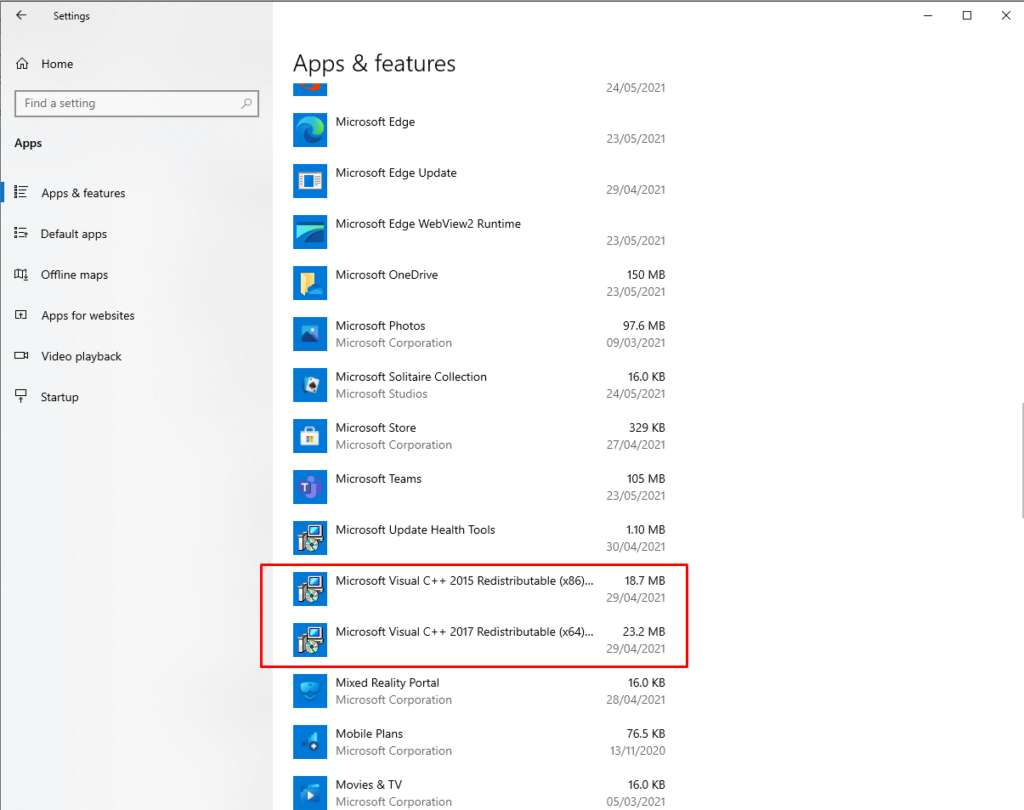
- Click the Start button and select the Settings menu. This is the one with the gear icon.
- In the window that appears, go to Apps and select Apps and Features.
- On the left pane, you should see a list of all installed apps. Scroll down and find Microsoft Visual Studio. Click on it.
- Next, choose the Modify option.
- A new window will now open. Click the Repair button.
- Wait for the process to complete before restarting your computer.
- If you still see the error after restarting, disable the software instead. To do so, go to Settings > Apps > Apps and Features. And then, click the Uninstall button.
- The Microsoft Visual C++ Redistributable window will now open. Hit the Uninstall button here and follow the on-screen prompts.
- Once done, restart your computer.
After uninstalling Microsoft Visual C++, it’s time to reinstall it. Without it, the software programs that rely on it will not work or launch. To proceed with the reinstallation of Microsoft Visual C++, do the following:
- Open your preferred browser and go to the official Visual Studio website to download the latest version of Microsoft Visual C++. Scroll down to the bottom of the page and click the Other Tools, Frameworks, and Redistributable category.
- Choose the version that matches your CPU’s architecture and hit the Download button.
- Once the download is finished, run the installer file. It is generally named VC_redist.x64.exe.
- In the installation wizard, agree to the license terms and click Install.
- Wait for the installation process to complete. If the software installs without any problems, click the Close button.
- Restart your computer.
For the most part, this should resolve the “VCRUNTIME140.dll Is Missing” error on Windows 10/11. But if it doesn’t work, then try other solutions.
Solution #2: Run the Windows Update Utility
More often than not, Microsoft rolls out security updates for the Microsoft Visual C++ software via the Windows Update utility. So, if you are having issues with the “VCRUNTIME140.dll Is Missing” error, you may try checking for any available updates via the Windows Update service.
Although this won’t fix problems with problematic installations, installing new updates can fix your installation problem right away. To run the Windows Update utility and install any pending update, do the following:
- Click the Start menu and select Settings.
- Next, go to Update and Security and choose Windows Update.
- Hit the Check for Updates button to begin searching for updates. If updates are available, click the Restart Now button.

- All updates will then be installed. Once done, restart your computer.
Solution #3: Download the Missing DLL File
As you can see, the “VCRUNTIME140.dll Is Missing” error is quite specific. It tells you that the VCRUNTIME140.dll file is missing. And with that, you will be tempted to just download the missing file elsewhere to fix the problem.
Yes, there are many sites that host these DLL files. But we highly recommend avoiding these sites. Why? DLL files are crucial elements of the Windows operating system. Unless you are sure about your source, it is best that you just remove the entire Visual C++ library.
Now, if you really feel the need to replace the file, the best option is to copy it from another PC of the same specifications and paste it into the designated folder.
Here’s how:
- Copy the VCRUNTIME140.dll file from another computer. It should be in a ZIP format. Unzip it first and copy it.
- Next, paste the copied file to your computer. Put it in this location: C:/Windows/System32.
- Now, try to run the program again. Hopefully, it would work.
- Run the program once again and see if the error still shows.
Solution #4: Reinstall the Problematic App
If you encountered the “VCRUNTIME140.dll Is Missing” error while trying to launch other programs like Skype, then try to uninstall the program first and reinstall it. Here’s how:
- Go to the Start menu.
- Select Settings and navigate to Apps.
- Click Apps and Features.
- From the list of installed apps, find the app where you encountered the error and click on it.
- Hit the Uninstall button.
- Follow the on-screen instructions to completely remove the program.
- After removing it, try to reinstall it. Go to the official manufacturer website of the program and download the installer file once again.
- Install the program by double-clicking on the EXE file.
- Once the problematic app has been reinstalled, open it and see if the error is resolved.
Solution #5: Re-Register the VCRUNTIME140.dll File
If you have already tried reinstalling the VCRUNTIME140.dll file but the error still shows, you might have to re-register it into the registry. For this, you need to use the Command Prompt.
To re-register the DLL file, do the following:
- Press the Windows + R keys to launch the Run utility.
- Type cmd into the text field.
- Press the Ctrl + Shift + Enter keys simultaneously to launch Command Prompt with administrator privilege.
- Hit the Yes button to proceed.
- Next, un-register the file by entering this command followed by Enter: regsvr32 /u VCRUNTIME140.dll.

- And then, re-register it by entering this command: regsvr32 VCRUNTIME140.dll.
- Exit the Command Prompt and run the problematic app once again.
Solution #6: Run an SFC Scan
Windows 10/11 comes with a utility that allows you to find corrupt system files and fix them. It is called the System File Checker.
Follow these steps to initiate an SFC scan:
- Click the Start button and input windows powershell into the search field.
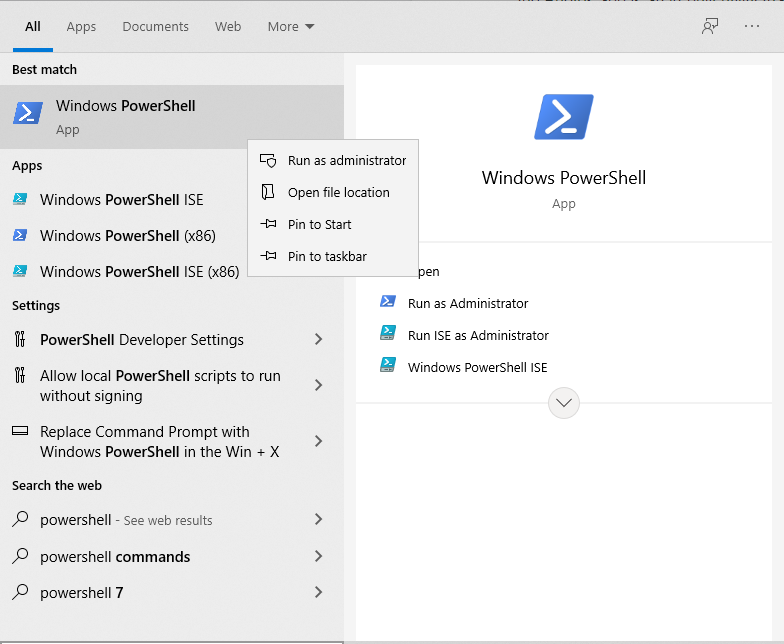
- Right-click on the most relevant search result and select Run as Administrator.
- A blue window will appear on your screen. Here, type the sfc /scannow command and hit Enter.
- The SFC utility will begin locating any corrupt files and fix them. Once done, restart your computer.
Solution #7: Update Your Device Drivers
Many of the Windows errors we encounter are caused by faulty and outdated device drivers. To resolve them, the best course of action is to update them to the latest version.
Follow the steps below to update your device drivers:
- Right-click on the Windows menu and select Device Manager.
- Click on a driver and hit the Update Driver button.
- Repeat the above steps for all the device drivers.
- After that, restart your computer to apply the changes.
If you have installed a plethora of device drivers, then this solution would be very time-consuming. To speed things up, you would need the help of a device driver updater tool. In just a few clicks, you can update any faulty or outdated drivers. Plus, you don’t have to worry about compatibility issues.
Solution #8: Perform a System Restore
Another efficient and fast way to resolve errors on Windows 10/11 is by using System Restore. With this utility, you can restore your system to an earlier version. This is especially helpful if you suspect that the error is caused by new updates or recent software installations.
How to Create a System Restore Point
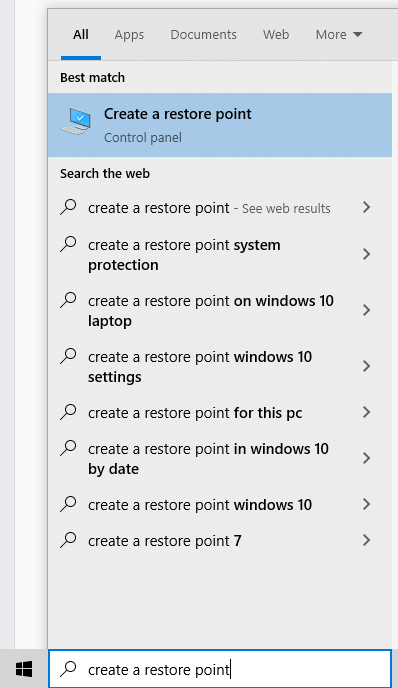
- Into the search field, input create a restore point.
- Click on the most relevant search result.
- The System Properties window will now open. Go to the System Protection tab and select Create.
- Provide a description for the restore point and tap Create.
- Lastly, hit OK.
How to Perform a System Restore
- Click the Start button.
- Type control panel into the search field.
- Select the top-most result.
- Go to Recovery and select Open System Restore.
- Hit Next to proceed.
- Select the restore point that you have just created.
- Proceed by clicking Next then Finish.
Solution #9: Use the Deployment Image Servicing and Management Tool
Also called the System Update Readiness Tool, the Deployment Image Servicing and Management (DISM) tool is designed to fix file corruption errors in Windows 10/11. So, you may try it to resolve your problem.
- Open the Start menu.
- Input cmd into the search field and right-click on the top result.
- Select Run as Administrator.
- Into the command line, type this command: DISM /Online /Cleanup-Image /CheckHealth.
- Hit Enter.
- After that, DISM will begin to scan and verify any file or data corruption issue.
If you wish to perform a more advanced scan, use these steps:
- Go to the Start menu.
- Type cmd into the search field and click on the top-most result.
- Choose Run as Administrator.
- Into the command line, type this command: DISM /Online /Cleanup-Image /ScanHealth.
- This scan will take minutes to complete. Make sure you don’t disrupt the process.
Solution #10: Disable Your Antivirus Temporarily
According to some users, an antivirus program can interfere with Microsoft Visual Studio’s processes and prevent you from running the required DLL files. If this happens, you may need to disable your antivirus program temporarily.
To disable Windows Defender temporarily, here’s what you should do:
- Click the Start button and go to Settings.
- Select Update and Security.
- Under Windows Security, click Firewall and Network Protection.
- Select a network profile.
- Find the Microsoft Defender Firewall setting and toggle it to Off.
To disable your third-party antivirus software, do the following:
- In the system tray, locate the icon of your antivirus program. Right-click on it.
- Select the Disable or Exit option.
Take note that disabling your antivirus software can make your device vulnerable to threats and unauthorized access. So, if the issue has already been resolved, make sure to enable it again.
Solution #11: Do an In-Place Upgrade
Another possible solution to the error involves performing an in-place upgrade. Here’s how to do it:
- Download the Windows 10/11 ISO from the official website of Microsoft. Be sure that you download the version that is compatible with your system architecture.
- Once the ISO file is downloaded, double-click on it.
- Windows will then prepare all the files needed for the installation.
- Select your desired options and hit Next.
- At this point, Windows will download all the necessary updates. This may take time so we suggest that you be patient.
- Click Accept to agree to the Terms of Service.
- Once you see the Ready to Install screen, hit the Change What to Keep button.
- Choose the Keep Personal Files option and proceed.
- The upgrade process will begin. Don’t interrupt it.
- Restart your computer.
- Check if the error still appears.
Keep Windows 10/11 Performing at Its Best
The “VCRUNTIME140.dll Is Missing” error is only a sign that your computer is having some issues. So, the moment that you resolve it, you have to keep up with regular maintenance. Here are a few maintenance tips that we suggest:
Tip #1: Keep Windows Updated
By keeping your operating system updated, you can ensure that you have the most recent bug fixes. You also have access to the latest features that Microsoft has rolled out for Windows 10/11. Finally, you can have peace of mind knowing that your system is up to date with the latest security measures.
Tip #2: Run Regular Malware Scans
Malware entities are notorious causes of DLL errors. Therefore, to remove any threats that could put your computer at risk for such errors, we suggest that you perform regular malware scans using Microsoft Defender or any third-party antivirus tool of your choice.
To initiate a scan using Windows Defender, do the following:
- Go to Settings and select Update and Security.
- Click Windows Defender from the list.
- Hit the Open Windows Defender Security Center button.
- Select Quick Scan.
- Windows Defender will now start scanning your system for viruses and other threats.
- After that, your system will restart.
Tip #3: Get Rid of System Junk
Most importantly, you must make it a habit to regularly free your system of junk and unwanted files. Malware entities can disguise as junk or cache files in your system folders. If left unattended, they can pose serious harm to your system. So, if you have a chance, remove this unnecessary junk. For this, you can use the in-built Disk Cleanup tool or any PC repair tool you have.
To use the Disk Cleanup utility, follow these steps:
- Click the Start button.
- Type disk cleanup into the search field.
- Hit Enter to open the Disk Cleanup utility.
- At the Drives list, select the drive you want to clean up.
- Choose the types of files you want to remove.
- Hit OK.
- Click the Delete Files button to proceed.
Wrapping Up
The VCRUNTIME140.dll file is important in the Windows 10/11 environment. Not only does it help programs load faster, but it also promotes the efficient use of resources.
So, when you encounter problems with it, such as the “VCRUNTIME140.dll Is Missing” error, then you have to do something about it. Your first repair option is to fix the Microsoft Visual C++ software, which is the program it belongs to. If it doesn’t work, then run the Windows Update utility to install any available Windows update. Another solution that is worth trying is downloading the missing DLL file manually, though this is something that should be done with caution to avoid more serious errors.
Other easier and more straightforward solutions to try include reinstalling the problematic application, re-registering the DLL file, running an SFC scan, updating your device drivers, performing a System Restore, using the DISM tool, disabling your antivirus temporarily, and performing an in-place upgrade.
However, if all these solutions are too tricky for you, feel free to ask for help from Microsoft’s team. They can provide you with a more specific approach to handle your issue.
And once you have resolved the error, we recommend that you perform regular maintenance to avoid similar errors to appear in the future. You can begin with installing every single Windows update available. And then, perform regular malware scans and make it a habit to get rid of system junk.
What other solutions do you suggest that can resolve the “VCRUNTIME140.dll Is Missing” error in Windows 10/11? We’d like to know! Share them below.