Windows 11 is Microsoft’s latest operating system that will be released in the fall of 2020. It has many new features and improvements over previous versions, such as a better user interface and improved security.
While everyone is excited to go and try it, some users who have had the chance to try it firsthand reportedly encountered compatibility issues. According to them, they’re getting the “This PC Can’t Run Windows 11” error message.
Before we delve deep into this error message and give troubleshooting options, let’s have a quick look into what this new Windows operating system version has to offer.
Windows 11: What We Know So Far
In a recent event, Microsoft has officially announced that Windows 11 is rolling out sometime in October 2021. While some are expecting that it’s going to be just another updated version of Windows 10/11, the majority is thinking it’s going to be something different.
Expert Tip: For smoother PC performance, consider using a PC optimization tool. It handles junk files, incorrect settings, and harmful apps. Make sure it's right for your system, and always check the EULA and Privacy Policy.
Special offer. About Outbyte, uninstall instructions, EULA, Privacy Policy.
Well, here’s what we know so far. There’ll be a number of changes we can expect from Windows 11. Aside from a new UI, this Windows version will offer better Xbox app integration, a completely revamped Windows Store, and more detailed widgets. Also, Microsoft is reportedly saying goodbye to the blue screen of death that has been giving many Windows users a headache.
Now, we understand you’re excited to get your hands on this new Windows version. But contain your excitement first. Some users who have had the privilege to try it first reportedly encountered an error while trying to install it: “This PC can’t run Windows 11.” What is this error all about and what causes it to appear? Can this error be resolved? Read on to find answers.
What Causes “This PC can’t run Windows 11” Error?
New system requirements for the upcoming Windows version may cause a number of issues for people looking to install the latest operating system of Microsoft on their current PCs. So, if you ever tried to install the Windows 11 Insider Preview and you’re getting the error message, “This PC can’t run Windows 11,” it is because your system has disabled two important settings: Secure Boot and TPM 2.0.
These two settings come with the processing chips from AMD and Intel, and they are required to run Windows 11 on all machines.
Now, if you have just invested in a new machine that can support both, then enabling TPM and Secure Boot won’t be an issue. In fact, you don’t need special coding skills to do so. All you need to do is click through some menus and you should be all set. If you feel a bit intimidated by those two settings, don’t be. With the right guidance, you can do it.
TPM and Secure Boot: An Overview
TPM microchips are tiny devices that are meant to function as virtual or firmware entities. Because they come as a chip, it is generally attached to the motherboard during the build. A TPM is designed to improve hardware security during the computer startup process.
Since 2016, TPMs have been used on Windows machines. Microsoft even required OEM manufacturers to ensure their machines can support TPM 2.0.
Although TPMs are strong enough to prevent firmware attacks, they remain controversial among security experts. According to them, these chips allow remote attestation wherein authorized parties can see the changes you make to your computer. Also, they mentioned that these components may restrict some software programs to run on your device.
Secure Boot, on the other hand, is a feature in a computer’s software. It controls what operating systems are allowed to run on the machine.
Like TPMs, it can do both good and bad for a Windows machine. On one hand, it prevents invasive malware entities from attacking your machine. On the other, it can keep you from installing another operating system. This means that if you ever wanted to experiment with other operating systems, then this feature may keep you from doing so.
Getting “This PC can’t run Windows 11” Error? Here Are Fixes You Should Try
There are a few potential workarounds that can resolve the “This PC can’t run Windows 11” error and may allow you to install Windows 11 without a hitch. We’ve listed them below.
Fix #1: Check If Your Machine Meets the Minimum System Requirements
Before you start with the complicated fixes, be sure your computer meets the minimum requirements of Windows 11. If your device has outdated specs, then it may not be compatible with this new OS. Here are the minimum requirements of Windows 11:
- A 64-bit processor
- 1GHz clock speed with at least 2 cores
- 4GB RAM
- 64GB Free Drive Space
- UEFI, Secure Boot capable
- Trusted Platform Module (TPM) version 2.0 or newer
- 9-inch display with a minimum resolution of 1366 x 768
- Compatible with DirectX 12 or later with WDDM 2.0 driver
- Compatible Intel, AMD, and Qualcomm Processors
Fix #2: Check If Your Device Supports TPM 2.0 and Secure Boot
If you’ve run the PC Health Checker and you’ve read that TPM is not enabled on your device, what you should do is verify whether it is an accurate diagnosis. Here’s what you should do:
- Press the Windows + R keys to launch the Run dialog.
- Into the text field, type tpm.msc and hit Enter. This will open the TPM Management utility on the Local Computer window.
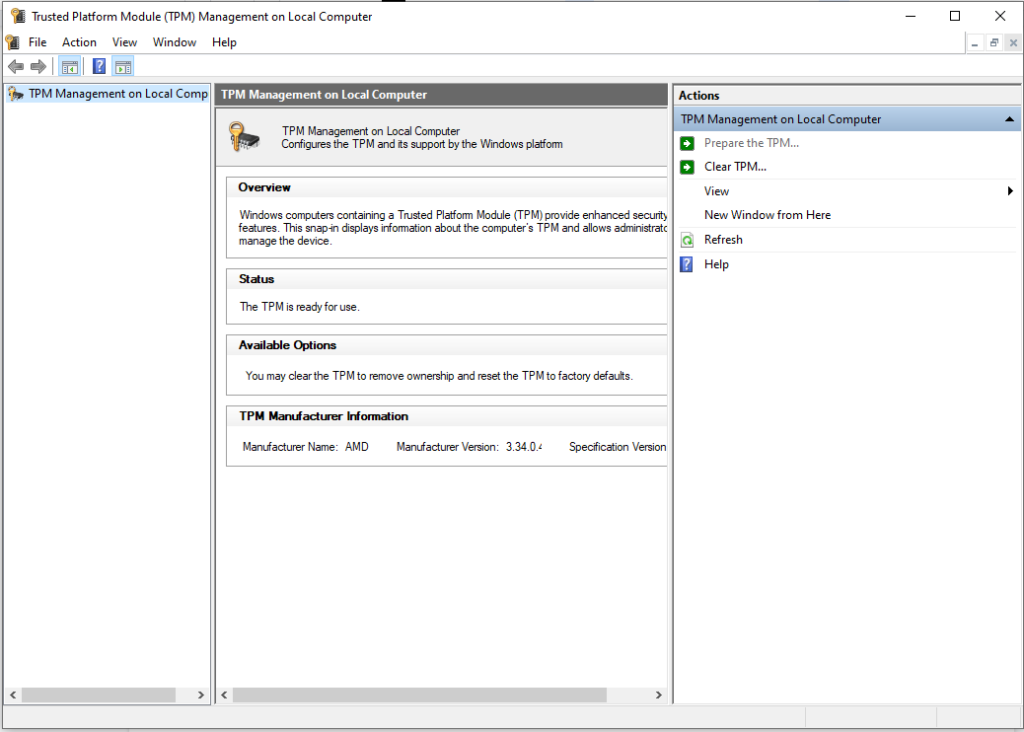
- Go to the Status section. If you are greeted by a message that says, “The TPM is ready for use,” then it is possible that the Health Checker utility provided a false diagnosis. In that case, your best course of action is to find a professional to inspect your machine.
- If you are seeing the “Compatible TPM cannot be found” message or anything similar telling you that TPM might be disabled, then try other solutions we have in this list.
Fix #3: Enable TPM 2.0
As mentioned above, TPM 2.0 is a requirement to run Windows 11 on a computer. So, it has to be enabled to ensure you don’t encounter errors in the process.
To enable TPM 2.0, you need to access the BIOS menu and follow the steps below:
- Start your computer as you normally would.
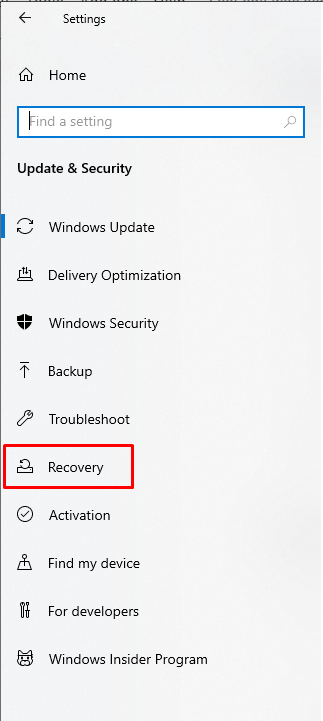
- Go to the Start menu and click Settings.
- In this window, open Update and Security.
- Navigate to the Recovery tab.
- Under the Advanced Startup section, hit the Restart Now button. Your device will restart automatically and bring you to a blue screen with several options.
- Next, go to Troubleshoot and select Advanced Options.
- Open the UEFI Firmware Settings.
- Access the Security tab and hit Enter.
- Look for TPM Settings. The label may vary depending on the device. But generally, it will be clearly labelled with the word “TPM”.
- Under the TPM settings menu, locate the switch that enables TPM.
- Save your settings and restart your device.
- Try to install Windows 11 again.
Fix #4: Enable Secure Boot
Because Security Boot is a security standard that is required of all new Windows devices, it has to be enabled. Make sure Secure Boot is enabled by doing the following:
- Open the Start menu and navigate to Settings.
- Go to Update and Security and click the Recovery tab.
- Now, go to Advanced Startup and click the Restart Now button to restart your device and open the BIOS menu.
- Navigate to Troubleshoot and choose Advanced Options.
- Access the UEFI Firmware Settings.
- Locate the Secure Boot setting. It could be under the labelled Boot, Authentication, or Security headers.
- Toggle the switch next to it to enable it.
- Save your changes and exit the menu.
- Reboot your device to a normal Windows desktop.
Fix #5: Perform an In-Place Upgrade
If you are using an old computer and want to upgrade it to Windows 11, then you know it may not be possible due to system requirements constraints. However, if you insist, you can try forcing an in-place upgrade and check if it works.
Here’s how to do it:
- Disable any third-party antivirus or security suite that you have installed on Windows.
- And then, disconnect all non-OS hard drives until the upgrade process is complete. Doing this will keep Windows Setup from installing some OS files on other hard drives.
- After that, download the Windows 11 ISO version and wait for the process to complete.
- Once done, double-click on the ISO file to let Windows 10/11 start mounting the new OS onto your device.
- Next, double-click on the setup.exe file and hit Yes when prompted by the UAC.
- The Windows 11 Setup will now take over.
- At this point, you don’t have to do anything. Just follow the on-screen instructions until you see the Change How Setup Downloads Updates screen. Now, click the button and untick the box next to the I want to help make the installation better option.
- Follow the remaining instructions and choose the Not Right Now option once you arrive on the Get Updates, Drivers, and optional Features option.
- Hit Next.
- Wait for the scans and processes to complete.
- Accept the EULA and hit the Install button to start performing an in-place upgrade.
- You will then be asked to decide if you want to Keep Personal Files and Apps (default), Keep Personal Files Only, or Keep Nothing. Make a choice.
- Wait for the upgrade process to complete.
- Sign in once you are done.
Fix #6: Use the WinPass11 Guided Installer
If your device has no dedicated TPM 2.0 chip and no Secure Boot function, your last resort is to fool Windows 11’s Setup wizard into thinking your device has met the minimum requirements. To do that, you can use the WinPass11 Guided Installer.
For a detailed guide on how to use the WinPass 11 Guided Installer, follow these steps:
- Open your preferred browser and visit the official release page of the WinPass11 installer.
- Download the latest executable file that is compatible with your computer.
- Once the download is complete, right-click on the file and select Run as Administrator. When prompted by the UAC, hit the Yes button.
- The WindowsPass 11 Guided Installer wizard will now appear. At the first screen, click Clean. This will remove any old installation file you have downloaded.
- Hit the Next button to proceed.
- Click the Apply button to enforce the fix needed to bypass the Secure Boot and TPM 2.0 checks.
- Follow the on-screen instructions to enable the Dev Channel.
- Wait until the installation of Windows 11 fails. And then, go back to the WinPass 11 Guided installer wizard and hit the Replace button.
- Follow the rest of the prompts to complete the installation of Windows 11.
Fix #7: Perform a Registry Hack
If you are confident in performing some registry tweaks to bypass the Secure Boot and TPM 2.0 checks, then this fix is for you. Here’s a guide on what to do:
- Press the Windows + R keys to launch the Run utility.
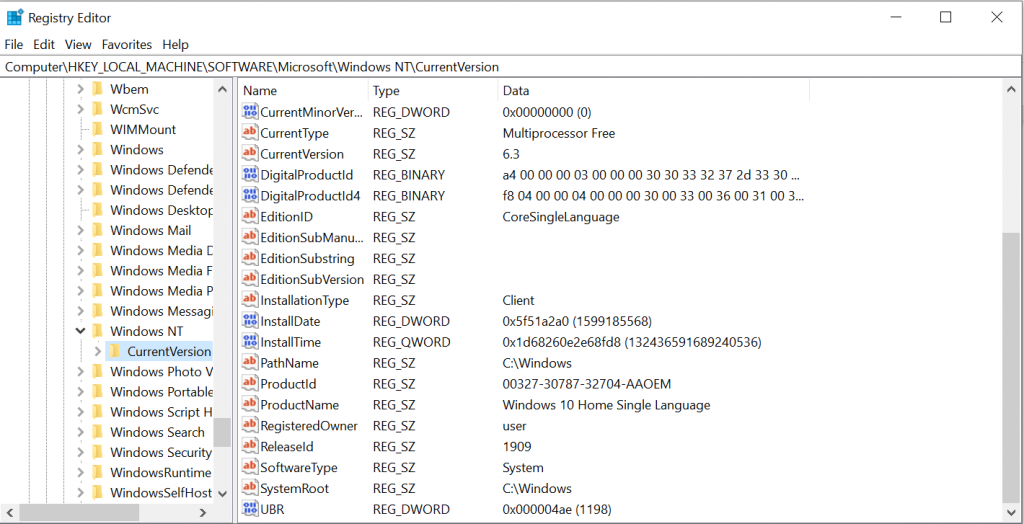
- Type regedit into the text field and hit the Ctrl + Shift + Enter keys simultaneously to launch an elevated Registry Editor.
- While in the Registry Editor, go to this location: HKEY_LOCAL_MACHINE\SYSTEM\Setup.
- Right-click on Setup and select New. Click Key.
- Rename the new key to LabConfig and hit Enter.
- Right-click on this new key and select New. Choose Dword (32-bit) Value.
- Next, rename the new key as BypassTPMCheck.
- Double-click on this key and set its base value to Hexadecimal. Change its Value to 1 as well.
- And then, disable the Secure Boot check by right-clicking on LabConfig and selecting New > Dword (32-bit) Value.
- Rename the new Dword value to BypassSecureBootCheck and set its base value to Hexadecimal and its Value to 1.
- Lastly, disable the RAM check. Right-click on the LabConfig key one more time and select New > Dword (32-bit) Value.
- Name the new key as BypassRAMCheck and set its base value to Hexadecimal and its Value to 1.
- Exit the Registry Editor and restart your computer to apply the changes.
- Install Windows 11 one more time.
Wrapping Up
Windows 11 is coming, and it’s going to be the best Windows ever. The release date for Windows 11 has not been set yet but we do know that this new operating system will have some major updates.
For example, there will be a new shell experience so you can get back to your desktop quickly. There are also improvements in security and performance that will make running apps smoother than ever before as well as enhancements to Cortana so you can use voice commands even more easily. With all these great features waiting for us in Windows 11, it sounds like an exciting update worth waiting for!
But, if unfortunately, you encounter the “This PC can’t run Windows 11” error on your computer after installing it, don’t panic. You can always pull up this article and find answers. You can start with easy troubleshooting methods like checking if your device meets the minimum requirements of the OS. If yes, then proceed to other fixes like running a system health check and enabling TPM from BIOS. And if all else fails, try turning on secure boot. Hopefully, one of these fixes could resolve your problem.
Have you downloaded and installed Windows 11 already? Were you able to install it seamlessly? We’d like to know! Share your experience in the comments.