Prerequisites
Before starting, ensure you have:
- A computer with a strong internet connection for faster file downloads.
- An 8GB or larger USB drive. Note: The drive will be erased.
- A 25-character Windows 11 Product Key, unless you have a digital license.
- A backup of important files, as data loss will occur during the new OS installation.
Also, verify your system meets Windows 11 minimum requirements.
If you’re wondering how much time you’ll need to allocate for creating a Windows 11 bootable USB, we’ve compiled a helpful table to guide you. The estimated times can vary based on your computer’s performance and internet speed, but these figures should give you a general idea. Below is a table outlining the estimated time required for each method of creating a Windows 11 bootable USB drive.
| Method | Estimated Time |
|---|---|
| Microsoft's Media Creation Tool | 15-20 minutes |
| UNetbootin | 20-25 minutes |
| Universal USB Installer | 20-25 minutes |
| Windows USB/DVD Download Tool | 30-35 minutes |
| Balena Etcher | 15-20 minutes |
| Rufus | 10-15 minutes |
| Command Prompt | 40-45 minutes |
Microsoft’s Media Creation Tool
- Insert a USB drive into your computer’s USB port.
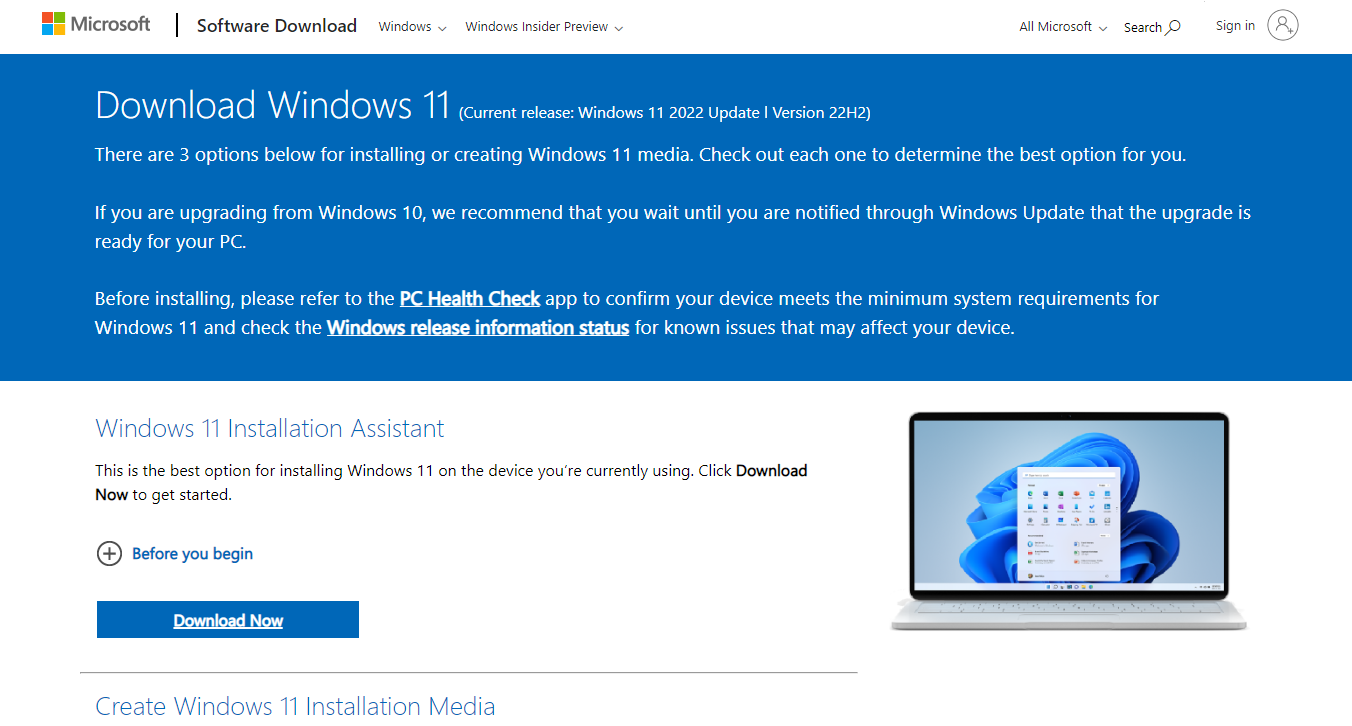
- Download the tool from Microsoft’s Windows 11 download webpage
- Run Installer: Click Download Now under ‘Create Windows 11 Installation Media’ and launch the downloaded file.
- Accept Terms: Agree to the terms and conditions.
- Select Edition: Choose the Windows 11 edition you want to install.
- Choose Media Type: Select USB flash drive.
- Select Drive: Pick your USB drive from the list that appears.
- Create Media: Click Next and wait. You will be notified once the process is complete.
Expert Tip: For smoother PC performance, consider using a PC optimization tool. It handles junk files, incorrect settings, and harmful apps. Make sure it's right for your system, and always check the EULA and Privacy Policy.
Special offer. About Outbyte, uninstall instructions, EULA, Privacy Policy.
Third Party Services
Important: For your own safety, download utilities and software only from verified and official sources. This helps mitigate the risk of accidentally installing malware or viruses on your system.
UNetbootin
- Download UNetbootin from the official website.
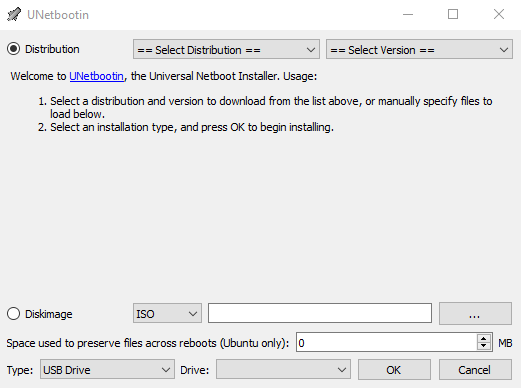
- Insert your USB drive and open UNetbootin.
- Select “Diskimage” and locate the Windows 11 ISO file.
- Choose your USB drive from the “Drive” dropdown.
- Click “OK.”
Universal USB Installer
- Download the software from its official website.
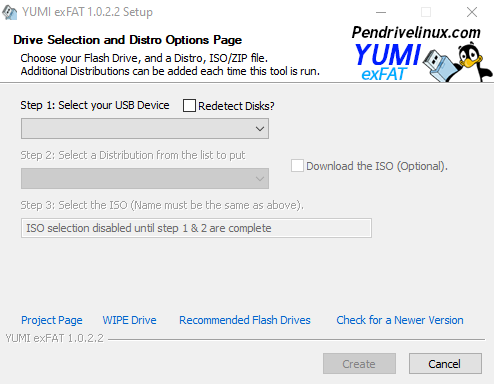
- Open the application and select “Windows Installer” in the dropdown.
- Locate your Windows 11 ISO file.
- Choose your USB drive.
- Click “Create.”
Windows USB/DVD Download Tool
Although a bit dated, this Microsoft-official tool can still get the job done for creating bootable USB drives.
- Download the Windows USB/DVD Download Tool from the Microsoft website.
- Run the tool and browse to your Windows 11 ISO file.
- Choose “USB device” as your media type.
- Select your USB drive from the list.
- Click “Begin copying.”
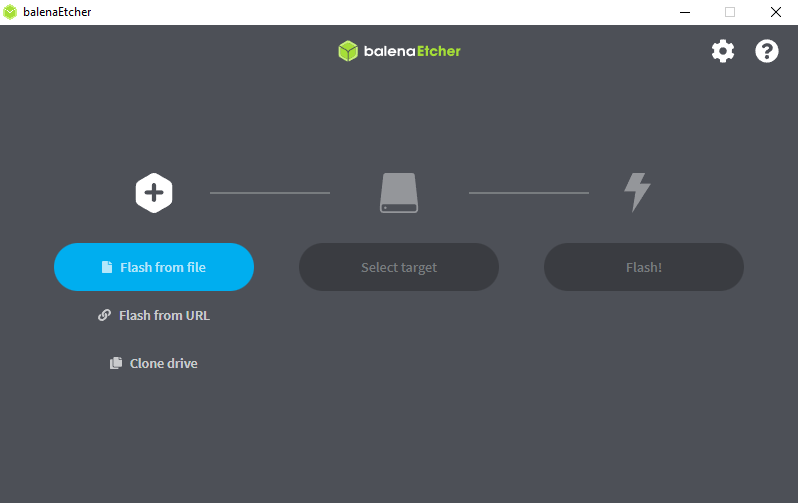
Balena Etcher
Balena Etcher is another reliable, open-source option for creating bootable USB drives.
- Download Balena Etcher from its official website.
- Run the application and click “Flash from file” to select your Windows 11 ISO.
- Click “Select target” to choose your USB drive.
- Click “Flash!” to start the process.
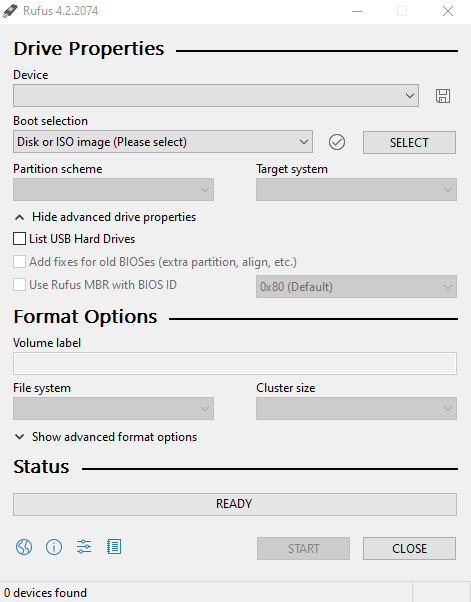
Rufus
- Download Rufus: Head to the Rufus website and download the utility from its official site. No installation is needed.
- Run Rufus: Launch the downloaded executable.
- Choose USB: Ensure your USB drive is selected in the “Device” dropdown.
- Load ISO File: In the “Boot selection,” click Select and locate your Windows 11 ISO file.
- Configuration: Choose either MBR or GPT under “Partition scheme” and NTFS as the “File system.”
- Begin: Click Start and acknowledge the data loss warning.
- Completion: Wait for the “READY” message to confirm your bootable USB drive is ready.
The methods listed above are commonly considered reliable for creating a Windows 11 bootable USB drive, but always ensure to follow all safety and download protocols. Always remember to download these utilities from their official websites to avoid any security risks.
Command Prompt (For Advanced Users)
- Download ISO: Get the Windows 11 ISO file from Microsoft’s official website.
- Open Command Prompt: Run as administrator.
- Initialize Disk: Use a series of commands (
diskpart,list disk,select disk, etc.) to format and create a partition. - Transfer Files: Use the
xcopycommand to copy installation files from the ISO to your USB drive.
Installing Windows 11 from USB
Boot Installation
- Change your PC’s boot order to prioritize the USB drive. Instructions vary by manufacturer.
- Reboot your PC.
- Follow on-screen instructions to install Windows 11.
Within-Windows Installation
- Navigate to the USB drive and open
setup.exe. - Follow the prompts to complete the installation.
Troubleshooting Common Issues When Creating a Windows 11 Bootable USB
Creating a bootable USB drive for Windows 11 can sometimes run into issues that may leave you puzzled. Below are some common problems you might encounter and their potential solutions.
USB Drive Isn’t Detected
- Solution: Ensure that the USB drive is properly inserted into the USB port. Try inserting it into a different port or restarting your computer.
- Additional Tip: Use the “diskpart” command on the Command Prompt (as an administrator) to check if your system recognizes the USB drive. If not, the drive might be faulty.
Error Messages During the Process
- Example Error: “Could not copy files” or “The process failed.”
- Solution: The downloaded ISO file might be corrupt. Redownload the file and try the process again.
- Additional Tip: Check if your antivirus or security software is blocking any aspect of the bootable USB creation process.
‘Failed to Format USB’ Error
- Solution: Sometimes the drive is set to ‘Read-Only’ mode. You can disable this using the diskpart utility. Run Command Prompt as an administrator and use the commands ‘diskpart’, ‘list disk’, ‘select disk [your disk number]’, and finally ‘attributes disk clear readonly’.
Stuck at ‘Creating Bootable USB’
- Solution: Ensure your USB drive has at least 8 GB storage and consider using a USB 3.0 for faster data transfer.
USB Drive is Bootable but Fails to Install Windows
- Solution: This could be due to an issue with the partition scheme or file system. Use the recommended settings for the tool you are using, typically GPT for UEFI and MBR for BIOS.
No Bootable Device Found
- Solution: Access BIOS settings by pressing a key like F2, F12, DEL, or ESC during startup. In BIOS, navigate to boot order and prioritize your USB drive.
By following these troubleshooting tips, you should be able to resolve most issues related to creating a Windows 11 bootable USB. If problems persist, consider reaching out to specialized forums or customer support for more personalized assistance.
Additional Tips and FAQs for Windows 11 Bootable USB
Additional Considerations, borrowed from here :
- Windows License Type: Activation varies by license. OEM licenses, often found on pre-installed Windows systems, should reactivate automatically. For retail licenses, have your product key ready.
- Missing System Files: A fresh install from a bootable USB can restore specific missing system files like those needed for TPM 2.0 encryption. Simple repairs or resets may not.
- OneDrive Backup: If you have adequate cloud storage, back up your important files to OneDrive for easy restoration after installation.
Conclusion
Whether you’re a beginner or an experienced user, the methods described offer varying levels of complexity and feature sets, so you can choose the one that best suits your needs. Each tool mentioned has its unique features and limitations; Microsoft’s Media Creation Tool is designed for user-friendliness, while Rufus offers more advanced options. The Command Prompt method is best suited for experienced users. Choose the one that best fits your level of expertise and needs.