
Windows 10/11 is an operating system that is a step ahead of its competitors. Used by more than one billion users, this operating system works in a variety of devices like smartphones, desktops, and laptops.
However, even if Microsoft has done a pretty good job with this OS’s scalability, there is one issue that is recurring for many users – some texts, menus, and fonts appear blurry.
In this article, we will tackle and share some blurry text in Windows 10/11 fixes, as well as some reasons why it shows. But before we delve into those topics, let us first explore Windows 10/11’s default font system.
Windows 10/11’s Default Font System
Yes, the default font system of Windows 10/11 is already visible and stunning enough. But did you know that you can change it to anything you want? To complete the task, you need to make changes to the registry.
Expert Tip: For smoother PC performance, consider using a PC optimization tool. It handles junk files, incorrect settings, and harmful apps. Make sure it's right for your system, and always check the EULA and Privacy Policy.
Special offer. About Outbyte, uninstall instructions, EULA, Privacy Policy.
In the previous Windows operating system versions, changing the font system is easy. This is because the Control Panel already had personalization settings that allow users to customize their fonts and even modify the visual elements on the desktop, such as title bars, menus, File Explorer, and many more.
But Microsoft has now restricted all that in Windows 10/11 for some reason. So, many users think they are stuck with the default font system.
Well, if we read that paragraph again, we particularly highlighted the word “restricted”. Why? That is because you can still change your font system. It’s just that the steps may be a bit technical as it involves playing around with the registry.
So, how do you change the default font system on Windows 10/11?
How to Change the Default Font System on Windows 10/11
Before you do anything, allow us to leave a friendly reminder that editing the registry is quite risky as one mistake can cause irreversible damage to your system settings. It is highly recommended to back up your device’s settings and your important files before proceeding. Better yet, have a system restore point in handy so you can easily revert your changes.
Without further ado, here’s how to change the default system font on Windows 10/11:
- Launch the Start menu.
- Into the text field, input notepad and click on the most relevant search result.
- Copy and paste the following code onto the text field:
Windows Registry Editor Version 5.00[HKEY_LOCAL_MACHINE\SOFTWARE\Microsoft\Windows NT\CurrentVersion\Fonts]
“Segoe UI (TrueType)”=””
“Segoe UI Bold (TrueType)”=””
“Segoe UI Bold Italic (TrueType)”=””
“Segoe UI Italic (TrueType)”=””
“Segoe UI Light (TrueType)”=””
“Segoe UI Semibold (TrueType)”=””
“Segoe UI Symbol (TrueType)”=””[HKEY_LOCAL_MACHINE\SOFTWARE\Microsoft\Windows NT\CurrentVersion\FontSubstitutes]“Segoe UI”=”NEW-FONT-NAME” - Next, go to Settings and select Personalization.
- Click Fonts.
- Choose your desired font family and take note of the official font family’s name. For instance, you may note Courier New.
- Find the section in the code that specifies the registry code. Replace its value with the name of the font family. In your case, input Courier New.
- Go to the File menu and click the Save as option.
- Click the drop-down menu and select the All Files option.
- Think of a descriptive name for the file. For instance, you can use my-system-font.reg.
- Hit the Save button.
- Now, right-click on the newly-created file and choose the Merge option.
- Hit Yes, then OK to proceed.
- Restart your computer for the changes to take effect.
- Once your computer has successfully rebooted, the new font should be visible throughout your desktop elements, including the message box, taskbar, File Explorer, and all other apps that use the default font system settings of Windows 10/11.
How to Restore Windows 10/11’s Default Font System
If you realize that you are not happy with the font system you chose, you can always restore the previous settings using the registry or via a restore point.
Using the Registry
Here’s how to use the registry to restore the default font settings of Windows 10/11: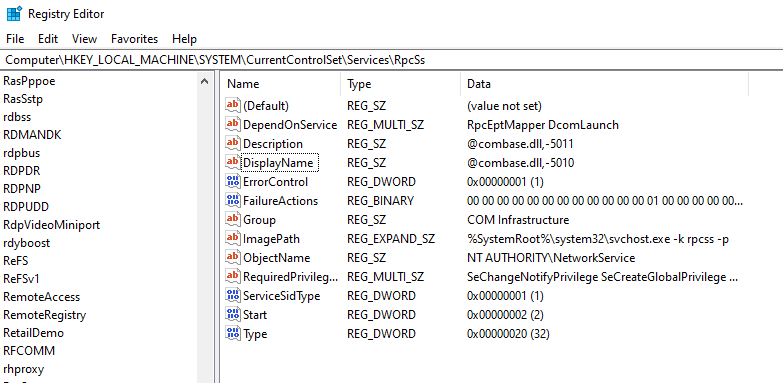
- Open the Start menu.
- Search for notepad and click on the most relevant search result. This should launch the text editor.
- Next, copy-paste the code below onto the text field:
Windows Registry Editor Version 5.00[HKEY_LOCAL_MACHINE\SOFTWARE\Microsoft\Windows NT\CurrentVersion\Fonts]
“Segoe UI (TrueType)”=”segoeui.ttf”
“Segoe UI Black (TrueType)”=”seguibl.ttf”
“Segoe UI Black Italic (TrueType)”=”seguibli.ttf”
“Segoe UI Bold (TrueType)”=”segoeuib.ttf”
“Segoe UI Bold Italic (TrueType)”=”segoeuiz.ttf”
“Segoe UI Emoji (TrueType)”=”seguiemj.ttf”
“Segoe UI Historic (TrueType)”=”seguihis.ttf”
“Segoe UI Italic (TrueType)”=”segoeuii.ttf”
“Segoe UI Light (TrueType)”=”segoeuil.ttf”
“Segoe UI Light Italic (TrueType)”=”seguili.ttf”
“Segoe UI Semibold (TrueType)”=”seguisb.ttf”
“Segoe UI Semibold Italic (TrueType)”=”seguisbi.ttf”
“Segoe UI Semilight (TrueType)”=”segoeuisl.ttf”
“Segoe UI Semilight Italic (TrueType)”=”seguisli.ttf”
“Segoe UI Symbol (TrueType)”=”seguisym.ttf”
“Segoe MDL2 Assets (TrueType)”=”segmdl2.ttf”
“Segoe Print (TrueType)”=”segoepr.ttf”
“Segoe Print Bold (TrueType)”=”segoeprb.ttf”
“Segoe Script (TrueType)”=”segoesc.ttf”
“Segoe Script Bold (TrueType)”=”segoescb.ttf”[HKEY_LOCAL_MACHINE\SOFTWARE\Microsoft\Windows NT\CurrentVersion\FontSubstitutes]“Segoe UI”=-
- Now, go to the File menu and click the Save as option.
- Navigate to the Save As Type drop-down menu and choose All Files.
- Create a descriptive name for the file. In this case, we can use restore-default-system-font.reg.
- Hit the Save button.
- Right-click on the file you have just created and choose Merge.
- Hit Yes, then OK.
- Once you have completed the steps above, the default font system of Windows 10/11 should be restored.
Using a Restore Point
 If the first method did not restore Windows 10/11’s default font system, try to use a previously created restore point. However, this option should be your last resort because depending on when the restore point was created, some system changes may have to be done. This means more work.
To undo the changes you’ve done, follow these steps:
- Go to the Start menu and input create a restore point into the text field.
- Click on the top-most search result.
- In the window that pops up, navigate to the System Protection tab.
- Hit the System Restore button.
- Click Next.
- Choose the restore point you have just created prior to applying the font changes.
- Hit Next to proceed, then click Finish.
- After completing these steps, the default font system of Windows 10/11 should be restored.
How to Manage Fonts in Windows 10/11
Though Microsoft has restricted the ability to change the default font system of Windows 10/11, know that you can still manage the fonts loaded onto your device. You can view, remove, and hide fonts. You can even download new ones if you want!
You probably have lots of fonts in mind that you want to use to spice up your files, presentations, and documents. But do you know where to find them? Do you know how to make them available on your device? Good thing that Microsoft has equipped Windows 10/11 devices with all the right tools to do that. Using the standard Fonts tool in Control Panel, users can see what fonts are installed and view each one of them.
If you installed the Windows 10/11 April 2018 update or the later patches, you can perform more tricks! Using the Fonts screen under the Settings menu, you can see how each font style looks without having to preview it. You can also uninstall fonts that you don’t need or download more online.
Viewing Installed Fonts
To view the installed fonts on Windows 10/11, launch Control Panel. With this window in Icon view, select Fonts. Windows will then display all the fonts installed in your system.
Previewing Individual Fonts
If you want to view a specific font, click on the Preview button or double-click on the font. The Font Viewer will then show you how the font appears at different sizes. You may have these previews printed in the font viewer window should you need a hard copy of them.
Previewing Font Families
Is the font that you chose belonging to a family? If that is the case, double-click on it. This will open a page that displays all other fonts that belong to the family. From there, you can see a preview of each font.
Now, if you click Preview for a particular font family, multiple pop-ups will surface, displaying the font with different attributes like italic and bold.
If you chose a font family that requires multiple viewer screens, you will be asked by Windows to confirm whether or not you want to open them all. Otherwise, you may need to close all individual preview windows.
Hiding Fonts
You can also hide a font that you don’t want to use or see. However, this hack isn’t really for everybody because hiding fonts will result in them becoming invisible for certain apps like Notepad and WordPad.
Programs like Microsoft Office generate their font menus, though. This means hiding fonts via Control Panel does not impact them. To hide a font, simply right-click on it and select Hide.
You may also choose to automatically hide fonts that are not meant for your preferred language settings. To do so, click the Font Settings link on your sidebar. In the window that appears, tick the box next to the Hide fonts based on your language settings option. Finally, hit OK to apply the changes.
Uninstalling Fonts
If you are confident that you will no longer use a certain font, then you can uninstall it. But this trick may not work for all fonts. It is impossible to delete fonts that are already built into Windows because they are protected.
If you attempt to remove them, Windows will stop you. You can delete those unprotected fonts, though, including the fonts added by programs like Adobe Creative Suite and Microsoft Office.
To delete unprotected fonts, right-click on them and select Delete. That’s pretty much it!
Backing Up Fonts
Before you even delete a font, you may want to back it up first. You never know if you will need it in the future.
To back up fonts, create a backup folder first. And then, right-click on the font or font family. Select Copy. Paste the copied font into the newly-created folder. After that, delete the font.
Reinstalling Fonts
Should you need the font again, you can always restore it, provided you have created a backup ahead. To reinstall a font, right-click on it in the backup folder you have created. And then, select Install.
Viewing Font Details
If you want to see more details of the font, click on it. Windows will then display the font’s various attributes. You may drag the slide to the left or right to see the font at varying sizes.
Why Is There Blurry Text in Windows 10/11?
 Now that you have found out how amazing the Windows 10/11 operating system is because it allows you to easily manage fonts, you’re probably thinking that it is one flawless system. Well, we also wished that way. But like other operating systems out there, it has flaws, too.
Since we’re talking about fonts here, it is worth mentioning that Windows 10/11’s font system has issues as well. One is that some of the texts and menus appear blurry at times.
You may ask, what causes the issue of blurry text in Windows 10/11? Is it triggered by changes in the font settings? Does it have something to do with malware attacks or virus infection? Does this happen because of playing around with the default font system? Well, those are possible scenarios. But the more common reason is associated with the blurry text issue is DPI scaling.
Windows 10/11 supports a combination of modern and legacy applications. These age-old apps are not designed to have high-resolution displays. This explains the blurry texts and fonts you see while using them.
Then again, this blurry text issue does not only happen in legacy apps. Some Windows users who use a screen resolution of 1920 x 1080 or higher can experience it, too.
In general, the DPI scaling of Windows 10/11 devices is set to at least 125%. This makes everything easier to read and make apps and photos appear stunning. Then again, this may also affect desktop programs, especially those that are not designed to support high resolutions. And for that, the fuzzy or text problem occurs.
Here are other scenarios where you can experience blurry texts in Windows 10/11:
- You open an app with a high resolution, and then move it to another display that uses a different resolution setting.
- You dock your tablet or laptop to a display that has a different resolution, and then you try to project it using the Second Screen Only Mode.
- You try to connect to your PC using another PC, but the displays of both devices are different.
How do you fix the blurry text issue in Windows 10/11 then?
7 Ways to Fix Blurry Text in Windows 10/11
Do not panic if you encounter a blurry text issue in Windows 10/11. Don’t even associate it with other Windows issues. Display issues are often easy to fix. We’ve compiled troubleshooting steps and solutions below to get rid of this blurry text in Windows 10/11 problem once and for all. Hopefully, one of them works for you.
Fix #1: Do Basic Troubleshooting.
Sometimes, all your computer needs is a fresh start as many unnecessary processes may already be running in the background, consuming a significant amount of memory resource. To restart your computer, simply click the Start menu, go to the Power option, and select Restart.
If it does not work, perhaps the issue is with your user account. If this is the case, logging out and logging in may do the trick.
Now, if the issue still persists, check the connectivity of your external display. The cable might not be properly connected to your CPU, hence the blurry text issue.
If none of these basic troubleshooting methods worked, move on to the next fixes.
Fix #2: Update Your Graphics Drivers.
 Your graphics drivers may already be outdated. That is the reason you are having the blurry text issue in Windows 10/11. To fix this, you need to update your graphics drivers.
You have two ways to update your graphics drivers: manual or automated. Of course, we would highly recommend the automated method. Not only is it a convenient option, but it is also safe and quick.
For this, you will need a third-party driver updater tool like Auslogics Driver Updater. Once you have it installed, launch it, and let it do its job of updating outdated device drivers. It’s that easy!
But if you prefer the manual option, then you can do so. However, we advise taking extra caution because installing the wrong driver may only worsen the problem. That is what we are trying to avoid. So, follow the instructions carefully to ensure good results:
- Press the Windows + R keys to launch the Run utility.
- Into the text field, input device manager and hit OK.
- Click on the most relevant search result.
- In the Device Manager window, find the Display section and expand it.
- Right-click on your device and select the Update Driver Software option.
- Next, click Search Automatically for Updates.
- Wait as your system finds updates for your driver.
- Reboot your device.
- Once done, check if the issue appears again.
Fix #3: Enable the Blurry Fixing Option.
Microsoft has created a handy tool that can be used to fix blurry text and menu issues in Windows 10/11. Here’s how to use it:
- Right-click on your desktop and select Display Settings.
- Choose Advanced Scaling Settings.
- Enable the Let Windows try to fix apps so they’re not blurry option.
- Exit the app or program that you had an issue with.
- Re-launch it and check if Windows has already resolved the problem.
Fix #4: Inspect the Display Settings.
It is possible that the display settings are at fault. That is why you’re having the blurry text problem in Windows 10/11. So, to fix this, check the display settings and apply the necessary changes.
Follow the instructions below:
- Open Display Settings.
- Navigate to the Scale and Layout section and check if it is set to 100% or higher.
- Re-launch the app that has blurry texts or menus.
- And then, try logging out and logging in to Windows.
- Check if the issue persists.
Fix #5: Change the Display Settings of the Problematic App.
You may also try changing the display settings of the problematic app and see if it resolves the problem. Here’s a detailed guide on how to do it:
- Into the search field, input the name of the app.
- Right-click on the most relevant search result.
- Select Open File Location.
- Next, right-click on the app and choose Properties.
- Navigate to the Compatibility tab and go to the Change high DPI settings section.
- Tick the Use this setting to fix scaling problems for this program option.
- And then, go to the High DPI scaling override section.
- Check the Override high DPI scaling behavior option.
- Be sure that the Application option is selected in the drop-down menu.
- Hit OK to save the changes.
- Close the app and check if the problem is resolved.
Fix #6: Play with the Custom Scaling Option.
If none of the above fixes worked, use the display menu’s custom scaling option. This has resolved the problem for some affected Windows users, so it’s worth trying on your end.
Here’s what you should do:
- Launch the Settings app.
- Navigate to the Display section and go to Scale and Layout. The default value should be 150%.
- Next, go to Advanced Scaling Settings and input a valid number in the Custom Scaling section.
- Restart your device and check if the text in your apps is still blurry.
Fix #7: Update Windows.
 This blurry text issue in Windows 10/11 could be caused by a buggy update released by Microsoft. So, if you happened to install one, you may need to roll back to a previous build or install the latest one.
Here’s how:
- Launch the Settings app and navigate to the Windows Update section.
- Check for updates.
- If a new build is available, install it.
- Wait for the installation process to complete.
- Re-launch the app with blurry text and check if the problem still exists.
How to Enjoy Sharper Text on Your Windows 10/11 Screen
Assuming that you have already gotten rid of the blurry text issue on Windows 10/11, you may want to consider these tips to enjoy a better display quality.
Tip #1: Calibrate Your Monitor to Enjoy Better Hues.
Make sure you have properly calibrated your display so you can enjoy its optimum color and quality. Although the default settings are already acceptable, a few minor tweaks won’t hurt. In fact, some find these changes much better.
To calibrate your monitor, follow these steps:
- Take note of your monitor’s model. It may be printed somewhere in front.
- Next, input display settings into the search field. Click on the most relevant result.
- In the Display Settings window, select Advanced Display Settings.
- Go to Display Adapter Properties.
- Select your monitor name.
- At this point, launch your favorite search engine and search for your monitor’s model. Look for recommended display settings. You should find a plethora of suggestions in different forums and communities.
- After you have done your research, change your display settings accordingly.
Tip #2: Use the ClearType Tool.
ClearType is a system-wide technology used by Microsoft to make texts sharper and clearer. Windows 10/11 supports this technology and it is enabled by default. So, if you find some texts on your screen are a bit blurry, be sure that this technology is turned on. And then, do some fine-tuning.
To use the ClearType tool, follow these steps:
- Go to the Windows 10/11 search field.
- Input cleartype and hit Enter.
- In the search results, choose the Adjust ClearType text option. This will launch the Control Panel.
- Once the ClearType Text Tuner window opens, tick the Turn on ClearType option.
- Hit Next to proceed.
- Windows should now check your monitor’s resolution and ensure it is set accordingly.
- Hit Next again.
- You will then be shown several text blocks and will be asked to choose one that looks best to you.
- After choosing, hit the Finish button and ClearType should make the necessary adjustments for you.
Tip #3: Invest in a Brand-New Display.
If you really need a display with superior quality, then we suggest investing in brand new monitor models. Your old display may already be nearing its end. That is the reason you’re seeing blurry texts. Newer models have better display quality. Plus, they last longer.
Here are some of the best monitors to date. These are recommended by gamers, graphic pros, and other professionals:
- BenQ PD3200U
- LG UltraGear 38GN950
- BenQ SW321C PhotoVue
- Asus ROG Swift PG27UQ
- Dell 4K S3221QS Curved Monitor
Wrapping Up
Using the fixes above, you should easily resolve the blurry text problem in Windows 10/11. Go through each fix carefully and find one that you think will work for you. If the problem is still giving you headaches, then try reaching out to Microsoft’s official support team. You can also go to the nearest authorized service center and have your device checked. Perhaps the problem is caused by an internal hardware issue, so have professionals check it for you.
You may also consider the tips above to enjoy a clearer and better display without all the blurred stuff.
Which of the above fixes resolved the blurry text problem for you? Do you know other solutions that may work? Do you have tips to give on how to avoid blurry text issues in Windows 10/11? Let us know your thoughts in the comments section!