
Microsoft recommends updating to the latest version of Windows 10/11 for improved PC performance and enhanced security. While the update process is typically straightforward, issues like Windows 10/11 update error 0x80248007 may arise occasionally.
Basically, this issue means that Windows Update is unable to locate Microsoft Software License Terms, or that Windows Update is missing some important files and folders. However, this problem might be caused by a variety of factors. In this article, we’ll look at how to resolve error code 0x80248007.
What Is Windows 10/11 Error 0x80248007?
Error codes in Windows, such as 0x80248007, are intended to assist users in identifying and resolving problems within their operating system. These issues can be caused by a variety of factors, including Windows upgrades, which is where this error code originates.
The vast majority of Windows update problems prevent users from installing or even downloading updates, while others, such as 0x800f084, might result in continuous boot cycles. Fortunately, error code 0x80248007 has no harmful consequences, making it considerably easier to troubleshoot.
Expert Tip: For smoother PC performance, consider using a PC optimization tool. It handles junk files, incorrect settings, and harmful apps. Make sure it's right for your system, and always check the EULA and Privacy Policy.
Special offer. About Outbyte, uninstall instructions, EULA, Privacy Policy.
Sometimes, when users try to upgrade the Windows system or drivers via Windows Update, it begins well, but is eventually halted by the 0x80248007 error message, which says:
There were problems installing some updates, but we’ll try again later. If you keep seeing this and want to search the web or contact support for information, this may help – (0x80248007)
Sometimes you get these error messages:
- Feature update to windows 10 version 1607 error 0x80248007
- Microsoft – wpd – 2/22/2016 12:00:00 am – 5.2.5326.4762 – error 0x80248007
This error indicates that Windows Update is missing some important files or that Windows Update is unable to locate the Microsoft Software License Terms. Despite the fact that every Windows PC is different in terms of setup settings, installed apps, and other characteristics, there is a common solution that can help all users cure the Windows 10/11 error 0x80248007.
It’s worth noting that Windows computers should be updated as soon as new patches are released; upgrades address a variety of stability and usability issues, as well as bug fixes.
It’s advised to restart your computer before proceeding with the recommended troubleshooting methods below. This will refresh the operating system and delete any corrupt temporary data files that may be the source of the issue.
What Causes Windows Update Error 0x80248007?
Windows error 0x80248007 is a frustrating problem. It can happen if you’re using out-of-date device drivers. Furthermore, if your internet connection is weak and unpredictable, it may result in a Windows update problem. Such update troubles could also be caused by an unexpected shutdown of the Windows update service. Additionally, if there are any missing or corrupted files in the Software Distribution folder, an update error will occur.
Additionally, Windows Firewall can obstruct the installation process, resulting in an install error. This Windows problem can also be caused by a virus or malware attack. When your device is infected with viruses and malware, they can prohibit you from installing updates. And, as a result, such an error code appears on Windows 10/11.
Methods to Resolve Install Error 0x80248007
Microsoft has acknowledged this flaw, which will be addressed in a future Windows update, but until then, there are a few things you can do to repair it to update Windows and its drivers without issues.
Here is some basic troubleshooting you can try first:
- To begin, double-check that you have a working internet connection so that you can download updated files from the Microsoft server.
- Disable antivirus software and deactivate your VPN for the time being (if installed on your PC)
- Start Windows in a clean boot state and check for updates; this will help if there is a third-party service conflict preventing the installation of Windows updates.
- Run a PC Repair Tool to scan your computer for issues that might be interfering with your computer processes.
If the fixes above don’t work, proceed with the next solutions:
Step 1: Manually start the Windows Installer service.
Manually running the Windows Installer service from an elevated Command Prompt will occasionally fix this error. The following are the measures to take:
- Launch an elevated Command Prompt by searching for it in the Windows search box, then right-click Command Prompt and choose Run as administrator.
- To run the command, type net start msiserver in the Elevated Command Prompt and push Enter on your keyboard.
- By clicking the X or typing Exit and pressing Enter, you can exit the command prompt. You should now be able to update whatever it was that needed updating in the first place.
Step 2: Restart the Windows Update service.

Stopping Windows Update, removing the temporary update files, and then resuming the service can also help. You will erase any temporary files that may be causing this issue, and Windows Update will be able to continue without any issues. It’s important to note that you’ll need to be logged in as an administrator to complete these instructions.
- Press the Windows key and R at the same time, then type services.msc and click OK.
- Find Windows Update or Automatic Updates in the Services window, depending on your Windows version, right-click it, and choose Stop from the menu.
- Navigate to the partition or drive where Windows is installed using File Explorer. Normally, this is the C: directory.
- Open the Windows folder and go to the SoftwareDistribution folder once inside the HDD.
- Locate and open the DataStore folder, then remove everything from there. If you receive a UAC prompt, confirm your actions.
- Return to the SoftwareDistribution folder and open the Download folder, deleting everything in there as well. If a UAC prompt appears, confirm your actions and close the window.
- To return to the Services window, repeat steps 1 and 2.
- Right-click Windows Update or Automatic Updates and choose Start from the context menu.
- Now you can test it, and it should work fine.
Given that this is a recognized issue with Microsoft, you’d be correct in expecting them to address it. However, because there is no estimated time for the error to be corrected, if you’re one of the many frustrated users who are encountering it, utilize the steps listed above to resolve it.
Step 3: Launch Windows Update troubleshooter.
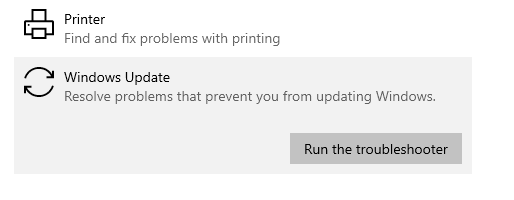
Start using the built-in troubleshooter if you have a Windows update related issue, such as error 0x80248007 Windows 10/11. Check that your computer has an internet connection before using this tool. To use the Windows Update troubleshooter, follow these steps:
- Select Settings from the Start menu (bottom-left corner of the screen).
- Select Update & Security from the drop-down menu.
- On the left side of the window, select Troubleshoot.
- On the right side, look for Windows Update and click it once.
- Select Run the troubleshooter from the drop-down menu.
Proceed to the next option if the Windows Update troubleshooter produces another problem and does not solve 0x80248007
Step 4: Reset all WU components manually.
If you’re still having problems after running the troubleshooter, you can try repeating the same steps manually. Another option is to delete the windows update cache files, which may or may not work for you. Follow these steps:
- Open a command prompt in Windows. Click Start > Run to launch a command prompt. Then hit ENTER after copying and pasting (or typing) the following command: cmd.
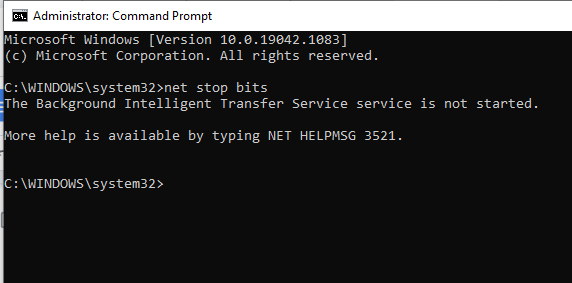
- The BITS, Windows Update, and Cryptographic services should all be stopped. To do so, open a command prompt and type the commands below. After you’ve typed each command, hit ENTER:
- net stop bits
- net stop wuauserv
- net stop cryptsvc
- Delete the qmgr*.dat files. To do so, open a command prompt and type the following command, followed by ENTER: Del “%ALLUSERSPROFILE%\Application Data\Microsoft\Network\Downloader\qmgr*.dat”
- If this is your first time using the steps in this article to resolve your Windows Update issues, skip to step 5 and skip the steps in step 4. Step 4 should only be used if you haven’t been able to resolve your Windows Update issues after completing all other steps in the troubleshooting process.
- The following directories should be renamed to *.BAK:
- %Systemroot%\SoftwareDistribution\DataStore
- %Systemroot%\SoftwareDistribution\Download
- %Systemroot%\System32\catroot2
- To do so, open a command prompt and type the commands below. After you’ve typed each command, hit ENTER.
- Ren %Systemroot%\SoftwareDistribution\DataStore DataStore.bak
- Ren %Systemroot%\SoftwareDistribution\Download Download.bak
- Ren %Systemroot%\System32\catroot2 catroot2.bak
- Set the default security descriptor for the BITS and Windows Update services. To do so, open a command prompt and type the commands below. After you’ve typed each command, hit ENTER.
- sc.exe sdset bits D:(A;;CCLCSWRPWPDTLOCRRC;;;SY)(A;;CCDCLCSWRPWPDTLOCRSDRCWDWO;;;BA)(A;;CCLCSWLOCRRC;;;AU)(A;;CCLCSWRPWPDTLOCRRC;;;PU)
- sc.exe sdset wuauserv D:(A;;CCLCSWRPWPDTLOCRRC;;;SY)(A;;CCDCLCSWRPWPDTLOCRSDRCWDWO;;;BA)(A;;CCLCSWLOCRRC;;;AU)(A;;CCLCSWRPWPDTLOCRRC;;;PU)
- At a command prompt, type the following command and then click ENTER: cd /d %windir%\system32
- Activate the BITS and Windows Update files again. To do so, open a command prompt and type the commands below. After you’ve typed each command, hit ENTER.
- regsvr32.exe atl.dll
- regsvr32.exe urlmon.dll
- regsvr32.exe mshtml.dll
- regsvr32.exe shdocvw.dll
- regsvr32.exe browseui.dll
- regsvr32.exe jscript.dll
- regsvr32.exe vbscript.dll
- regsvr32.exe scrrun.dll
- regsvr32.exe msxml.dll
- regsvr32.exe msxml3.dll
- regsvr32.exe msxml6.dll
- regsvr32.exe actxprxy.dll
- regsvr32.exe softpub.dll
- regsvr32.exe wintrust.dll
- regsvr32.exe dssenh.dll
- regsvr32.exe rsaenh.dll
- regsvr32.exe gpkcsp.dll
- regsvr32.exe sccbase.dll
- regsvr32.exe slbcsp.dll
- regsvr32.exe cryptdlg.dll
- regsvr32.exe oleaut32.dll
- regsvr32.exe ole32.dll
- regsvr32.exe shell32.dll
- regsvr32.exe initpki.dll
- regsvr32.exe wuapi.dll
- regsvr32.exe wuaueng.dll
- regsvr32.exe wuaueng1.dll
- regsvr32.exe wucltui.dll
- regsvr32.exe wups.dll
- regsvr32.exe wups2.dll
- regsvr32.exe wuweb.dll
- regsvr32.exe qmgr.dll
- regsvr32.exe qmgrprxy.dll
- regsvr32.exe wucltux.dll
- regsvr32.exe muweb.dll
- regsvr32.exe wuwebv.dll
- Winsock should be reset. To do so, open a command prompt and type the following command, followed by ENTER: netsh winsock reset
- You will have to configure the proxy settings if you are using Windows XP or Windows Server 2003. To do so, open a command prompt and type the following command, followed by ENTER: proxycfg.exe -d
- Start BITS, Windows Update, and Cryptographic services all over again. To do so, open a command prompt and type the commands below. After you’ve typed each command, hit ENTER.
- net start bits
- net start wuauserv
- net start cryptsvc
- Clear the BITS queue if you’re using Windows Vista or Windows Server 2008. To do so, open a command prompt and type the following command, followed by ENTER: bitsadmin.exe /reset /allusers
Step 5: Run the SFC Command.
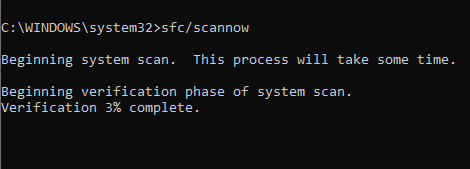
You can use the System File Checker to see if the Windows error is caused by damaged or corrupted system files. As this is an integrated tool, it aids in the detection and correction of internal flaws and malfunctions.
To begin scanning with the System File Checker utility, press the Windows logo key and the R key at the same time to open the search box. Now type “sfc/scannow” in the search box and press the Enter key. After this, the SFC tool begins detecting the problem associated with error 0x80248007. Once the run is complete, try installing the Windows updates to see if the problem persists.
Step 6: Perform a Clean Boot.
The easiest way to eliminate conflicts caused by applications that can cause Windows error 0x80248007 is to do a clean boot. These conflicts might arise as a result of the services and apps that start up when Windows is launched.
Login with administrator access to successfully do a clean boot on your device. After you’re finished, you can follow these steps:
- On your PC, hit and hold the Windows Home and R keys simultaneously. The Run dialog box will appear as a result. Now type msconfig into the Run dialogue box and press the Enter key.
- After that, you’ll notice the System Configuration option, which you should select and then go to the Services tab. Once you’ve navigated to the Services menu, look for the Hide All Microsoft Services option. After you’ve found this option, press the Disable All button.
- After that, you must find the Startup tab. Once there, right-click it and select Open Task Manager from the menu. You must disable any apps that come from third-party sources in this section. If you find more than one third-party program in this section, you should disable them all.
- When you’re finished, dismiss Task Manager and click OK to finalize your changes. Finally, reboot the computer to apply the modifications.
Step 7: Update manually via Microsoft’s website.
Even if you’ve attempted the steps above, Windows Update may still refuse to operate in some cases. In those cases, you may always try manually updating your OS using Microsoft’s website. This site always offers the most recent updates, and if you install them right away, you’ll have all of Microsoft’s latest features and problem fixes.