
Blue screens of death (BSODs) are caused by critical errors in the Windows operating system, leading to system failure. These errors can be triggered by software crashes or hardware issues, causing frustration for users.
Here are some of the most common BSOD errors:
- WHEA_UNCORRECTABLE_ERROR
- VIDEO_DXGKNL_FATAL_ERROR
- IRQL_NOT_LESS_OR_EQUAL BSOD
What Causes BSODs?
There are many possible causes of BSODs. However, most of the time, they are caused by issues with the driver or hardware components. But then again, we must not forget the fact that they may also be triggered by problems with low-level software programs that are running in the Windows kernel level.
Now, regular apps that you download online won’t be able to cause BSODs. In the event that they crash, they won’t bring the operating system along.
Expert Tip: For smoother PC performance, consider using a PC optimization tool. It handles junk files, incorrect settings, and harmful apps. Make sure it's right for your system, and always check the EULA and Privacy Policy.
Special offer. About Outbyte, uninstall instructions, EULA, Privacy Policy.
When Windows encounters a BSOD, it comes across a STOP error. This is a critical failure that results in a crash. And in case this happens, all that is left for Windows to do is restart. This situation can then lead to data loss because apps and programs did not have a chance to save any active data.
It is worth noting that BSODs look different from one Windows version to another. But in general, they appear like a blue screen with a terminal screen displaying information about the crash.
In this article, we will tackle one specific blue screen problem: the RTKVHD64.sys BSOD in Windows 10/11.
What Is the RTKVHD64.sys Blue Screen Error In Windows 10/11?
The RTKVHD64.sys is a BSOD stop error that results in a system crash. When it happens, your system turns blue and forces a restart right away. This problem can be very frustrating as it can negatively impact one’s productivity.
Even with all the inconveniences that this issue brings, know that a BSOD error like this plays a vital role within the Windows platform. This is because it prevents any serious damage that may otherwise cause the whole system to malfunction. Because a BSOD often forces a system restart, then a problem can be resolved immediately and the user can continue working productively.
Now, in the case of a RTKVHD64.sys error, it’s a completely different story. This error indicates that something is wrong with your system causing it not to function optimally.
So, what causes the RTKVHD64.sys error to appear? This particular problem is triggered by a problematic device driver, which is most of the time, associated with the Realtek High Definition Audio driver. When this BSOD occurs, your audio may stop working. Worse, there could be other technical issues with the sound.
Other possible triggers are:
- An insufficient disk space
- Faulty device drivers
- Misconfiguration of the BIOS
- Corrupted hard disk
- Unidentified Windows 10/11 bug
- Outdated Windows OS
- Incorrect system registry entries
To fix this problem, there are a couple of basic troubleshooting steps you can perform.
Basic BSOD Troubleshooting Steps
If you are running Windows 10/11, then you are in luck. Most of the time, your system will automatically perform troubleshooting methods after restarting or recovering from a crash. But still, it is still worth checking the Action Center to find out other details of the crash or see other helpful troubleshooting methods.
After that, if you find that Windows was unable to resolve the problem on its own, your best option is to search the web. Better yet, do the following:
Use System Restore
If it is your first time seeing a BSOD, then System Restore might just help. This will allow you to revert your system to a previously working state. If this troubleshooting method works, then it means that a certain software program has triggered the error.
To use System Restore, do the following:
- Go to the Start menu and select Control Panel.
- Click Control Panel from the search results.
- Navigate to Recovery -> Open System Restore.
- Hit Next.
- Select a restore point and hit Next.
- Finally, click Finish.
Scan for Virus or Malware
There are malware entities and viruses that dig deep into the system and gets hooked into the kernel level, resulting in system instability. So, if you suspect that a malware or virus has triggered the BSOD, then scan your computer for any signs of malware and get rid of them once and for all.
Make Sure Your Drivers Are Up to Date
An outdated device driver can lead to a blue screen on death error. Make sure you install any available driver update to prevent any driver-related issues.
Boot Your System into Safe Mode
If you see the BSOD error every time you turn on your device, then try booting into safe mode. In this mode, only the essential drivers and processes are loaded upon startup. If a recently installed driver is causing the BSOD, it shouldn’t appear in this mode.
To boot Windows 10/11 into Safe Mode, do the following:
- Hold the Shift key while pressing the Power button.
- Select Restart.
- When your PC restarts to the Choose an Option screen, choose Troubleshoot.
- Click Advanced Options and go to Startup Settings.
- Press Restart.
- Once your PC restarts, a list of options will appear. Press F4 to boot your device into Safe Mode.
Check for Hardware Issues
Blue screens can also show if you have a faulty hardware component in your device. Try checking the temperature of your hardware components to make sure they’re not overheating. Also, test your device’s memory for any errors. If that fails, then you may have a more serious hardware problem. Hire a professional to resolve the problem for you.
To check if your PC is having a hardware issue, follow these steps:
- Press the Windows + R keys to open the Run dialog box.
- Input mdsched.exe and hit Enter to launch it.
- Choose whether you want to restart your computer or check for problems the next time you restart your computer.
Alternatively, you can use a third-party hardware diagnostic app. If you do a quick search on Google, you can find a lot of powerful diagnostic apps that can identify potential or existing hardware problems.
Reinstall Windows
This should be the last resort. Doing this will remove anything you have saved on your system. If your device still throws a BSOD error after this, then this is a hardware problem that needs to be checked.
To reinstall Windows, do the following:
- Tap Settings and select Change PC settings.
- Click Update and Recovery and press Recovery.
- Navigate to the Remove everything and reinstall Windows section. Click Get Started.
- Follow the onscreen instructions.
Ways to Fix the RTKVHD64.sys Blue Screen Error In Windows 10/11
If none of the above troubleshooting methods worked, then these methods should fix it:
Solution #1: Run the Windows Startup Repair Tool.
Windows 10/11 is created by compiling hundreds of different elements and configuration files. If an issue occurs between these elements and files, there is a chance that an error will surface.
But with so many files out there, it would be difficult to pinpoint which one is the culprit. For that, you need a quicker and more effective solution: the Windows Startup Repair Tool.
The Windows Startup Repair Tool is a handy tool in Windows 10/11. It is widely used in cases when Windows does not boot up properly or when you are experiencing issues that indicate a problem in your system.
To use it, follow these steps:
- Hold the Shift key while pressing the Power button.
- Continue holding the Shift key and select Restart from the list of options that appear.
- Once your device restarts, you will be presented with several options. Select Troubleshoot.
- Navigate to the Advanced Options section.
- Select Startup Repair.
- In the screen that shows, select an account with administrator privileges.
- Enter your password to continue.
- Hit Continue.
- Wait as the tool scans your system and fixes any issues.
- After the scan, restart your PC and check if the error persists.
Solution #2: Check for Any Corrupt System File.
As mentioned, a corrupt system file can cause BSOD errors to surface. Therefore, you should make sure that no corrupt system file exists in your system. To check this, refer to the instructions below:
- Input cmd into the search field.
- Right-click on the most relevant search result and select Run as Administrator.
- Enter the sfc /scannow command into the command line.
- Hit the Enter button and wait for the results.
- Restart your device.
Solution #3: Uninstall Your Audio Drivers.
We’ve specifically mentioned above that the RTKVHD64.sys BSOD is usually caused by an issue with the Realtek Audio Driver. So, it might be helpful to update it.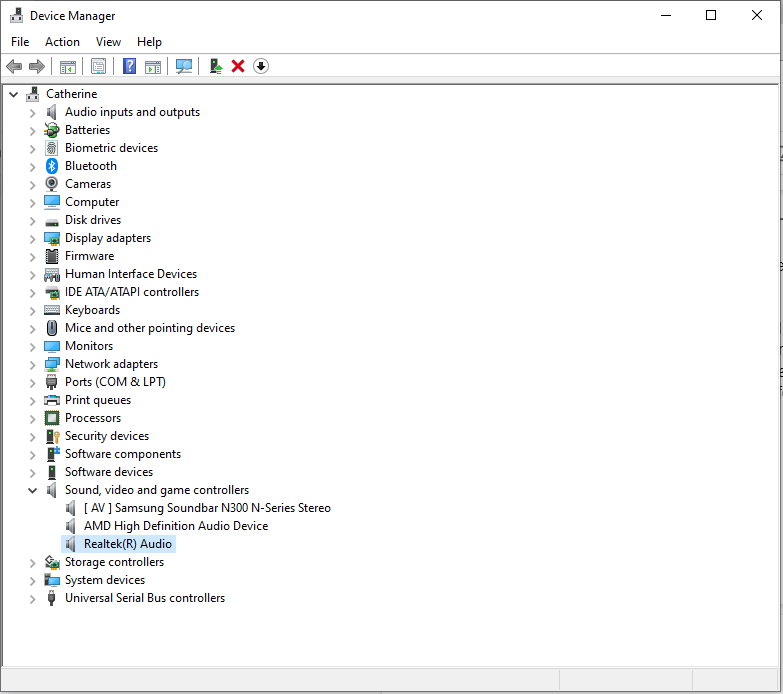
Here’s how to update and uninstall your audio driver:
- Press the Windows + X keys and select Device Manager.
- Double-click on the Sound, video, and game controllers section to expand it.
- Right-click on the Realtek Audio Device and choose Update Driver.
- Select the Search automatically for updated driver software option and follow the onscreen prompts to complete the update process.
- Once done, restart your device and the BSOD error should be fixed.
Solution #4: Install a New Realtek Driver.
Without an audio driver, you cannot hear any sound from your computer. So, try installing the latest version of your Realtek audio driver.
Although this can be done via the Device Manager, we highly discourage doing so to avoid compatibility issues. Your other alternatives would be to visit the official Realtek website to download the most recent audio driver for your device or use a third-party device driver updater tool.
Install a New Driver via Device Manager
- Into the search field, input device manager and select the most relevant result.
- Locate your audio driver and right-click on it.
- Select the Search automatically for updated driver software option.
- Hit the Update Driver button to proceed.
Install a New Driver via the Realtek Website
For this method, you simply need to visit Realtek’s official website and download the audio driver version that is compatible with your device. Once you have the driver, run it and follow the onscreen instructions.
Install a New Driver Using a Third-Party Driver Updater
Among all methods, this is what we recommend. Not only is it quick and easy, but it is also safe. All you have to do is download and install a third-party driver updater tool, run it, and let it find the driver that is compatible with your Windows version. Once it finds the driver, then let the tool do its job. It’s that fast and easy!
Solution #5: Disable Your Antivirus Suite.
Are you using an antivirus software program? If yes, then it could also be causing the RTKVHD4.sys BSOD error. To verify this, try disabling or uninstalling your current antivirus.
To turn off your antivirus, do the following:
- Go to the Start menu and select Settings.
- Navigate to the Update and Security section and click Windows Security.
- Select Virus and Threat Protection and click Manage Settings.
- Switch off the Real-Time Protection option.
To uninstall your current antivirus software, here’s what you should do:
- Go to the Start menu and click Control Panel.
- Select Uninstall a Program.
- Choose the antivirus program that you want to uninstall.
- Hit the Uninstall button.
- When prompted, restart your device.
If this solution helped you, it only suggests that your security software is causing the BSOD error. Thus, you might want to consider using another antivirus program.
Solution #7: Update Your BIOS.
Before you proceed with this step, take note that this is a bit complex and can trigger more serious problems if not done properly. If you don’t trust your technical skills, then we suggest skipping this solution entirely. But if you wish to give it a try, follow these steps:
- Into the search field, input system information and hit Enter.
- Check the BIOS Version/Date and the BaseBoard Product sections. Jot down any important information.
- Next, launch your favorite web browser and visit the official website of your motherboard’s manufacturer.
- Navigate to the Downloads section and locate the appropriate update for your BIOS.
- Launch the installer you have downloaded and wait for the process to complete.
- Once done, your device will automatically reboot.
Solution #8: Check for Any Hard Drive Problems.
If you suspect that hard drive problems are causing the BSOD error, then try this solution. Here’s how to begin:
- Click the Start button and input command into the search field.
- Press and hold the CTRL + Shift keys and hit Enter.
- Hit Yes if prompted by the dialog box.
- Input chkdsk /f into the command line and hit Enter.
- The program will then start scanning.
- Follow the on-screen instructions.
Solution #9: Roll Back Windows to a Previously Working State.
This is another solution that we don’t recommend, especially if you are not tech-savvy. However, should you wish to give this solution a try, just follow the steps below:
- Press the Win + X keys and select Run.
- Input rstrui into the text field and hit OK.
- Click Next to see a list of restore points.
- Next, choose the Show More Restore Points option.
- Select a restore point prior to the appearance of the error.
- Click Next and hit Finish to restore Windows to your desired restore point.
Solution #10: Run a Malware Scan.
The error could also be triggered by a malware entity. So, get rid of any threats on your device to rule out the possibility of a malware infection. To run a malware scan, do the following:
- Into the Cortana search field, and type windows defender.
- Hit Enter.
- Select the most relevant search result to launch Windows Defender.
- Click the shield icon and select Advanced Scan.
- Choose the Full Scan option to perform an extensive scan.
- Press Scan Now to begin the scan.
Solution #11: Check If a Newly Installed Device Is Causing the BSOD.
If you have just installed a new device prior to the occurrence of the BSOD error, try to unplug the device first. After that, check if your screen turns blue. If not, check if your device is properly installed and securely connected to the motherboard.
Solution #12: Install Any Pending Windows Update.
It is important to keep your operating system updated, too. If any patch or update is available from Microsoft, install it right away. These updates and patches are rolled out for a reason. So, if you leave them uninstalled, then you may be putting your device at risk of threats.
To update Windows, here’s what you should do:
- Go to the Start menu and navigate to the Microsoft System Center.
- Select Software Center.
- Navigate to the Updates section and hit the Install All button.
- Once all updates have been installed, restart your computer.
Solution #13: Run the BSOD Troubleshooter.
To fix BSOD errors, you can use the BSOD troubleshooter. This tool interprets various bug check codes and lets you know whether the crash was caused by a faulty hardware component, problematic device driver, or whatsoever.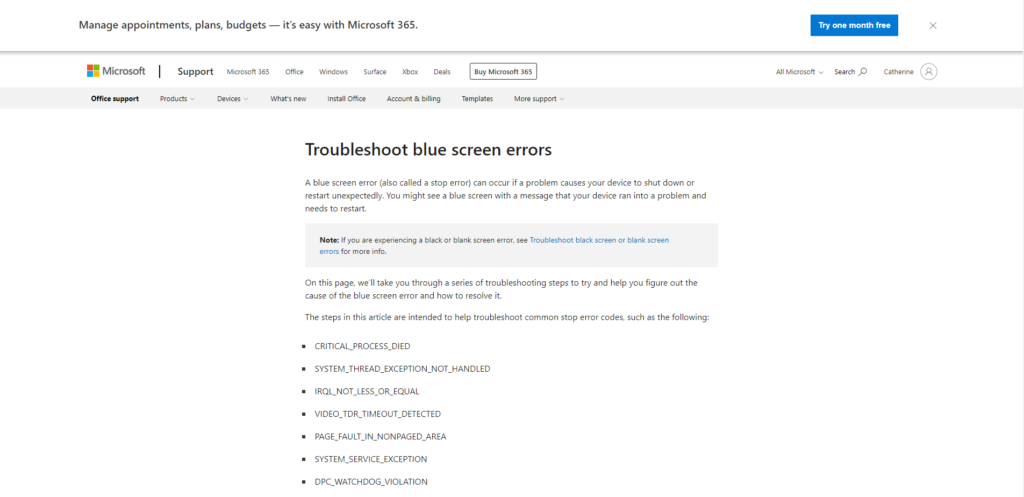
There are two ways to use this troubleshooter. First, use it via Microsoft’s website. Second, use it directly from your device.
Via Microsoft
- Go to the Troubleshoot blue screen errors section on Microsoft’s website.
- Follow the instructions and provide answers to the question to be able to troubleshoot the blue screen error.
- If you still require more help, then you can post a new thread on the forum section and a member of Microsoft’s support team will get in touch.
Via Windows 10/11
- Go to Control Panel and click the Troubleshooting icon.
- Tap the View All link.
- Right-click on the Blue Screen Troubleshooter option and select Run as Administrator.
- Click the Advanced link.
- Tick the Apply Repairs Automatically option and click Next.
- The troubleshooter will now proceed with identifying problems on your device. If problems were found, then follow the instructions shown on your screen. Otherwise, click the View Detailed Information option.
Solution #14: Disconnect Any Incompatible Peripheral.
This BSOD can also occur if a connected hardware component is incompatible with Windows 10/11. Make sure that you are using a hardware peripheral that is compatible with Windows 10/11. To do so, visit the website of your hardware manufacturer.
Solution #15: Uninstall Incompatible Third-Party Apps.
Incompatible third-party apps can cause the BSOD error to appear. To uninstall these apps, do the following:
- Click the Start menu and select Settings.
- Go to the Apps section and find the conflicting app in the list. Click on it.
- Hit the Uninstall button and follow the onscreen instructions.
Solution #16: Free Up Disk Space.
If you no longer have sufficient disk space on your Windows 10/11 device, then you may likely encounter the RTKVHD64.sys BSOD. So, try freeing up your hard disk space to rule out the possibility of an insufficient hard disk drive space.
To free up disk space on your Windows 10/11 device, do the following:
- Go to the Start menu and select Settings.
- Navigate to System and click Storage.
- Select Storage Settings.
- Delete any unnecessary files on your hard disk.
- Under the Free Up Space Now section, click Clean Now.
Now, manually deleting files on your hard drive is not recommended as you may end up deleting important system files, which can then result in more serious problems. And we don’t want that to happen. As an option, try using a PC repair tool to get rid of unwanted files automatically.
Solution #17: Fix Problems with Registry Entries.
To fix a corrupt registry entry, you have three options: Run an Automatic Repair, Refresh, or Reset.
Which of the three should you choose? As the name suggests, the Run an Automatic Repair option automatically runs a repair session on your behalf. The Refresh option will reinstall applications you installed in Windows and create a copy of them on your desktop. The Reset option, on the other hand, will remove any personal files and delete system settings or configuration on your computer.
To run an automatic repair, follow these steps:
- Open the Settings utility.
- Go to the Update and Security option.
- Open the Recovery tab and click Advanced Startup.
- Select Restart Now.
- In the Choose an Option screen, select Troubleshoot.
- Choose Automated Repair.
- Select an account and log in.
- The repair process should now begin. Your computer will reboot many times during the process.
To perform a system refresh, do the following:
- Open the Settings utility.
- Navigate to Update and Security.
- Select Recovery and click Get Started.
- Next, hit the Get Started button to proceed.
- Click the Keep My Files option.
- Follow the instructions on your screen to complete the refresh process.
To reset Windows 10/11, here’s what you should do:
- Go to the Settings utility.
- Select Update and Security.
- Click Recovery and select Get Started.
- Hit the Get Started button.
- Choose the Remove Everything button.
- Follow the instructions to finish the reset process.
In Conclusion
A computer that is in perfect working condition should not show any blue screen issue at all. However, let’s admit it. No hardware or software is without a fault. Even the most expensive supercomputer out there may encounter a BSOD error like the RTKVHD64.sys blue screen.
If you have encountered this error, don’t worry. The solutions we have laid above should help you resolve it. You could begin by performing basic troubleshooting steps like using System Restore, scanning your device for malware, ensuring your drivers are updated or booting your system into safe mode. But none of them works, move on to the more complex solutions like uninstalling your audio drivers, updating your BIOS, or rolling back Windows to a previously working state.
Now, if you think you have done everything you can but to no avail, then your best option is to seek help from a professional Windows technician. You can take your device to an authorized service center and have it checked. And then, let them fix the problem on your behalf.
How did you resolve the RTKVHD64.sys error? Do you know other solutions that we forgot to include in this article? We’d love to hear from you. Comment below!