
If you encounter a system error while transferring files between your Windows 10/11 system and external devices, or while accessing a specific driver connected to your computer, it can disrupt the process and prevent completion.
This troubleshooting guide may assist you if you receive the error 0x80070079 the semaphore timeout period has expired message when attempting to transfer large files. This transfer could occur within your local network or between your computer and an external driver.
The steps outlined in the following guide will show you how to resolve this Windows issue.
What Is Error 0x80070079: The semaphore timeout period has expired?
When transferring files over a network, the semaphore timeout period has expired error with 0x80070079 code may occur, especially if the file sizes are large. It may also occur while transferring files between your computer and portable drives. The likelihood of a problem is directly proportional to the file size, but you may also encounter it when transferring small files.
Expert Tip: For smoother PC performance, consider using a PC optimization tool. It handles junk files, incorrect settings, and harmful apps. Make sure it's right for your system, and always check the EULA and Privacy Policy.
Special offer. About Outbyte, uninstall instructions, EULA, Privacy Policy.
The error message reads:
The backup failed.
Windows Backup encountered an error when accessing the remote shared folder. Please retry the operation after making sure that the remote shared folder is available and accessible. (0x8078015B)
Additional Information:
The semaphore timeout period has expired. (0x80070079)
This message simply informs you that your operating system failed to retry the network connection, resulting in a timeout. When there is a faulty network adapter, slow wired links, or weak signals, this problem can occur.
It could be caused by a number of factors, including incorrect driver or network configuration, as well as a deadlock state or the server being overloaded with tasks, and if any location is unavailable. This error message may also appear if you attempt to create a System Image, copy, or move files on your computer. You might even encounter the 0x80070079 Xbox error when playing games on your PC. If you’re creating a backup of your drive, you’ll get the Windows backup error code 0x80070079 instead.
It can be difficult to pinpoint the exact cause of a problem. However, we are here to assist you in resolving the issue. In this guide, we will show you how to resolve the 0x80070079 Windows 10/11 error. Start at the top and work your way down until you find the one that works best for you.
What Triggers the Error Code 0x80070079?
The primary cause of this error is that Windows fails to retry the network connection after it has timed out. A network problem could be caused by weak signals, slow wired links, or a faulty network adapter driver.
The error could also occur while transferring files from or to a portable device, in which case the cause of the error could be the file system, incompatible port versions, or simply the file transfer limit on your portable drive.
Here are some of the other factors you need to consider:
- File system corruption in the source or target drive – File systems such as NTFS, FAT32, and others are used to format disks. The file system serves as the operating system’s index. The file systems identify the physical location of the stored files as well as the space on the disk that is available for new data storage. If the file system becomes corrupt, the operating system may be unable to determine the location — source disk, target disk, or both — and may generate the error 0x80070079: Location is not accessible, the semaphore timeout period has expired.
- Bad sectors on the hard drive – If the drive(s) contains bad sectors, the OS will be unable to read/write data on those sectors, which may result in an error.
- Physical damage to the drive – It is possible that a physically damaged drive will not respond to Read/Write commands. It may result in a failure of data transfer to or from it, resulting in the error. If the drive is physically damaged, there is little you can do to resolve the semaphore timeout period has expired error 0x80070079 on your own. In the event of physical damage, this error could indicate permanent data loss. Seek immediate assistance from a professional data recovery expert to avoid data loss.
- Damaged USB or Network cable – If the data transfer cable is damaged or incompatible, the semaphore timeout period has expired error 0x80070079 may occur. In that case, simply changing the cable will resolve the issue.
- Networking hardware problem – Aside from the cable, other hardware components that connect two or more drives, such as connectors, ports, network cards, and so on, could be to blame for Error 0x80070079. Failure of any of these may result in data transfer failure.
- Corrupt and outdated network drivers – Network drivers are critical in establishing communication between the system and devices such as network drives. Corrupted or outdated network drivers can cause broken communication, resulting in the error 0x80070079.
- Firewall or Antivirus blocking access to the drive – Error 0x80070079 is sometimes caused by Windows Firewall or an antivirus. Because they are designed to protect your system, they may prevent communication with the external drive that you have connected to it
- File size limit – File transfer limits exist in file systems such as FAT 32. A drive formatted with the FAT 32 file system, for example, cannot transfer a single file larger than 4 GB. If you receive this error while transferring a file larger than 4 GB, the file system may be to blame.
- Third-party programs blocking data transfer – This error can also occur if a program prevents you from transferring data.
How to Troubleshoot Error 0x80070079
When you encounter this error, rebooting should be your first course of action. It works most of the time, especially if the issue was caused by temporary glitch. Scanning your computer for junk files using a PC Repair Tool like Outbyte PC Repair should prevent these errors from occurring in the first place.
If restarting and cleaning up did not help, try the solutions below:
Solution 1: Update the network adapter driver.
The main cause of this error code 0x80070079 is a problem with your network connection. And any network issue is often caused by the driver. In this case, try updating your network adapter driver to resolve the issue.
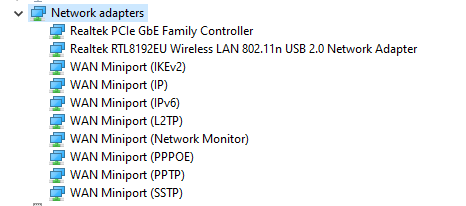
- To open the Run menu, press the Windows logo key + R at the same time. Open Device Manager.
- Locate and expand the Network adapters dialog in the Device Manager window. Then, right-click on the network adapter driver software that is currently in use and select Update driver.
- Select Automatically search for updated driver software.
- Windows will now automatically detect the driver update.
- Simply continue to follow the on-screen instructions to finish updating if one is detected.
For various reasons, Microsoft is unable to always locate the update for you. If you receive the message: “The best drivers for your device are already installed”, you should use another method to update the driver to avoid missing the update.
You can download the most recent driver from the website of the manufacturer of your network adapter. However, this method requires you to locate and download the driver on your own. If you are not familiar with computers or simply want to save time, it is recommended that you use a driver tool. Driver Updater is a fantastic tool for automatically updating your drivers.
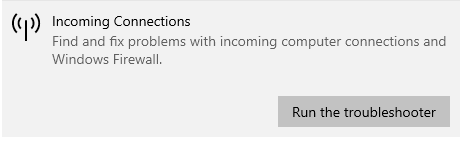
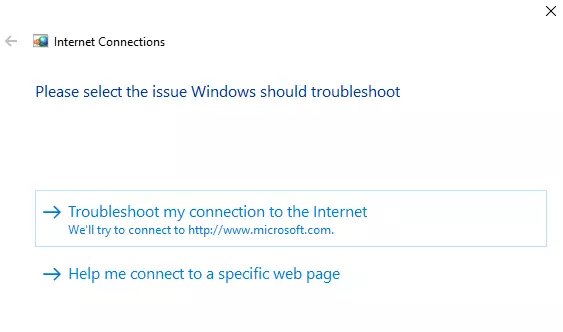
The next step in resolving the issue is to use one of the three built-in Network troubleshooters, such as Incoming Connections, Network Adapter, and Shared Folders. To get to them, launch the Windows Settings app and navigate to Update & Security > Troubleshoot. Run any or all of the aforementioned troubleshooters from there.
Solution 3: Perform SFC and DISM scans.
If the error was caused by damaged, missing, or corrupt files, run scans with the System File Checker (SFC) and Deployment Image Servicing and Management (DISM) tools to resolve it. To do so, follow these steps:
- By pressing Windows Key+R on your keyboard, you can access the Run dialog.
- Enter “cmd” in the Run dialog.
- Open an elevated version of Command Prompt by pressing Ctrl+Shift+Enter.
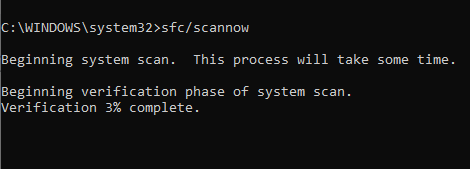
- When Command Prompt appears, type sfc /scannow and press Enter.
Allow the System File Checker to scan your computer for potentially harmful files. When the process is finished, follow the on-screen instructions to fix the error. Following that, run a DISM scan using the instructions below:
- Open Command Prompt once more, then type the following command: DISM /Online /Cleanup-Image /RestoreHealth
- Wait for the results of the scan, and if the utility finds an issue, follow the instructions for resolving it.
Solution 4: Temporarily disable your antivirus and firewall.
The Error Code 0x80070079, as previously stated, appears during file transfer over a wireless network. Your antivirus or firewall might have interfered with the transfer, preventing it from succeeding. So, if you want to know how to fix Error 0x80070079, you must first learn how to temporarily disable your antivirus and firewall.
To disable your antivirus, perform the following steps:
- To open the Settings app, press Windows Key+I on your keyboard.
- Choose Update & Security.
- On the following page, select Windows Security from the left pane.
- Now, in the right pane, select Virus & Threat Protection.
- Under the Virus & Threat Protection section, click Manage Settings.
- Toggle the switch next to Real-Time Protection to the off position.
To turn off your firewall, take the following steps:
- Navigate to your Taskbar and click the Search icon.
- Enter firewall.cpl into the Search box.
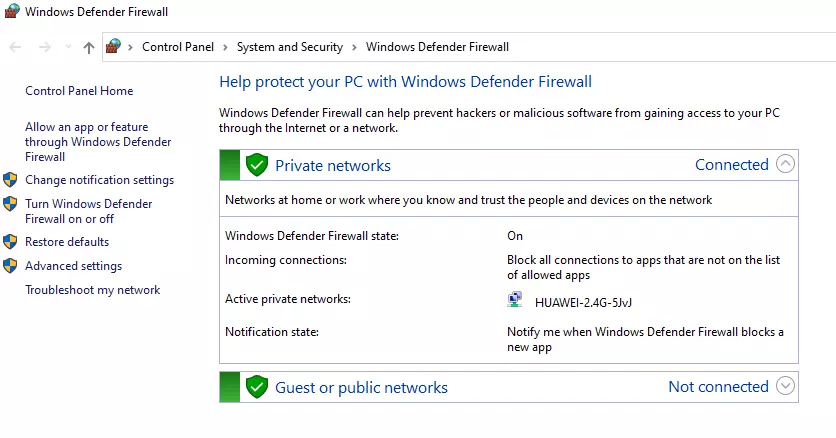
- Click the Turn Windows Defender Firewall on or off option in the left-pane menu.
- Under Private Network Settings, select Turn off Windows Defender Firewall (not recommended).
- Carry out the same procedure for Public Network Settings.
- To save the changes you’ve made, click OK.
After you’ve finished these steps, try transferring the files again to see if the error has been fixed.
Solution 5: Convert FAT32 to NTFS.
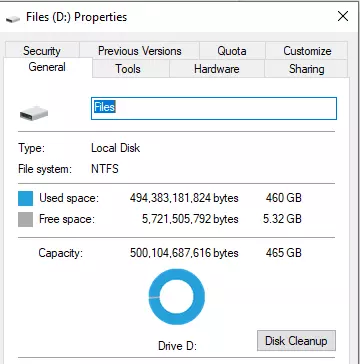
As you may know, transferring large files is only possible if the actual drivers are formatted into NTFS, which is especially important if you’re using a USB flash drive. Hence, make sure you convert FAT32 to NTFS.
However, before you begin this procedure, make a backup of the data on your external drive. Remember that this process will delete all of the files on the drive. After that, you can proceed with the steps below:
- Right-click on the affected drive and select Properties.
- Select Format from the list that appears.
- Select NTFS from the next window.
- Select Quick Format.
That’s all there is to it; you can now resume the transfer process.
Solution 6: Perform a Network Reset.
Network Reset is a feature in Windows 10/11 that allows you to reinstall network adapters as well as reset Networking Components to their default settings.
- Open the Start Menu and select the Settings option.
- Then, on the left side, click on the Status link to see the current status of your network. Aside from that, you should see a link to the Network Troubleshooter – click on that link to expand Network Troubleshooter.
- Select the Network Reset link under Network Troubleshooter.
- When you click Network Reset, you should be taken to the following page. Then, select the Reset now option.
Solution 7: Remove HDD Entries.
The Error Code 0x80070079 may prevent you from properly using your HDD. As a result, we recommend that you go to the Device Manager and see if there are any old entries for external drives. Get rid of them if you find any. The steps are as follows:
- Navigate to your Taskbar and right-click the Windows icon.
- Choose Device Manager from the drop-down menu.
- Now, expand the Universal Serial Bus Controllers category by clicking on it.
- Examine the list of devices to see if your HDD is included.
- If you see an old HDD entry, right-click it and select Disable Device.
Solution 8: Check the integrity of your local network.
When attempting to transfer files within a local network, you must ensure that everything works flawlessly.
There should be no issues with the signal, all connections between workstations should be properly configured, and no timeouts should occur during the actual transfer. Of course, some operations may require administrator privileges.
Summary
The error “0x80070079: the semaphore timeout period has expired” is a system problem that can be resolved using various troubleshooting methods. If you were able to solve this problem using a different solution, please share your experience with us by leaving a comment in the section below.h