
Windows Update errors are a common occurrence for users, and while some may resolve on their own, others can be frustrating and require troubleshooting to fix.
Having said that, Windows Updates are essential for any operating system to function properly. They not only patch software vulnerabilities to prevent malware intrusions, but they also fix existing bugs, improve stability and performance, and add new features for users to enjoy.
0x800f020b is a Microsoft Windows 10/11 update error that occurs when you update your operating system. Windows updates are frequently problematic for many users, who encounter issues either as soon as their update begins downloading onto their computer or while attempting to install new software.
When attempting to install one or more Windows updates, several Windows users are encountering the Error Code 800f020b. The problem is not limited to a single Windows version, as it has been reported on Windows 7, Windows 8.1, and Windows 10/11. However, Windows 10/11 has by far the highest number of reported issues with this error code. Some affected users who have run the diagnostic tool in relation to this issue have reported that multiple issues remain unresolved.
Expert Tip: For smoother PC performance, consider using a PC optimization tool. It handles junk files, incorrect settings, and harmful apps. Make sure it's right for your system, and always check the EULA and Privacy Policy.
Special offer. About Outbyte, uninstall instructions, EULA, Privacy Policy.
What Is the Windows 10/11 Update Error 0x800f020b?
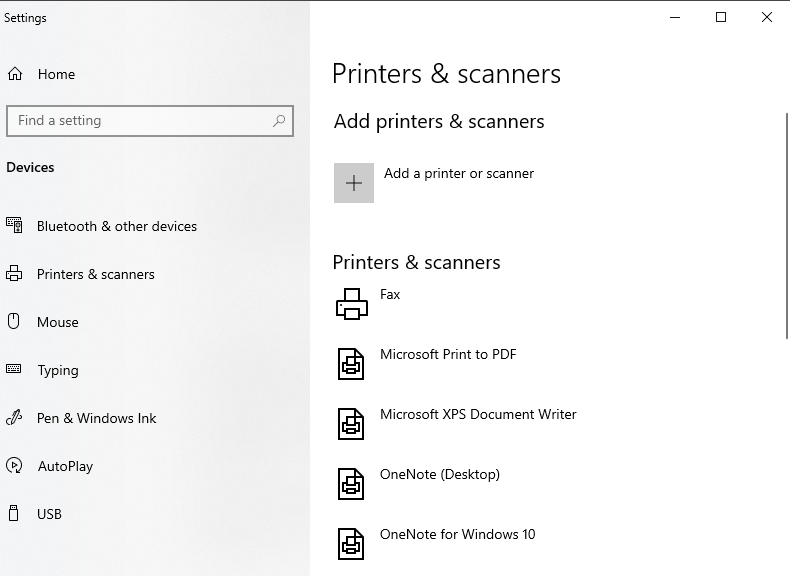
When installing a Windows Update, some users encountered the update error 0x800f020b. Because a wireless connection is not ideal for updating a printer driver, this problem usually occurs when you try to update your printer firmware via Windows Update.
Many Xerox users, for example, are encountering the install error 0x800f020b. The Xerox – Extension – 7.208.0.0 update is available via Windows Update. However, when you attempt to complete the installation, it fails with the following error: Installation Failure: Windows failed to install the following update with error 0x800f020b: Xerox – Extension – 7.208.0.0. This also happens to users using HP printers.
Some users who encountered the error claim that they didn’t even have a printer installed, despite the fact that Windows detects it and refuses to proceed with the update. In this case, disabling this specific optional update component may assist in resolving the Windows Update 0x800f020b.
Aside from Windows 10/11, this error has also been encountered by Windows 11 users. This error appears for some users when they attempt to update their Windows 11 PC normally. Others notice it when attempting to update their printers. Most users encounter this Windows 11 update error 0x800f020b as a result of the pre-existing printer software, specifically HP and Xerox.
This is the error message that often accompanies this error code:
There were some problems while installing updates, but we’ll try again later. If you keep seeing this and want to search for information, this may help: (0x800f020b)
In this guide, we will go over solutions that will benefit both users who have printer software installed on their PCs and users who are experiencing this problem for the first time.
Factors That Cause 0x800f020b Windows Update Issue
This error could appear for a variety of reasons. Because this update is to be installed on an external device, such as a printer, you will see this error if the device is not properly connected. However, it is not the only reason; there are several others that we will consider and address in this article:
- The driver instance does not exist – It’s also possible that this error code indicates that the optional driver that’s causing it doesn’t apply to the current system. If this update is pushed by Windows Update, the only known way to resolve this issue is to take the necessary steps to hide the update.
- The printer cannot accept updates via wireless connections – The vast majority of wireless-enabled printers will not allow you to update their firmware over a wireless connection. If this scenario applies to you, you can solve the problem by switching to a wired connection.
- Disconnected pocket media – Another common cause of this error code is a pocket media drive that is no longer connected to the PC / laptop. When this occurs, Windows will generate this error code because it is unable to locate the device. In this case, reconnecting the device will resolve the problem.
- Corrupted device driver – This error code may appear in some cases when Windows Update attempts to install a new updated version over a corrupted one. If this scenario applies to your current situation, you can resolve the problem by restoring the machine to a healthy state using a System Restore point.
If you’re having trouble resolving this specific error code, this article will walk you through several troubleshooting steps. Below is a list of methods that other users in a similar situation have used to successfully resolve the 800f020b error.
How to Deal with the Update Error 0x800f020b
When you encounter this error, don’t panic because this issue can easily be resolved using the solutions below. But before you proceed, make sure to run a scan using your PC Repair Tool, such as Outbyte PC Repair, to get rid of bugs that might be contributing to the problem. Once your computer is prepped, proceed with the troubleshooting steps below.
Fix #1: Switch to a wired printer connection.
If you receive this error while Windows Update is attempting to update your printer firmware, it is likely that the problem is caused by the printer driver being incompatible with being updated over a wireless connection. This is most common with HP printers.
If this scenario applies to your current situation and your printer is connected to your wireless network, try switching to a wired connection to see if the problem persists.
After switching to a wired connection, try installing the previously failing update to see if the problem has been resolved. If you’re still getting the Windows Update error 0x800f020b, or if this method didn’t work for you, proceed to the next method down below.
Fix #2: Insert the pocket media drive.
If you previously used a Pocket media drive (especially the HP version), the 800f020b error code is likely to be triggered because Windows Update is unable to communicate with the device in order to update its firmware.
Several other users who encountered this problem reported that the problem was resolved and the update installed normally after connecting the pocket media drive and completing the update installation.
This method may also be applicable to other types of devices. If this method did not work for you, or if you connected the pocket media drive and received no results, proceed to the next method below.
Fix #3: Hide the Windows update.

The 0x800f020b update error indicates that the device instance does not exist in some cases. Under certain circumstances, Windows may attempt to install optional drivers that aren’t necessarily applicable to your system.
Several users who encountered a similar issue reported that they were able to resolve the issue by simply hiding the update that was causing the error code. Simply hide the update, and other Windows updates will proceed without issue. This procedure is not permanent because you can always manually download the driver (from the manufacturer’s website) if you decide to try it again.
Many posts show you how to use the Microsoft Show Hide tool to hide this Windows update, but Microsoft has withdrawn it. You can still use it if you want, but we found a better way: use PowerShell to hide the update.
- Locate the Windows icon in the bottom left corner of the desktop and right-click on it.
- Select Windows PowerShell (Admin) from the menu.
- Copy and paste this command into PowerShell to install Windows Update Module: Install-Module PSWindowsUpdate
- To confirm, press A. This could take a while.
- When the process is finished, copy and paste this code to get a list of all the Windows updates that are currently available on your computer: Get-WUList
- Find the update you want to hide and make a note of its title or KB number. This information will be required to conceal the update.
- Copy the command and paste it into PowerShell. Replace KBNUMBER with the update number you’re attempting to block: Hide-WindowsUpdate -KBArticleID KBNUMBER
- If you don’t have the KB number, you can block the update by using the title: Hide-WindowsUpdate -Title “TITLE”
- To confirm, simply press the A key on your keyboard.
- The target Windows Update will be hidden as a result of this action.
Update your Windows again to see if the error has been resolved.
Fix #4: Run the Windows Update Troubleshooter.
You can use the built-in Windows Troubleshooter to troubleshoot software or Windows updates on your PC. It allows you to detect the error and possibly correct it while the process is running.
It’s fairly simple to use, and the instructions below explain everything in detail. So, before proceeding with advanced solutions, run the Windows Troubleshooter to see if it can resolve the Windows 10/11 error 0x800f020b.
- Using the Win+I keys, launch the Settings app.
- Select Updates & Security.
- Select the Troubleshoot option.
- From the right-hand menu, select Additional troubleshooters.
- Select Run the troubleshooter from the Windows Update menu.
- Follow the instructions on the screen.
- When the solution is available, click the Apply this fix button.
After you’ve finished the steps, restart your computer and check to see if Windows has been updated.
Fix #5: Reinstall the printer driver.
It was reported that installing a new driver after uninstalling the (working) driver fixed the problem. Here’s how you could go about doing it:
- Using the Win+R keys, launch the Run dialog.
- Copy and paste the command below into the search box: devmgmt.msc
- To open the Device Manager, press the Enter key.
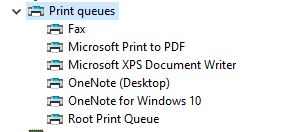
- Expand the Print queues category as you go through the list.
- Uninstall your printer by right-clicking it and selecting Uninstall device.
- To confirm, click the Uninstall button once more.
After uninstalling the printer driver, go to the manufacturer’s website and look for your printer model. Check that you have downloaded the correct driver installer for your device.
Fix #6: Clean Windows Update Cache.
If using Windows Update Troubleshooter did not resolve the issue, try cleaning the Windows Update Cache.
First and foremost, we must disable the Windows Update Service. To do so, open Services from the Start Menu, search for Windows Update, right-click on it, and choose Stop.
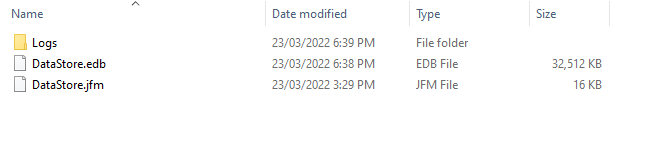
Now, press Win + R to open Run, enter the following address, and click Ok: %windir%\SoftwareDistribution\DataStore
There, you must delete all of the files. Ctrl + A will select all of them at once. Then, with a right-click, select Delete. Finally, restart the Windows Update service to see if the problem has been resolved.
Fix #7: Delete the printer drivers.
You may still have Xerox printer drivers on your system even if you no longer use Xerox printers. In this case, you can use Print Management to locate and remove any unused drivers.
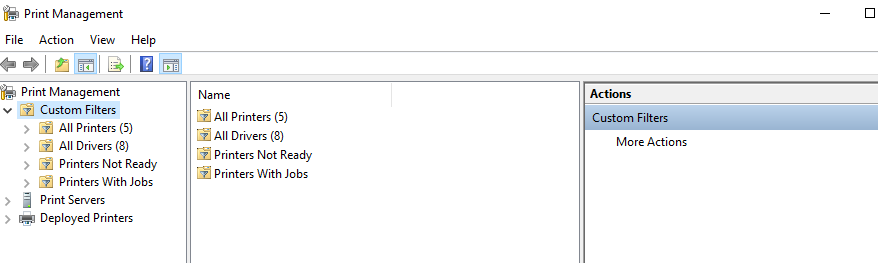
- Start by clicking Start and then typing Print Management. Click on Print Management when it appears as a search result.
- Select All Drivers from the Print Management menu. Locate the Xerox entry (or the brand of the printer you are using), right-click it, and select Delete.
- Please keep in mind that there may be more than one driver installed. Delete any and all drivers.
Done! Try running Windows Updates once more.
Fix #8: Delete Xerox drivers from the registry.
This option may appear overly complicated to some, but it is a viable option if other fixes have not worked for you.
- Launch Services.msc as an administrator and terminate the Print Spooler service. Don’t forget to close the Service window.
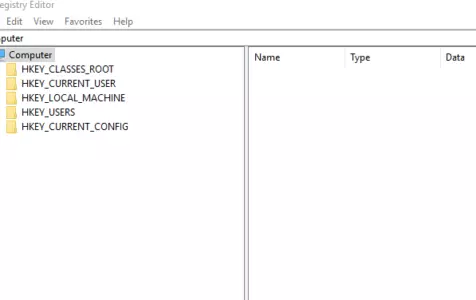
- Launch the Registry Editor and navigate to: Computer\HKEY_LOCAL_MACHINE\SYSTEM\CurrentControlSet\Control\Print\Environments\Windows x64\Print Processors\winprint”
- You should be able to find your printer driver under printer processors; rename it to.old.
- From the Services window, restart the Print Spooler service.
If the file is properly deleted, Windows Update will resume normal operation without the error 0x8023200b.
Fix #9: Use a System Restore point.
Several affected users have reported that they were only able to resolve the 800f020b error code after using an older System Restore point to restore their machine to a healthy state prior to the bad update.
System Restore is a utility that will return your entire Windows installation to a functional state. A restore point is a copy of Windows system files, hardware drivers, registry settings, and program files. Although restore points can be created manually, they are not required.
Here’s a step-by-step guide to performing a System Restore from a specific point:
- To open the Run dialog box, press Windows key + R. Then, type “rstrui” and press Enter to launch the System Restore wizard.
- To proceed to the next menu, click Next on the System Restore’s initial screen.
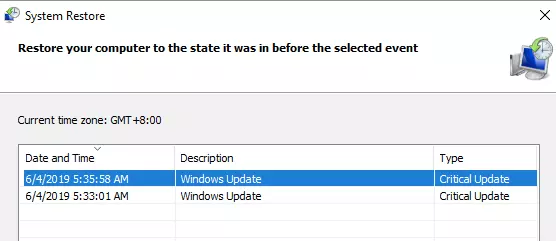
- Next, ensure that you begin by checking the box next to Show more restore points.
- Then, click Next and choose a restore point that is older than the date you first encountered the 800f020b error code.
After you’ve correctly configured the utility, all that’s left to do is click the Finish button to restart your machine. The older machine state should be restored during the next startup sequence.
Wrapping Up
The error code 0x800f020b in Windows Updates is quite common. This error can be caused by various things, including Xerox and HP Printers. We hope that one of the fixes will solve the problem for you. If you have any ideas or suggestions to share, please leave a comment below.