
Windows 10/11 is a powerful operating system that has been around for years, and there are still many features to explore.
The recent release of the Windows 10/11 Feature Update is an important milestone for the Windows operating system. Microsoft continues to innovate and deliver great products, including this latest update for Windows 10/11.
This update focuses on security, accessibility and productivity features that will benefit both desktop users and Microsoft 365 customers. The most notable changes are related to Edge browser improvements, touch keyboard enhancements, a new clipboard manager, updates to Mail and Calendar apps with Fluent design support, the introduction of a dark theme mode or ‘Nightlight’, virtual desktops now available across all devices running Windows 10/11 including phones, as well as productivity features such as Timeline, which records everything you do while working in one document so you can easily go back in time to find what you were looking for.
Let’s find out more about this latest Windows 10/11 Feature Update below.
Expert Tip: For smoother PC performance, consider using a PC optimization tool. It handles junk files, incorrect settings, and harmful apps. Make sure it's right for your system, and always check the EULA and Privacy Policy.
Special offer. About Outbyte, uninstall instructions, EULA, Privacy Policy.
The Latest Windows 10/11 Update
The latest Windows 10 version is the May 2021 Update, which is also called 21H1. It was rolled out on May 18, 2021.
Typically, Microsoft rolls out major updates once every six months. In case you are wondering why it takes that long, these major updates may take time to reach your PC because Microsoft and manufacturers of PCs need to perform extensive tests before rolling them out.
As for the May 2021 Update, it was named 21H1 during the development phase because it was set to be released in the first half of the year 2021. Its build number is 19043.
While there’s nothing so special about this update as it focuses on fixing bugs that were on the October 2020 Update, it had some minor changes, which include better multicamera support for Windows Hello. This feature allows users to log in to their PCs with only their faces.
So, how do you get this latest update?
How to Install the Latest Windows Version
The latest Windows 10/11 update is initially available for devices running on Windows 10/11. However, it will soon be rolled out for Windows 2004 and other later versions.
If you wish to install this update, do the following:
- Go to Windows Update by opening Settings, clicking Update and Security, and then selecting Windows Update.
- Next, click the Check for Updates button.
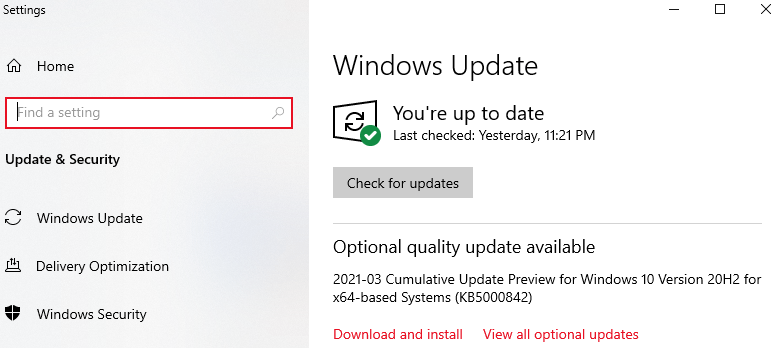
- If the update is available, click the Download and Install button to begin.
- Once the download is complete and ready to install, you will be notified.
- And then, select the right time to complete the installation.
- Reboot your computer.
Usually, devices that are already running Windows 10/11 will have a smooth and seamless update experience. However, if you experience problems in the long run, it is best to seek help from Microsoft’s support team.
How to Check If You Have the Latest Version
So, how do you know if you are running the latest Windows 10 version? It’s simple. Just follow these steps:
- Click the Start button and go to Settings. It’s the gear icon located in the left corner of the pop-up menu.
- In the Settings window, go to System.
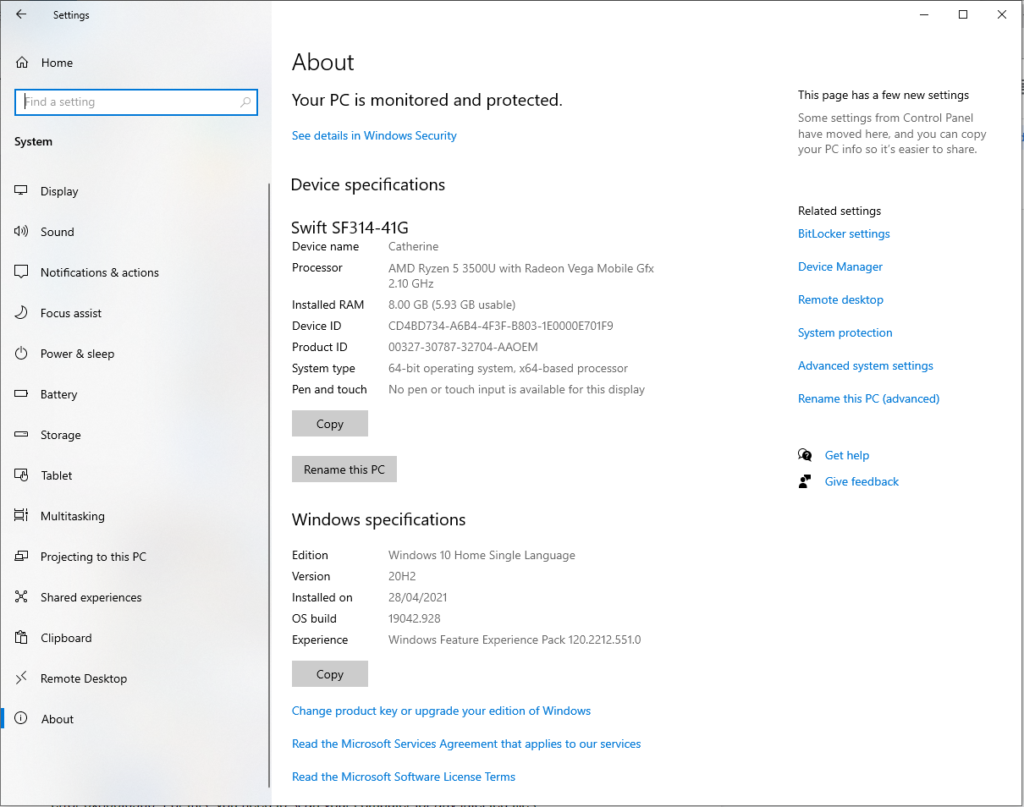
- Select About.
While it’s exciting to have the latest update installed on your device right away, some users are having second thoughts because of the error code 0xc1420121 that’s been giving headache to those who have already installed it.
So, what is this error about? What causes it and can it be fixed? Read on for answers.
What Is Error Code 0xc1420121 on Windows 10/11?
If you are among the unlucky few who have come across the error code 0xc1420121, then you’re in the right place. We’ll share with you what we know so far about the error.
As the name suggests, this error appears while trying to install the Windows 10/11 feature update. What causes error code 0xc1420121, Couldn’t Install Windows 10/11 Feature Update, you may ask. Well, there are many triggers. However, the most popular reasons include corruption inside the Windows ISO or any system file, as well as insufficient hard disk space.
Other possible triggers include malware infection, corrupted system files, permission problems, and incompatibility of components.
If you have also installed the Macrium software program on your device, then it is likely that you will see the error as well. This is because the program is said to make changes in your registry. Once you install the app, it will tweak the registry keys without your permission.
In case you are wondering what’s the Windows Registry used for, it acts as a storage or database of information and settings for hardware devices, software programs, user settings, and operating system configuration. It is what’s called when an action needs to be performed or done.
For example, if you install a tool, instructions, settings, and file references are generated and added to the registry. Once other programs or services use the tool, then the registry is checked for instructions that need to be followed to launch the tool. In a simpler sense, the registry can be referred to as the DNA of a component, which will be used by the Windows operating system.
So, what should you do when you are faced with the error code 0xc1420121?
Basic Troubleshooting Steps
Windows errors like the 0xc1420121 error code can be difficult to troubleshoot, but with these basic troubleshooting steps, you’ll find that errors are not so bad. The first step is to identify the problem. Is your internet slow? Does your laptop turn on and off at random times?
Step 1: Make Sure Your Computer Meets the Minimum Requirements
First, make sure that your computer meets the following minimum requirements:
- Processor: 1 GHz or any faster CPU
- RAM: 1 GB for 32-bit or 2GB for 64-bit
- Hard drive: 16 GB for 32-bit or 20 GB for 64-bit existing installation
- Graphics: DirectX 9 or later with WDDM 1.0 driver
- Display resolution: 800×600
- Networking: Wi-Fi or Ethernet adapter
Step 2: Disconnect Any External Hardware Components
If you’re getting the error message in Windows, it might be time to disconnect some hardware components. This is a common fix for computer problems, and can help eliminate the need to spend money on expensive diagnostics. If you are experiencing any of these symptoms: laggy graphics or loading screens, crashing apps, freezing screens/mouse cursor; sluggish performance; and random reboots, then try disconnecting hardware components.
Step 3: Uninstall Your Antivirus Suite
If you are trying to fix the error on your Windows PC, and it keeps coming up, try disabling the antivirus program temporarily and see if that fixes the problem. However, you have to know that it is not a good idea to disable your antivirus. If you find that this step fixes the problem, enable your antivirus as soon as possible.
Step 4: Free Up Disk Space
Another way to resolve the error on your Windows device is by freeing up disk space. Here is how you can free up significant disk space:
- Go to the Start menu.
- Select Settings and go to System.
- Click Storage.
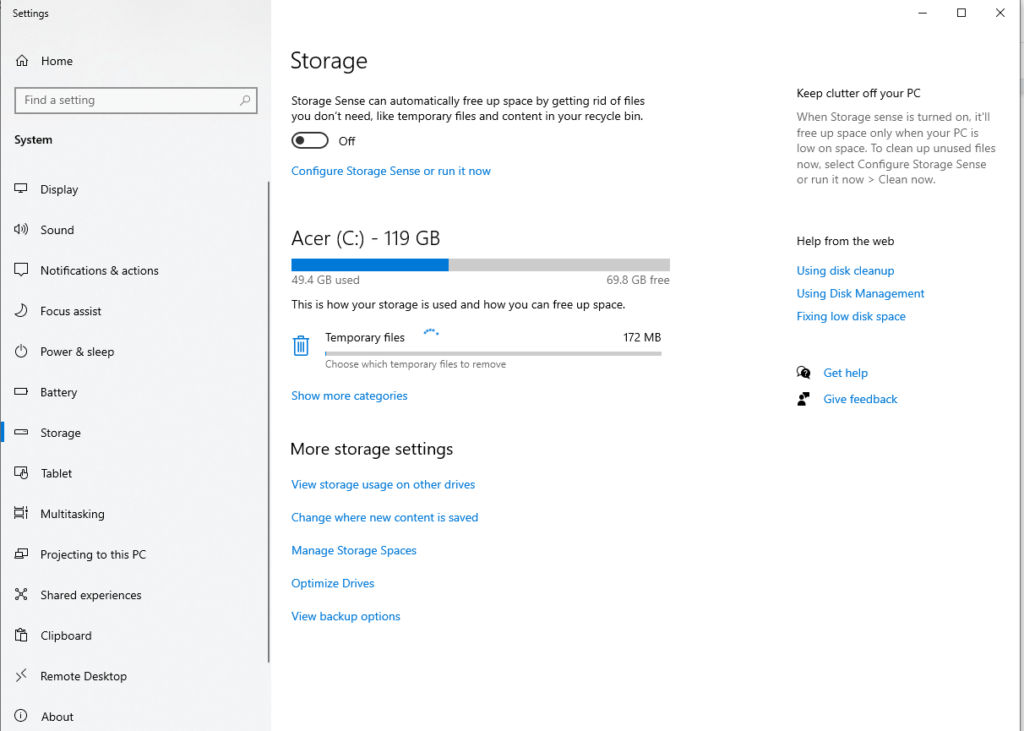
- Enable Storage Sense to allow Windows to automatically delete unnecessary files.
- And then, go back to Settings.
- Select Apps and click Apps and Features.
- Find an app or sort them by size to identify which one is taking up the most system space.
- Click on an app that you want to delete and hit Uninstall.
Step 5: Update System Drivers
As a tech enthusiast, you know how frustrating it is to have your computer not perform as well as when you first bought it. There are many reasons why this can happen but one of the most common causes is outdated drivers. Drivers act like an interpreter between your hardware and the software that runs on them, so if they’re outdated then they might be causing issues for your system. Updating drivers will not only make things run faster but also keep things running smoothly in general.
Here’s how to update system drivers:
- Into the search box, type device manager and click on the most relevant search result.
- Select the driver that you want to update and right-click on it.
- Choose the Search automatically for updated driver software option.
- Click Update Driver.
- If Windows cannot find a new driver available for your device, manually look for it on the website of the manufacturer.
Alternatively, you may use a driver updater tool and let it automate the process of updating device drivers. You can find plenty of available driver updater tools out there. Make sure you choose a reliable one.
If you’re still experiencing problems after trying these steps, then proceed with the solutions below.
Getting Error Code 0xc1420121, Couldn’t Install Windows 10/11 Feature Update? Here’s What You Should Do
Again, the error code 0xc1420121 is a known issue that many people face when they are updating or installing software on their computer. One of the most common causes for this error code is due to lack of disk space, and it can be fixed by checking the hard drive’s properties. If you have checked these settings and do not have enough room still, then there may be an issue with your hard drive that will require professional help to fix.
A few other things that could cause this error include corrupted files, malware issues, incorrect permissions on some important files, or system file conflicts. These all need to be individually investigated before determining if the problem lies within your hardware or software.
To know more about these solutions, read on.
Solution #1: Run a CHKDSK Check
Chkdsk is a command-line utility that can be used to scan for and attempt recovery of bad sectors on a disk. Chkdsk scans for and attempts recovery of errors in the file system’s allocation table. Disk volume data is not changed during this process. The parameters are; /f, which fixes errors found on the disk; /r, which locates bad sectors so they can be marked as unusable; and finally, /p, which shows all available information about any problems that were found.
Running a CHKDSK scan is recommended if you suspect that you have a corrupted disk drive causing the error. Here’s how to use this tool to check for possible hardware corruption on your Windows 10/11 device:
- Open the Command Prompt with admin privilege. To do this, press the Windows button and type cmd into the search field. Right-click on the top-most result and select Run as Administrator.
- And then, type this command into the command line: chkdsk c: /f /r /x.
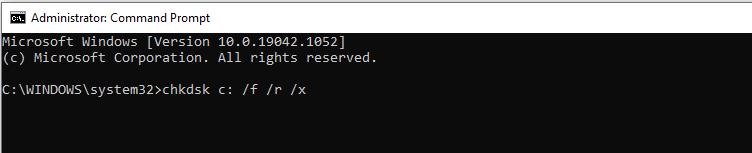
- Hit the Enter button.
- You will now see the message that says, “CHKDSK cannot run because the volume is in use by another process.” It will also ask you to schedule your scan the next time the system restarts. Type Y and hit Enter.
- Type the exit command and hit Enter to close the Command Prompt.
- Restart your computer and the CHKDSK utility will automatically start scanning your hard disk for any possible corruption.
- Once the scan is complete, review the results.
- If there are no issues on your hard disk, proceed to other solutions below. Otherwise, consider replacing your hard disk with a new one.
Solution #2: Run an SFC Scan
As a Windows user, you know that the system can sometimes get into a bad state where it’s running too slow or not responding. This is usually due to software bugs which often lead to corrupt data in your system folders. And in some cases, it causes error codes to appear like the 0xc1420121 error code.
The System File Checker tool will scan for these corrupted files and replace them with fresh copies from Microsoft servers. It also checks for other faults like missing DLLs and invalid shortcuts, but its main focus is on finding and fixing corruption issues in your system folder.
The System File Checker (SFC) tool has been around since Vista days but it hasn’t always been easy to find or use. That all changed when Windows 10/11 was released.
Here’s how to run an SFC scan:
- Press the Windows + X keys and select Windows PowerShell (Admin).
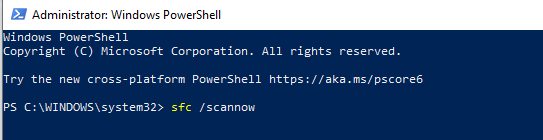
- If the User Account Control appears, click the Yes button to authorize launching the PowerShell with admin privilege.
- Into the text field, type sfc /scannow and hit Enter.
- Wait for the process to complete. This usually takes 10 to 15 minutes.
Solution #3: Run a DISM Scan
Sometimes, the Windows ISO itself becomes corrupted resulting in the 0xc1420121 error code. Luckily, your Windows 10/11 computer has an in-built utility that allows you to deal with a corrupted ISO issue. It’s the DISM utility.
What is DISM? DISM stands for Deployment Image Servicing and Management. It’s a command-line tool that replaces the old Diskpart, and can be used to mount images offline or online, capture images from a running system, add drivers to an image, and more.
DISM was first introduced in Vista as part of Microsoft’s response to the SysInternals suite of tools developed by Mark Russinovich (Microsoft) and Bryce Cogswell (Sysinternals). Introduced originally as an emergency troubleshooting tool, it quickly became apparent that there were many other uses for this new technology – such as adding language packs or installing device drivers.
So, how do you use this tool to fix the 0xc1420121 error code? Follow these steps:
- Press the Windows + R keys.
- Once the Run dialog appears, type cmd and press the Ctrl + Shift + Enter This will open the Command Prompt utility with administrator rights.
- With the Command Prompt open, type the DISM.exe /Online /Cleanup-image /Restorehealth command and hit Enter.
- Once the scan is over, close this window and restart your computer.
Solution #4: Make Changes to the Registry
If you installed the Macrium software on your Windows 10/11 device, then this solution is worth trying.
Macrium is a backup utility designed for the Windows environment. It is developed by Paramount Software UK in 2006 for creating disk images and file backup archives. It can also back up the whole partitions or individual folders or files and compress them into a mountable archive file.
Although this tool seems to be useful, at times, it triggers issues like the 0xc1420121 error code. So, if you have just installed this software and you encounter the error, you may need to modify a key entry on your registry.
Here’s how to do it:
- Press the Windows + S keys to launch the Search utility.
- Into the text field, type regedit.
- Hit Enter.
- With the Registry Editor open, go to this location: Computer\HKEY_LOCAL_MACHINE\SYSTEM\CurrentControlSet\Services\WIMMount.
- Navigate to the right pane and fine the entry named ImagePath.
- Double-click on it to launch the REG_EXPAND_SZ file.
- In the Value data field, change the old value to system32\drivers\wimmount.sys. If it’s already there, there are no further actions left to do.
- And then, hit OK to apply the changes.
- Restart your computer.
- Check if you can install the new feature update on your device.
Solution #5: Run the Windows Update Troubleshooter
Windows updates have become a regular part of our lives, and sometimes they can be problematic. However, with the Windows Update Troubleshooter it is easy to fix common update problems. The Windows Update Troubleshooter has been designed by Microsoft to automatically diagnose and fix some common issues that may cause your device or computer to not install or start installing updates as expected.
The Windows Update Troubleshooter works by examining the current state of your PC in order to identify any potential problems preventing it from getting up-to-date software patches for vulnerabilities. It will find out what issues you are having and then provide fixes for these problems. The troubleshooter can also be used to change the Windows Update settings, such as how often it checks for updates, or if it notifies you about important updates. This is also a great way to ensure your PC stays up to date.
To use this troubleshooter, follow these steps:
- Open the Settings utility.
- Select Update and Security.
- Go to Troubleshoot.
- And then, navigate to the Additional Troubleshooters section. Click on the link.
- Click Windows Update and hit the Run the Troubleshooter button.
- After the troubleshooting process, try installing the Windows Feature update once again and see if the error still shows.
Solution #6: Restart the Windows Update Service
The Windows Update service is a service that helps provide updates for Microsoft’s operating systems and applications. Updates are provided with the intent to improve the performance of your operating system and improve user productivity. The goal of these updates is to introduce bug fixes, security patches, or other improvements from previous releases.
However, this service has been known to cause problems in certain situations with hardware drivers or compatibility issues with software programs such as Microsoft Office 2007 or earlier versions. One example is the error code 0xc1420121.
In the event that the Windows Update service is causing error messages to appear, try restarting it. Here’s how:
- Click the Start menu.
- Type services.msc into the search field and hit Enter.
- A new window will now open displaying a list of all Windows services on your system.
- Search for the Windows Update service.
- Right-click on the service and hit Stop.
- Now, hold the Windows + R keys simultaneously to launch the Run utility.
- Into the search field, type %windir%\SoftwareDistribution\DataStore and hit OK.
- Delete everything in this folder. Use the CTRL + A keys and press the Delete button.
- After that, go back to the Windows Services window.
- Find Windows Update.
- Right-click on it and select Start.
- Restart your computer and install the update once again.
Wrapping Up
We know how frustrating the Error Code 0xc1420121, Couldn’t Install Windows 10/11 Feature Update is. Lucky for you, you’ve come across this article. We have outlined the common reasons why you encounter this error and provided some solutions to help you get rid of it once and for all.
This error can be triggered by many different things. But the most popular ones include file corruption, insufficient hard disk space, malware infection, permission issues, and incompatible components.
To fix this, try basic troubleshooting steps. First, be sure your device meets the minimum requirements. And then, disconnect any external hardware component, uninstall your antivirus program, free up relevant disk space, and update your system drivers.
If none of the troubleshooting steps works, then run a CHKDSK scan. If the error persists, consider performing an SFC scan or a DISM scan. Other solutions that we suggest include running the Windows Update Troubleshooter, tweaking the registry, and restarting the Windows Update service.
We hope you found this article useful. If you’ve had any experience with Error Code 0xc1420121, we would love to hear from you! Share your thoughts in the comments below.