If you’re encountering error 0x80070026 on your Windows system, particularly during Windows update or System Restore, you’re not alone. This guide offers solutions to help resolve this error and get your system back on track.
What Is Error 0x80070026 on Windows?
The Error 0x80070026 for Windows Update or System Restore mostly appears in Windows 10/11 computers. One possible reason why you’re getting this error code is the fact that the default C: Users folder was switched to another directory, such as F:Users, causing potential system errors with the Windows Update feature.
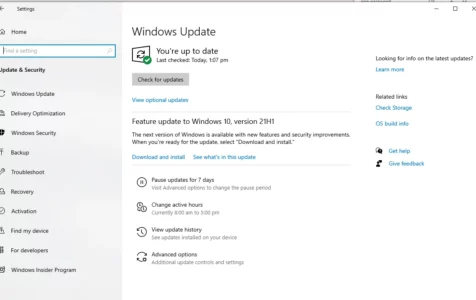
A lot of users have come across the Windows Update error 0x80070026, especially when installing the latest update. The dialog shows that the files are being downloaded, then the process suddenly fails. This problem is common with the Windows Creators Edition, but earlier versions of Windows 10/11 were plagued by this issue as well.
This is the error message that pops up when this trouble is encountered. It reads:
Expert Tip: For smoother PC performance, consider using a PC optimization tool. It handles junk files, incorrect settings, and harmful apps. Make sure it's right for your system, and always check the EULA and Privacy Policy.
Special offer. About Outbyte, uninstall instructions, EULA, Privacy Policy.
There were problems installing some updates, but we’ll try again later. If you keep seeing this and want to search the web or contact support for information, this may help:
(The Name of the Update) – Error 0x80070026
As per the error message, there isn’t that much information that can be gleaned from it, except that Windows ran into some problems while trying to install the update. The issue might be the result of many other problems, such as corrupted system files or missing Windows update services. Therefore, there is no exact formula to fix the 0x80070026 error.
Nevertheless, there are several solutions you can try when the system fails to install updates. Resetting Windows Update Components should help if there are issues with the WU component. It is also recommended to disable your antivirus temporarily when running Windows Update. You should also give the Windows Update Troubleshooter a try to see if it works.
Fortunately, there are quite a few easy methods to resolve error code 80070026 so you can get back to your everyday life. Simply follow the steps outlined below in the order they are given and you’ll have your computer up and running in no time.
Reasons Why You’re Getting Error 0x80070026 on Windows
Before we try to troubleshoot this error, it is important to understand first what might be triggering it. As mentioned above, there are several factors that come into play when this error message pops up, and they can be any one of the items listed below:
- Interrupted or failed internet communication with Microsoft update servers
- Corrupt Windows system files that need repair or reinstallation
- C:/Users/ directory settings have been changed
- Third-party antivirus blocking the update download
- Malware or other malicious programs
- Broken or missing Windows Update components
It can be hard to figure out what’s causing the error, especially when it’s a combination of two or more factors. Hence, we recommend going through the solutions in the order given below to see which one works for you.
How to Fix Error 0x80070026 on Windows
If you are getting error 0x80070026 on Windows when installing updates on your computer, here are some basic troubleshooting steps you need to do first:
- Restart your PC and try to run Windows Update once again.
- Update your drivers using Driver Updater.
- Make sure you have enough storage for the updates to be downloaded and installed.
- Switch to a wired or stable internet connection to prevent disruptions.
If these steps are not enough to deal with the error, then try the solutions below:
Solution #1: Run the Windows Update Troubleshooter.
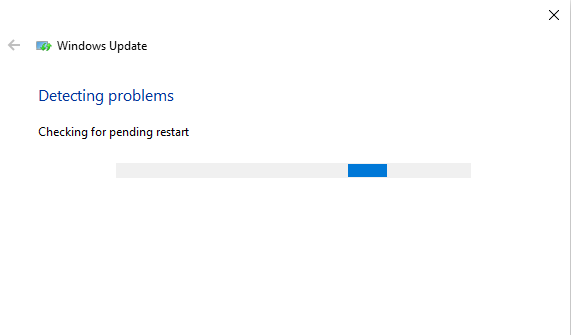
This method is for those computers running Windows versions that do not have the Defer Upgrades option, particularly Windows Home users. The troubleshooter is designed to fix common Windows Update errors, including the error code 0x80070026.
The Windows Update troubleshooter checks your internet connectivity, network adapter functionality, and the Windows Update service. To run the troubleshooter, follow the instructions below:
- In the search box beside the Start menu, type in troubleshoot, then click Troubleshoot settings from the search results.
- From the left menu, click Troubleshoot.
- Click Windows Update from the right window to scan for Windows Update errors.
- Click the Run the troubleshooter button.
The troubleshooter will automatically scan your computer for problems related to Windows Update and resolve them if possible.
Solution #2: Restart BITS and other Windows Update Components Manually.
The Background Intelligent Transfer Services or BITS, Windows Update service, and Cryptographic service, are the components that manage the downloading and installation of Windows updates. Any error encountered by any of these components can lead to an update failure.
There are two ways to reset these components. Your first option is to open the Services window through the Run dialog. Press Windows key + R, then type in services.msc in the dialog box. Look for the BITS, Windows Update, and Cryptographic services in the list and restart them one by one.
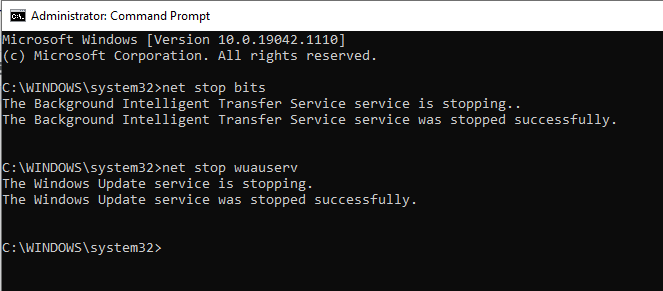
The second option requires using the Command Prompt. Type in Command Prompt in the search box beside the Start button. Right-click on Command Prompt from the search results and choose Run as administrator. In the Command Prompt window, type in the following commands, followed by Enter after each line:
- net stop bits
- net stop wuauserv
- net stop appidsvc
- net stop cryptsvc
You might also need to delete cache files from your computer by running these commands one at a time:
- Del “%ALLUSERSPROFILE%\Application Data\Microsoft\Network\Downloader\*.*”
- rmdir %systemroot%\SoftwareDistribution /S /Q
- rmdir %systemroot%\system32\catroot2 /S /Q
While you’re at it, reset your network configurations as well to ensure that your internet is not the problem. Run the commands below:
- netsh winsock reset
- netsh winsock reset proxy
Once everything is ready, restart the BITS, Windows Update, and Cryptographic services by entering the command lines below:
- net start bits
- net start wuauserv
- net start appidsvc
- net start cryptsvc
Restart your computer to see if this solution worked.
Solution #3: Clear the SoftwareDistribution Folder.
Every Windows 10/11 operating system has a Software Distribution folder located in the Windows directory. This is where files required to install Windows Updates are temporarily stored.
In this solution, you may have to delete the contents of this folder and retry the update process.
Here’s how to clear the files:
- Click the Start menu.
- Into the search field, input cmd and right-click on the most relevant search result. Select Run as Administrator.
- Once the Command Prompt opens, input this command into the command line: net stop wuauserv.
- Hit Enter.
- Next, input this command to stop the Background Intelligent Transfer Service: net stop bits.
- Hit Enter.
- Now, use the Windows + R keys to launch the Run utility.
- Browse this path: C:Windows\SoftwareDistribution.
- Select all the contents and hit the Delete button to remove them.
- Go back to the Command Prompt and input this command: net start wuauserv.
- Hit Enter.
- And then, start the Background Intelligent Transfer Service by entering this command: net start bits.
- Hit Enter.
At this point, you should have successfully cleared the contents of the SoftwareDistribution folder.
Solution #4: Perform SFC and DISM Scans.

Both DISM (Deployment Image Servicing and Management) and SFC (System File Checker) are built-in utilities capable of repairing system files. The only difference is they do it in different ways.
Here’s a quick guide on running an SFC and DISM scan from an elevated Command Prompt:
- Press Windows key + R to open up a Run dialog box.
- Then, type cmd inside the text box and press Ctrl + Shift + Enter to open up an elevated Command Prompt.
- When you’re prompted by the UAC (User Account Control), click on Yes to grant administrative privileges.
- Type in the following command and press Enter immediately to start the SFC scan: sfc /scannow
When the procedure is complete, you can safely close the elevated command prompt and restart your computer to see if the issue has been resolved at the next system startup.
If the same issue is still occurring even after you’ve performed the SFC scan, perform a DISM scan this time using this command: DISM /Online /Cleanup-Image /RestoreHealth
Once the scan is finished, perform one final restart and check if the issue has been resolved once the next startup sequence is complete.
Solution #5: Delete the Pending.Xml File.
Oftentimes, a stuck pending.xml file could be the culprit behind the Windows Update error code 0x80073712. So, you might want to remove it.
Here’s how to remove the pending .xml file on your Windows 10/11 device:
- First, boot your computer into Safe Mode.
- And then, go to the Windows SxS folder.
- In this folder, locate the xml file and right-click on it. Rename it or delete it.
- Hit Enter. At this point, the Windows Update utility should delete all pending tasks and build a fresh new update. Wait for the process to complete.
- Restart your computer and check if the error persists.
Solution #6: Perform a Clean Boot.
A clean boot is often performed to run Windows with only a minimal set of startup applications and drivers. This will allow you to easily identify any software conflicts that may have occurred after installing an update.
Here’s how to perform a clean boot on your Windows 10/11 PC:
- Make sure you are signed in to your PC as an administrator. If you don’t have an admin account, you need to create one.
- Into the search field, enter msconfig.
- From the search results, select System Configuration.
- Navigate to the Services tab.
- Tick the Hide all Microsoft Services option.
- Choose Disable all.
- Next, go to the Startup tab.
- Choose Open Task Manager.
- Go to Startup.
- Click on every startup item and hit Disable.
- Exit the Task Manager.
- Now, go to the Startup tab again and hit OK.
Solution #7: Download and Install the Update Manually.
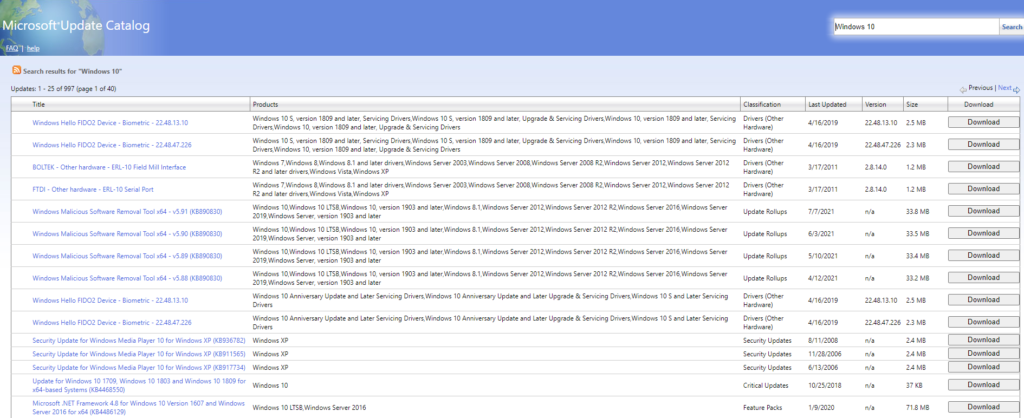
If you cannot install the update because of the error 8024a112, you can resolve the problem by manually downloading the update from the official Microsoft Update Catalog. But for you to be able to do that, you have to know the update code of the Windows update you wish to download.
Usually, the update code begins with KB. It is then followed by a combination of numbers. After you find this code, download it by following these instructions:
- Go to the official Microsoft Update Catalog website.
- Type the update code into the search field.
- A list of all matching updates will show. Find the most relevant one that is compatible with your system architecture.
- Hit the Download button next to it.
- Next, run the setup file and follow the installation wizard.
- Restart your computer to fix the problem.
Solution #8: Perform an In-Place Upgrade.
If the solutions above don’t work, your last option is to perform an in-place upgrade to help resolve your system troubles. To do this:
- Download the Media Creation Tool from Microsoft’s website.
- After downloading, you’ll be asked what to do with the file. Click Run.
- Click Yes once the confirmation message appears, then accept the Terms.
- Tick off Upgrade this PC Now > Next.
- Click Install.
What’s Next?
The error 0x80070026 for Windows Update or System Restore can be troublesome and cause a lot of stress since your computer won’t be able to perform at its 100% without resolving it. If you’re getting this error while trying to install a Windows update, you can check out the solutions above by trying them one by one until you find one that works for you. If nothing works, you can try performing an in-place Windows 10/11.