
If your computer has irregular beeps or doesn’t boot, you may face a Power On Self Test (POST) issue. This post offers solutions to resolve BIOS POST error codes.
What Is BIOS Power-On Self-Test (POST)?
A power-on self-test (POST) is a succession of built-in diagnostic tests performed when turning on a computer. This series of tests determines proper functioning of the following:
- Random access memory (RAM)
- Disk drives
- Hard drives
- Central processing unit (CPU)
- All other hardware devices
Every time a PC is turned on or reset using the Reset button or Windows Restart command, the computer is rebooted and reset to its basic operating condition. The system BIOS program starts by invoking a special program (stored on a ROM chip) called the POST (power-on self test). The POST sends out standardized commands that check every primary device (in more technical terms, it runs an internal self-diagnostic routine).
The POST has two stages:
Expert Tip: For smoother PC performance, consider using a PC optimization tool. It handles junk files, incorrect settings, and harmful apps. Make sure it's right for your system, and always check the EULA and Privacy Policy.
Special offer. About Outbyte, uninstall instructions, EULA, Privacy Policy.
- Test 1 occurs before and during the test of the video.
- Test 2 occurs after the video has been tested.
This division determines whether the computer will display errors by beeping or showing them on the screen. The POST does not assume the video works until it has been tested. The POST does assume that the speaker always works, but in order to let you know that the speaker is working, all computers beep on startup. Depending on the BIOS type, the POST might also sound a single beep when it’s done, to let you know the boot process was successful. If something goes wrong, the POST sends a series of beep codes to let you know what the problem is or where to start looking for it.
The power-on self-test is the first step in the boot sequence. It doesn’t matter if you just restart your computer or turn it on for the first time within a few days. Regardless, POST will run.
It does not depend on any particular operating system. In fact, you don’t even need to have an operating system installed on your hard drive to run POST. This is because testing is handled by the system’s BIOS and not any installed software.
It checks for the existence and functioning of basic system devices, such as keyboards and other peripherals, and other hardware elements (such as processors, storage devices, and memory).
After the POST, the computer will continue to boot, but only if it completes successfully. The problem definitely comes after POST, such as Windows hangs during startup, but in most cases, these problems may be due to operating system or software issues, not hardware.
In computers compatible with IBM PC, the main responsibility of POST is handled by the BIOS. The BIOS will transfer some of these responsibilities to other programs designed to initialize very specific peripherals, especially for video and SCSI initialization. The principal duties of the main BIOS during POST are as follows:
- Find, size, and verify the system main memory.
- Initialize BIOS.
- Identify, organize, and select which devices are available for booting.
- Verify CPU registers.
- Verify the integrity of the BIOS code itself.
- Verify some basic components like DMA, timer, interrupt controller.
- Pass control to other specialized extensions BIOS (if installed).
The checks are performed majorly on:
- Hardware elements like processor, storage devices and memory.
- Basic System Devices like keyboard, and other peripheral devices.
- CPU Registers
- DMA (Direct Memory Access)
- Timer
- Interrupt controller
What Is BIOS Power-On Self-Test (POST) Errors on Windows 10/11 Systems?
When you encounter a BIOS POST error code, it’s usually accompanied by a single or more computer beep sound.
Almost everything that might prevent the computer from continuing to boot will signal some kind of error. Errors can come in the form of flashing LEDs, audible beeps, or error messages on the display, all of which are technically called POST codes, beep codes, and on-screen power-on self-test error messages.
If some part of the power-on self-test fails, you will know soon after turning on the computer. For example, if the problem lies with the video card, and therefore you can’t see anything on the monitor.
On macOS computers, power-on self-test errors often appear as an icon or another graphic instead of an actual error message. For example, a broken folder icon after starting up your Mac may mean that the computer can’t find a suitable hard drive to boot from.
Certain types of failures during the POST might not produce an error at all, or the error may hide behind a computer manufacturer’s logo.
The BIOS issues an error message if hardware is not working properly or if it is not identified. The error message consists of text on the display screen or a series of coded beep sounds. Because POST is initiated prior to activating the video card, a display screen message is not typical. There are a variety of beep codes that are properly descriptive for troubleshooting the error. A beep code may indicate a parity error, base memory read/write (R/W) error, memory refresh timer error, display memory error, motherboard timer not functioning, cache memory failed or numerous other errors.
Sometimes, an error stops the boot process until the error is corrected, and a device with an error is not allowed to run, ensuring safety. An error message can be basic. For example, error 161 means the system board has a dead battery. Sometimes a POST error can be drastic, such as when the motherboard does not detect a RAM component.
The error message could consist of text messages on the console or audio in the form of beeps. Irrespective of the vendor there would be a manual describing the types of errors and the error message mappings to help us troubleshoot. The error messages can vary from a parity error to a faulty motherboard.
The following chart is about beeps and their corresponding meanings:
- 1 short beep – Normal POST – the system is OK
- 2 short beeps – POST error – error code is shown on screen
- 3 long beeps – 3270 keyboard card
- 3 beeps – Base 64 KB or CMOS RAM failure
- 4 beeps – System timer
- 5 beeps – Processor failure
- 6 beeps – Keyboard controller or Gate A20 error
- 7 beeps – Virtual mode exception error
- 8 beeps – Display monitor write/read test failure
- 9 beeps – ROM BIOS checksum error
- 10 beeps – CMOS RAM shutdown register failure
- No beep – Power supply, system board problem, disconnected CPU, or disconnected speaker
- Continuous beep – Power supply, system board, or maybe RAM problem, keyboard problem
- Repeating short beeps – Power supply or system board problem or keyboard
- 1 long, 1 short beep – System board problem
- 1 long, 2 short beeps – Display adapter problem (MDA, CGA)
- 1 long, 3 short beeps – Enhanced Graphics Adapter (EGA)
- 1 long, 8 short Display test and display vertical and horizontal retrace test failure
Here is the list of the error codes and the error messages that accompany them:
- 0000 – Timer Error
- 0003 – CMOS Battery Low
- 0004 – CMOS Settings Wrong
- 0005 – CMOS Checksum Bad
- 000B – CMOS Memory Size Wrong
- 000C – RAM R/W Test Failed
- 000E – A: Drive Error
- 000F – B: Drive Error
- 0012 – CMOS Date/Time Not Set
- 0040 – Refresh Timer Test Failed
- 0041 – Display Memory Test Failed
- 0042 – CMOS Display Type Wrong
- 0043 – ~<INS> Pressed
- 0044 – DMA Controller Error
- 0045 – DMA-1 Error
- 0046 – DMA-2 Error
- 0047 – Unknown BIOS error. Error code = 0047
- 0048 – Password Check Failed
- 0049 – Unknown BIOS error. Error code = 0049
- 004A – Unknown BIOS error. Error code = 004A
- 004B – Unknown BIOS error. Error code = 004B
- 004C – Keyboard/Interface Error
- 005D – S.M.A.R.T. Command Failed
- 005E – Password Check Failed
- 0101 – ! This system board does not support the power requirements of the installed processor. The processor will be run at a reduced frequency, which will impact system performance.
- 0102 – Error! The CPU Core to Bus ratio or VID configuration has failed! Please enter BIOS Setup and re-config it.
- 0103 – ERROR! CPU MTRRs configuration failed! Uncacheable memory hole or PCI space too complicated!
- 0120 – Thermal Trip Failure
- 0121 – Thermal Trip Failure
- 0122 – Thermal Trip Failure
- 0123 – Thermal Trip Failure
- 0124 – Thermal Trip Failure
- 0125 – Thermal Trip Failure
- 0126 – Thermal Trip Failure
- 0127 – Thermal Trip Failure
- 0128 -Thermal Trip Failure
- 0129 – Thermal Trip Failure
- 012A – Thermal Trip Failure
- 012B – Thermal Trip Failure
- 012C – Thermal Trip Failure
- 012D – Thermal Trip Failure
- 012E – Thermal Trip Failure
- 012F – Thermal Trip Failure
- 0150 – Processor Failed BIST
- 0151 – Processor Failed BIST
- 0152 – Processor Failed BIST
- 0153 – Processor Failed BIST
- 0154 – Processor Failed BIST
- 0155 – Processor Failed BIST
- 0156 – Processor Failed BIST
- 0157 – Processor Failed BIST
- 0158 – Processor Failed BIST
- 0159 – Processor Failed BIST
- 015A – Processor Failed BIST
- 015B – Processor Failed BIST
- 015C – Processor Failed BIST
- 015D – Processor Failed BIST
- 015E – Processor Failed BIST
- 015F – Processor Failed BIST
- 0160 – Processor missing microcode
- 0161 – Processor missing microcode
- 0162 – Processor missing microcode
- 0163 – Processor missing microcode
- 0164 – Processor missing microcode
- 0165 – Processor missing microcode
- 0166 – Processor missing microcode
- 0167 – Processor missing microcode
- 0168 – Processor missing microcode
- 0169 – Processor missing microcode
- 016A – Processor missing microcode
- 016F – Processor missing microcode
- 0180 – BIOS does not support current stepping
- 0181 – BIOS does not support current stepping
- 0182 – BIOS does not support current stepping
- 0183 – BIOS does not support current stepping
- 0184 – BIOS does not support current stepping
- 0185 – BIOS does not support current stepping
- 0186 – BIOS does not support current stepping
- 0187 – BIOS does not support current stepping
- 0188 – BIOS does not support current stepping
- 0189 – BIOS does not support current stepping
- 018A – BIOS does not support current stepping
- 018B – BIOS does not support current stepping
- 018C – BIOS does not support current stepping
- 018D – BIOS does not support current stepping
- 018E – BIOS does not support current stepping
- 018F – BIOS does not support current stepping
- 0192 – L2 cache size mismatch.
- 0193 – CPUID, Processor stepping are different.
- 0194 – CPUID, Processor stepping are different.
- 0195 – Front side bus mismatch. System halted.
- 0196 – CPUID, Processor Model are different.
- 0197 – Processor speeds mismatched.
- 5120 – CMOS cleared by jumper.
- 5121 – Password cleared by jumper.
- 5125 – Not enough conventional memory to copy PCI Option ROM.
- 5180 – Unsupported Memory Vendor : DIMM_A0
- 5181 – Unsupported Memory Vendor : DIMM_A1
- 5182 – Unsupported Memory Vendor : DIMM_A2
- 5183 – Unsupported Memory Vendor : DIMM_A3
- 5184 – Unsupported Memory Vendor : DIMM_A4
- 5185 – Unsupported Memory Vendor : DIMM_B0
- 5186 – Unsupported Memory Vendor : DIMM_B1
- 5187 – Unsupported Memory Vendor : DIMM_B2
- 5188 – Unsupported Memory Vendor : DIMM_B3
- 5189 – Unsupported Memory Vendor : DIMM_B4
- 518A – Unsupported Memory Vendor : DIMM_B5
- 518B – Unsupported Memory Vendor : DIMM_C0
- 518C – Unsupported Memory Vendor : DIMM_C1
- 518D – Unsupported Memory Vendor : DIMM_C2
- 518F – Unsupported Memory Vendor : DIMM_C3
- 5190 – Unsupported Memory Vendor : DIMM_C4
- 5191 – Unsupported Memory Vendor : DIMM_C5
- 5192 – Unsupported Memory Vendor : DIMM_D0
- 5193 – Unsupported Memory Vendor : DIMM_D1
- 5194 – Unsupported Memory Vendor : DIMM_D2
- 5195 – Unsupported Memory Vendor : DIMM_D3
- 5196 – Unsupported Memory Vendor : DIMM_D4
- 5197 – Unsupported Memory Vendor : DIMM_D5
- 51A0 – Unsupported AMB Vendor : DIMM_A0
- 51A1 – Unsupported AMB Vendor : DIMM_A1
- 51A2 – Unsupported AMB Vendor : DIMM_A2
- 51A3 – Unsupported AMB Vendor : DIMM_A3
- 51A4 – Unsupported AMB Vendor : DIMM_A4
- 51A5 – Unsupported AMB Vendor : DIMM_A5
- 51A6 – Unsupported AMB Vendor : DIMM_B0
- 51A7 – Unsupported AMB Vendor : DIMM_B1
- 51A8 – Unsupported AMB Vendor : DIMM_B2
- 51A9 – Unsupported AMB Vendor : DIMM_B3
- 51AA – Unsupported AMB Vendor : DIMM_B4
- 51AB – Unsupported AMB Vendor : DIMM_B5
- 51AC – Unsupported AMB Vendor : DIMM_C0
- 51AD – Unsupported AMB Vendor : DIMM_C1
- 51AE – Unsupported AMB Vendor : DIMM_C2
- 51AF – Unsupported AMB Vendor : DIMM_C3
- 51B0 – Unsupported AMB Vendor : DIMM_C4
- 51B1 – Unsupported AMB Vendor : DIMM_C5
- 51B2 – Unsupported AMB Vendor : DIMM_D0
- 51B3 – Unsupported AMB Vendor : DIMM_D1
- 51B4 – Unsupported AMB Vendor : DIMM_D2
- 51B5 – Unsupported AMB Vendor : DIMM_D3
- 51B6 – Unsupported AMB Vendor : DIMM_D4
- 51B7 – Unsupported AMB Vendor : DIMM_D5
- 51C0 – Memory Configuration Error.
- 8101 – ! USB Host Controller not found at the specified address!!!
- 8102 – Error! USB device failed to initialize!!!
- 8104 – ! Port 60h/64h emulation is not supported by this USB Host Controller!!!
- 8105 – ! EHCI controller disabled. It requires 64bit data support in the BIOS.
- 8301 – Not enough space in runtime area. SMBIOS data will not be available.
- 8302 – Not enough space in runtime area. SMBIOS data will not be available.
- 8601 – Error: BMC Not Responding
- 8701 – Insufficient Runtime space for MPS data.!.
- 4F – Initializing IPMI BT interface.
- D4 – Testing base memory; system might hang if test fails.
- D5 – Copying Boot Block to RAM and transferring control to RAM.
- 38 – Initializing different devices through DIM (Device Initialization Manager). For example, USB controllers are initialized at this point.
- 75 – Initializing Int-13 and preparing for IPL detection.
- 78 – Initializing IPL devices controlled by BIOS and option ROMs.
- 85 – Displaying errors to the user and getting the user response for error.
- 87 – Executing BIOS setup if needed / requested. Checking boot password if installed.
- 00 – Passing control to OS Loader (typically INT19h).
- FF – The flash has been updated successfully. Making flash write disabled. Disabling ATAPI hardware. Restoring CPUID value back into register. Giving control to F000 ROM at F000:FFF0h.
What Causes BIOS Power-On Self-Test (POST) Errors on Windows 10/11 systems
Power On Self Test (POST) problems can be caused by any of the following situations.
New hardware conflicting with old hardware.
If any new hardware has just been added to the computer, remove that hardware to make sure it is not the cause of your problem. If after removing this new hardware your computer works, it’s likely the computer is either not compatible with the new hardware or a system setting needs to be changed to work with the new hardware device.
Bad or failing hardware device.
Remove everything from the back of the computer except the power cable. Turn on the computer and see if it beeps normally. If the computer has never beeped also connect a monitor to the computer to see if a message occurs.
If you are receiving a sequence of beeps see our beep code page for a listing of all the different beep codes and what they mean. These beep codes can help you to identify exactly what computer component is failing or is dead.
Make sure all the PC’s fans are running. If a fan has failed (especially the heat sink fan for the CPU) your computer could be overheating which can cause it not to boot.
If you were unable to determine by the beep code what component is failing, or do not have a beep code, disconnect the cables from the CD-ROM, DVD-ROM, Hard Drive and Floppy drive and from the Motherboard connectors. If this resolves your irregular POST, attempt to connect each device one at a time to determine which device and or cable is causing the problem.
Other hardware issues.
Hardware problems, such as bad memory or a malfunctioning CPU are another major cause of computer errors. For example, the ikernel.exe application error may occur if there is a problem with the memory. To check your hardware on a regular basis you may use a good hardware diagnostics tool. If you are using Windows Vista, you may use the memory diagnostics tool that is included with the operating system to check the memory chips on your PC.
How to Fix BIOS Power-On Self-Test (POST) Errors on Windows 10/11 Systems
There are two levels of error codes during POST: fatal and nonfatal. As the name implies, fatal errors will halt the system without attempting to load the operating system. Memory problems or a faulty disk or display adapter are examples of fatal errors. Nonfatal errors like a “missing” floppy disk drive will still result in the system attempting (and often succeeding) to load the operating system.
In most cases, the POST procedure does a good job of testing components. If it gives a clean bill of health to the hardware, its failure to boot will often lie in the operating system. You can use a bootable floppy disk in most cases to access the hard disk drive, or boot Windows using the Safe Start approach (press the F8 key just after the POST completes) and check for conflicting settings.
If you’re experiencing POST errors when you boot your computer, the following steps may help you fix the problem. Some of the steps below recommend removing physical parts from inside the computer. While working inside the computer, it’s highly recommended you be aware of ESD (electrostatic discharge) and its potential hazards.
Step 1: Remove new hardware
If any new hardware was recently added to the computer, remove that hardware to make sure it is not causing your issue. If your computer works after removing the new hardware, it can mean a few things. Either the new hardware is not compatible with your computer, a system setting needs to be changed, or the new hardware is defective.
Step 2: Remove any disks or USB devices
Remove any disks, CDs, or DVDs that are in the computer. If any USB devices (iPods, drives, phones, etc.) are connected, disconnect all of them as well. Reboot the computer and see if anything changes.
Step 3: Disconnect external devices
Remove everything from the back of the computer, except the power cable. Turn on the computer and see if it beeps normally. If the computer has never beeped, keep the monitor or display connected to see if any change occurs.
Step 4: Reconnect and check power cords
If the computer is not getting enough power or the power is getting interrupted, the computer can encounter problems. Disconnect your power cables from any power strip or UPS (uninterruptible power supply) and connect the computer directly to a known good wall outlet.
Step 5: Identify beep code
If you are receiving a sequence of beeps, see the beep code page for a listing of different beep codes and their explanation. You can also check your motherboard or computer documentation for information on the beep codes. These beep codes are meant to help identify which computer component is failing or bad. If your beep code is not listed, continue troubleshooting.
Step 6: Check all fans
Make sure all fans are running on the computer. If a fan has failed (especially the heat sink fan for the CPU), your computer could be overheating or detecting the fan failure, causing the computer not to boot.
Step 7: Check all cables
Verify all the cables are securely connected to the computer and that there are no loose cables by firmly pressing in each cable.
All disk drives should have a data cable and power cable connected to them. Your power supply should have at least one cable going to the motherboard. Many motherboards may also have additional cables connected to them to supply power to the fans.
Step 8: Disconnect all expansion cards
If the above recommendations still have not resolved the irregular POST, disconnect the riser board (if applicable) and each of the expansion cards. If this fixes the problem or allows the computer to POST, connect one card at a time until you determine which card is causing the problem.
Step 9: Disconnect all drives
If you cannot diagnose the problem by the beep code (or you do not hear a beep code), power off the computer. Then, disconnect any IDE, SATA, SCSI, or other data cables from the motherboard. When they are disconnected, try booting the computer again.
If this resolves your irregular POST or generates error messages, reconnect each device until you determine which device or cable is causing the issue. In some situations, it can also be a loose cable connection that causes the issue.
Step 10: Remove the RAM
If you continue to experience the same problem with all the above hardware removed, remove the RAM from the motherboard and turn on the computer. If the computer has a different beep code or was not beeping but is now, turn off your computer and try the suggestions below. Make sure to turn off the computer before adding and removing the memory and then turning it back on to see if the suggestion resolves the issue.
Step 11: Re-insert the memory into the same slot.
If you have more than one stick of memory, remove all but one stick of memory and try rotating through each stick.
Try one stick of memory in each slot. If you can get the computer to boot with one or more of the sticks of memory installed, you are likely dealing with some bad memory. Try to identify which stick of memory is bad and replace it.
If you can get the memory to work in one slot but not another slot, the motherboard is likely defective. You can either workaround the issue by running the memory in a different slot that does work or replace the motherboard.
Step 12: Power cycle the computer
In some situations, a computer may have power related issues often caused by either the power supply or the motherboard. To help determine if this is the issue, try turning the computer on, off, and back on as fast as possible, making sure the computer power light goes on and off. In some situations, you may get the computer to boot. Try this method only as a temporary workaround or as a last resort to get any valuable information from the computer.
Step 13: Disconnect and reconnect the CPU
For users who’re more comfortable working inside their computer, reseat the CPU by removing it and re-inserting it into the socket. You should also apply a fresh layer of thermal compound between the CPU and the heat sink.
Step 14: Check if BIOS chip is loose
If your motherboard has a BIOS chip, it can become loose over time due to heat expansion and cause the computer to give an irregular POST. Gently press down on the BIOS chip to make sure it has not become loose.
Step 15: Clear CMOS
To clear the CMOS, do the following:
- Turn off all peripheral devices connected to the computer.
- Disconnect the power cord from the AC power source.
- Remove the computer cover.
- Find the battery on the board. The battery may be in a horizontal or vertical battery holder, or connected to an onboard header with a wire.
If the battery is in a holder, note the orientation of the + and – on the battery. With a medium flat-blade screwdriver, gently pry the battery free from its connector.
If the battery is connected to an onboard header with a wire, disconnect the wire from the onboard header.
- Wait one hour, then reconnect the battery.
- Put the computer cover back on.
- Plug the computer and all devices back in.
- Boot the computer and see if POST error occurs.
Step 16: Reset BIOS to default settings
You can reset the BIOS setting to its default values and see if the issue is resolved.
Step 17: Update BIOS
Updating the BIOS and firmware on your system could help fix the issue. Since you’re unable to boot to the desktop, you can update BIOS by creating a bootable USB on a working machine and then boot the faulty PC with the bootable media.
Once you complete the manual update of the BIOS/firmware on your system, see if the issue is resolved.
Step 18: Replace motherboard, CPU, RAM, PSU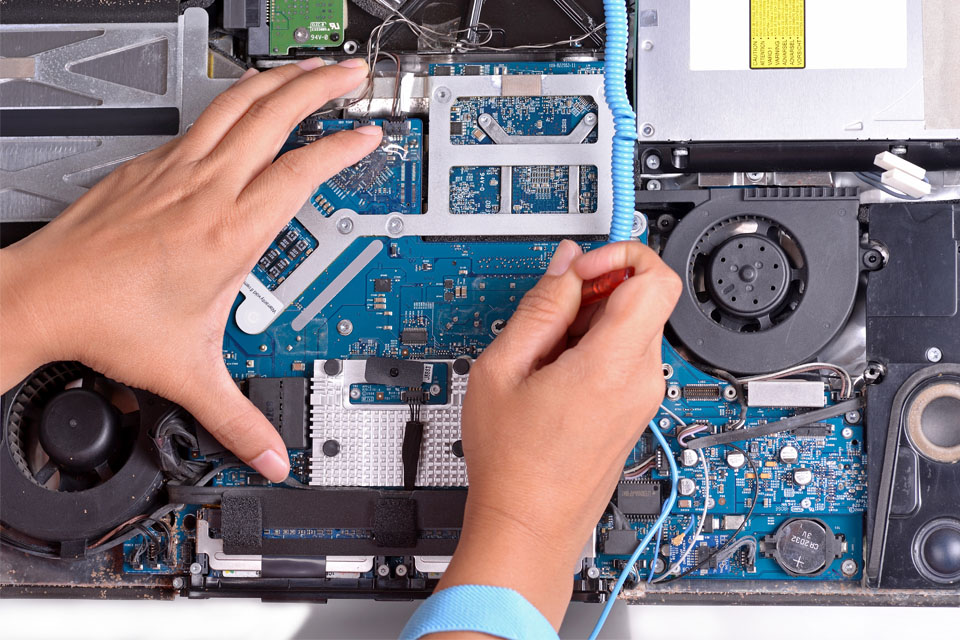
At this point, if nothing has worked so far, it’s likely you have a case of a bad motherboard, power supply, CPU, or RAM stick. In which case, you need to either replace these components or have the computer serviced. You can replace or swap in parts from another computer that is known to work. Do the replacing in this sequence; the motherboard first, then the RAM, the CPU, and finally, the PSU.
Summary
Remember that the Power On Self Test is just that: a self-test. Just about anything that might prevent the computer from continuing to start will prompt some kind of error.
Errors might come in the form of flashing LEDs, audible beeps, or error messages on the monitor, all of which are technically referred to as POST codes, beep codes, and on-screen POST error messages, respectively.
The troubleshooting guide above should cover all scenario and resolve any POST error you might be experiencing.