Disclaimer: The instructions provided in this article are for informational purposes only. Making changes to the BIOS or other system settings can be risky and may lead to further issues if not done correctly. Consult with a professional or your device’s technical support if you are unsure or need assistance.
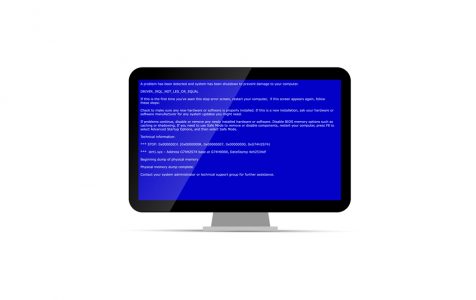
When your system encounters a problem like Blue Screens of Death (BSODs), it displays error messages during startup. These messages can be generated by the system BIOS or Windows itself. But let’s start with the basics: what is BIOS?
BIOS: What You Should Know
Short for Basic Input Output System, BIOS is a chip embedded on a motherboard. It allows users to access and set up their external peripherals at the most basic levels.
The BIOS contains instructions on how to load some common computer hardware. It also includes the Power-On Self-Test (POST), which is used to verify if the computer meets the specific requirements for proper booting. If a computer fails the test, users often hear a combination of beeps, which is an indication of a problem.
Expert Tip: For smoother PC performance, consider using a PC optimization tool. It handles junk files, incorrect settings, and harmful apps. Make sure it's right for your system, and always check the EULA and Privacy Policy.
Special offer. About Outbyte, uninstall instructions, EULA, Privacy Policy.
To figure out the BIOS version on your device, simply access the BIOS setup. Here, your device’s BIOS type should be displayed.
Unfortunately, as with other components of the computer, the BIOS is also prone to problems. This is why some users disable some of its components for troubleshooting purposes.
Among the common BIOS memory options that are being disabled is the BIOS cache or shadowing.
To learn about BIOS cache or shadowing, as well as how to disable BIOS memory options, simply read on. We have created this article just for you.
What Is BIOS Cache or Shadowing?
All motherboards have fixed read-only storage called ROM. It contains the firmware and necessary instructions that are needed to read and run computer hardware components.
Now, there are instances when the ROMs become slow. In this case, OEMs suggest loading the RAM with the ROM to execute commands faster. This instance usually happens during the startup process, and in situations like this, disabling the BIOS cache is also recommended.
What Does Disabling BIOS Cache Do?
When you are faced with a BSOD or any memory problem, Windows technicians often suggest disabling caching or shadowing.
The BIOS cache is a high-speed static RAM. It plays a crucial role because many programs repeatedly access the instructions or data in this portion. Thanks to the BIOS cache, a computer can continuously access the information it needs without affecting the system performance.
Once the BIOS cache is disabled, it is likely that users experience a slow system performance.
Steps to Disable the BIOS Cache or Shadowing
In this section, we teach you how to disable BIOS memory options. However, before we begin, keep in mind that the BIOS menu differs for each device. This means that your computer may not have the same options and settings that other devices have. This also suggests that you might not be able to disable the BIOS memory options as well.
Regardless of the case, here’s how to disable the BIOS memory options:
Step 1: Access the BIOS
- Restart your computer. Go to the Start menu, click the Power icon, and choose Restart.
- Wait for the startup screen to show. Once it appears, press the displayed setup key. It should be flashed at the bottom of your screen.
- Press and hold the F2 or Del key to enter setup.
- Wait for the BIOS to load. You can then start looking for the memory item you wish to disable.
Step 2: Disable Memory Options
- Go to the Advanced section by selecting the Advanced option at the top-most part of the screen.
- Hit Enter. The Advanced section of the BIOS should now appear.
- Next, locate the memory option you wish to disable. There are two common memory options. These include:
- Shadowing or caching – If you encounter a blue screen or a memory-related issue, then disabling this option may resolve the problem.
- RAM – If you installed a custom RAM and it’s not working, you can disable it from the BIOS without removing it physically from your computer.
- Again, the available memory options vary from one computer to another. Some computers may have more memory options, while others don’t have that much. If you can’t find the particular memory option you are looking for, then go to the General section.
- To select a memory item to disable, use the arrow keys. Make sure the selection box next to the item is disabled.
- After that, hit the Change key. This will disable the selected memory option.
- Exit the BIOS menu by pressing the ESC key.
- Finally, hit Enter to save your changes.
What to Do When You Can’t Disable the BIOS Cache
If you cannot disable the BIOS settings and you are experiencing memory problems, then we suggest trying any of the solutions below.
Solution #1: Use a registry cleaner
If a damaged registry key is causing the BSOD error, you might consider using a registry cleaner tool. These tools can often be found online, but it is essential to download from reputable sources to avoid potential issues. A popular choice is trusted registry cleaner, known for addressing registry-related errors.
Solution #2: Perform a System Restore
You can also perform a System Restore to revert your computer to an earlier date. This solution is very effective, but it only works if restore points have been previously created.
To perform a System Restore, do the following:
- Into the search field, input control panel. Click on the top-most search result.
- Once the Control Panel window opens, input recovery into the search field.
- Navigate to Recovery and select Open System Restore.
- Hit Next in the Restore system files and setting box.
- Choose a restore point.
- Click the Scan for affected programs option.
- At this point, you will see a list of items that will be removed if you choose such a restore point. If you are happy with deleting them, click Close.
- Proceed by hitting Next.
- Finally, hit Finish.
Solution #3: Run the online BSOD troubleshooter
Microsoft has created two BSOD troubleshooter for Windows devices. One can be accessed online, while the other is built-in on your device.
To use the online BSOD troubleshooter by Microsoft, follow these instructions:
- Go to the Troubleshoot blue screen errors section on Microsoft’s website.
- Answer the questions and follow the instructions to troubleshoot the problem.
To use the built-in BSOD troubleshooter on your Windows 10/11 device, do the following:
- Launch Control Panel.
- Click on the Troubleshooting icon.
- Tap on the View All link.
- Right-click on the Blue Screen Troubleshooter option.
- Select Run as Administrator.
- Click Advanced.
- Tick the box next to the Apply repairs automatically option.
- Hit Next to proceed.
- The BSOD troubleshooter will now begin identifying what’s causing BSOD problems. If it detects any, follow the on-screen instructions. Otherwise, tap on the View detailed information section to read the report.
Solution #4: Scan your system for damaged or corrupt system files
You may perform an SFC scan to fix any corrupt system files that are causing the BSOD error. Here’s how:
- Press the Windows key to launch the Start menu.
- Into the search field, type cmd. Right-click on the top-most result and select Run as Administrator.
- Enter your administrator password.
- Into the command line, input the sfc /scannow command and hit Enter.
- Wait for the scan to complete. Hopefully, it resolves the BSOD error.
Wrapping Up
We may have properly outlined and discussed everything about BIOS cache or shadowing, but it is important to understand that committing a mistake in the BIOS or changing some options may result in more issues. So, in case you are not confident enough, do not hesitate to get in touch with your device’s tech support.
We hope this post helped you better understand what BIOS shadowing or cache is. We also hope that you were able to understand how computers work at the hardware level. Now, we’d like to hear your thoughts about this post. Let us know in the comment section!
Disclaimer: The instructions provided in this article are for informational purposes only. Making changes to the BIOS or other system settings can be risky and may lead to further issues if not done correctly. Consult with a professional or your device’s technical support if you are unsure or need assistance.