Sometimes, Mac users may encounter the “The application is not open anymore” error message. This error message typically occurs when using native Apple apps like Steam, Finder, and Preview, but it can also occur when using third-party apps. Despite being an unfamiliar error, it’s important to address it to ensure that your apps are running smoothly.
The “The application is not open anymore” error on Mac brings confusion to the user whenever it pops up. This error notification includes the name of the application that stops responding along with the following message:
The application “x” is not open anymore.
However, you can see that the app’s window is still open. Because of this, users are not able to use the application any longer. This error is not really limited to a specific application. Rather, it can happen to any application on your Mac, native or not. The most annoying part of this error is that when you get the notification, the said app does not close but remains open instead. You are stuck with the hanging app until you force quit it or restart your system.
Pro Tip: Scan your Mac for performance issues, junk files, harmful apps, and security threats
that can cause system issues or slow performance.
Special offer. About Outbyte, uninstall instructions, EULA, Privacy Policy.
What actually happens is that macOS thinks the affected application is no longer open even though the app stays open in the background. The error message pops up when the app that you are trying to access becomes unresponsive.
Despite the error notification, the app actually appears as though it’s open, even though you can no longer use it. You might see a dot beneath the shortcut in the Dock (which indicates that the app is running) or it may still have open windows. However, you are unable to use it. If this occurs with the Preview app, it means that you can’t open PDFs, screenshots, or other images anymore.
When third-party apps show the “The application is not open anymore” error on Mac, users can fix the issue by themselves using basic troubleshooting procedures.
But in some cases, the problem seems to be persistent and your Mac is forced to restart every single time. If this is the case, the problem might be associated with an operating system bug. If this happens to you, make sure that your Mac is up-to-date.
This article explains how to deal with this error and get your apps working again. We’ve even included steps you can take in case this issue keeps cropping up again and again.
What Causes “The application is not open anymore” Error on Mac
The “The application is not open anymore” error on Mac is a weird yet common problem. However, the problem is no rocket science. When an app freezes due to instability or unresponsiveness, the ‘”The application is not open anymore” error might arise. Despite the app not running in the background when it is stuck, the Dock and Finder icons might continue to indicate that the app is open. When this happens, the user gets the error “The application is not open anymore” error on Mac when they try to open that particular app using the Dock shortcut or the Finder window.
As mentioned earlier, it doesn’t take a lot of effort to get rid of the “The application is not open anymore” error. There are only a few steps, which involves quitting the involved app and starting from the scratch. However, if there are some open processes you were working on, you might lose your progress if the auto-save feature isn’t turned on.
One of the main reasons why an app becomes unresponsive is the corruption of the application files, often due to viruses. To avoid this, keep your antivirus or antimalware programs updated at all times.
Hardware and software malfunctions can also contribute to this error. This can be resolved by restarting the application in question or restarting your Mac. Re-launching an application or macOS refreshes the file system and should get rid of any errors. This guide will take you through simple steps you can follow to troubleshoot “The application is not open anymore” error on Mac.
However, before you proceed, it is important to determine whether the “The application is not open anymore” error on Mac just froze up or crashed. There is a huge difference between how your app shuts down. When the app stops working unexpectedly on its own, it’s known as a crash. But when the app starts up but gets stuck, it is known as hang or unresponsive.
This distinction is critical as your system logs in the error messages using the application console. To check, you can always open up a session using the console utility. Follow the steps below:
- Click File Menu > New System Log query.
- Create a name for the query, for example app crash.
- Click on the message that contains pop-up menus and configure your filter options.
- Set the pop-up menus to Message and Contains, then enter crash in the right-most field.
- Using these queries, you can scour the console log to find messages that indicate an app crashing or not responding to know more details.
- If your app is showing a lot of crash messages, your best option is to uninstall and reinstall it.
How to Uninstall and Reinstall a Problematic App
If you followed the steps above and determined that your application is crashing not because of any hardware issues or resource-related issues and extension-related issues, the best course of action would be to uninstall the third-party app, delete all its files, and then reinstall it from the app store.
If you are trying to uninstall the app, it is not recommended to just drag the app to trash. You need to follow the app developer’s uninstall guidelines to successfully remove the program and all its associated components from your Mac.
How to fix “The application is not open anymore” error on Mac
In this guide, we’re going to share several tricks that you can use to quit even the most stubborn of apps. The next time you encounter this “The application is not open anymore” error, you’ll know exactly what you need to do in order to fix it.
Fix #1: Force Quit the app
Keep in mind that macOS can only force quit applications that it detects as being open. So don’t be surprised if you don’t find the misbehaving apps in the ‘Force Quit’ menu. But since this is the easiest method to fix the error, it’s always worth a shot.
The first thing that you need to do whenever you encounter the above error message is to force quit the application. Since the app has frozen or has become unresponsive, you won’t be able to close it as you would normally close other apps. Therefore, force quit is your only option to kill the app. There are several ways to force an application to quit and we listed down the most popular methods below.
Using a Keyboard Shortcut
The easiest way you can force quit an application is to use the keyboard shortcut. Follow the steps below to do this:
- First, press the Command + Option + Escape keys on your keyboard together.
- This should bring up the Force Quit Applications window.
- Select the app that is unresponsive and then click the Force Quit button at the bottom.
- This will close the app immediately.
Force Quit from the Dock
Another way of forcing an app to quit would be via the Dock. Here’s how you can do this:
- On your Dock, hold the Option key, then right-click on the app that is not responding.
- This will bring up a list of options.
- From the list, choose the Force Quit option.
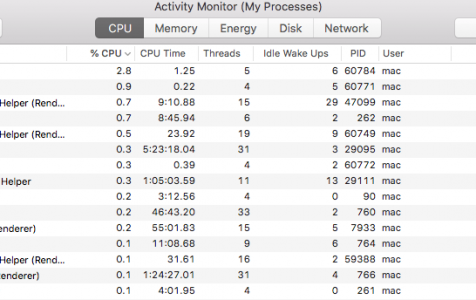
Using Activity Monitor
 Finally, if the above steps do not work for you, you can check the Activity Monitor to close a problematic app. To do this, follow the steps below:
- Open Activity Monitor located in /Applications/Utilities directory. Alternatively, you can also search for the app using Spotlight. To do this, press the Command + Space keys. Then, search for Activity Monitor and launch it.
- Once Activity Monitor has opened, find the application that is not responding and then click the X button at the top-left corner.
- Click the Force Quit button on the pop-up dialog box.
Fix #2: Reboot Your Mac.
Rebooting your Mac resets all critical system files and resolves all errors because all application files are restored in their normal, fault-free state. A soft reboot is ideal since it does not cause errors to your files or cause you to lose data. To reboot:
- Go to Menu > Shut Down.
- Uncheck the Reopen windows when logging back in box.
- Click Shut Down to confirm and let your Mac shut down completely.
- Restart your Mac after 30 seconds.
Fix #3: Force Reboot Your Mac
If force quitting the application does not fix the issue for you, then, you will have to force reboot your Mac to be able to use the application again. It is important to note that force rebooting will result in losing any unsaved files so make sure that you close any applications that are running beside the culprit one. The procedure is the same for all Macs, just the power button is located differently. With that said, follow the instructions below to force reboot your Mac.
- To force reboot, hold down the Power button of your Mac until the screen goes black.
- Once the system has powered off, wait for a few seconds.
- After that, hit the Power button again to turn on your Mac.
- In case you are asked to open apps, just click Cancel.
Fix #4: Clear the Application’s Container Folder.
To clear the Application Container folder, you can do as follows:
- Go to the Finder window and then choose Go > Go to Folder.
- Here type the path: ~/Library/Containers. and hit Go.
- Copy the file and paste it outside of the Library/Containers folder.
- Now, delete the applications’ original folder.
- Finally, launch the application again and see if the issue has been resolved or not.
Fix #5: Use Safe Mode
As it turns out, you can use the safe mode to launch the application and then perform a restart to fix the issue. This has been reported by a user who was facing a similar issue. Safe Mode boots your Mac with only the required apps running in the background. To boot into safe mode, follow the instructions below:
- Power off your Mac.
- Once powered off, wait for a few seconds. After that, press the Power button.
- Now, while the Mac is starting, press and hold the Shift key immediately. Some Macs play a startup sound, that is when you hold the shift key.
- Then, once you see the gray Apple logo along with the progress indicator, let go of the Shift key.
- If you do this correctly, your Mac should’ve started in Safe Mode.
- Now, launch the application that was facing the issue. After a while, restart your Mac normally.
- See if that fixes the issue.
Fix #6: Remove your Preview preferences
If you still get the same error message, you may need to remove some of your preference files.
These preference files on your mac hold the startup and permission-related information associated with the app and the user.
The preference files are available for all the Apple apps that you run on your MacBook. Typically, when Apple apps are crashing or not working correctly on your MacBook and you have already tried the “Safe Mode” to no avail, you can recycle the associated preference files.
Make a backup of your Mac first using Time Machine. These are small files that macOS automatically creates to store your settings for each application. You can usually remove them without losing any data or causing problems, but we recommend you backup your Mac first just in case.

Follow each of the suggestions below, testing the problematic again after each one.
We advise you to move the preference files to a new folder on your Desktop for safekeeping. That way you can always put them back if something goes wrong. If this works and your issue is fixed, go ahead and delete those preference files.
To remove the app’s preferences, follow the instructions below:
- Open Finder, then from the menu bar select Go > Go to Folder.
- Type the following location and click Go: ~/Library/Preferences.
- Look for the files with the app’s name in the filename. For example, if the Preview app is unresponsive, look for the following plist files: com.apple.Preview.plist.
- Move the highlighted preferences file to your Desktop for safekeeping.
- Reboot your Mac and test Preview again.
- If the error persists, repeat the steps above for each of the following files:
- ~/Library/Containers/com.apple.Preview
- ~/Library/Containers/com.apple.quicklook.ui.helper
- ~/Library/Preferences/com.apple.Preview.LSSharedFileList.plist
- ~/Library/Preferences/com.apple.Preview.SandboxedPersistentURLs.LSSharedFileList.plist
- ~/Library/Saved Application State/com.apple.Preview.savedState
Fix #7: Update or reinstall macOS
 Hopefully, that’s all you need to resolve the ‘“Preview.app” is not open anymore’ errors. But if you’re still experiencing problems, there might be a bug in your operating software. You can fix this by updating or reinstalling macOS.
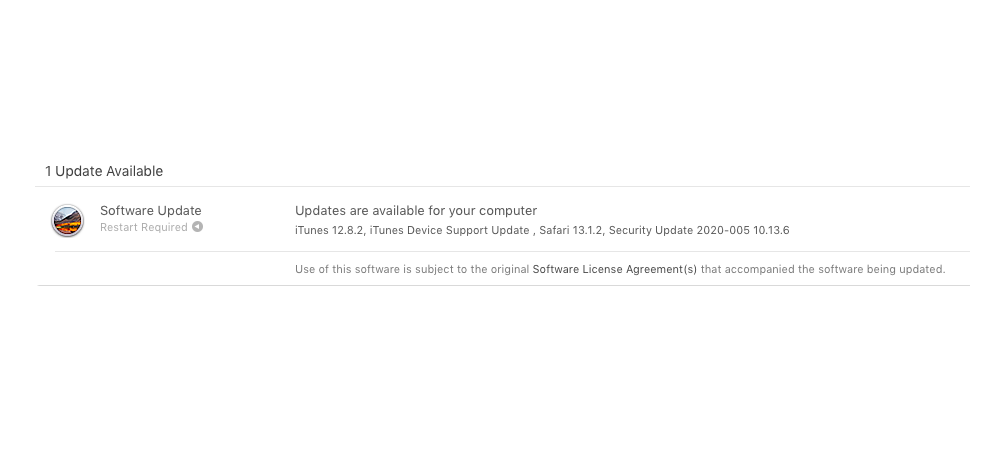
Apple regularly releases small updates to macOS. We suggest you update your Mac to the latest version of macOS first. Apple frequently releases patch updates to fix bugs like this, but you can’t benefit from them if you don’t keep your machine up-to-date.
If you’re already running the latest version of macOS or if an update doesn’t solve anything, you need to reinstall macOS using Recovery Mode. This shouldn’t affect your data — although we recommend you back up your Mac first anyway. Reinstalling macOS rewrites every line of code in the operating software on your Mac.
To update to the latest release of macOS, follow the instructions below:
- Connect your Mac to a working Internet connection.
- Go to System Preferences > Software Update to check for new updates.
- Download and install any updates your Mac finds.
To reinstall macOS, follow the steps below:
- If you haven’t already, make a new backup using Time Machine.
- Use the following instructions to boot your Mac into Recovery Mode:
- Go to > Shut Down and confirm you want to shut down your Mac.
- Wait 30 seconds for your Mac to fully power off.
- Briefly press the power button, then immediately hold Command + R.
- When the Recovery Mode screen appears, click Reinstall macOS.
- Follow the on-screen prompts to complete the macOS reinstallation.
Fix #8: Check the Extensions for Third-Party Apps.
If the app that is crashing or freezing is a third-party app, you may want to check out the app extensions or plug-ins. Try to turn them off one by one to locate the extension that is the culprit.
We have seen this issue with Safari extensions in the past where third party app extensions have caused heartaches.Folks that use third party apps such as Send later with their Mail have sometimes seen their Mail crash. Usually, the problem is that of an older version of the plug-in.
Once you update the third party app to the current version, the crash issue is resolved. The best way to rule out extension/plug-in issues that may be causing your app to crash is to run an etrecheck. This is very popular software that is available free to you and it can help you diagnose numerous issues with your Mac.
Once you have completed the etrecheck, look at the report and try to locate processes that are not loading or failing.
Tips To Minimize App Freezes and Crashes on Your Mac
Although there is no one single antidote to prevent apps from freezing or crashing, you can still take regular maintenance steps to minimize the chances.
- Check for App Updates and make sure to upgrade to the latest version using your Mac App store. This is especially important for users who have blocked the auto-update setting on their MacBook
- Use the Disk-Utility tool on your Mac and regularly check for problematic disk permissions and fix the related issues.
- Empty your application caches on a regular basis. Turning on your MacBook using the Safe mode sometimes clears up problematic caches.
- Defragment your hard disk on a regular basis. You can use one of the numerous third-party utilities available to do this.
- Run Etrecheck and consider Upgrading your memory or MacBook if the Etrecheck reports poor performance on a regular basis. This is especially true if you have an older unit with 4GB memory and have a large number of apps running on it
Summary
We hope that you found these tips helpful. In most cases, the main reason for your apps crashing regularly on your Mac is due to either corrupt user accounts/permissions or a third party app that has not been updated following a macOS upgrade. By following the regular housekeeping tasks listed above, you can minimize some of the problems from happening on your Mac.