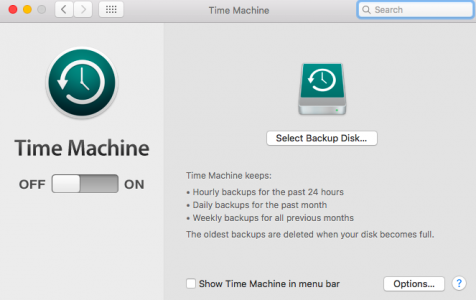
Mac’s built-in backup tool, Time Machine, is the most convenient way to keep your files safe. Set it up once and it runs in the background, creating copies of your files every hour. Time Machine runs quietly, and you may only notice it when your Mac slows down.
Sometimes, too, problems like “.sparsebundle is already in use” happen, leaving users with no clue as to what happened or what caused the error.
This guide will discuss what /Volumes/Data/Name.sparsebundle error is, what causes it, and how to fix this issue.
What Is ‘.Sparsebundle Is Already in Use’ Error?
This error happens when Time Machine assumes that the backup process is still running, even though it has already stopped for some reason. The error seems to occur randomly, but several users have noted that the problem occurs when the device is left overnight and switches to sleep mode to save energy. The error can also happen when the computer restarts after freezing.
Pro Tip: Scan your Mac for performance issues, junk files, harmful apps, and security threats
that can cause system issues or slow performance.
Special offer. About Outbyte, uninstall instructions, EULA, Privacy Policy.
Here are some of the common notifications associated with the Time Machine error:
- Time Machine couldn’t complete the backup to “name of the drive”/
The backup disk image “Volumes/TimeMachineBackup/(name of the drive).sparsebundle” is already in use.
- Backup has failed.
The backup disk image “/Volumes/Data/(name of the drive).sparsebundle” is already in use.”
It is hard to determine exactly what causes this error, but based on what we have gathered from online reports, the “.sparsebundle is already in use” error can be caused by an incompatible update, failed backup process, outdated AirPort Utility settings, incorrectly mounted backup drive, or Wi-Fi connection problems. It is difficult to determine what the exact root of the problem is, so the only way to fix this is to try every method available to see which one resolves the error.
How To Fix Time Machine Error
Before you proceed with the solutions discussed below, it might be beneficial to start with some basic troubleshooting. Restart your computer to refresh macOS and remove any files that may be causing the Time Machine error. Consider using a professional Mac management tool, if necessary, to help optimize your computer’s performance. One such tool could be Mac repair app, but there are many others available that could equally meet your needs.
If these steps don’t work, then take a look at some of these fixes that have worked for other users and see whether they’ll work in your case as well.
Solution #1: Unmount Then Re-Mount Your Backup Drive.
If restarting your Mac does not resolve the error, try unmounting your backup drive first, then mounting it back again. The easiest way to unmount drives on Mac is by dragging the drive icon to the Trash or by using the Eject symbol in Finder. Afterwards, you need to disconnect the drive from your Mac, then plug it back again for your computer to automatically mount it.
However, if you don’t want to disconnect the drive physically, you can mount and unmount drives via Terminal. This method is a lot more convenient, especially if you’re using a big external drive.
To unmount an attached drive, launch Terminal, then type in the following command:
diskutil unmount (path to the drive)
To mount the drive, type in:
diskutil mount (path to the drive)
Once your backup drive is mounted once again, run Time Machine to check if the error has been resolved.
Solution #2: Rename the Backup Drive.
One of the common reasons why the “.sparsebundle is already in use” error happens are corrupted backup processes. Renaming the hard drive forces Time Machine to prompt you to choose a new backup drive since it can no longer locate the previous one.
To rename your hard drive, follow these steps:
- In Finder, click Go > Computer. This will show you the different drives you have on your Mac.
- Choose the disk you want to rename. In this case, we want to rename the disk you are using as the destination drive for Time Machine.
- Right-click on the disk, select Get Info.
- Expand the Name section and type in the new name you want to use.
- Hit Tab once for the change to take effect, then close the window.
- Launch Time Machine and select your renamed drive when prompted to choose the backup disk.
You might need to double-check your Time Machine settings to make sure that they have not been reset.
Solution # 3: Reset File Sharing Options on Airport Utility.
If you’re using Airport Utility to manage your Wi-Fi networks, you might need to enable the file sharing option to fix this Time Machine error. To do this:
- Launch Airport Utility by clicking its icon on the Dock or searching for it via Spotlight.
- Double-click on Time Capsule, and choose Edit.
- Click on the Disks tab.
- Uncheck Enable file sharing, then click Update.
- Tick off Enable file sharing, the click the Update button again.
Your Time Machine should now be running just fine after resetting the file sharing option.
Solution #4: Roll Back Changes via Time Machine.
If the error appeared right after you installed an update, you can use your Time Machine to revert the changes and go back to a time when everything was working fine.
To do this:
- Restart your computer and hold down the Command + R keys until you see the Apple logo or a spinning globe on the screen.
- When you see the macOS Utilities window, select Restore from a Time Machine Backup.
- Click Continue.
- In the Restore Your System window, click Continue once again.
- Select the most recent backup of your hard drive, then click Continue.
- Follow the on-screen instructions to complete the process.
Once the updates have been uninstalled, check if the Time Machine error persists.
Summary
Having a working backup process is important because we don’t know when computer disasters might happen and lead to data loss. We hope that this guide has given you an idea or two on how to fix your Time Machine error and get your backup system running smoothly again.