Are you getting the error “The Device Is Being Used by Another Application” on Windows? Then you have come to the right place. In this article, we will discuss what this error is about, what causes it, and some solutions that worked for many affected users. We will also share tips and hacks on how to avoid this error in the future. So, read on.
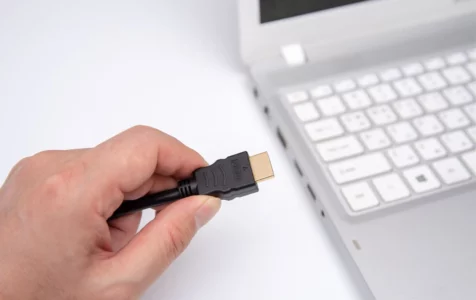
According to some affected users, the “The Device Is Being Used by Another Application” error appears while trying to use HDMI cables to connect their devices to an external display. This only suggests that the error may have something to do with the HDMI cables.
It is worth noting, though, that the error isn’t only triggered by a problematic external component. In some cases, it can show because of issues with audio drivers or other system files.
Expert Tip: For smoother PC performance, consider using a PC optimization tool. It handles junk files, incorrect settings, and harmful apps. Make sure it's right for your system, and always check the EULA and Privacy Policy.
Special offer. About Outbyte, uninstall instructions, EULA, Privacy Policy.
Now, this error does not only show on Windows 10/11 devices. It can also surface on Windows 7 or Windows 8 devices. And it usually comes with this complete message, “The device is being used by another application. Please close any devices that are playing audio to this device and then try again.”
To better understand this error message, let’s first define HDMI.
What Is HDMI?
High-Definition Multimedia Interface or HDMI for short provides a platform or interface between video and audio sources like video display devices and other devices like video monitors, HD televisions, video projectors, digital cameras, Blue-ray players, and camcorders.
Although HDMIs come in different versions that have identical connectors, they each have different capabilities and features. Also, the newer versions are compatible with the older versions, so you may need to use a new one to be able to take advantage of the latest features.
HDMIs are widely used if you want to watch clips or videos on a huge screen. They are also used when connecting multimedia devices to a computer.
While HDMIs play a number of functions, they may also come across errors. Sometimes, users will not hear any audio while using these HDMI cables. Others simply get errors like the “The Device Is Being Used by Another Application” error message.
So, what is this error message and what triggers it to appear?
What Is “The Device Is Being Used by Another Application” Error in Windows
From the error message itself, you will pretty much have an idea of what it is all about. It tells you that the HDMI device cannot be used because it is currently in use by another application.
When you see this error, you may be advised to close any device that is playing music or audio. And then, try to perform the same action again.
There are many possible causes for this error. We’ll share them with you in the next section.
What Causes “The Device Is Being Used by Another Application” Error in Windows
The main reason this error appears because the device is currently in use by another application. However, there are other reasons, too. We’ve listed them below.
- Faulty Driver – If you have a faulty audio device driver, then it is likely that you have identified the culprit. In a lot of cases, the error has been resolved by rolling back to a previous driver version or by updating it.
- Incompatible Drivers – Sometimes, if you install incorrect or incompatible drivers, the error message will show.
- Problematic Hardware – Are you using a new HDMI cable? Perhaps it may be causing the error. The cable might not be compatible with your Windows device.
- Malware Infection – It is possible that malware entities have infected your system and messed up important system processes.
How to Resolve “The Device Is Being Used by Another Application” Error in Windows
Regardless of what’s causing the error, know that it can be resolved in just a few things. But before you do anything, you might want to consider using the in-built tools that Microsoft has provided. One is the Troubleshooter utility.
Here’s how to use it:
- Press and hold the Windows + R keys to launch the Run utility.
- Type the control.exe /name Microsoft.Troubleshooting command and hit Enter.
- Select Hardware and Sound.
- Click the Playing Audio button.
- Hit Next.
- Now, wait for the troubleshooter to finish scanning your system for any problems. Once it is done, it will tell you what device is causing the issue. Then, select Next.
- Follow the additional on-screen prompts.
- In the end, you will be told what settings need to be changed to fix the problem.
If this basic troubleshooting method doesn’t work, proceed with the solutions below:
Solution #1: Allow Apps to Take Control
If you see any error, the first thing you should do is to investigate further. Find out what the error message is telling you. It should give you a hint on what to do.
As for the case of the “The Device Is Being Used by Another Application” error, it’s clearly telling you that the device is still in use by another application. So, you need to check other apps that might be using the sound component. After identifying it, turn off the option that allows other programs to take control of your device. That should fix the problem.
Basically, what you will do is find the application that is using the audio device. And then, close the application. After that, turn off the option that allows other programs and apps to take control of the device.
For a step-by-step guide on what to do, refer to the instructions below:
- Press and hold the Windows + R keys.
- Type sndvol and hit the Enter key.

- At this point, you should see all the apps that using the audio device. Close them. You can do this by pressing the Ctrl + Shift + ESC keys simultaneously to open the Task Manager. From here, select the apps that are using the audio device and hit the End Task button. Repeat the steps for all apps that are using the audio device. It is worth noting that if there are no devices listed, then skip this step and proceed to the next.
- Right-click on the speaker icon in the notification tray and choose Playback Devices.
- Now, select your audio device and right-click on it. Make sure you select the device that has no problem.
- Go to the Advanced tab.
- Untick the Allow applications to take exclusive control of this device option.
- Hit OK to save your changes.
- Restart your computer and check if the problem is fixed.
Solution #2: Restart the Audio Service
Oftentimes, restarting the Audio Service of Windows will fix the problem. Don’t worry because this is such an easy solution. All you have to do is follow these steps:
- Press and hold the Windows + R keys.
- Type services.msc command and hit Enter.
- Now, find and double-click Windows Audio.
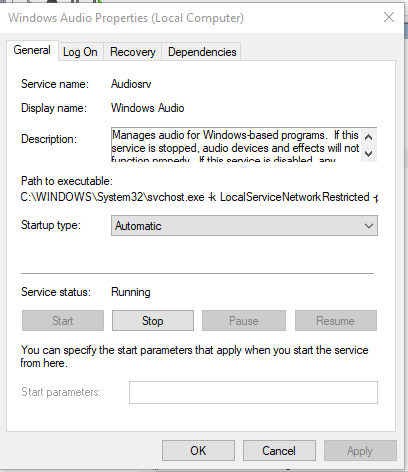
- Hit the Stop button under the Service Status section.
- Wait for a couple of seconds before starting the service once again.
- Hit the Start button.
- Click OK to save the changes.
- See if the issue has been fixed.
Solution #3: Roll Back Your Drivers
If you have been using your Windows computer for quite a long time already, then chances are you have probably heard about device drivers. These are pieces of software that allow your Windows operating system to start, use, and control a hardware component. Simply said, they work like translators, enabling your operating system to ask the hardware components connected to your computer to do what you want.
For example, if you try to play a video on YouTube, you press the Play button on the video on YouTube’s website. The browser, which is the application, sends the request to your operating system. Your operating system already knows what to do. Aside from buffering the video using the network card and the graphics card to display the video, it will also ask the sound card to play the audio. Your operating system sends all these requests to the corresponding drivers.
Usually, these drivers are already installed on your operating system. Microsoft has already bundled your operating system with an extensive library of device drivers. So, when you connect a new hardware component to your Windows computer, your operating system can detect it and locate the appropriate driver in the library. If it finds one, then it will be installed, and you will be asked to reboot your computer so you can enable and use the driver.
While these drivers play a critical role in your operating system, they are not without a fault. They too encounter errors. For instance, if you have just recently installed a sound device driver, you may encounter “The Device Is Being Used by Another Application” error. This isn’t uncommon because compatibility issues often cause your system to misbehave.
In this case, rolling back to a previous driver version can solve the issue. Here’s how to do it:
- Press and hold the Windows + R keys.
- Input devmgmt.msc into the text field and hit Enter.
- Double-click on the Sound, video, and game controller section.
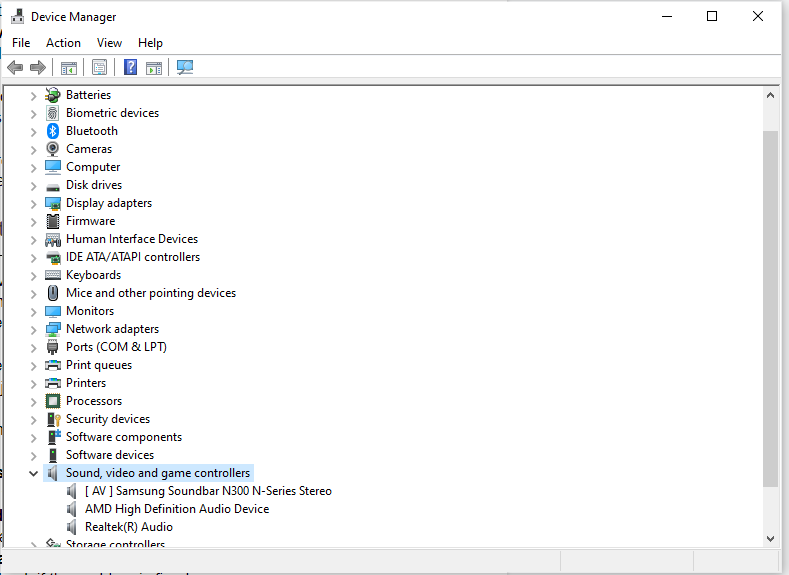
- Find your audio device and double-click on it.
- Go to the Driver tab.
- Select the Roll Back Driver option and follow the on-screen prompts. Note that if the button is greyed out, then it suggests that it isn’t possible to revert to the previous version.

- Restart your computer after reverting to the previous driver version.
- Check if the problem has been resolved.
Solution #4: Uninstall the Latest Windows Update
We suggest that you only proceed with this step if you suspect that the issue is caused by a problematic Windows update. If you haven’t installed any update for quite some time, then there is no use in moving forward with this method. Otherwise, if you trust your gut feeling and you suspect that a faulty update has triggered the error, then follow through.
According to some affected users, the update that caused this error is the Windows update KB2962407. So, if you have installed it, just uninstall it and you should be fine.
To uninstall the recent update, here’s what you should do:
- Press and hold the Windows + R keys to launch the Run utility.
- Type appwiz.cpl into the text field and hit OK.
- Click the View Installed Updates link at the upper-left corner of the screen.
- Locate the update that you have just installed.
- Click on it and select Uninstall.
- Restart your computer and check if the problem is fixed.
Solution #5: Install the Windows Native Audio Drivers
If the issue persists, then you may consider using the native audio drivers of Windows. In case you don’t know, Windows has its native drivers. And most of the time, they are compatible with modern hardware components and they work pretty well.
Here’s how to use the native drivers of Windows:
- Press and hold the Windows + R keys.
- Input devmgmt.msc and hit Enter.
- Double-click on the Sound, video and game controller section.
- Find and right-click on your audio device driver.
- Choose the Update Driver Software option.
- Select Browse my computer for driver software.
- Click the Let me pick from a list of device driver on my computer option.
- A list of available drivers will then be displayed. Choose the High Definition Audio Device option.
- Hit the Next button.
- If prompted, confirm your actions.
- Restart your computer and check if the issue persists.
Solution #6: Install the Latest Windows Update
Ever wondered why you need to install Windows updates? Aside from the fact that it grants you access to the latest Windows features and keeps your computer protected against the latest strains of malware entities, these updates also fix the recently reported bugs and issues. Who knows? They also contain the fix to the “The Device Is Being Used by Another Application” error on Windows 10/11.
While most Windows devices already have the Windows Update utility set up to automatically install updates, you can also manually check for available updates. Here’s how:
- Go to Settings. You can access it by clicking the Start menu and then selecting the gear icon.
- While in the Settings window, select Update and Security.
- Click Windows Update.
- Select the Check for Updates option.
- Wait as Windows searches for any available updates. If an update is available, it will be automatically installed on your device.
- Once the update has been installed, restart your computer.
Solution #7: Scan for Malware
Malware entities are designed to harm your device and data, and there are many different types of malware entities, including Trojans, ransomware, worms, and viruses.
Every year, millions and millions of users fall victim to malware attacks. Your device is no exception.
Malware entities also work in different ways and they each have different capabilities. While some of them steal your personal information or slow down your computer, others disrupt your daily operations, affecting your system processes and corrupting your device drivers. This explains why you may be seeing the “The Device Is Being Used by Another Application” error on your computer.
Good thing that Microsoft has created an in-built security tool for your Windows 10/11 device. It’s called Windows Defender. Here’s how to use it to scan your computer for malware:
- Open the Windows Security settings.
- Go to Virus and Threat Protection and select Scan Options.
- Choose the Windows Defender Offline Scan option and hit the Scan Now button.
- Usually, it will take about 15 minutes to complete the scan. After that, your PC will restart.
- After your PC has rebooted, view the results of the scan. Go to Windows Security settings once again and go to Virus and Threat Protection.
- This time, navigate to Protection History.
- The Windows Defender tool will identify and automatically get rid of or quarantine any suspicious entity it sees.
Aside from Windows Defender, you can always use a third-party anti-malware suite to ensure your system is free of malware entities. You have plenty of options out there. Just make sure you download one from a trusted source to avoid exposing your computer to more harm.
Once you have removed any malware entity on your device, it is wise to take precautionary measures to keep malware entities at bay. Make sure you keep your system up to date as millions of malware entities are introduced every day. Also, do not click any link you see on suspicious emails. Most importantly, perform regular malware scans. Do not just scan your PC when you encounter errors.
Solution #8: Update Your Drivers
You must always keep your device drivers updated. Not only will it keep your computer running in optimal condition, but it will also help you avoid potential problems in the future.
However, manually update device drivers can be a harrowing process, not to mention quite daunting. But as long as you follow the instructions below, there should be no problem.
- Navigate to the Cortana search box and type device manager.
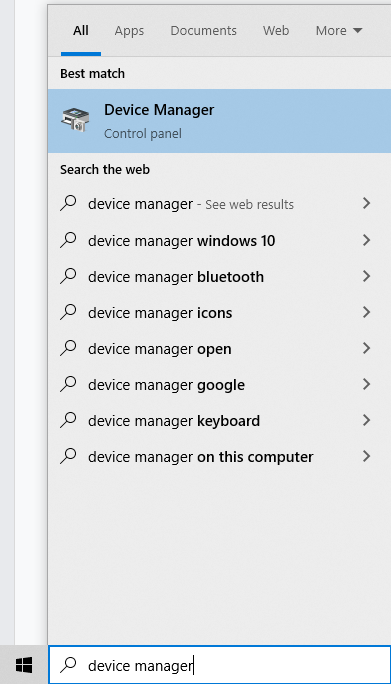
- Select the most relevant search result.
- Choose one category from the list of devices. Right-click on it.
- Click the Search automatically for updated driver software option.
- And then, click the Update Driver option.
- If Windows cannot find an available update for your driver, you may try looking for one on the official website of the device manufacturer. After that, follow their instructions.
Now, if you feel hesitant about taking these steps, you can always use a Driver Updater tool instead. These tools are generally designed to install a driver version that is compatible with your Windows 10/11 device. This will save you time from searching and help you avoid costly problems.
Solution #9: Check Your HDMI Connection
This solution is pretty basic, but many users disregard this solution thinking that the issue is complex. Double-check your HDMI connection. Be sure it did not slip out. If it didn’t, try to unplug then plug the cable once again. To ensure that the cable stays connected for long, invest in an HDMI lock.
Solution #10: Set Your HDMI Device as Default
You may also want to set your HDMI device as default. This solution has worked for some affected users. To do so, follow these instructions:
- Right-click on the volume icon.
- Choose the Playback devices option.
- Select Digital Output Device or HDMI.
- Next, click Set Default and hit the OK button. At this point, your HDMI sound output is set as default.
Solution #11: Repair Your Registry
The Windows registry is a database of information and settings for hardware devices, software programs, operating system configurations, and user preferences. If a program is installed, new file references will be added to the registry.
A problem in the registry may suggest a problem with your operating system. This can eventually result in having other issues while using your device like the “The Device Is Being Used by Another Application” error.
Normally, when the registry gets damaged or corrupted, the operating system needs to be reinstalled, which means you will be losing all your data. However, there are ways to fix registry issues without having to reinstall Windows from scratch. Just follow the steps below:
- Prepare a bootable media.
- Insert it into your computer.
- When prompted, press any key to start booting from the installation media.
- Wait for the installation process to be completed.
- From the Windows Installer menu, select Repair and follow the on-screen instructions.
To ensure everything in your registry has been fixed, you can also use a registry cleaner software program. Find a reliable software program that can restore your Windows registry to its default settings and work like charm.
Solution #12: Perform a System Restore
System Restore is a handy tool designed to protect and repair any issues with your computer software. This utility takes snapshots of your system files and registry entries and saves them as restore points.
You can use these restore points to bring back your computer to a state before the error message appeared. Here’s how:
- Go to Settings.
- Select Update and Security.
- Click the Recovery option.
- Navigate to the Reset This PC option and select Keep your files.
- Hit the Get Started button.
- Follow the on-screen instructions to complete the reset.
Solution #13: Uninstall Any Recently Installed Software
Did you just install a program before the error message appeared? It could be the culprit why you are experiencing your HDMI-related problem. It is likely to be interfering with your audio-related processes. Try to temporarily uninstall it and check if the error still shows.
Here’s how to do it:
- Go to the Start menu and type control panel into the search field.
- Select the program you recently installed.
- Hit the Uninstall button.
Solution #14: Remove Any Temporary Files and Folders
Temporary files and folders could be affecting your computer’s processing speed. As a result, apps respond slowly and HDMI-related issues may be triggered.
Thankfully, Microsoft has made it easier for Windows 10/11 users to get rid of these junk files. We have this Disk Cleanup utility that can be used to quickly remove temporary files and folders.
To use the Disk Cleanup utility, follow these steps:
- Go to the Start menu and input disk cleanup into the search field. Hit Enter to launch the tool.
- Next, select the Clean up system files option and choose the drive that you wish to clean up.
- Hit the OK button.
- Navigate to the Disk Cleanup tab.
- Tick the boxes of the file types you want to remove.
- Hit OK and confirm your action by hitting the Delete Files button.
Solution #15: Seek Help from Professionals
Finally, if you have done everything above but the error still shows, then your best and safest option is to seek help from people who know how to handle such a situation.
Take your computer, for instance, to the nearest authorized service center. If your computer is under warranty, then you may still have a chance to fix the problem without having to pay extra.
Otherwise, prepare to spend a few bucks for the repair costs. Note that the costs may go higher if the problem is hardware-related because they may have to get a replacement for the damaged component.
Wrapping Up
“The device is being used by another application” error message can be a frustrating issue to come across. And if you’re using your Windows PC and see this error, there are some things you might want to try before calling tech support or scheduling an appointment with the shop.
First of all, make sure that no other app is running in the background while you’re trying to run something else. This could also mean shutting down any apps like Skype or Facebook Messenger that aren’t currently in use but may have been left open on your screen for an extended period of time. Another possible solution would be restarting your computer if it has experienced one too many crashes recently.
Other solutions that are worth trying include allowing apps to take control, restarting the audio service, rolling back your drivers to the previously working versions, uninstalling the latest Windows update, and scanning for malware.
Did any of the solutions above resolve the “The device is being used by another application” error message? Let us know your thoughts about this article in the comments.