
While macOS is considered one of the best operating systems, it’s not immune to problems over time.
Among the many errors that Mac users see is the “no mountable file systems focusrite” message. So, what does “no mountable file systems” mean? And how do you fix it? We’ll discuss more of this “no mountable file systems” on Mac error here.
About the Mac “No Mountable File Systems” Error
Most of the time, when you double-click on a DMG (disk image) file, it should open and mount automatically. However, there are instances when it doesn’t work as expected. Instead, it throws the error message, “no mountable file systems” DMG error.
As the error message clearly states, your Mac cannot open or mount the DMG file because it isn’t accessible in the first place. It is likely that it has been corrupted, or your Mac has failed to recognize it.
Pro Tip: Scan your Mac for performance issues, junk files, harmful apps, and security threats
that can cause system issues or slow performance.
Special offer. About Outbyte, uninstall instructions, EULA, Privacy Policy.
What Causes the DMG No Mountable File Systems Error?
Based on the experience of many affected users, the following scenarios can trigger “no mountable file systems” on Big Sur, El Capitan, and other macOS versions:
- Corrupt DMG File – It is likely that the DMG file is corrupt. In some cases, it is possible that the DMG file cannot be downloaded properly.
- Incorrect File Format – Not all files are compatible with every macOS version. The new files won’t work with older macOS versions, while the old ones don’t support the latest Mac operating systems.
- Corrupt Catalog File Nodes – A catalog file node keeps file type records and other information needed to access them. This file is system-generated. But sometimes, it gets corrupted for some reason. As a result, you may see the “no mountable file systems” on Mac El Capitan error.
How to Fix the “No Mountable File Systems” Error
Now that you understand what triggers this error message, let us share with you how to fix the “no mountable file systems” on Mac error. We have compiled several fixes that users in similar scenarios have used to resolve the issue. Try these fixes and find out which one works best for you!
Fix #1: Restart Your Mac
If you’re still seeing the No Mountable File Systems error, restart your Mac and try again. A quick restart can sometimes fix the problem as it closes all unnecessary files and processes that are consuming your device’s resources.
To do this, click the Apple icon in the top left corner of your screen and select Restart from the drop-down menu. After your Mac restarts, try mounting the drive again.
Fix #2: Run Disk Utility
Another possible “no mountable file systems” on Mac fix involves checking your computer’s hard drive for errors. To do this, open Disk Utility. You can find it in the Utilities folder in the Applications folder.
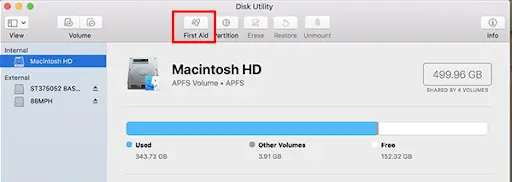
Once Disk Utility is open, select your hard drive from the list of drives on the left side of the window. Then click the First Aid tab and click Verify Disk. If Disk Utility finds any errors, it will fix them for you.
Fix #3: Check volumes and permissions
In some cases, the problem may be with your volumes and permissions. To check this, open Disk Utility and click on your hard drive. If you see an error message, it’s likely that your volumes and permissions are the culprits.
To fix this, open Disk Utility and click on your hard drive. Then click the First Aid tab and click Verify Disk Permissions. Once that’s done, try mounting your drive again. It should work this time!
Fix #4: Repair disk permissions
Another known “no mountable file systems” DMG fix involves repairing your disk permissions. This can be done by going to your Applications folder, then Utilities, and finally Disk Utility.
Once in Disk Utility, select your startup drive (typically named Macintosh HD) from the left sidebar. Then click on the First Aid tab and click Repair Disk Permissions. Finally, restart your computer and see if the problem has been fixed.
If you still have the No mountable file systems error message after all of these steps, try opening up Terminal on your Mac and running the following command: sudo bless -folder /Volumes/my_hard_drive_name/.
Fix #5: Repair disk permissions from Recovery Mode
You can also repair disk permissions by starting from Recovery Mode. To do this, start up your Mac in Recovery Mode by holding down CMD + R while it starts up. When the macOS Utilities screen appears, choose Disk Utility and click Continue.
In the Disk Utility window that appears, select your startup disk (usually named Macintosh HD) from the left side of the window. Click the First Aid tab, then click Verify Disk Permissions followed by Repair Disk Permissions. This will scan your disk for any permissions that are set incorrectly and repair them.
Fix #6: Create a new user account
If you’re still having trouble after trying the other fixes, you can try creating a new user account. This will help determine if the issue is with your user account or with the computer itself.
To create a new user account:
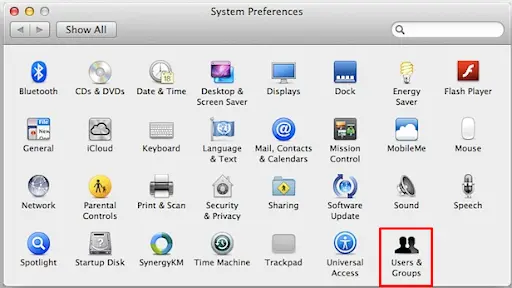
- Go to System Preferences and click on Accounts.
- Click the + sign to add a new user.
- Enter the new user’s information and click Create User.
- Log out of your current account and log in to the new one. Try mounting the drive again to see if it works.
- If it does, you can transfer your files over to the new account and delete the old one.
Note that any apps installed under the old account won’t work on the new one, so make sure you save them first.
To do this:
- Quit all open apps by going to Finder > Applications > Quit All Apps (Command-Q).
- Open Finder > Applications > Utilities > Disk Utility from the menu bar at top of screen.
- Select your startup disk and select Restore From Backup. Browse for an earlier backup file (the most recent should be listed first) and click Restore when ready.
Fix #7: Replace your hard drive with an SSD
You can also consider purchasing an SSD that is the same size or larger than your current hard drive. Once you have the SSD, you will need to format it for use with a Mac.
The next step is to install macOS onto the SSD. After the installation is complete, you will need to set up your computer’s BIOS to boot from the SSD. Finally, you will need to migrate your data from your old hard drive to your new SSD.
You can either do this by using Carbon Copy Cloner or Time Machine, depending on which option is best for you. After migrating your data, remove the old hard drive and then turn off your computer. Then turn your computer back on and enjoy having an error-free and super fast machine!
Fix #8: Download the DMG file again
Sometimes, the “no mountable file systems” error message appears because the DMG file is damaged or incomplete. In this case, you can try downloading the file again from the website where you originally got it. Be sure to download it from a trusted source, and check that the file size is correct.
However, there are times when damaged DMG files can be fixed by simply changing their extension to .ISO or .CDR, then mounting it using Disk Utility.
To do so, perform the following actions:
- Open Disk Utility and find the mounted drive in the left column.
- Click it, then select the Restore tab at the top of the window.
- Now, click the Open button under the Image text field on the right side of the window.
- Navigate to the ISO or CDR file, select it and click the Open button at the bottom of the window.
- Select Mac OS Extended (Journaled) as disk format and click the OK button at the bottom of the screen to start restoring your DMG file back into its original form.
Fix #9: Check the file system format
The most common reason for the “no mountable file systems” error is an incompatible file system format. In order for your drive to be readable by your Mac, it must be formatted as HFS+ or APFS.
If you’re not sure what format your drive is, you can check it by following these steps:
- Open Disk Utility and select the drive in the left sidebar. The format will be listed next to Format, which is near the bottom of the window.
- If the format is anything other than HFS+ or APFS, you’ll need to reformat the drive using Disk Utility before it can be used with your Mac.
- Click on the Erase tab at the top of the window and then select a new name for your disk from the drop-down menu below Partition Layout.
- Choose either Mac OS Extended (Journaled) or e xFAT from this list, depending on which file system your Mac uses.
- After choosing a partition layout, click Options underneath it to choose a formatting scheme like GUID Partition Table (GPT) if necessary.
- Click Erase when you’re done.
Fix #10: Use Outbyte MacAries
If you see the “No Mountable File Systems” error when trying to install macOS, it means that your computer’s startup disk is either corrupted or damaged. To fix this, you can use Outbyte MacAries.
This software will repair any corrupt or damaged files on your startup disk and get your computer up and running again. After repairing your hard drive, it should be able to read the installation files of a new operating system.
Fix #11: Mount the DMG file in Terminal
Here’s another way to mount the DMG file. For this fix, we will use Terminal. Here’s how:
- Open Finder, and locate the DMG file you want to mount.
- Right-click (or Control+click) the DMG file and select Open from the pop-up menu.
- A new Finder window will open showing the contents of the DMG file.
- Drag the app icon from the DMG window to your Applications folder.
- Double-click the app icon in your Applications folder to launch it.
- When you’re done using the app, unmount (eject) the DMG by clicking on its icon in the Finder and selecting Eject from the pop-up menu or by pressing Command+E while it’s selected in the Finder.
Fix #12: Repair the Corrupt DMG file
A corrupt DMG file is the most common reason for the “no mountable file systems” error. The best way to fix this is to use a utility like Disk Drill. This software will scan your DMG file and repair any errors that it finds. Plus, it can also recover any data that may have been lost due to corruption.
If you don’t want to go through all of that trouble, you can always try rebooting into Recovery Mode. To do this, turn off your Mac and then hold down Command + R as soon as you power it back up. From there, open Disk Utility from the Utilities menu and select Repair disk. You’ll be given an option for whether or not you want to overwrite files, so make sure you choose the correct one before starting.
Fix #13: Mount the file via the CMD line
If you’re getting the “no mountable file systems” error when trying to mount a drive in Disk Utility, it’s likely because the drive is formatted as exFAT.
You can fix this by opening the Terminal and using the following command: diskutil mountDisk /dev/disk#. This will force Disk Utility to try and mount the drive using the correct file system.
If you’re still getting the error, there may be something wrong with your hard drive. Make sure that your hard drive isn’t damaged or has lost its connection to your computer and try again.
Summary
If you’re getting the no mountable file systems error when trying to install macOS, there are a few possible fixes. First, try to restart your Mac and run the installation again. If that doesn’t work, try erasing your disk first using Disk Utility. If you still can’t get it to work, contact Apple Support for help.
Comment other fixes for the error message below!