Windows computers have traditionally offered built-in screenshot capabilities, but Microsoft has expanded our options. There are now multiple ways to capture screenshots on Windows computers. Let’s explore these methods individually below.
Take a Screenshot of Your Entire Screen
To take a screenshot of your screen, you have the following options:
1. The Snipping Tool
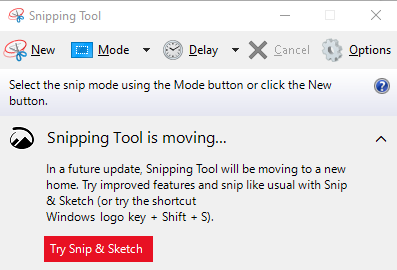
You’ve probably used this tool before. The Snipping Tool utility is the most popular way to take a screenshot of your screen. To use it, input Snipping Tool into the search box. From the search results, click on Snipping Tool to open the utility. Take a snapshot of your screen by clicking New. Drag the cursor to the area you want to capture. Lastly, save the screenshot.
Expert Tip: For smoother PC performance, consider using a PC optimization tool. It handles junk files, incorrect settings, and harmful apps. Make sure it's right for your system, and always check the EULA and Privacy Policy.
Special offer. About Outbyte, uninstall instructions, EULA, Privacy Policy.
2. Windows Key + Print Screen Button
By pressing the Windows key and the Print Screen button together, you can take a screenshot of your screen and save it to the clipboard. It will also save a screenshot file in the Screenshots folder.
3. Print Screen Button
Pressing the Print Screen button on your keyboard will save a shot of your current screen to the clipboard. To see it, use the paste shortcut (CTRL + V) on Microsoft Paint or Microsoft Word.
Take a Screenshot of an Active Window
If you prefer to take a screenshot of an active window, try any of these methods:
1. ALT + Print Screen
Pressing the ALT and Print Screen buttons together will save a screenshot of an active window to the clipboard. To view this screenshot, use the paste shortcut (CTRL + V) on Microsoft Paint or Microsoft Word.
2. The Snipping Tool
The Snipping Tool utility can also be used to take a screenshot of an active window. To do so, enter Snipping Tool into the search box. Click on Snipping Tool from the search results. Hit New to take a snapshot of an active window. Drag the cursor to the area of the active window. Save the screenshot.
It is worth noting, though, that the Snipping Tool can only capture the active window at the forefront. It cannot take a screenshot of a window that is fully or partially hidden.
For Windows 11 users, the older Snipping Tool is combined with the excellent Snip & Sketch tool from Windows 10, eliminating the confusion surrounding the previous screenshot tool in Windows. The combined screen-shooter for Windows 11 can be accessed by pressing Windows Key+Shift+S. This keyboard shortcut gives you the option to take a screenshot using a rectangular selection, freehand selection, window, or full-screen capture.
3. Using the Game Bar
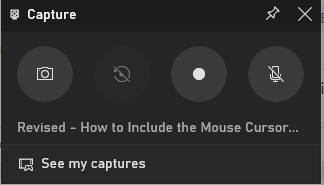
The Game bar can be accessed by pressing the Windows Key+G buttons. From there, a camera icon can be found in the Capture window. In a somewhat counterintuitive way, by tapping that, your screenshot is saved to the Videos/Captures folder under your main user folder. In the primary Windows Settings app, you can modify the target folder. (Alternatively, to avoid opening the Game bar, press the Windows Key+Alt+PrtScn shortcut.)
4. Use the Volume Buttons on Surface Tablets
Unless you have a keyboard attached, taking screenshots on Surface tablets differs from doing so on a PC. There is no PrtSc key on the on-screen touch keyboard.
To take a screenshot on the Surface Pro 8 and the majority of its predecessors, simultaneously press the Volume Up and Power buttons. You risk turning off the screen if you don’t press the buttons at the same time.
The same thing happens when you take a picture in this manner: the image is saved to your Pictures>Screenshots folder.
Older Surface tablets required you to simultaneously press the power button and a hardware Windows button, and some used the Fn+Windows Key+Spacebar combination on their attached keyboards. If you have a less well-known tablet model, you might need to experiment or look up the documentation. On the Dell Latitude tablet, you press the Power button and Volume Down buttons simultaneously. Additionally, opening the Snipping Tool on a Surface Pen requires double-tapping the Back button.
Take a Screenshot with a Mouse Pointer on Windows 11
Do you want to capture your screen with a mouse cursor? Unfortunately, the screenshot methods above won’t allow you to do so. Even the new Snipping Tool isn’t capable of getting that mouse cursor in the image. So, we listed a few options you can try below:
1. Steps Recorder
If you’re using Windows 11, you can use Windows 11’s Steps Recorder app. With Steps Recorder, a built-in Windows app, as well as many other third-party apps, you can take excellent screenshots that include the mouse cursor. Any of the apps requires a few extra steps beyond what a standard screenshot would require in order to take a screenshot that also includes the mouse cursor. Let’s look at how Steps Recorder can take screenshots.
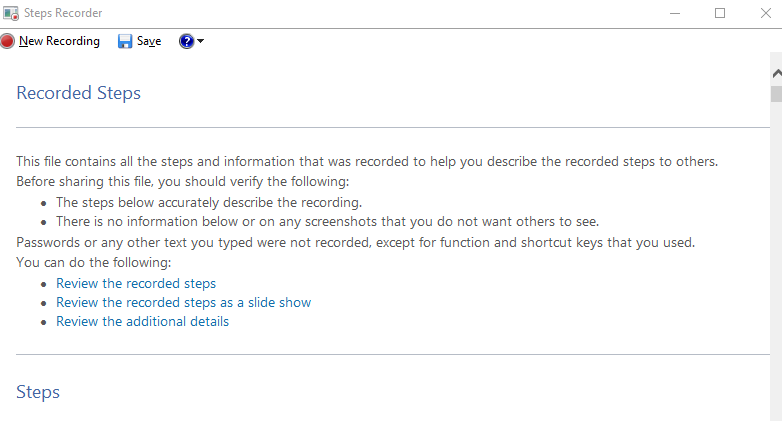
Windows 11’s Steps Recorder enables you to take screenshots of the actions you take and send them to Microsoft or another technician to describe any problems (if any) your PC is currently experiencing. It can help us get the screenshots we want with the mouse cursor included.
- To begin, click the Start button and type “Steps Recorder” into the search bar. Launch it. You will see a tiny Steps Recorder window. To start taking screenshots, click Start Record.
- Click on Stop Record once you have finished taking the desired screenshot.
- The list of screenshots will appear as Recorded Steps. To save them into a file, click the Save button and choose a location.
- The screenshots or recorded steps will now be saved in the location you specified as a zip folder. After the folder has been unzipped, double-click the .mht file to start it up. Internet Explorer will open the file.
- Browse the page, right-click the desired screenshot, and then choose Save picture as from the menu. Select a location for the file to be saved, then do so.
- The location you select will be used to store the screenshot with the mouse cursor you want to save.
2. Third-Party Apps
If you don’t feel like using the built-in screen recording app of Windows, you can install third-party screen recording apps to take a screenshot of your screen with your mouse cursor.
IrfanView
One of the most popular apps today which you can use to capture an image of your screen with your mouse cursor is IrfanView. This app works as an image viewer, organizer, editor, and converter program for Windows computers. It also plays audio and video files, as well as taking screenshots.
To use it to take screenshots, make sure you have it installed on your computer first. After that, launch the app and go to Options. Go to the menu bar and click Screenshot or Capture. A new window will now open. Select the Desktop Area – Current Monitor (Mouse) option. By default, CTRL + 11 are the hotkeys associated with screen capture. Hit Start to start capturing the screen with your mouse cursor. Hit the hotkeys to capture a screenshot.
Greenshot
Aside from IrfanView, there are other apps you can use to capture the mouse cursor in a screenshot. But they are mostly designed to show only the default look of a cursor. If that is fine with you, try Greenshot.
This app works the same way as IrfanView. Its only advantage is that it lets you move the cursor in the screenshot before you save it.
Share X
One of the well-liked choices for taking a screenshot of the mouse cursor on Windows is ShareX. You can schedule and edit screenshots using ShareX, a free and open-source screen capture program that comes with a wealth of practical tools.
Aside from the tools included for taking screenshots, ShareX also comes with useful tools like a color picker, a ruler, and even a decoder/encoder for QR codes. In contrast to the other apps on this list, ShareX also has a screen recording feature.
You can also include the mouse cursor in your captures with ShareX. In actuality, this function is turned on by default. To modify ShareX’s mouse cursor settings:
- Launch ShareX, then select Task settings.
- Make sure that the first option, Show cursor in screenshots, is enabled by clicking on Capture.
Next, you have a few choices for taking a screenshot with ShareX. After launching ShareX, select Capture. Depending on the region and method of capture, there are many options here. Select the option that best suits your needs, and then start taking screenshots. The ShareX keyboard shortcuts can also be used to take a screenshot.
Before you install any third-party app on your Windows 10/11 computer, please ensure you are downloading from a trusted source to safeguard your privacy and security. It’s also beneficial to use a reliable PC Repair tool to optimize your computer’s performance, even when taking loads of screenshots. This tool can be used to locate unnecessary files, remove them, and create more room for new screenshots.
Summary
There are many different ways to take a screenshot of your screen. But among all, the Snipping Tool is, by far, the most popular. Not only does it capture active windows and full screens, but it can also be used to take shots in freeform shapes.
While the Snipping Tool has many uses, it doesn’t have the ability to capture your screen with the mouse cursor on it. This is where other solutions, including third-party apps, can be helpful. Many of these apps, some of which require paid subscriptions, offer a range of additional features and functions, including the ability to capture the mouse cursor in screenshots. Depending on your specific needs and budget, these third-party apps could be an excellent supplement or alternative to the built-in Windows tools.
Which of these screenshot methods do you find easy to use? We’d love to hear your thoughts in the comments.
I suggest Microsoft update Snipping Tool to capture the mouse cursor.