
Microsoft releases Windows updates on a regular basis. However, according to reports, many Windows users have been unable to update their Windows 10/11 machines due to a specific install error code — 0x800f0988.
Recently, a number of users received error code 0x800f0988 while attempting to update their existing OS build. These types of errors usually occur due to some internal glitches and are easily resolved. All you have to do is go back to Windows Update and click Check for updates. The issue should be resolved immediately after that.
An update failure is usually easily repairable by Windows, and only very rarely does it necessitate human intervention. However, this is not the case with this error code.
Because there may be several issues preventing your system from being updated, you may need to perform more than one of the fixes listed below.
Expert Tip: For smoother PC performance, consider using a PC optimization tool. It handles junk files, incorrect settings, and harmful apps. Make sure it's right for your system, and always check the EULA and Privacy Policy.
Special offer. About Outbyte, uninstall instructions, EULA, Privacy Policy.
What Is the Windows Update Error 0x800f0988?
When users attempt to download and install new cumulative updates, their computers may display the error message:
“Updates Failed. There were problems installing some updates, but we’ll try again later.”
The users usually encounter the 0x800f0988 error code, but some may come across a different code such as 0x800f0984, 0x80073701, 0x80070643, or 0x800f0982. This is a generic Windows Update error message so a lot of things could have gone wrong.
As a result, Windows 10/11 is unable to install the most recent patch updates. Regardless of how inconvenient the problem is, there are several methods that can assist you in quickly resolving update error 0x800f0988.
In most cases, this error appears when installing cumulative updates for Windows. Several users have encountered this error when installing the optional cumulative update (KB4532693) for Windows 10/11 (version 1909 and 1903). This update was created specifically to address issues with the start menu, File Explorer not working, and other related issues. However, one unanticipated consequence was the problems that arose as a result of its implementation. That is the case with error 0x800f0988.
The Security Update, known as KB4579311, was also reported to trigger the Windows 10/11 update error 0x800f0988. Cumulative Update for Windows 10/11 v2004 is included in Patch Tuesday. There have been several reports that the update fails to install with the error code 0x800f0988.
Aside from these cumulative updates, KB4528760, KB4534273, and KB4524147 have also been reported to cause this error.
What Causes Windows 10/11 Update Error 0x800f0988?
Many problems can occur when installing updates, and many users have reported the 0x800f0831 update error on Windows 10/11 and even Windows 11.
This is usually caused by corrupted update files, so removing and recreating them may help. Update error 0x800f0986 can be resolved by running the built-in troubleshooter.
However, this error can also occur due to more advanced causes such as file corruption, cache storage, and so on. The error 0x800f0988 typically occurs when one or more of the following conditions are met by your system:
- Corrupted or damaged Windows update components
- Insufficient storage in the WinSxS folder.
- Missing, corrupted, or damaged system files
- Incorrect system date and time
This guide contains several effective methods for resolving this error; simply try them one at a time from the top of the list until you find one that works for you.
How to Resolve the 0x800f0988 Windows Update Error
As is typical with Windows Update problems, the solutions can be quite extensive. The best approach is to assume every possible cause and try every possible solution.
As a result, we recommend that you try the solutions listed below in the order they appear. But before you try anything, make sure to optimize your PC by running a reliable PC Repair Tool such as Outbyte PC Repair. This app scans your computer for minor bugs, junk files, and other issues that might complicate the troubleshooting process. It is a useful maintenance app to keep your computer running in top shape and prevent common errors, such as 0x800f0988, from occurring.
Restarting your PC can also be a huge help. Try downloading the updates again after a reboot. Unplug any unnecessary devices, such as a USB flash drives or external HDDs, headphones, or printers.
There could be security software or a third-party antivirus interface on Windows Update that prevents it from installing. Disable or temporarily uninstall the antivirus software and, most importantly, disconnect from the VPN (if it is configured on your device) before checking for Windows updates.
Also, ensure that the drive where Windows is installed (typically the C: drive) has enough disk space to download and install Windows updates.
If the above steps didn’t help, proceed with the solutions below:
Solution 1: Download the Windows 10/11 Update Manually.
Microsoft allows you to download and install software updates manually on your computer. However, you must know the base number of the Windows update that needs to be installed, which can be found on your Windows 10/11 PC’s ‘Software Update’ screen. Here’s how to manually download and install Windows 10/11 updates:
- Launch your web browser and navigate to Microsoft Update Catalogue.
- Enter the Knowledge Base (KB) number in the top right-hand corner search bar and click Search.
- As shown, select the desired update from the provided list.
- Once you’ve decided which update you want to install, click the Download button.
- In the resulting window, right-click on the hyperlink and select the Save as option.
- Select the location where you want to save the installer with the .msu extension and click Save.
- Now, press the Windows + E keys at the same time to launch File Explorer and locate the downloaded file.
- Double-click the.msu file to open it.
- In the installer prompt, select Yes.
- Please keep in mind that the installation may take a few minutes to complete, after which you will receive a notification.
- After saving your unsaved data, restart your computer.
Solution 2: Run the Windows Update Troubleshooter.
If you continue to receive the error 0x800f0988, the Windows Update troubleshooter may be useful in resolving it. This is the official Microsoft tool for assisting Windows users in resolving all problems related to updates, so it should work for you as well.
Here’s how to run the WU troubleshooter:
- Using the Win + I keyboard shortcut, navigate to Windows 10/11 Settings.
- Navigate to Troubleshoot after clicking on Update and Security.
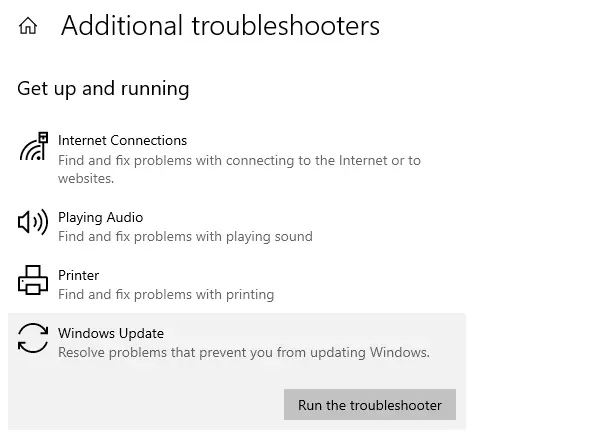
- Locate Windows Update and click on it, then click the Run the troubleshooter button.
- It will look for any pending restarts, start the diagnosis, and restart services such as BITS.
Note: Microsoft has changed the troubleshooter settings in Windows 11. If you are experiencing this issue on Windows 11, try the following instead –
- Select System by pressing Win + I.
- Click Troubleshoot > Other Troubleshooters in the adjacent right pane.
- On the next screen, you’ll see a Windows Update option; click the Run button.
After you have completed the troubleshooting process, you can proceed with the cumulative update, and you will no longer encounter the Windows update error 0x800f0988.
Solution 3: Run StartComponentCleanup.
Before we run it manually, let’s learn about the StartComponentCleanup task. The task was introduced in Windows 10/11 to clean up Windows components that are not in use on a regular basis. The operating system is expected to initiate it. When it does this, it will wait at least 30 days after installing an updated component before uninstalling previous versions of the component.
According to Microsoft, users can perform this task using either Task Manager or DISM. There is a distinction between the two approaches. The timeout is only for an hour when using Task Manager. It is possible that some of the cleanups will be skipped. When using DISM, updated components are deleted immediately, without the 30-day grace period, and there is no 1-hour timeout limit.
Run the StartComponentCleanup using Task Manager
- Press the Windows + R keys at the same time.
- To open Task Scheduler, type taskschd.msc and press OK.
- Navigate to Library\Microsoft\Windows\Servicing\.
- Select StartComponentCleanup, right-click it, and then select Run.
Wait until the process is finished, then check for updates and see if the Windows update error 0x800f0988 appears again.
Run the StartComponentCleanup using DISM
- Select the Windows icon.
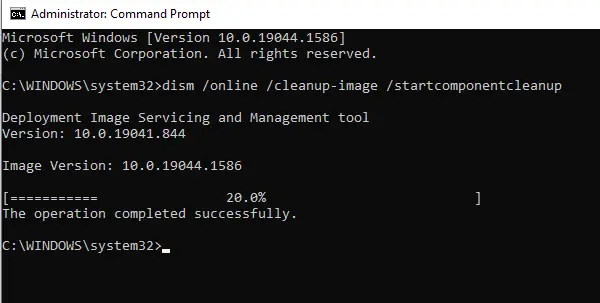
- Enter CMD, right-click it, and choose Run as administrator.
- Enter dism /online /cleanup-image /startcomponentcleanup in the command prompt window, then press Enter.
- Wait while the commands run, then restart your computer to see if the error 0x800f0988 remains or disappears.
The Switch/ResetBase command can also be used to remove all obsolete component versions from the component store. The command to do so is as follows: Dism.exe /online /Cleanup-Image /StartComponentCleanup /ResetBase and enter
Solution 4: Empty the Update Cache.
Emptying the update cache is one general method for resolving Windows Update errors. To resolve the Windows 10/11 Update error 0x800f0988, try emptying the update cache. To empty the update cache, simply rename the SoftwareDistribution and catroot2 folders, which contain files and signatures related to Windows Update.
To rename these two folders, follow the steps below:
- To open the Run dialog, press Win+R (the Windows logo key and the R key at the same time) on your keyboard.
- In the search box, type cmd.
- Press Ctrl+Shift+Enter on your keyboard to launch the Command Prompt as administrator.
- First, disable the Windows Update services – Background Intelligent Transfer Service (BITS), the Windows Update service, and the Cryptographic service.
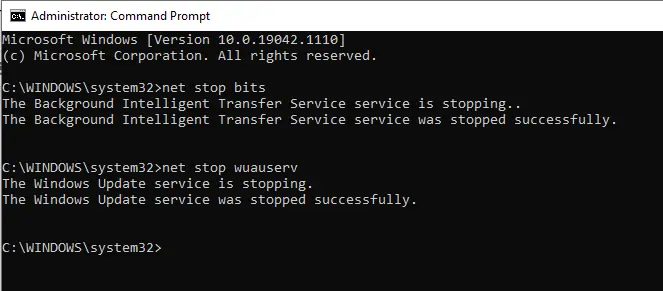
- Type the following commands to halt the services. After you type each command, make sure to press Enter.
- net stop bits
- net stop wuauserv
- net stop cryptsvc
- Second, rename both the SoftwareDistribution and the catroot2 folders. To do so, enter the commands listed below. After you type each command, make sure to press Enter.
- Ren %systemroot%\SoftwareDistribution SoftwareDistribution.bak
- Ren %systemroot%\system32\catroot2 catroot2.bak
- Ascertain that the folders have been successfully renamed. Navigate to C:\Windows to see if the SoftwareDistribution folder has been renamed to SoftwareDistribution.bak. Check C:\Windows\System32 to see if catroot2 has been renamed to catroot2.bak.
- Finally, restart the BITS service, Windows Update, and Cryptographic service. To do so, enter the commands listed below. After you type each command, make sure to press Enter.
- net start bits
- net start wuauserv
- net start cryptsvc
Solution 5: Uninstall Additional Languages.
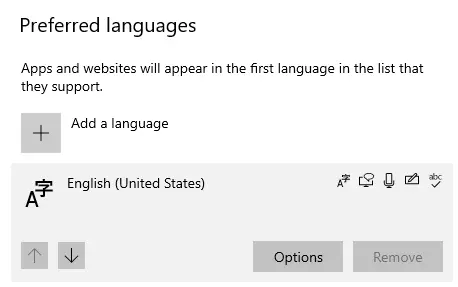
Microsoft has provided support for a large number of languages for ease of use due to the wide support base for Windows operating systems. However, there have been instances where additional installed languages have been the cause of error 0x800f0988.
End users discovered that removing all additional language packs fixed the error as a workaround. Simply follow the steps below to accomplish this:
- First, hold down the Windows key and press the letter I.
- This will open the Settings menu; from here, select Time & Language.
- Click Languages on the Time & Language screen that appears.
- This will open the Language menu; scroll down to your preferred languages, then click on Additional languages and select Remove.
- After you’ve removed the language(s), restart your system and check to see if error 0x800f0988 has been resolved.
Solution 6: Perform a Clean Boot.
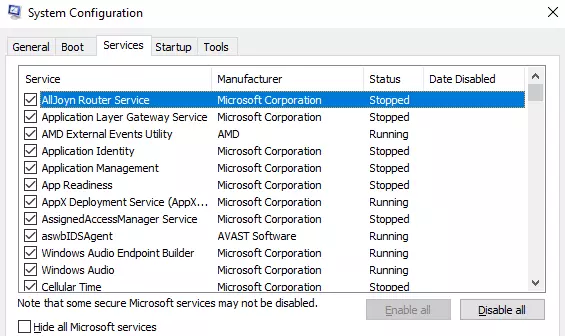
A clean boot of your computer may also be beneficial. If any third-party software interferes with the download and installation of Windows updates. Here’s how you do it:
- Enter msconfig in the search box.
- Go to the Services tab after selecting System Configuration.
- Disable all Microsoft services > Hide all Microsoft services.
- Turn off all Microsoft services.
- Go to the Startup tab > Open Task Manager > Disable all unnecessary services that are running.
- Check for updates and restart your computer.
Solution 7: Perform an In-place Upgrade.
If none of the fixes works, the last resort is to perform a repair install of Windows 10/11 with an in-place upgrade, which allows you to upgrade the current system to the same or a newer edition. Except for the installed Windows Updates, nothing will be lost with the in-place upgrade.
Summary
Don’t be alarmed if you open the Windows update history and notice that some updates failed to install with an error 0x800f0988. This is a common Windows Update error and it comes with various error codes, not just 0x800f0988. If Windows Update fails with the 0x800f0988 update error, follow the steps outlined above. One of these solutions will undoubtedly work on your machine to resolve the update error, and you will soon be receiving and installing updates on your PC as usual.