
Encountering the error message “Task image is corrupt or has been tampered with 0x80041321” indicates a corrupted scheduled backup task. The task service validates items before execution, and if Task Scheduler detects integrity or registry corruption, the tasks are marked as corrupted.
This error usually occurs when a scheduled backup task becomes corrupted. It can also happen when there are problems with the registry’s integrity or corruption. The good news is that there is a solution to this issue.
What Is the ‘The task image is corrupt or has been tampered with (0x80041321)’ Error?
The 0x80041321 error code indicates a problem with the Task Scheduler service. The message that appears is “The task image is corrupt or has been tampered with,” and it informs you that you have a corrupted scheduled backup task. The Task Scheduler service is in charge of scheduling, but you can try to prepare tasks without it because it uses the file system to store information. However, some of the tasks may not be recognized, and it is very likely to refuse running tasks that have been tampered with, resulting in the aforementioned message.
This error usually appears when you try to configure a backup of your Windows 7 operating system, and if you don’t fix it, you won’t get very far because Task Scheduler recognizes the image as corrupt and refuses to do anything with it, leaving you stuck and the image useless.
Expert Tip: For smoother PC performance, consider using a PC optimization tool. It handles junk files, incorrect settings, and harmful apps. Make sure it's right for your system, and always check the EULA and Privacy Policy.
Special offer. About Outbyte, uninstall instructions, EULA, Privacy Policy.
There are a few solutions to this problem, and they all involve either resetting the Task Scheduler task or deleting the image so that it can create a new, non-corrupt one and continue working. You can try any or all of the methods listed below; one of them will undoubtedly assist you in resolving your issue.
To resolve this error, use the Registry Editor to edit and repair the corrupted tasks, delete the schedule keys or the WindowsBackup file, delete the task from the Task Scheduler, or refresh the User Feed Synchronization.
But, before you try any of these potential fixes, double-check every option to see if they have the proper associations or if they are attempting to run a file that it shouldn’t. Additionally, make a system restore point so that you can undo any changes you make if something goes wrong.
Troubleshooting Methods for Windows Error 0x80041321
When you get the “The task image is corrupt or has been tampered with 0x80041321” error, the first thing you need to do is close everything and then restart your computer. Run a scan using Outbyte PC Repair to get rid of junk and corrupted files before trying to check the Task Scheduler if the error has been resolved. If the (0x80041321) error code persists, proceed with the solutions below.
Solution #1: Use the Registry Editor to fix corrupted tasks.

The first step in resolving the issue is to edit those tasks in Registry Editor and repair the corrupted ones in System32. Before you begin, keep in mind that because you are dealing with a backup triggered by the Task Scheduler, the entries for the tasks can be found in various locations.
To find the Task Scheduler, navigate to Task Scheduler Library > Microsoft > Windows > Windows Backup. The Registry Editor can be found by navigating to this directory: HKEY_LOCAL_MACHINE\SOFTWARE\Microsoft\Windows NT\CurrentVersion\Schedule\WindowsBackup\AutomaticBackup\
The Windows System folder is located in this folder: C:\Windows\System32\Tasks\Microsoft\Windows\WindowsBackup
Take note of the name of the task and make sure it is consistent everywhere.
Once you’re finished with that, proceed to the steps below.
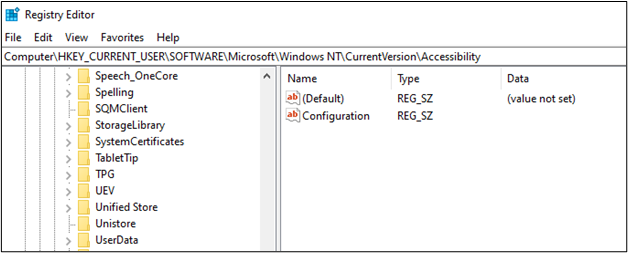
- To open the Registry Editor, press the Win + R keys to open Run, then type “regedit” in the field and press Enter.
- Navigate to the following key:Computer\HKEY_LOCAL_MACHINE\SOFTWARE\Microsoft\Windows NT\CurrentVersion\Schedule\TaskCache\Tree\Microsoft\Windows\WindowsBackup
- Take note of the GUID value in the task’s “ID” entry in the folder AutomaticBackup and Windows Backup Monitor.
- Then, from these locations, delete the task registry entries associated with the ID.
- You’ll find the task in one of these locations:
- HKEY_LOCAL_MACHINE\SOFTWARE\Microsoft\Windows NT\CurrentVersion\Schedule\TaskCache\Plain
- HKEY_LOCAL_MACHINE\SOFTWARE\Microsoft\Windows NT\CurrentVersion\Schedule\TaskCache\Logon
- HKEY_LOCAL_MACHINE\SOFTWARE\Microsoft\Windows NT\CurrentVersion\Schedule\TaskCache\Boot
- Make a backup of the corrupted task file. Go to: C:\Windows\System32\Tasks\Microsoft\Windows\WindowsBackup
- Locate the task(s) — AutomaticBackup and Windows Backup Monitor — and save them somewhere safe.
- Repair the corrupted task by deleting the identical task file from this folder: C:\Windows\System32\Tasks\Microsoft\Windows\WindowsBackup
The next step is to recreate the task from the temporary backup copy. You can import the tasks in one of two ways: by using Task Scheduler’s Import Task or via Command Prompt/PowerShell. Here are the steps:
Task Scheduler
- Navigate toTask Scheduler > Navigate to Microsoft\Windows\WindowsBackup.
- Select the Import task from the Action menu.
- Navigate to the saved files and import them.
Command Prompt
- Start Command Prompt with administrative privileges.
- Type in this command: Schtasks.exe /CREATE /TN <New_Task_Name> /XML <Xml_File_Name>
After you’ve created the tasks, run them manually to see if the error has been resolved.
Solution #2: Delete the Schedule keys from the Registry.
If you are comfortable editing and modifying the registry on your computer, this is another method for resolving the 0x80041321 error. You should back up your registry just in case.
First and foremost, launch the Registry Editor. This is accomplished by simultaneously pressing Windows and R on your keyboard, typing regedit in the Run window that appears, and then pressing Enter. Use the navigation pane on the left to navigate to the following location: HKLM\SOFTWARE\Microsoft\Windows NT\Current Version\Schedule
Delete the Schedule key and all of its subkeys. Exit the registry editor after saving your changes. You can now try again to see if the Task Scheduler works properly.
Solution #3: Delete the WindowsBackup file.
If the first two options did not solve the problem, you can try removing the WindowsBackup file. It is possible that the issue is related to corrupted task files. The task files are XML files that contain parameters, programs to use, and other information. If any of these files becomes corrupted, the task scheduler will have difficulty running it and will display an error. There are two ways to do this: via File Explorer or the Command Prompt.
Via File Explorer
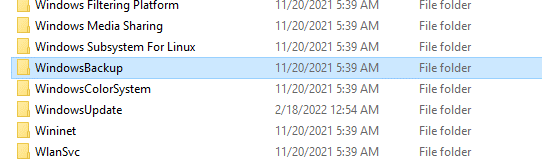
The Task Scheduler will refuse to work with a corrupted file. You can find it, manually delete it, and then let Task Scheduler create a new one. The first thing you should do is navigate to the folder containing the file. Open My Computer and navigate to the partition containing your operating system (usually the C:\ drive). Once inside, go to the following folders: Windows -> System32 -> Tasks -> Microsoft -> Windows -> WindowsBackup
You’ll find the WindowsBackup file you need to delete inside the folder. However, before you delete it, make a backup in a different location to ensure you still have the file in case something goes wrong. When you’re finished with the backup, remove the file. Try backing up your system again and see if the problem reappears.
Via Command Prompt
To open an elevated command prompt, go to the Start menu and type cmd. Hit Run as Administrator after right-clicking on the result. You must use the following command to navigate to WindowsBackup folder: cd %windir%\system32\tasks\Microsoft\Windows\WindowsBackup
Now that you’re in the correct folder, use the commands below to delete the files:
- del AutomaticBackup
- del “Windows Backup Monitor”
When you’re finished, close the command prompt and restart the backup by going to the Backup and Restore Center in Control Panel. You should now be able to back up without incident.
Solution #4: Delete the task from the Task Scheduler.
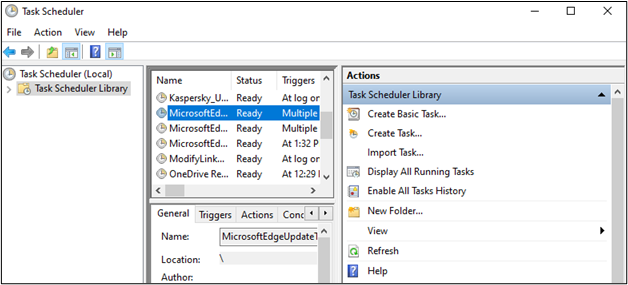
Deleting the task is essentially the same as deleting the files from the WindowsBackup folder, so it’s useful to be aware of this option as a backup method. To begin, launch the Task Scheduler by pressing the Start button on your keyboard, typing Task Scheduler, and pressing Enter. To the left of the window that opens is a navigation pane. To navigate, use the dropdowns to go to this path: Task Scheduler Library -> Microsoft -> Windows -> WindowsBackup
Once inside, remove both the Automatic Backup and the Windows Backup Monitor tasks. Close the Task Scheduler and try to restart the backup from the Backup and Restore Center when finished.
Solution #5: Restart the Task Scheduler service.
As previously stated, the Task Scheduler service may be disabled. You could have disabled it while trying to improve the performance of your computer or something. As a result, you must first determine whether it is running and then restart it.
- To begin, press the Win + R keys on your keyboard to open the Run dialog box.
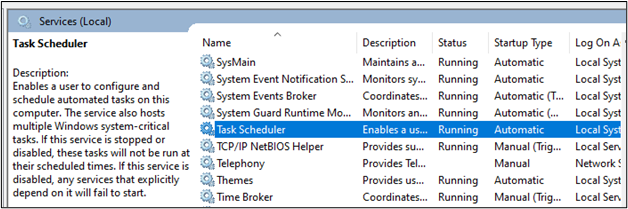
- Then, in the field, type “services.msc” and press OK or enter to open the Windows Services Manager.
- You will see a list of Services; look for and double-click on the Task Scheduler service.
- Then, on the General tab, click the Startup Type options, and then select Automatically from the list.
- Select the Restart the Service option from the Run menu.
- And then select the Restart Service option after the After Second Failure option.
- Now, go to the After Subsequent Failures tab and select Restart the Service.
- Finally, click the Apply and OK buttons before running the Task Scheduler to see if the problem has been resolved.
Solution #6: Refresh User_Feed_Synchronization.
The ‘User Feed Synchronization’ task in Internet Explorer 7/8 is responsible for updating the RSS feeds. However, because it is an automated task that works with the Task Scheduler, disabling and enabling it may help your problem. You will need an elevated command prompt for this, so click Start -> Type cmd -> Run As Administrator. Type the following commands in the window that appears, one after the other, followed by Enter on your keyboard:
- msfeedssync disable
- msfeedssync enable
These commands will disable and then enable the User Feed Synchronization task, respectively. When you’re finished, exit the elevated command prompt and try backing up again.
Final Thoughts
The 0x80041321 error message is a common issue when creating backups, but it is nothing to be concerned about. You can use any of the methods listed above to help you solve it, and then you will be able to continue with your Windows backup without incident. If you’re still getting the If you get the same error after following the solutions listed above, you can use third-party backup software instead.