
If you’re not a root user and you try to use the “sudo apt-get” command, you’ll receive an error message that says “sudo apt-get command not found.” This article will guide you on how to fix this error and use your preferred package manager without logging into a root user account.
What Is the Apt-Get Command?
To better understand the Mac sudo: apt-get: command not found error, let us first understand what the apt-get command does.
The apt-get command is a crucial part of Debian/Ubuntu-based systems. It is commonly used for installing packages on macOS. While it plays an essential role in the system, there are times when using it will cause a command not found error, which we will discuss further below.
In most cases, you can use another Terminal or program window to re-run apt-get again with sudo so that it installs without any errors. If that doesn’t work, there are some options that you can try. However, before trying anything else, you should always make sure your repositories are up to date. That’s because if something has been updated recently, then it’s possible that your problem isn’t due to an outdated package but rather an incompatible version.
Pro Tip: Scan your Mac for performance issues, junk files, harmful apps, and security threats
that can cause system issues or slow performance.
Special offer. About Outbyte, uninstall instructions, EULA, Privacy Policy.
To update your system, open a terminal window by pressing Ctrl+Alt+T on your keyboard and run these commands: sudo apt update && sudo apt upgrade -y –force-yes && sudo reboot. You’ll need to enter your password once or twice before everything finishes updating. Then try running apt-get again with sudo.
It may take longer than usual since Ubuntu is checking all of its files and repositories now. But if successful, everything should run smoothly from here on out.
Below is a list of the most common apt-get commands:
- sudo apt-get install (for installing packages)
- sudo apt-get remove (for removing packages)
- sudo apt-get update (for updating packages)
- sudo apt-get upgrade (for upgrading packages)
- apt-get help (to know more about a command)
What Causes the Error Sudo: Apt-Get: Command Not Found on macOS?
In most cases, installing a new version of Mac OS X or updating your Mac’s OS X operating system causes that annoying sudo apt-get command not found message to appear. As such, many people consider it a standard issue when running macOS—one of those glitches you just have to deal with as an Apple user. That is until you learn how to get rid of it for good and never see it again.
While there are countless things that can cause any given software or hardware problem, in most cases, there are only three actions that can lead to a ‘sudo: apt-get: command not found’ message: upgrading your Mac’s operating system (OS), installing incompatible software on your machine, or updating a program so that its previous version no longer works correctly.
Then again, there are times when this error shows because a particular application or library is no longer available or not installed on your system. By design, if a utility or application is not installed on your Mac, then all the other functions and commands associated with it won’t work.
Here are other known reasons that trigger the sudo: apt-get: command not found on Mac:
- Unsupported operating system – The command only works on Ubuntu, Debian, and their derivatives. So, if you execute the command on an operating system like CentOS and Fedora, then you may see the error.
- Package unavailable – If you are using an operating system that is incompatible with the command, then you may see the error. Thus, before running it, check the availability of the APT package first. You can do it by typing the apt-get command. If no output is shown, then the APT package is not installed.
What to Do to Fix Sudo Apt-Get Command Not Found on Mac
It can be quite challenging to deal with issues like sudo apt-get command not found on Mac. To help you resolve the issue, follow these fixes:
Fix #1: Restart Your Mac
A solution that’s often overlooked by many is restarting your Mac. Often, an installation or update can cause errors that are resolved by simply shutting down and starting up again. (This is one of many things you should know about Linux.)
If you’re having problems with sudo apt-get commands, reboot your machine before diving in. You may be surprised at how easy it is to fix your system.
Fix #2: Update Your System
The sudo apt-get command, or any other apt-get commands for that matter, won’t work if you don’t have an updated system. You’ll want to update your packages and then restart your system before trying again.
To do so:
- Input these commands in a terminal:
- sudo apt-get update
- sudo apt-get upgrade
- Just enter them into a terminal and hit enter each time.
- After typing in those two commands, press Y on your keyboard when prompted to download any updates.
- Once you’re finished updating all of your packages, reboot your computer by typing in sudo reboot. That will restart everything on your machine and prepare it for using Sudo correctly.
Fix #3: Run the “sudo apt-get install openssh-server” via Terminal
Sometimes, you may get a command not found errors after installing sudo apt-get install openssh-server. To address these errors, run this command in the Terminal: sudo dpkg-reconfigure openssh-server.
If it doesn’t work then run the following commands one by one:
- sudo rm /etc/ssh/sshd_config
- sudo rm /etc/ssh/sshd_conf;sudo service ssh restart
If they still don’t work, try these commands one by one:
- rm -rf /var/lib/dpkg/*
- sudo dpkg –clear-avail
- sudo dpkg –configure -a
- sudo apt-get update && sudo apt-get upgrade -y
- sudo service ssh restart
After running the above commands and you are still getting the same error, then try to delete your
.bashrc file and .profile file from your home directory. And then, open a new terminal window and try again.
Fix #4: Install Homebrew in macOS

Homebrew for Mac is a free and open-source software package management utility that simplifies the installation of software on Apple’s macOS operating system. It is a complete package management system that provides its own binary distribution network for installing its own compiled versions of packages from source and also features compatibility with MacPorts and Fink. As with apt-get or yum, it makes installing new programs simple via commands, such as brew install. This makes it comparable to Linux’s apt-get program.
And if you are getting the sudo: apt-get: command not found error, you can use Homebrew instead. Here’s how:
- Press and hold the Command key and hit Space to launch Spotlight.
- Next, input Terminal and hit Enter.
- You then need to install the Xcode command-line utility by typing this command: xcode-select –install.
- Once Xcode is installed, input the following command to begin the installation of Homebrew on macOS: ruby -e “$(curl -fsSL https://raw.githubusercontent.com/Homebrew/install/master/install)”
- At this point, the installation wizard will ask you to hit the Return or Enter key. It will also require your password to confirm your action.
- If the installation is successful, you should see an installation successful message in Terminal.
- Now, using Homebrew, input this command to install the package you want: brew install name. Make sure to change the value of “name” to the actual name of the package.
- Homebrew will then install it on your system.
Fix #5: Install MacPorts on macOS
MacPorts, is a command-line package manager that makes it easy to install open-source software on macOS. Like Homebrew, MacPorts can be used to install hundreds of software packages and utilities. Both are excellent methods for installing open-source code on your Mac, but only one can rule your machine.
Follow the steps below to have MacPorts installed on your system:
- Launch App Store via Dock, then type Xcode into the search field.
- Select Get and install Xcode. The process will take time because its size is about 6 GB. Hence, patience is required.
- At some point, you will also be asked to input your App Store account’s username and password.
- And then, agree to the terms and conditions by hitting the Agree button. Alternatively, you can input this command in Terminal: sudo xcodebuild -license.
- Press and hold the Command key and hit Space to launch Spotlight.
- Next, input Terminal and type this command to install the Xcode command-line tool: xcode-select –install
- After that, install MacPorts from this link. Ensure it is compatible with your current operating system.
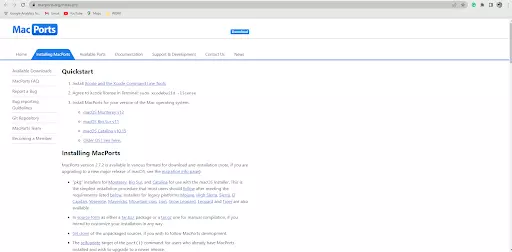
- Then open the downloaded file and start the installation of the software.
- Once done, restart Terminal and input this command: sudo port selfupdate.
- If MacPorts is successfully installed, you should see the “Updating MacPorts base sources using rsync” message.
- Finally, install any package using this command: sudo port install name.
Fix #6: Use Alternatives of the APT Command on Macs
As we have mentioned, APT commands are called upon for updating, downloading, and upgrading apps via the Terminal utility. But they are only available for Debian Linux users. Hence, for macOS users, there are a few alternatives for this command that can be considered.
Fix #7: Download the Latest APT Package
Another effective way to resolve the error is to download the most recent APT package that is compatible with your operating system. And for that, you need to download the .deb file that works for your system architecture.
Fix #8: Reinstall macOS
If all else fails, there is no other way to fix the error than to reinstall macOS. Most of the time, this fix works. But if you are not confident in reinstalling macOS, do not hesitate to seek help from Apple Support.
Fix #9: Use an Optimization Software for macOS
Similar to Windows, Mac computers can slow down with age and encounter issues like this sudo error. And so, you might be tempted to upgrade your macOS right away. While that might work for older machines, new computers with enough RAM don’t always need a fresh installation of an operating system or even an upgrade of software – sometimes, they just need optimization.
You can free up memory and speed up processes by using a virtualization application such as Outbyte MacAries. This program grants you access to additional functions such as optimizing your RAM with a memory cleaner if something doesn’t go exactly right during installation. It also frees up your Mac storage to give way to more important processes and files.
Wrapping Up
If you’re using Ubuntu and have been having issues with sudo apt-get commands or any other kind of command not found errors, you might want to try a couple of fixes before moving on. Sometimes, these issues are just due to directory structure changes, so it may be worth checking permissions and ensuring that your sudo is correctly set up.
So long as you don’t have an issue with root access (and can make changes), the above fixes should help. But if not, make sure there isn’t anything else going on before thinking of throwing in a dist-upgrade. Although it’s generally safe, that command can break things unexpectedly, so it is best to double-check first.
Do you know other fixes to resolve the Sudo apt-get command not found error on macOS? Let us know below!