
Although Windows 10/11 is free upgrade for all Windows 7 and Windows 8 users, it doesn’t mean that upgrade is always smooth. User have reported error 0x800704DD-0x90016 during Windows 10/11 Setup, so let’s see if we can fix this somehow.
If you’re getting error 0x800704DD-0x90016 while upgrading to Windows 10/11 from Windows 7 or Windows 8, you need to follow this simple solution.
How to Upgrade to Windows 10/11 in 2020
Now Windows 7 has now reached end of life it is no longer safe to store your data on the platform because all new vulnerabilities will be left exposed. Users are then wondering if the free upgrade hack for Windows 10/11 still works. Fortunately, it does.
Despite Microsoft ending its free Windows 10/11 upgrade offer to all users on July 30, 2016, the company has left open a loophole. There’s just one snag: you will need a legal copy of Windows 7 or Windows 8 to do this.
Expert Tip: For smoother PC performance, consider using a PC optimization tool. It handles junk files, incorrect settings, and harmful apps. Make sure it's right for your system, and always check the EULA and Privacy Policy.
Special offer. About Outbyte, uninstall instructions, EULA, Privacy Policy.
Tip: if you don’t have one, you can buy a legal copy of Windows 7 or Windows 8 at third part retailers for a fraction of the cost of a Windows 10/11 license. Home licenses update to Windows 10/11 Home, Pro licenses update to Windows 10/11 Pro, so choose carefully.
With that caveat out the way, here’s how you get your Windows 10/11 free upgrade:
- Click on the Windows 10/11 download page link here
- Click ‘Download Tool now’ – this downloads the Windows 10/11 Media Creation Tool.
- When finished, open the download and accept the license terms
- Choose: ‘Upgrade this PC now’ then click ‘Next’
- Choose ‘Keep personal files and apps’
- Click ‘Install’ (note this takes some time and involves multiple restarts)
- Once installed, open: Settings > Windows Update > Activation to activate your Windows 10/11 digital license…
- OR enter your (genuine) Windows 7 or Windows 8/8.1 product key if you haven’t previously activated your old version of Windows
If you’d like to check your license has successfully been activated afterwards, open: Settings > Update & Security > Activation.
Note: a Windows 10/11 license is tied to your hardware. As such, if you need to format your computer for any reason Windows 10/11 will reactivate automatically.
If you change multiple components in your PC as part of a device upgrade, Windows 10/11 may mistakenly think you’ve bought a new PC and refuse to register the license automatically. Thankfully, Microsoft has a simple process you can follow if that happens. You can reactivate it by going to Start > Settings > Update & Security > Activation.
Using the Windows Media Creation Tool to Upgrade to Windows 10/11
The free Windows 10/11 Media Creation Tool is a very popular utility developed by Microsoft. With this marvelous Windows 10/11 creation tool, you can upgrade Windows 10/11 to its latest version without a hassle and create a Windows 10/11 installation USB drive/DVD disc to perform a clean install or to repair a problematic PC.
Windows Media Creation Tool is also a Windows upgrade tool as it can upgrade your PC to the latest Windows 10 version. According to many Windows 10/11 users, using Windows Update to upgrade Windows 10/11 may encounter some errors like the common Windows 10/11 update error 0x8007007e, leading to upgrade failure.
In this case, it is highly recommended to utilize Windows 10/11 Media Creation Tool to upgrade Windows 10/11. With this Windows upgrade tool, you can quickly upgrade your computer to the latest version of Windows 10/11. Here are detailed steps and screenshots.
This process requires another PC with internet access, and a USB flash drive with at least 8 GB of storage space. The data on the USB flash drive will be erased to create the Windows 10/11 bootable flash drive.
Creating the Windows 10/11 USB flash drive
- Visit the Microsoft Media Creation Tool website.
- Click Download Tool Now.
- Save the Application.
- Plug your USB Flash Drive into the PC where you saved the application.
- Run the Application.
- Accept the EULA
- Select Create installation media for another PC and click Next.
- Choose the correct settings for your version of Windows 10/11
- Language (Country)
- Windows 10/11
- 64-bit (x64)
- Select the Flash Drive and click Next.
- Select USB Flash Drive and click Next.
- Click Next.
Allow the application to complete. You will be prompted when it is finished and has successfully created the bootable drive.
Reloading Windows with the Media Creation Tool:
- Press and hold the Power key for five seconds to turn off your computer.
- Plug in the USB Drive that contains the Media Creation Tool files.
- Power on the system and begin tapping the F2 Key to enter the BIOS.
- In the BIOS, use the arrow keys to navigate to the Main menu item at the top.
- Use the down arrow to highlight F12 Boot Menu and press Enter.
- Highlight Enabled and press Enter.
- Press the F10 key and press Enter to save the changes and exit. The system will reboot immediately.
- As soon as the system begins rebooting, press the F12 key repeatedly to enter the Boot Manager.
- Select the USB HDD and press Enter. The Windows Setup environment will launch.
- Select your Language, Time and Keyboard, then click Next.
- Click Install Now.
- Accept the license terms and click Next.
- You will be prompted with choices:
- Upgrade: Install Windows and keep files, settings and applications. This option should work for most users and should save most personal files. If you attempt this and run into errors, we suggest the next option.
- Custom: Install Windows only (advanced) This option allows you to determine the location where you want to install Windows. Using this option will erase all personal data.
What Is Windows Installation Error 0x800704DD-0x90016?
Microsoft’s Media Creation tool for upgrading to Windows 10/11 has made it a very simple and straight forward process to upgrade your current PC to Windows 10/11 or perform a clean install of the latest Windows 10/11. For a long time, users had to jump through hoops to install a new Windows version if an installation disk wasn’t available. Between the forced updates and this tool making the update so much easier, Windows 10/11 adaptation has grown rapidly. That said, the tool doesn’t guarantee a successful upgrade and does throw errors. At times, the tool refuses to start until you force it to. Another error you might see is the Error code 0x800704DD – 0x90016 which is rather easy to resolve. Here’s how.
The error appears when you launch the Media Creation tool to start the upgrade process and after you accept the EULA. The tool tells you it’s ‘Getting a few things ready’. Instead of proceeding to the download screen, it gives you the error code 0x800704DD – 0x90016.
The tool isn’t sure what happened but the error appears when you try to upgrade to Windows 10/11 from an account that doesn’t have admin rights. To resolve it, simply log out of the current user and log in to the admin account and run the tool again. It will ask you to accept the EULA and then proceed to the download screen without any errors.
The error really shouldn’t appear in the first place because when you start the upgrade from a non-admin account, you are asked to enter the administrator’s password to run the Media Creation tool. That is what gets you to the EULA screen in the first place but for whatever reason, the download doesn’t begin and instead you see this error. It appears you can only run the tool from inside the admin account which begs the question as to why people were force-upgraded to Windows 10/11 via Windows updates.
What Causes Windows Installation Error 0x800704DD-0x90016?
Windows installation error 0x800704DD-0x90016 is the problem that can occur when the person upgrades from an older version like Windows 7 or 8. Still, users report the problem appearing when the machine requires the Windows 10/11 upgrade.[1] This issue keeps the Windows 10/11 setup from loading, so there is no permission to move with the update.[2]
It can occur due to insufficient permissions on the account or hen security solution on the machine that interferes with the operating system. The error can be frustrating since the message pop-up does not indicate a particular trigger or reason behind the problem.
Various factors that can trigger this error 0x800704DD-0x90016 include:
- Standard account. If you are using the Windows Media Creation Tool without having administrative permissions, the error will most likely pop up.
- Third-party antivirus. If you are using any third-party antiviruses, there’s a possibility that the error is occurring because of it.
- External hardware. In some cases, the error is caused by the external hardware that is plugged into your system like USBs etc.
How to Fix Windows Installation Error 0x800704DD-0x90016
0x800704DD-0x90016 error can be problematic and it can prevent you from installing Windows 10/11. If you’re getting error 0x800704DD-0x90016 while upgrading to Windows 10/11 from Windows 7 or Windows 8, you need to follow these simple solutions.
But before you proceed, make sure to delete any corrupted system files on your computer to improve your troubleshooting success:
Run the DISM Tool
DISM is a built-in utility that is designed to allow users to access the core of the operating system itself. It is used when a computer is facing issues associated with performance and start-up.
To use it to fix the Windows Update error code 0x80073712, do the following:
- Press the Windows + X keys and select the Command Prompt (Admin) option.
- Into the command line, input the following commands. Hit Enter after each command:
- DISM /Online /Cleanup-Image /CheckHealth
- DISM /Online /Cleanup-Image /ScanHealth
- DISM /Online /Cleanup-Image /RestoreHealth
Once these commands have been executed, reboot your system and run an SFC scan using these steps:
- Press the Windows + X keys and select Command Prompt (Admin).
- Into the command line, input the sfc /scannow command and hit Enter.
- Wait until the scan is complete and review the results.
- Restart your computer.
An easier way to delete corrupted files and other junk on your computer is to run Outbyte PC Repair. It resolves minor issues and optimizes your computer processes. Once you have done these preparations, you can proceed with the solutions below:
Fix #1: Switch to the administrator account.
For most of the users that encountered this error, it was due to insufficient permissions. Using Windows Media Creation Tool typically requires administrative authorities, hence, make sure that you’re logged in as an administrator. If not, please log out of your current account and log in as an administrator.
In case you don’t have an administrator account available, you can create one by doing the following:
- Open the Settings app. You can do that quickly using the Windows Key + I shortcut.
- When the Settings app opens, go to the Accounts section.
- Select Family & other people from the menu on the left. Now click Add someone else to this PC button in the right pane.
- You’ll be asked to enter sign-in information for the new user. Choose I don’t have this person’s sign-in information.
- Now select Add a user without a Microsoft account.
- Enter the desired username and click Next.
After you create a new user account, you need to convert it to the administrator account. To do that, follow these steps:
- In the Settings app go to Accounts > Family & other people.
- Locate your new account and choose Change account type.
- Set Account type to Administrator and click OK.
After creating a new administrator account, switch to it and try to run the setup again.
As we already mentioned in our previous solution, 0x800704DD-0x90016 error can occur if you don’t have the necessary privileges, but you can obtain those privileges simply by using an administrator account.
Whenever you install Windows, an administrator account is created that is, by default, hidden. In case you don’t want to create an administrator account, you can use the hidden account to run the upgrade or to install Windows 10/11. All versions of Windows have this hidden account available, and you can switch to it by doing the following:
- Start Command Prompt as administrator. The simplest way to do that is to press Windows Key + X and choose Command Prompt (Admin) or PowerShell (Admin) from the menu.
- When Command Prompt opens, run net user administrator /active:yes command to enable the hidden account.
- After running this command, the hidden administrator account should be enabled and you’ll be able to access it. Once you access the new administrative account, try installing Windows 10/11.
- If the process is successful, you can disable the hidden administrator account by starting Command Prompt and running net user administrator /active:no command.
This method is quite effective, especially if you don’t want to create a new user account, so you might want to try it out.
Fix #3: Disable your antivirus.
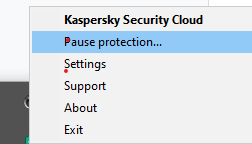
Having a good antivirus is important, but sometimes your antivirus can interfere with Windows 10/11 installation and cause 0x800704DD-0x90016 error to appear. Your antivirus will prevent certain applications from modifying the system files, and that will cause this issue to occur.
To fix the problem, it’s advised to disable your antivirus before you try to install Windows 10/11. If disabling the antivirus doesn’t help, it’s advised to completely remove your antivirus and try to run the setup again. To make sure that your antivirus is completely removed, download the dedicated removal tool for your antivirus and run it.
Once your antivirus is disabled, try to install Windows 10/11 again, and 0x800704DD-0x90016 error shouldn’t appear. If you manage to complete the installation process, you should consider installing a new antivirus on your PC.
Fix #4: Uninstall your third-party Antivirus.
If the above method doesn’t work for you, you have the option to totally remove the third-party antivirus software. If you have purchased a license, you don’t have to worry about this as you can simply reinstall the tool later, enter your license key and resume enjoying the service. Before you begin, you should end the processes associated with the program via Task Manager.
Open Control Panel, click the “Uninstall a program” option under Programs, find the antivirus in the program list, right-click it, and select Uninstall. Follow the onscreen instructions. You may need to reboot your PC once for all the software files to be removed.
Some security tools come with their own uninstallers. Clicking the Uninstall button in Control Panel sometimes launches the uninstaller for the program. Generally, using the app’s custom uninstaller is the better option. That way, the chances that all the software files are actually removed are high. You may use a third-party removal tool to ensure that there are no leftover files or registry items.
Uninstalling the third-party security application is, unfortunately, the easy part in the case of most applications. The hard part is getting rid of all the residual files and settings that most of these applications leave behind when they are uninstalled. If you do not get rid of the files and settings a security application leaves behind once you have uninstalled it, they will only cause trouble for you in the future. To get rid of any and all files and other elements left behind by a third-party security application that you have uninstalled, you need to:
- Go to the list of the removal tools for all widely used third-party security applications.
- Go through the list and locate the entry for the security program you uninstalled from your computer.
- Click on the provided link for the respective application’s removal tool.
- Carefully read any instructions you find on the page the link directs you to, and download the removal tool from there.
- Once the removal tool has been downloaded, navigate to where it has been downloaded, locate it and double-click on it to launch it.
- Follow the onscreen instructions and go through the removal tool to get rid of anything and everything left behind by the uninstalled application.
- Do not leave your computer vulnerable! If you uninstall a third-party security program and do not have another as a backup, be sure to enable your computer’s built-in security program (Windows Defender or Microsoft Security Essentials) to make sure it remains protected.
Fix #5: Disconnect unnecessary USB devices.
If you’re having 0x800704DD-0x90016 error while trying to install Windows 10/11, the problem might be your USB devices. Certain USB devices such as external hard drives, card readers and such can sometimes interfere with Windows 10/11 installation.
To make sure that the installation process goes smoothly, we strongly advise you to disconnect all USB devices except your keyboard and mouse and your installation media. Once you disconnect all USB devices, you shouldn’t have any issues with it.
Fix #6: Perform a clean boot.
Third-party applications can sometimes interfere with Windows 10/11 installation, and if you keep getting 0x800704DD-0x90016, perhaps you should try disabling the startup applications and services. This is quite simple to do, and you can do it by following these steps:
- Press Windows Key + R, enter msconfig and click OK or press Enter.
- System Configuration window appear. Go to the Services tab. Now you need to check Hide all Microsoft services option and click the Disable all button.
- Now go to the Startup tab and click Open Task Manager.
- List of all applications will now appear. Now you need to disable all startup applications. To do that, right-click the first application on the list and choose Disable. Repeat this for all entries on the list.
- After disabling startup applications, go back to the System Configuration window. Now click Apply and OK to save changes and restart your PC.
After doing that, all startup applications will be disabled. Now try to install Windows 10/11 again and check if the issue is still there.
Fix #7: Disconnect from the Internet during the setup.
According to users, if you’re trying to install Windows 10/11 using the ISO file, be sure to disconnect from the Internet. To be on the safe side, disconnect your Ethernet cable or in some cases you might even have to remove your wireless adapter from your PC. After doing that, try to install Windows 10/11 again.
Fix #8: Download the ISO from a different PC.
Sometimes the ISO file you’re using to install Windows 10/11 isn’t good, and that can cause 0x800704DD-0x90016 error to appear. This can be a problem, but several users reported that you can fix the issue simply by downloading the ISO file on a different PC and using that ISO to install Windows 10/11.
This sounds like an unusual solution, but users claim that it works, so you might want to try it out.
Fix #9: Run Windows Update Troubleshooter.
If you keep getting 0x800704DD-0x90016 error while trying to install Windows 10/11, you might be able to fix the problem simply by running Windows Update troubleshooter. Windows has many troubleshooters and they are designed to automatically scan your system and fix various problems. To run Windows Update troubleshooter, you just need to do the following:
- Press Windows Key + I to open the Settings app.
- Now navigate to the Update & Security section.
- Select Troubleshoot from the menu on the left. Select Windows Update from the list and click the Run the troubleshooter button.
Follow the instructions on the screen to complete the troubleshooter. Once the troubleshooting is finished, try to install Windows 10/11 again.