Despite its widespread use in businesses, organizations, and among professionals, the Windows operating system is not immune to flaws and issues that can affect the user experience.
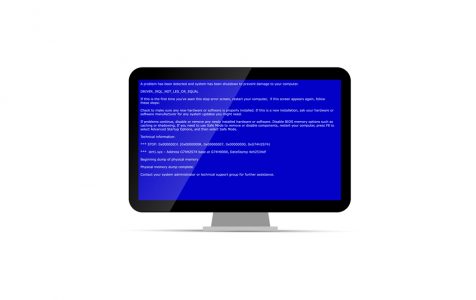
One notorious problem of the Windows operating system is SYSTEM_THREAD_EXCEPTION_NOT_HANDLED + stornvme.sys.
What is Stornvme.sys?
Also known as the Microsoft NVM Express Storport Miniport Driver file, stornvme.sys was first introduced in 2013, particularly in the Windows 8.1 OS. If this file fails to load or initialize, an error is logged and the computer attempts to restart. Once the attempt fails, it throws the dreaded Blue Screen of Death with the error code SYSTEM_THREAD_EXCEPTION_NOT_HANDLED + stornvme.sys.
Ever wondered why the SYSTEM_THREAD_EXCEPTION_NOT_HANDLED + stornvme.sys error appears? Read on for answers.
Expert Tip: For smoother PC performance, consider using a PC optimization tool. It handles junk files, incorrect settings, and harmful apps. Make sure it's right for your system, and always check the EULA and Privacy Policy.
Special offer. About Outbyte, uninstall instructions, EULA, Privacy Policy.
What Causes the Stornvme.sys Error?
There are many possible scenarios where you could encounter a stornvme.sys-related issue. It could be problematic hardware. It could also be an outdated driver. Oftentimes, it could be caused by corrupted firmware or software-related issues. Even worse, it could be triggered by malware entities.
More often than not, the issue is accompanied by error messages such as:
- sys could not be found.
- The file stornvme.sys is missing or corrupt.
- sys failed to load.
- Windows failed to start – stornvme.sys.
- SYSTEM_THREAD_EXCEPTION_NOT_HANDLED + stornvme.sys.
How to Fix the SYSTEM_THREAD_EXCEPTION_NOT_HANDLED + Stornvme.sys Error
If you’ve encountered the SYSTEM_THREAD_EXCEPTION_NOT_HANDLED + stornvme.sys error, follow the troubleshooting methods below to resolve it. You don’t really have to try everything. Just work your way down until you find a fix.
But before we proceed with the fixes, we suggest that you use the System Restore utility. This will allow you to restore your system settings to a state when everything was still working.
To use System Restore, follow these steps:
- Click the Start button.
- Input System Restore into the search box and hit Enter.
- In the search results, choose and click System Restore.
- If prompted, enter your administrator credentials.
- Now, follow the on-screen prompts. The System Restore Wizard should guide you in the process of creating or reverting to a restore point.
- Reboot your computer.
Assuming you have already created a restore point, proceed with the fixes below:
Fix #1: Run the System File Checker
Do you suspect that the stornvme.sys file is corrupted or missing? Then run the System File Checker to restore it.
The System File Checker is a useful utility that comes built-in with every Windows OS version. It allows users to scan and restore corrupted or missing system files like stornvme.sys.
To run the System File Checker to restore a corrupted stornvme.sys file, here’s what you should do:
- Click the Start button.
- Input cmd into the search bar. Do not hit the Enter button yet.
- Press and hold the CTRL + Shift + Enter combo.
- A permission dialog box will pop up. Agree by clicking Yes.
- A black screen with a blinking cursor will now appear. Into the command line, input sfc /scannow.
- Hit Enter.
- The System File Checker will now start scanning your system. It will find any stornvme.sys-related issues and fix them.
- Should there be any problems, follow the instructions on your screen and everything will be fixed.
Fix #2: Perform a Windows Update
If the first fix did not resolve the problem, it might be a good idea to perform a Windows update. This is because some stornvme.sys errors are triggered by an outdated Windows OS version.
To update your Windows OS, follow the instructions below:
- Click the Start button.
- Into the search bar, input update.
- Hit Enter to launch the Windows Update dialog box.
- Click the Check for Updates button.
- If updates are available, hit Install Updates.
- Wait for the update process to be completed.
- Reboot your computer.
Fix #3: Uninstall Any Recently Installed Program
If you can successfully launch your Windows operating system after seeing the SYSTEM_THREAD_EXCEPTION_NOT_HANDLED + stornvme.sys error, uninstall the program you have recently installed.
To uninstall a recently installed program, here’s what you should do:
- Click the Start button.
- Look for the program or app that you’ve recently installed.
- Right-click on the app and click Uninstall.
Fix #4: Restore Your System’s Stability
With new tools and apps being introduced nowadays, issues and error messages should be a thing of the past.
One tool that has proven its efficiency and reliability in repairing computer issues is Outbyte PC Repair. With its precision tools and features, any invalid keys from the Windows registry, corrupt keys, and junk files can be carefully removed. Aside from that, it also scans your computer for any malware entities that put your information at risk.
Fix #5: Boot Your Computer into Safe Mode and Fix the SYSTEM_THREAD_EXCEPTION_NOT_HANDLED Error
Is your computer stuck in a never-ending loop and unable to boot normally? Then your only option is to boot it into Safe Mode. Once you’re in this mode, you can uninstall any faulty driver and replace it with a functioning version.
You may not know this yet, but your Windows 10/11 device is designed to reboot into the Automatic Repair mode when the reboot process fails for more than three times. So, if your computer attempts to reboot the fourth time, expect the Automatic Repair dialog box to appear. Take advantage of this to boot into Safe Mode.
For a step-by-step guide on what to do, follow these steps:
- Press the Power You might need to long-press it to force your computer to shut down. Switch it on again. Do this step thrice.
- On the fourth restart attempt, Windows should automatically enter the Automatic Repair You will be greeted by the Preparing Automatic Repair screen.
- Select the administrator account you want to use. Enter your password.
- At this point, your system will diagnose your computer for any problems. Wait for the scan to complete.
- Once the diagnosis is done, select Advanced Options.
- Choose Troubleshoot.
- Navigate to Advanced Options > Startup Settings > Restart.
- Hit the F4 key to boot into Safe Mode.
- As soon as you’ve rebooted your computer into Safe Mode, go to Device Manager. Follow the on-screen instructions and uninstall the problematic driver.
- Now, reboot your computer into Normal Mode to apply the changes.
- Finally, download the latest version of the problematic device driver and install it.
Summary
Windows issues may cause headaches and waste your precious time, but know there are many possible workarounds to have them fixed. And in the case when you come across the SYSTEM_THREAD_EXCEPTION_NOT_HANDLED + stornvme.sys error, just try any of the 5 fixes we have listed above. If none of them work, we suggest that you seek help from legit and experienced Windows technicians.
Let us know what other Windows problems you have encountered. Comment below!