
The Service Control Manager Error (Event ID 7001) can occur due to installation issues or hardware problems. Thankfully, it’s an easy fix without needing professional assistance.
Before anything, what is the Service Control Manager and what function does it play?
What Is the Service Control Manager?
The Service Control Manager allows you to make changes to different Windows processes, features, and programs that run in the background. This tool lets you modify services like the Windows Defender, as well as other third-party apps, such as antivirus suites that protect your computer.
Expert Tip: For smoother PC performance, consider using a PC optimization tool. It handles junk files, incorrect settings, and harmful apps. Make sure it's right for your system, and always check the EULA and Privacy Policy.
Special offer. About Outbyte, uninstall instructions, EULA, Privacy Policy.
Depending on your Windows 10/11 computer’s software configuration, you can access this utility to modify a program or service’s execution pattern all while maintaining a certain level of efficiency with other existing apps. Here’s how to use the Service Control Manager:
- Right-click on the Windows menu and select Manage.
- Double-click on the Services and Applications section and choose Services.
- Double-click on the service that you want to modify. Doing this will launch the service’s Properties menu.
- Now, you will see a set of execution options. Choose whatever you prefer. The Automatic Startup option sets the service to launch at startup, while the Manual Startup option lets you launch the service only when needed. The Disabled option will deactivate the service entirely.
- Hit OK to apply the changes.
Like other Windows 10/11 services and utilities, the Service Control Manager is also at risk of errors. One particular error associated with it is the Service Control Manager Event ID 7001.
What Is Service Control Manager Event ID 7001 on Windows 10/11?
Some Windows 10/11 users have reportedly encountered the Service Control Manager Error with Event ID 7001 while using the Event Viewer. It seems that this error is a result of a system issue associated with the Service Control Manager. If you go to the Event Viewer’s General tab, you should see the detailed error and have an idea about what’s causing it.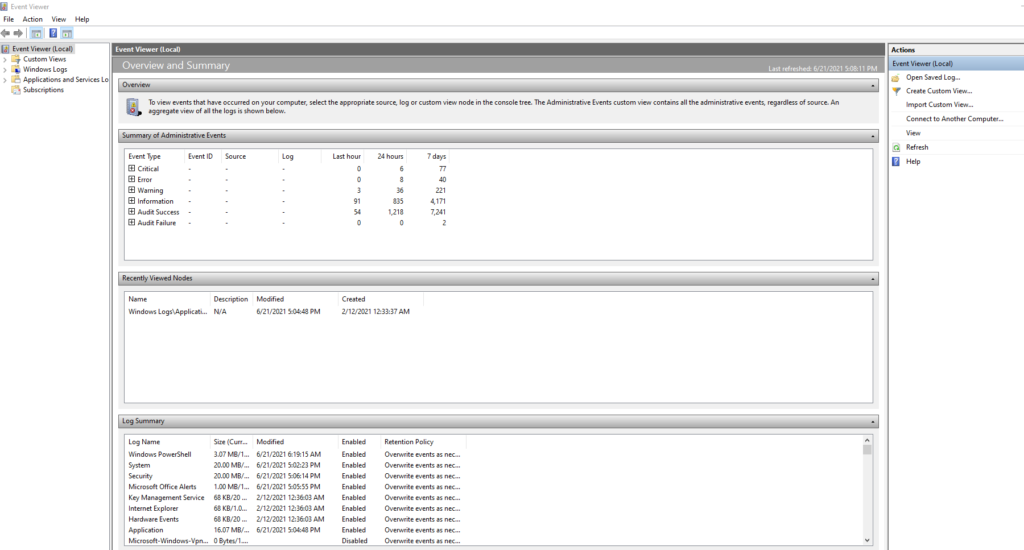
Generally, the Event ID 7001 error comes with this error message:
<System>
<Provider Name=”Service Control Manager” Guid=”{555908d1-a6d7-4695-8e1e-26931d2012f4}” EventSourceName=”Service Control Manager” />
<EventID Qualifiers=”49152″>7001</EventID>
<Version>0</Version>
<Level>2</Level>
<Task>0</Task>
<Opcode>0</Opcode>
<Keywords>0x8080000000000000</Keywords>
<TimeCreated SystemTime=”2018-10-
13T17:00:04.618596100Z” />
<EventRecordID>13970</EventRecordID>
<Correlation />
<Execution ProcessID=”884″ ThreadID=”3636″ />
<Channel>System</Channel>
<Computer>My Computer</Computer>
<Security />
</System>
– <EventData>
<Data Name=”param1″>RasMan</Data>
<Data Name=”param2″>SstpSvc</Data>
<Data Name=”param3″>%%0</Data>
<Binary> 5200610073004D0061006E000000 </ Binary>
</ EVENTDATE>
</ Event>
But then again, there could be other factors that could cause the Service Control Manager Error with Event ID 7001. And we will share them with you in the next part.
What Causes ‘Service Control Manager Error 7001’ on Windows 10/11?
There are various culprits that can contribute to the occurrence of this error. Below, we have listed some scenarios or instances where the Service Control Manager Event ID 7001 error will show:
- Mandatory Services Are Disabled – For the Computer Browser service to run efficiently, there are many different mandatory services that must be enabled. When they are not running, the error 7001 may appear. In this case, you need to access the Services utility to enable all the essential services.
- There Are Missing Network Discovery Dependencies – If you see that the Event IDs on the Event Viewer window is associated with the Network Discovery function, then the fix will involve running different commands using an elevated Command Prompt.
- Some System Files Are Corrupted – In some cases, you will see the error if your system has experienced system file In such a scenario, the best solution is to refresh Windows by performing a clean install.
- A Software Conflict Has Happened – According to some users, this error may occur after performing a system change like a driver installation or update. To fix this, you may need to use the System Restore utility.
- Malware Infection – It is possible that some sort of malware entity has infected your computer, resulting in the error.
How to Fix ‘Service Control Manager Error 7001’ on Windows 10/11
If you encounter the Service Control Manager Event ID 7001 on your Windows 10/11 device, then there is good news. You can easily resolve it by following the solutions below.
However, before you proceed, try easy troubleshooting methods first. Your Windows 10/11 device may just need a quick restart as plenty of processes are already running in the background, and that there are no sufficient resources to be allocated for new processes, which leads to the error.
It could also be the case of malware entities wreaking havoc on your system. Malware infection may have affected essential services, causing them not to run properly and throw the error message that you’re seeing.
If the basic troubleshooting methods did not work, then move on with the following solutions:
Solution #1: Enable All Essential and Related Services
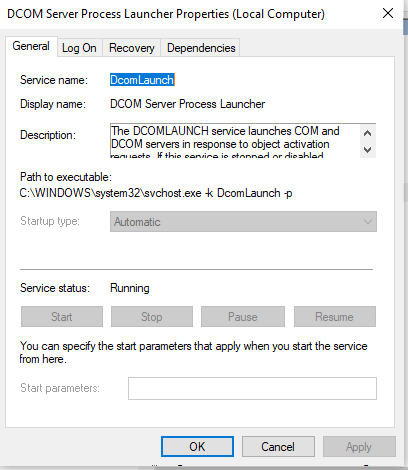
As mentioned above, the error may surface if the essential services required by the Service Control Manager are disabled. These include the DCOM Server Process Launcher, Security Accounts Manager, Server, and RPC Endpoint Mapper. By making sure these services are enabled, you can get rid of the error.
Here’s how to enable the mentioned services: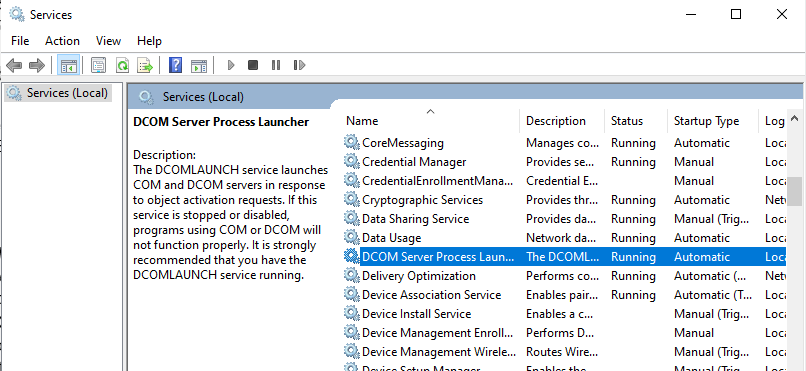
- Press the Windows + R keys to launch the Run utility.
- Type services.msc into the text field and hit OK. This will open the Services utility.
- Next, double-click on any of the above services to open Properties.
- Go to the General tab. Make sure that the status is Running.
- Navigate to Startup Type and select Automatic.
- Hit Apply then OK to apply your changes.
- Repeat the above steps for all other services.
- Restart your computer and see if the error still shows.
Solution #2: Repair All the Faulty Discovery Dependencies
You may also see the Service Control Manager Event ID 7001 if there is a problem with any of the Network Discovery dependencies. By cleaning the PeerNetworking folder, some users were able to resolve the problem.
Here’s a guide on how to do so:
- Launch the Run utility by pressing the Windows + R keys.
- Type cmd into the text field and press the CTRL + Shift + Enter keys simultaneously. This will open an elevated Command Prompt.
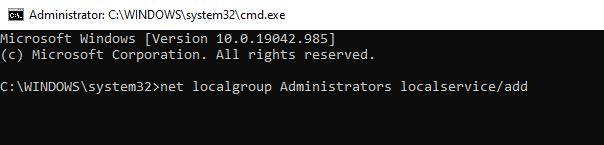
- Next, type the following commands and hit Enter after each one of them:
- net localgroup Administrators localservice /add
- net localgroup Administrators service /add
- Launch File Explorer and navigate to this location: C:\Windows\ServiceProfiles\LocalService\AppData\Roaming.
- Go to the PeerNetworking folder and delete all its contents.
- Restart your computer and see if the Service Control Manager Event ID error 7001 is resolved.
Solution #3: Adjust the Service Logon User Rights
Based on the error’s general information, we can assume that it could be caused by a service that failed to start. And in some cases, it could happen because the service does not have sufficient user rights.
To fix this, adjust the service’s logon user rights. Here’s how:
- Go to the Services app and right-click on the problematic service highlighted on the error information.
- Select Properties.
- Go to the Log On tab and select This Account.
- Provide your username and password. Hit the Apply and OK button to apply the changes.
Solution #4: Optimize Your Drives
By optimizing your drives, you help improve your computer’s performance. If you want to optimize your Windows 10/11 drives, you may use the built-in Defragment and Optimize Drives tool.
To use it, follow these steps:
- Type optimize drives into the search field and click on the top-most result.
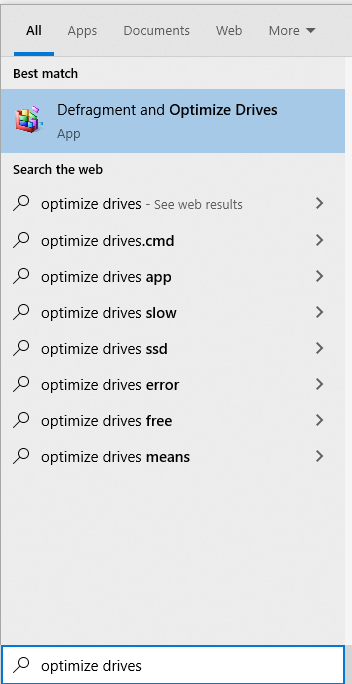
- Now, you will see a percentage of fragmentation of each disk in the Current Status column.
- Ideally, it must be less than 10%. If a disk’s fragmentation is more than 10%, then you have to optimize it. To do so, just click on the drive and hit the Optimize button.
Solution #5: Reset the TCP/IP of Your Windows Device
You may also see the error on your Windows computer if the Net.Tcp Port Sharing service is unable to start. In this scenario, resetting the TCP/IP of your device may resolve the problem.
Here’s how:
- Click the Start menu and type cmd into the search field.
- Right-click on the most relevant search result and select Run as Administrator.
- When the elevated Command Prompt opens, type the netsh int ip reset command.
- Hit Enter.
Solution #6: Enable the Net.Tcp Port Sharing Service
If the above solutions did not resolve the error, then this solution is worth trying. Many affected users have reportedly fixed the problem by enabling the Net.Tcp Port Sharing service.
Here’s how they did it:
- Press the Windows + R keys to launch the Run utility.
- Launch the Services Management Console by typing services.msc into the Run dialog box and hitting Enter.
- Scroll down the list and find the Net.Tcp Port Service.
- Double-click on the service and set its startup type to Automatic.
- Click the Start button and hit OK to continue.
- Restart your computer and check if this solution helps.
Solution #7: Disable the TCP Port Sharing Feature
Another solution you should try involves disabling the TCP Port Sharing feature. You can do this by using the Control Panel.
Just follow the instructions below:
- Input Turn Windows Features On and Off into the search field.
- Click on the top-most result.
- Expand the .NET Framework 4.6 Advanced Services section.
- Next, expand the WCF Services.
- Disable the TCP Port Sharing feature by unticking the box next to it.
- Hit OK to save your settings.
- Restart your computer.
Solution #8: Perform a System Restore
If all else fails, you may need to perform a System Restore. This way, you can restore your system to a previous point when the error does not show.
For this solution to work, you need to have a restore point first. To create one, follow these instructions.
- Type create a restore point into the search field. The System Properties window should now appear.
- Click the Configure button.
- If System Protection is disabled, enable it.
- Hit OK to proceed.
- Next, go to the System Properties window and select the partition associated with your system.
- Press the Create button.
- Add a description to the restore point and click Create once again.
- At this point, your system will create a restore point. Wait for it to finish.
- Once done, hit the Close button.
To restore Windows 10/11 using a restore point, do the following:
- Press the Power button twice or thrice to enter the Troubleshoot window.
- Select Advanced Options and click System Restore.
- In the window that appears, hit the Next button.
- Choose a restore point and hit Next.
- Confirm your action and press Finish.
Solution #9: Reset Every Windows Component
If none of the solutions has worked so far, then it is possibly the case of your system dealing with a system file corruption. Unfortunately, this calls for a more complex fix. So, if you find yourself in such a situation, then try resetting every Windows component relevant to the process.
Reset Windows components by following any of these procedures:
Repair Install
This is the approach we recommend if you plan to retain your applications and personal files. But to proceed with this, you need compatible installation media. Here’s how to perform a repair install:
- Download the Windows 10/11 ISO file from here.
- Save it on your computer, preferably on your desktop.
- Next, mount the file.
- Double-click on the setup.exe file to begin the repair and installation process.
Alternatively, you can use a USB installation media, but you need to have a USB flash drive with a minimum of 4 GB space for 32-bit installation and 8 GB for 64-bit.
Solution #10: Install Any Pending Windows Update
As you may already know, Microsoft fixes previously reported bugs and issues on Windows 10/11 by rolling out regular updates. So, you may try installing any available Windows update to resolve the Service Control Manager Event ID 7001 error.
To install a Windows update, do the following:
- Go to the Start menu.
- Click on the Settings icon. It is the one that has a gear icon.
- Next, select Update and Security.
- Navigate to the Windows Update tab.
- Hit the Update button. If an update is detected, it should start downloading right away.
- Wait for the process to complete. Once done, restart your computer.
Clean Install
This is usually the default choice if you are looking for a fast method that allows you to reset every Windows component without having to insert an installation media. But remember that this method may cause you to lose your data, so make sure you have a backup file.
Windows 10/11 Error Prevention Tips
To avoid errors like the Service Control Manager Event ID 7001, make sure your computer is running at an optimal state. Below are some tips that can help speed things up. Try them in any order you desire.
Tip #1: Make Sure Everything Is Up to Date
One of the best ways to ensure you make the most of your Windows 10/11 PC is to have the latest Windows 10 version. When you install the latest version, you are also installing the latest device drivers and improving your computer’s performance.
Tip #2: Make It a Habit to Restart Your PC and Open Those That You Only Need
Opening too many programs, tabs, and apps can slow down your computer. Worse, it can trigger error messages to appear. If you feel that your computer is becoming sluggish, restart it and open only the apps that you need.
To restart your computer, click the Start button. Go to Power and select Restart.
Tip #3: Free Up Disk Space
You can significantly improve your device’s performance by freeing up some disk space on your computer. To check if a disk has no sufficient space, go to Start and select Settings. Next, click System then Storage. All your drives will be listed in the Storage area. Take note of the total amount of free space and delete files from disks that are running low in space.
Tip #4: Pause Cloud Syncing
We know how handy the cloud is, especially when it comes to backing up files. However, syncing your files all the time can take a toll on your PC. Syncing real-time can slow down your PC. If you notice your PC is performing poorly, pause automatic syncing temporarily.
Tip #5: Disable Unnecessary Startup Programs
Whenever you switch on your computer, some programs will automatically launch and start in the background. You can disable them if you notice your computer is running slow.
Summary
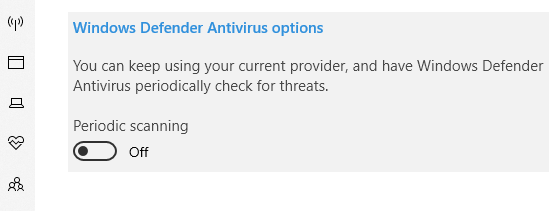
The Service Control Manager plays an essential role in the Windows 10/11 platform. Not only does it allow you to make changes in core processes, but it also lets you modify various services like Windows Defender.
But as with other services, this tool may also encounter errors, and one of the most notorious ones is the Service Control Manager Error with Event ID 7001.
This error can be triggered by many different factors. The most common ones include disabled mandatory services, missing network discovery dependencies, corrupted system files, and software conflict.
Regardless of the cause, the error can be resolved. While some fixes are complex like clean installing Windows 10/11, others are easy to do such as enabling some services and disabling some features. And if you feel that the issue requires the help of professionals, you can always turn to the experts at Microsoft. They should be able to provide you with a solution that is suited for your scenario.
Have you used the Service Control Manager before? What errors did you encounter while using it? Share your experience in the comments!