Windows Updates are essential for security on latest Windows systems, but sometimes users face error 0x80070012 while updating. This error, caused by a misconfigured system, can lead to PC freezing, lagging, and automatic shutdown of applications. Possible causes include viruses and malware, corrupted files, or incomplete installations of applications or software drivers.
To resolve this error, you need to restore your system. Perform a full PC scan and uninstall all the recently installed programs. Or else you can download any PC repair tool and start scanning with the help of that repair tool.
What Is Windows Update Error Code 0x80070012?
Windows Update is a Microsoft service used to provide updates for Microsoft software, including Windows operating systems. Windows Update service provides updates in the form of patches and service packs. The main purpose of Windows Update is to keep operating systems updated with improved security features and enhancements. Every second Tuesday of the month is called “Patch Tuesday”, a day when Microsoft routinely releases patches and security updates for Windows operating system users.
During the update process, Windows can produce various errors, including an error with code 0x80073712. This usually means that there are missing or damaged files required by Windows Update to perform the update. When an error code such as this appears, Windows Update cannot finish updating the operating system and install the updates. This error can be caused by an incomplete installation/uninstallation of software.
Expert Tip: For smoother PC performance, consider using a PC optimization tool. It handles junk files, incorrect settings, and harmful apps. Make sure it's right for your system, and always check the EULA and Privacy Policy.
Special offer. About Outbyte, uninstall instructions, EULA, Privacy Policy.
However, a lot of users reported getting Windows Update Error Code 0x80070012 when trying to update the printer driver.
Here is a sample error message for this case:
Canon driver update for Canon Inkjet MP830 Series – Error 0x80070012
The printer still works but may not be getting other updates until the error is fixed. Resetting windows also didn’t work.
Many users experienced the Windows Update error code 0x80073712 though it has been mostly reported on Windows 10/11 computers. Fortunately, there are several possible ways to solve the problem. In the guide below, we outline a number of solutions.
What Causes Windows Update Error Code 0x80070012?
As it turns out, there are several underlying causes that might be triggering this particular error code. Here’s a list of potential culprits that might be triggering the Windows Update error 0X80070012:
- Common Windows Update issue – The ideal way to start troubleshooting this particular issue is to run the Windows Update Troubleshooter. If the problem is already covered by a repair strategy, the utility will be able to resolve the issue automatically.
- WU service/s stuck in a limbo state – If the problem originates from an issue having to do with the state of several critical WU services that are neither opened or closed. In order to resolve this issue, you’ll need to reset every Windows component either via the automated agent or with a series of manual commands inside an elevated Command prompt.
- System file corruption – Another fairly common scenario that will cause this issue is some kind of system file corruption that is affecting the WU component. Several users facing the same problem have managed to fix the issue by deploying SFC and DISM scans. in more serious circumstances, you might need to go for a repair install.
- Corrupt Windows Registry Entries – Corrupt Windows registry entries can trigger the Windows Update Error 0x800f0805. This is because if Windows is unable to find the files needed for the update, it will be unable to boot properly. This will result in an error.
- Unstable Internet Access – A stable internet connection is required to install a Windows update. If your connection is unstable, then you will likely encounter a Windows update error.
- Disabled Windows Update Service – You need to enable the Windows Update service to be able to download and install a Windows update. Otherwise, an error message will be thrown.
- Misconfiguration – If your Windows Update settings are not properly configured, then there is a chance that you will encounter the Windows Update Error 0x80070012.
- Malicious Entities – Malicious entities like viruses, malware, and adware are notorious culprits behind different Windows errors, and the Windows Update Error 0x80070012 is no exemption.
How to Fix Windows Update Error Code 0x80070012
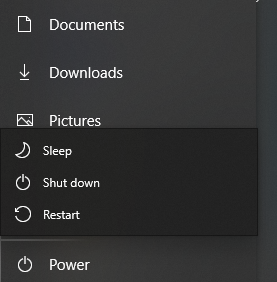
Sometimes, a simple restart of your computer can fix the glitches causing this update error. Save your work, restart your computer, and attempt the update again.
Next, ensure your internet connection is stable, as network disruptions could interfere with the update. If you’re on Wi-Fi, try switching to a wired connection or vice versa, then reattempt the update.
Also, firewalls or antivirus software could block Windows Updates. If you suspect this could be the case, disable these programs temporarily and check if the issue persists. If the error disappears, consider changing your security suite to a trusted and less intrusive one.
If you’re still facing the issue after trying these basic troubleshooting steps, consider exploring the following advanced solutions:
Fix #1: Force Restart Windows.
The update error could be due to another update in progress, as your system may be automatically downloading and installing an update that requires a restart. So, if you initiate another update, it may fail, resulting in the error code 0x80070012. You can solve this by allowing your system to finish the current update. Here’s how:
- Click the Start menu and select ‘Update and Restart’.
- Windows will restart to complete the pending update.
- After your computer reboots, return to the Windows Update utility and try installing the newest update.
If the error persists, consider trying a different solution.
Fix #2: Run Windows Update Under Clean Boot.
A clean boot launches Windows using the least number of drivers and programs, reducing software conflicts that can arise during installations or updates. It’s important to understand that clean booting is different from safe mode, the latter is more of an advanced troubleshooting step.
To initiate a clean boot, follow these steps:
- Type
MSConfigin the taskbar search field and press Enter to open the System Configuration window. - In the ‘General’ tab, select ‘Selective Startup’ and uncheck the ‘Load Startup Items’ box. Ensure ‘Load System Services’ and ‘Use Original Boot Configuration’ are checked.
- Move to the ‘Services’ tab, select ‘Hide all Microsoft Services’, and then click ‘Disable All’.
- Click ‘Apply’ then ‘OK’, and restart your machine.
Upon reboot, Windows will start in a clean boot state, allowing you to attempt the Windows update installation without encountering the Error Code 0x80070012.
Fix #3: Run the Windows Update Troubleshooter.
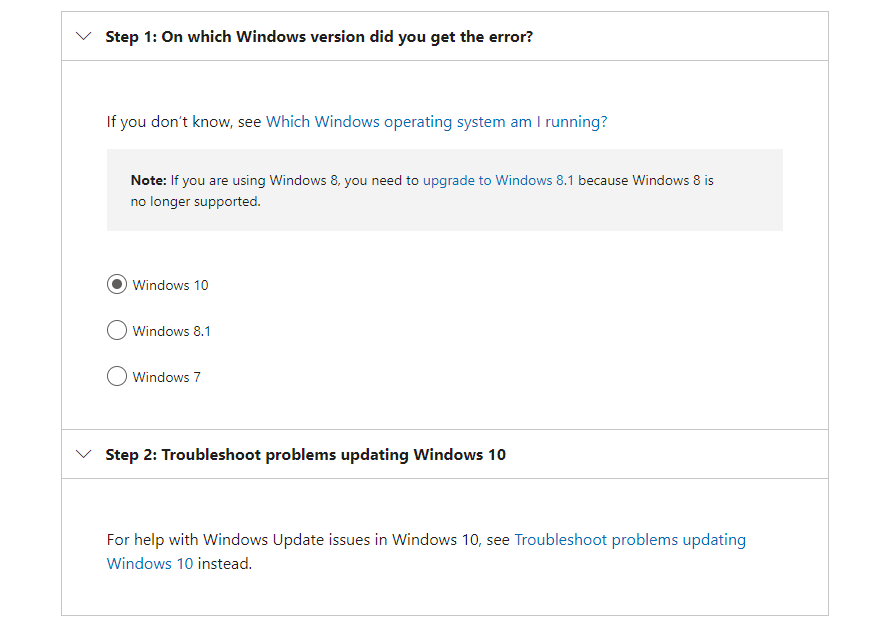
If a simple system reboot doesn’t resolve the issue, consider utilizing the built-in Windows Update Troubleshooter utility. This tool is designed to diagnose and fix problems related to Windows updates, and it has helped many users resolve the error.
This built-in utility scans for inconsistencies within the Windows update system and automatically suggests fixes when applicable. It’s a simple and efficient first-step resolution that only requires a few clicks to use.
Follow these steps to run the Windows Update Troubleshooter:
- Press the Windows + R keys to launch the Run utility.
- Enter
ms-settings:troubleshootin the text field and hit Enter to open the Windows Update Troubleshooter. - Scroll through the list to find ‘Windows Update’, and click on it.
- Select ‘Run the Troubleshooter’ and let the tool perform its analysis.
- Once the analysis is complete, click ‘Apply and Fix’ and wait for the process to finish.
- Restart your computer once done.
If the error 0X80070012 persists after running the troubleshooter, or if the troubleshooter doesn’t suggest a viable solution, proceed to the next potential fix.
Fix #4: Remove Pending XMLFile.
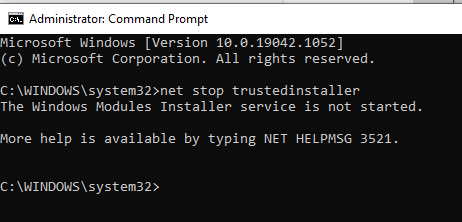
If you are unable to update the Windows operating system, you might want to remove the pending .xml file and try to start the Windows Update process again. Open Command Prompt as administrator and type the following commands (remember to press the Enter key after you type each command):
- net stop trustedinstaller
- cd %windir%\winsxs
- takeown /f pending.xml /a
- cacls pending.xml /e /g everyone:f
- del pending.xml
If you receive a message stating that “The Windows Modules Installer service is not started”, simply ignore it and continue executing commands by pressing Enter after: remove pending xml file
Restart the computer and try to update Windows again. See if this fixes the Windows Update error code 0x80073712 that prevents you from updating the Windows operating system.
Fix #5: Reset Every Windows Update Component.
If you still encounter the 0X80070012 error post troubleshooting, you might be dealing with a stubborn glitch within the Windows Update component. This problem often results from one or more Windows Update components getting stuck in an indeterminate state – neither fully open nor closed.
In such cases, resetting these components could resolve the issue. This ensures all elements involved in the updating process return to their default state, eliminating any potential hang-ups.
Here’s how to reset Windows Update components using two methods:
Resetting WU via the WU Agent
- Open your default browser, visit the Microsoft Technet download page and download the Reset Windows Update Agent script.
- Once the download is complete, go ahead and extract the zip archive with a utility like WinRar, WinZip, or 7Zip and paste it into an easy to access location.
- Next, double-click on the ResetWUENG.exe file and click Yes at the User Account Control prompt.
- Then, follow the instructions to run the script on your computer. At the end of this operation, the utility will reset all your WU components.
- After the operation is complete, restart your computer and see if you’re able to install the failing update once the next startup sequence is complete.
Resetting WU via elevated CMD
- Start by pressing Windows key + R to open up a Run dialog box. Then, type “cmd” inside the text box and press Ctrl + Shift + Enter to open up an elevated Command Prompt.
- At the UAC (User Account Control) prompt, click Yes to grant administrative privileges.
- Inside the elevated Command Prompt, type the following commands in order and press Enter after each command to stop all WU related services:
- net stop wuauserv
- net stop cryptSvc
- net stop bits
- net stop msiserver
- These commands will stop the Windows Update Services, MSI Installer, Cryptographic services, and BITS services.
- Once every relevant service is stopped, run the following commands to clear and rename SoftwareDistribution and Catroot2 folders:
- ren C:\Windows\SoftwareDistribution SoftwareDistribution.old
- ren C:\Windows\System32\catroot2 Catroot2.old
- Renaming these folders with the commands above will force your OS to create new healthy equivalents that will not be affected by corruption.
- Now that the folders have been cleared, run the following commands to re-enable the services that we’re previously disabled:
- net start wuauserv
- net start cryptSvc
- net start bits
- net start msiserver
- Finally, restart your computer once again and see if the issue has been resolved at the next computer startup.
If the same 0X80070012 error is still occurring even after you have successfully refreshed every Windows Update component, move down to the next potential fix below.
Fix #6: Perform SFC and DISM Scans.
If the issue persists despite refreshing all Windows Update components, it’s possible system file corruption is triggering the 0X80070012 error when installing a pending Windows Update. In this case, you should perform scans with two inbuilt utilities – System File Checker (SFC) and Deployment Image Servicing and Management (DISM).
While SFC and DISM share functionalities, running both consecutively can bolster the likelihood of repairing corrupted system files. Start with an SFC scan, an offline tool not requiring an internet connection. Once initiated, ensure you keep the CMD window open, even if it appears to be frozen. Interrupting the process might cause logical errors on your storage drive. Once the SFC scan concludes, restart your computer and check if the issue is resolved.
Subsequently, conduct a DISM scan. As it uses a Windows Update sub-component to replace corrupted system files with healthy ones, a stable internet connection is needed. Post completion of the DISM scan, restart your computer again and see if the 0X80070012 error is resolved. If the error continues, consider exploring the next suggested solution.
Fix #7: Remove Problematic Registry Entries.
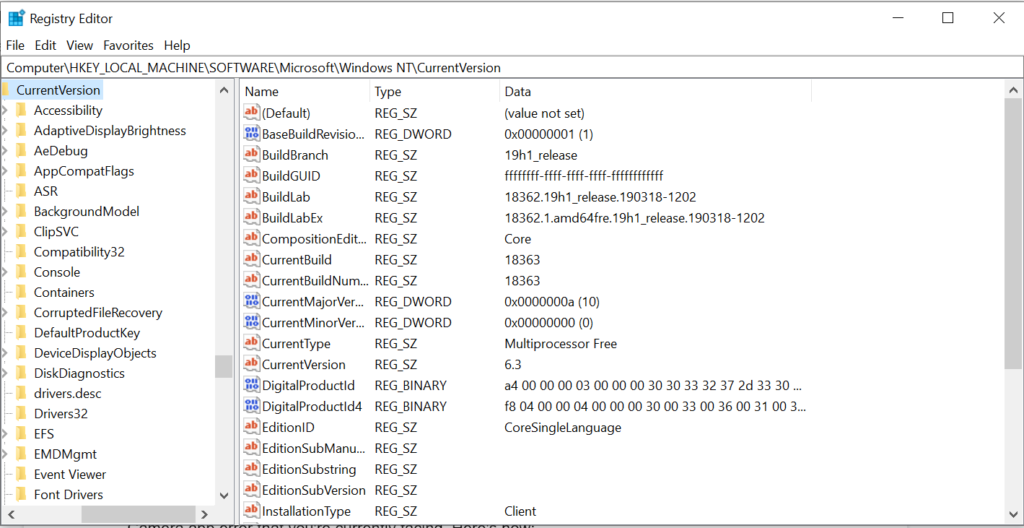
If you suspect that there are registry entries that are damaged or corrupt, then remove them. Although this fix sounds complicated, it is relatively simple. Just follow the steps below:
- Press the Windows + R keys to launch the Run utility.
- Type regedit into the text field to run the Registry Editor.
- Hit Enter.
- Navigate to the left pane and go to this location: HKEY_LOCAL_MACHINESOFTWAREMicrosoftWindowsCurrentVersionWindowsUpdateAuto UpdateRequestedAppCategories.
- Expand this section and right-click on 8B24B027-1DEE-BABB-9A95-3517DFB9C552.
- Remove it.
- Restart your computer.
Take note that playing around with registry entries can be risky. One wrong move and you may end up causing more damage than good. So, before you even consider this fix, make sure you have a backup file in handy.
Fix #8: Set the Update Services to Automatic.
Sometimes, a poor services configuration can lead to this Windows update error. Thus, make sure it is set properly. Here’s what you should do:
- Launch the Command Prompt with administrator privilege by pressing the Windows + X keys.
- Select Command Prompt (Admin).
- Next, run the following commands one at a time. Press Enter after each one of them:
- SC config wuauserv start= auto
- SC config bits start= auto
- SC config cryptsvc start= auto
- SC config trustedinstaller start= auto
- net stop wuauserv
- Restart your computer and launch the Command Prompt once again. Run this command: net start wuauserv.
- Navigate to Settings and select Update and Security.
- Click the Check for Updates button.
The Windows Update utility will then start scanning for any available updates. If it detects any, it will be installed automatically.
Fix #9: Download and Install the Update Manually.
If you cannot install the update because of the error 8024a112, you can resolve the problem by manually downloading the update from the official Microsoft Update Catalog. But for you to be able to do that, you have to know the update code of the Windows update you wish to download.
Usually, the update code begins with KB. It is then followed by a combination of numbers. After you find this code, download it by following these instructions:
- Go to the official Microsoft Update Catalog website.
- Type the update code into the search field.
- A list of all matching updates will show. Find the most relevant one that is compatible with your system architecture.
- Hit the Download button next to it.
- Next, run the setup file and follow the installation wizard.
- Restart your computer to fix the problem.
Fix #10: Use System Restore to Revert the Computer to a Healthy Point.
Should this error have begun following a Windows Update installation, it’s feasible to return your system to a stable state preceding the problematic update. This can be achieved through the System Restore tool.
System Restore points are auto-generated snapshots of vital system events such as third-party installations, security updates, and fresh Windows updates. Unless manual adjustments have been made to the Windows Update behaviour, a variety of Restore Points should be available to choose from.
In cases where a normal boot isn’t possible, make sure to have installation media ready that’s fully compatible with your installed Windows 10 version. This is crucial in aiding the restoration process.
- Press any key to boot from the installation media.
- On the initial installation screen, click Repair your computer to launch the Advanced Options menu.
- Now, select System Restore to open the utility.
- Once inside, check the box next to Show more restore points. Then, select the one created just before the issue was triggered. Click on the desired restore point and click Next to proceed.
- Click Finish and wait for the process to complete reverting your system to the selected restore point.
- Reboot the system and check if the issue persists.
Fix #11: Perform Clean or Repair Installation.
If the previously discussed solutions don’t rectify the issue, you may need to resort to a more drastic measure—Repair or Clean installation. You should consider this step when it becomes evident that the issue is significant and can’t be fixed using other methods.
Prior to starting a Repair or Clean installation, make sure to backup your data to safeguard your files. This process is essential as it refreshes your system, eliminating any underlying issues, including the fatal error C0000034.
If you possess compatible installation media, you can opt for a Repair Installation. This not only solves the problem but also lets you retain your personal files, ensuring minimal data loss.
Repair Installation
- Insert the installation media and reboot the computer. Press any key during the boot process to load Windows from the installation media.
- Choose language and time zone, and then keyboard input methods before clicking Next.
- Click on Repair your computer, and then select System Image Recovery.
- Follow the prompts to complete the process.
- When done, restart and check if the issue has been solved.
Clean Installation
- Insert the installation media and reboot the system. Press any key to boot from the installation media.
- Note that even if the Windows 10/11 copy you have is different from the one installed, you can use it when performing Clean Installation. Alternatively, you can match the original installation details and use the previous key to activate your Clean installation.
- Once you reach the initial Windows Setup screen, click Install now.
- Follow the prompts to set up new disk partitions, etc.
- Depending on your PC specifications, this process can take from 30 minutes up to more than an hour.
- When done, restart the PC once more.
Conclusion
Windows Update issues are fairly typical, particularly when dealing with newly released versions. If you prefer to avoid these glitches, it’s perfectly fine to wait until a more stable release is available. But if you’re excited to experience the latest features and enhancements, don’t hesitate to install the updates immediately. Should any problems arise, remember that help is just a click away in this article.
Don’t let initial troubleshooting setbacks discourage you. There are several avenues to explore. The Windows Update Troubleshooter tool should be your first stop. If it doesn’t fix the issue, the next steps include executing the SFC and DISM commands, resetting the Windows Update service, or opting for more drastic measures.
Some more complex solutions could involve performing a clean install, manually downloading the Windows update, decluttering your system of unnecessary files, running an antivirus scan, or temporarily disabling active VPN connections.
Remember, if all else fails and you’re unable to solve the issue independently, it’s always wise to seek help from professionals knowledgeable about the Windows 10/11 platform. They can guide you through the troubleshooting process and help restore your system’s functionality.
