Effective Methods to Fix Windows Update 0xc1900209
Windows remains the top preference for most PC users, holding a dominant position in the operating system market. While it excels in user experience, some users have encountered the Windows Update 0xc1900209 error when attempting to update to Windows 10 or 11.
The update error code 0xc1900209 is usually caused by corrupted programs on a Windows 10/11 or Windows 11 PC. When this happens, the user is unable to update the operating system normally. If the error message alerts you to a conflicting app, the solution is straightforward. All you need to do is uninstall the faulty software and then update your device. But what if you have no idea which app is causing this error on your computer?
You could always try the hit-and-miss method. However, this would undoubtedly take up more of your time. In this post, we present a solution for quickly identifying apps that are causing compatibility issues.
The 0xc1900209 error could also occur for a variety of other reasons. Whatever the cause, simply follow the instructions below to resolve it. We’ve put together a guide to help you get out of this jam using some simple solutions and workarounds.
Expert Tip: For smoother PC performance, consider using a PC optimization tool. It handles junk files, incorrect settings, and harmful apps. Make sure it's right for your system, and always check the EULA and Privacy Policy.
Special offer. About Outbyte, uninstall instructions, EULA, Privacy Policy.
What Is the Windows Error Code 0xc1900209?
When using Windows Update or attempting to upgrade your operating system, you may encounter the error code 0xC1900209.
The error 0xc1900209 occurs because another program or process is interfering with the upgrade/update process. In the Windows Action Center, you may be told which program is causing this error.
If an incompatible application is the culprit, removing it should resolve the issue. However, determining which program is incompatible can be more difficult than it appears at first glance.
Roxio Backup My PC, Microsoft Virtual PC 2007, and Intel Dynamic Power Performance Management, as well as outdated drivers, are the most common causes of this error. If you do not have any of these applications installed, this guide will teach you how to manually read the update logs and remove any problem-causing software. You will also see other possible solutions to this problem.
Keep in mind that uninstalling programs at random to see if the error persists is extremely inefficient. Fortunately, there are tools available to help you identify the culprit.
What Causes the Windows 10/11 Update Error 0xc1900209?
The following are the most common triggers behind the 0xc1900209 Microsoft error:
- Outdated/Missing Drivers: If some drivers on your computer are either missing or outdated, you may receive the Windows Update 0xc1900209 error message when attempting to install an update. It is best to install any missing drivers and update old ones before proceeding with an update.
- Background Applications: Certain background applications have been known to interfere with Windows Update services, resulting in the 0xc1900209 error when installing an update. To resolve this issue, restart your computer in clean boot mode as described below.
- Windows Update Cache: A corrupted Windows Update cache is another possible cause of the Windows Update 0xc1900209 error, and it can prevent updates from being installed on your computer. It is preferable to clear this cache before attempting to install a new update on your Windows computer.
- Corrupted System Files: It is possible that some registry files or other critical system files have become corrupted as a result of a storage failure or malware issue. It is preferable to locate these corrupted files and replace them as described below.
- WU Service Glitches: If you receive the Windows Update 0xc1900209 error while attempting to update your system, you should not rule out an update service glitch. Update services must occasionally be restarted to maintain normal operation, which should be done manually in some cases.
- Antivirus Software: Because most people are dissatisfied with the security provided by Windows Defender, they install third-party antivirus software to further protect their systems. However, this can sometimes backfire if the software generates false alarms, resulting in the error 0xc1900209 on your computer. During an update, it is best to add a temporary exception or disable the antivirus completely.
Now that you’re aware of some of the possible causes of the Windows Update 0xc1900209 error, we can move on to the fixes.
How to Deal With the Error Code 0xc1900209
If you are unable to install a pending update on your computer due to the error code 0xc1900209, try the following solutions:
Method 1: Uninstall Conflicting Apps
The update error 0xc1900209 may be caused by some conflicting apps running on your system. If you have recently installed new software on your computer, uninstall and reinstall it to see if the problem goes away. If the error persists after you have uninstalled all recently installed apps, you must manually identify and uninstall the faulty app.
The following guidelines should assist in identifying the culprit:
- First, go to Microsoft’s official website and download the most recent SQL Server.
- Open the folder containing all of the downloaded files and double-click the setup file.
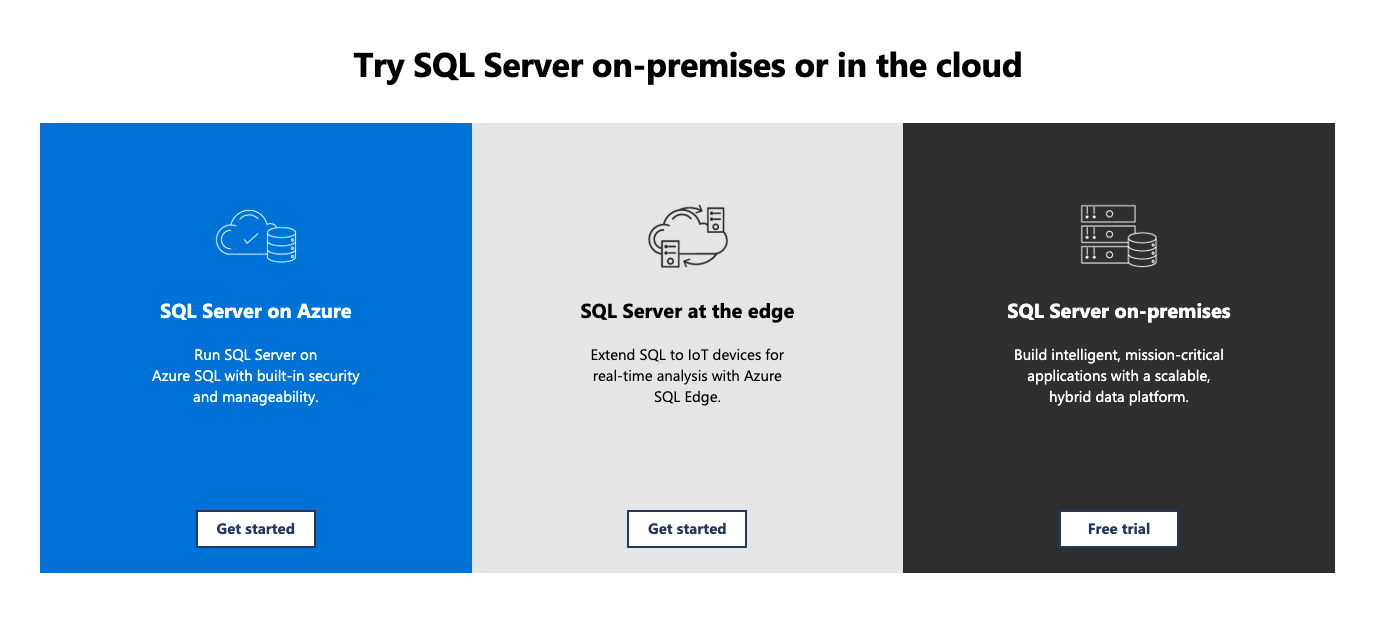
- This will start the SQL Server installation process on your device. The installer will display three options for you to select from; select the Basic option.
- When the installation is finished, go to the Windows Assessment and Deployment Kit (ADK) for Windows 10/11 page and download the tool.
- To begin the installation, double-click the downloaded file. When installing the ADK, make sure to install only the features that you want.
- Wait for the selected features to successfully install on your device. When this is complete, follow the steps below to resolve Error 0xc1900209.
Repair Compatibility Issues with Faulty Apps
- To open the Search window, press Win + S.
- In the text field, type Compatibility Administrator and press Enter.
- When the Compatibility Administrator app loads, click Search and then choose Fixed Programs.
- Next, select the Find Now option.
- This tool will scan all installed apps on your computer and select a few that are incompatible.
- Choose the first item on the list. ADK will then redirect you to the program’s main section with the selected entry.
- Copy the selected item by right-clicking on it. Scroll down until you find an entry titled New Database under Custom Databases in the right pane.
- Right-click New Database again and paste the selected item inside it.
- Repeat this process for all of the entries in the list above.
Please keep in mind that if you’re using 64-bit Windows, you’ll need to take a few extra steps. This is due to the fact that the steps outlined above will only resolve compatibility issues with apps located in the Program Files folder. As a result, you must repeat the entire process for any programs that you downloaded from the Microsoft Store and that are located in the Program Files (x86) folder.
Here’s how to resolve 32-bit app compatibility issues on any x64-based PC:
- Click Browse in the upper right corner of the Compatibility Administrator tool.
- Navigate to the Program Files (x86) folder and select Find Now.
- To resolve compatibility issues with x86-based apps, follow the same steps as above.
Once you’ve uninstalled the faulty programs, run a PC repair tool like Outbyte PC Repair to make sure there are no leftover files that would cause trouble in the future. Hopefully, this method resolves any issues that may arise as a result of a faulty app. Check to see if you can update your device.
Method 2: Identify and Uninstall the Faulty App Manually
If the first method did not work, you should try this instead:
- Launch Windows Explorer and go to this folder: C:\$WINDOWS.~BT\Sources\Panther. Since this is a hidden folder, just copy that path and paste it into Explorer, then press Enter.
- Look for the problematic file using this parameter: “*_APPRAISER_HumanReadable.xml”.
- Right-click on the latest .xml file and use Internet Explorer or Notepad to open it.
- Scan through the code and look for the following:
- PropertyList with the “Decision Maker” type and with the character string “<Property Name=”DT_ANY_FMC_BlockingApplication” Value=”TRUE” Ordinal=”1″ />”
- The XML node “<PropertyList Type=Inventory”>” under “Asset” with the property name LowerCaseLongPath
- LowerCaseLongPath includes the path to the faulty application. Take note of the application and its path.
- Navigate to Control Panel > Programs > Programs and Features and uninstall the app.
Method 3: Perform a Clean Boot
Although the above solution should assist you in resolving the error 0xc1900209 on your device, it may not always do so. If you’re still having trouble updating your system, try entering the Clean Boot state on your computer and see if the problem persists.
There will be no interference from third-party apps or drivers because they won’t be running in Safe Mode. Check to see if you can update Windows normally.
Method 4: Run SFC and DISM Scans

Obsolete or missing system files may prevent Windows Update from running normally. As a result, you may need to use the SFC tool to check for and resolve file issues on your computer. Here’s how to complete this task:
- Launch the Command Prompt with admin privileges.
- When it opens, type the following into the window and press Enter: sfc /scannow.
- This command typically takes 10-15 minutes to search for and repair corrupt files; however, depending on the level of corruption, the scan may take a little longer.
- Restart your computer once it is finished.
- Reboot your device and see if you can now update Windows normally.
If the error 0xc1900209 persists, it could be due to corruption in the Windows image itself. To resolve this, you can use a built-in tool called DISM:
- Press the Win + R shortcut.
- When the Run dialog box appears, type CMD and press Ctrl + Shift + Enter.
- Following this procedure will launch the Windows Command Prompt with administrative privileges.
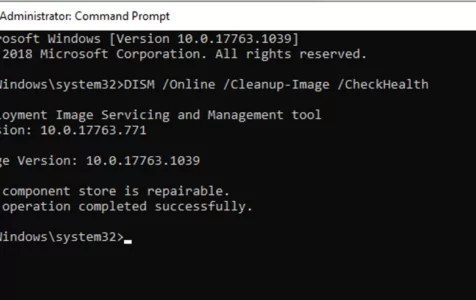
- Copy and paste the following code into the Command Prompt: Dism /Online /Cleanup-Image /CheckHealth.
- To begin executing the command, press Enter.
- The process usually takes about 15-20 minutes, so be patient.
- Reboot your computer and see if that solves the error 0xc1900209.
Method 5: Clear the Windows Update Cache
Clearing the Windows Update cache has helped some users get rid of the Windows Update error 0xC1900209. You can also give it a shot; the steps are outlined below:
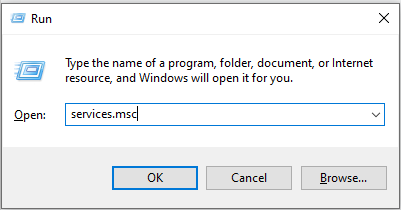
- In the Run dialog, type services.msc and press OK to launch the Services app.
- To temporarily disable the Windows Update service, right-click it and select Stop.
- In File Explorer, copy and paste %windir%\SoftwareDistribution\DataStore into the address bar, then press Enter to find the DataStore folder. Delete everything in this folder.
- Return to the Services app. To start the Windows Update service, right-click it and select Start this time.
You can now test whether Windows can update without the error 0xC1900209.
Method 6: Reset Windows Update Components
Every now and then, Microsoft releases new updates for all versions of Windows 10/11. In a month, at least 2-3 updates are released, including out-of-band, non-security, and security updates. Though some are optional, most users install all such updates.
The issue is that with each update, some cache accumulates within the Windows cache folders. When the stored cache exceeds a predefined limit, it can cause a variety of update-related problems, including 0xC1900209. This issue can only be resolved by resetting Windows Update components to their default settings.
The simplest way to reset Windows Update components is to use a batch script. This page contains a script for resetting Windows Update. After you’ve downloaded it, right-click it and choose Run as Administrator. Allow the process to finish before rechecking for updates.
You can also write your own batch script using the instructions provided below.
Copy and paste the following text into Notepad:
@ECHO OFF
echo Simple Script to Reset / Clear Windows Update
echo.
PAUSE
echo.
attrib -h -r -s %windir%system32catroot2
attrib -h -r -s %windir%system32catroot2*.*
net stop wuauserv
net stop CryptSvc
net stop BITS
ren %windir%system32catroot2 catroot2.old
ren %windir%SoftwareDistribution sold.old
ren “%ALLUSERSPROFILE%\Application Data\Microsoft\Network\Downloader” downloader.old
net Start BITS
net start CryptSvc
net start wuauserv
echo.
echo Task completed successfully…
echo.
PAUSE
Save the file as WUReset.bat to your desktop. Simply right-click on the script and select Run as Administrator to use it.
Wrapping Up
Resolving the 0xc1900209 error may appear slightly different from eliminating other similar problems since it requires the use of additional utilities. However, the solutions above should cover all possible scenarios and resolve the error for most users. If the problem persists, you have only one option left: use an ISO file and perform a clean installation of Windows 11/10.


