
Windows 10/11 is without a doubt one of the most popular and commonly used operating systems nowadays. But despite its popularity, it is also notorious for producing update errors that surface at random and mess with important system processes.
One of these errors is the Microsoft error 0x80070652. According to affected users, this issue keeps you from installing any available updates on your system. And like other update errors on Windows, the error code 0x80070652 can be fixed.
Before we delve deep into the known fixes, let’s have a quick look at the Windows error code 0x80070652, what causes it, and how it affects your computer.
What Is the Error Code 0x80070652 on Windows 10/11?
You may encounter the error 0x80070652 on Windows 10/11 while installing a system update or when updating a software program like Microsoft Visual Studio. Often it comes with the error message ERROR_INSTALL_ALREADY_RUNNING, suggesting that an installation is currently running.
Expert Tip: For smoother PC performance, consider using a PC optimization tool. It handles junk files, incorrect settings, and harmful apps. Make sure it's right for your system, and always check the EULA and Privacy Policy.
Special offer. About Outbyte, uninstall instructions, EULA, Privacy Policy.
In some cases, the Windows 10/11 error code 0x80070652 results in a Blue Screen of Death, where users seem to be in a never-ending rebooting loop.
What Causes the Microsoft Error Code 0x80070652?
The Windows Update error 0x80070652 can be caused by different things, but below are some of the most common culprits:
- Multiple installer processes are running at the same time. Windows is unable to run all the installers simultaneously, hence the error. The occurrence of the error code means you have to end other installation processes via Task Manager.
- You are trying to download another application while there is an ongoing Windows upgrade.
- There is an issue with the previous update installation. For instance, the previous upgrade process failed or has not been properly completed.
- A system crash has occurred.
- Malicious entities have attacked your PC and messed with important system processes.
Ways to Resolve the Windows 10/11 Update Error 0x80070652
If you are looking for ways to fix the 0x80070652 error on Windows 10/11, keep on reading. We have compiled a list of easy-to-follow solutions that are proven to work against the error 0x80070652. And since there are many potential triggers to this error, we suggest that you begin with the first solution on this list. And then, work your way down the list until you come across a fix that is helpful for you.
By the way, make sure that you follow all the steps carefully to ensure you achieve the best results.
Fix #1: Restart Your PC and Run the Windows Update Troubleshooter
The first and easiest fix is restarting your PC. Sometimes, all your computer needs is a simple restart as many unnecessary processes are already running in the background. A restart may clear any issue caused by faulty system features, third-party programs, or Windows Update services.
If the error persists after restarting your computer, run the Windows Update Troubleshooter. Here’s how:
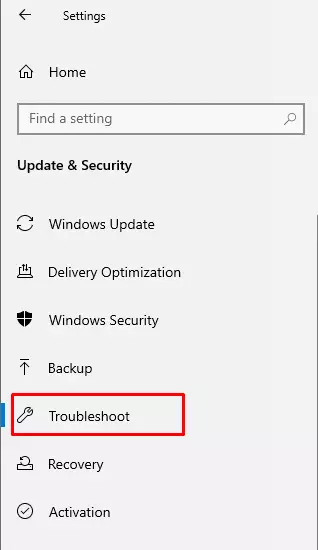
- Press the Win + I shortcut to access the Settings utility.
- Go to Update and Security.
- Navigate to the left pane and select Troubleshoot.

- Lastly, click the Windows Update option and run the troubleshooter.
Fix #2: Uninstall the Most Recent Update and Install It Once Again
Microsoft regularly rolls out mandatory updates, and it is quite difficult to keep up with them. What makes the situation more troublesome is that notifications keep showing, telling you that an update is available. So, to put an end to the random pop-ups, you install the update.
Now, while it is important to install all these updates for security purposes, it is worth noting that Microsoft also releases problematic updates. Luckily, there is an option to uninstall them in case anything goes wrong.
To uninstall the most recent update from Microsoft, follow these steps:
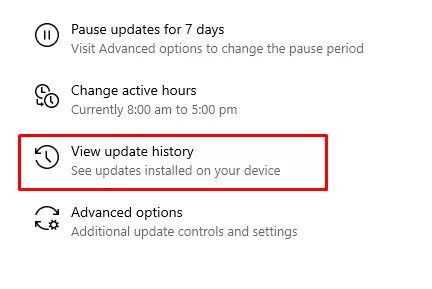
- Go to the Settings app and navigate to the Update and Security section.
- Next, go to the Windows Update pane and choose Advanced Options.
- Select the View your update history option.

- Click Uninstall Updates.
- Find the most recent update that you suspect is causing the error. Uninstall it.
- And then, check for available updates once again.
Fix #3: Use a Third-Party Tool to Resolve Windows Issues
Clutter and junk files can sometimes trigger the error 0x80070652. That is why, in some cases, performing regular scans using a PC repair tool, such as Outbyte PC Repair, can help get rid of the issue.
Here’s a guide on how to use such a tool:
- Download and install a trustworthy PC repair tool that is compatible with your Windows device.
- Launch it and run a scan.
- Wait for it to identify any space hogs and unwanted files.
- Get rid of them if you want to.
- Restart your computer to apply the changes.
Fix #4: Run a Batch Script
Though it happens rarely, Windows Update services may become unresponsive at times. Fortunately, there is a way to reset these services. You can even do that manually using a batch script. Here’s how:
- Download this batch script file.
- Right-click on it and execute it with administrator privileges.
- Once done, restart your computer and check if you can install the update.
Alternatively, you can create your own batch file and run it. Here’s how:
- Launch Notepad.
- Copy and paste these lines:
- @CHECH OFF
- echo Simple Script to Reset / Clear Windows Update
- echo.
- PAUSE
- echo.
- attrib -h -r-% windir% \ system32 \ catroot2
- attrib -h -r-% windir% \ system32 \ catroot2 \ *. *
- net stop wuauserv
- net stop CryptSvc
- net stop BITS
- ren% windir% \ system32 \ catroot2 catroot2 .reg
- ren% windir% \ SoftwareDistribution sold.old
- ren “% ALLUSERSPROFILE% \ application data \ Microsoft \ Network \ downloader” downloader.old
- net Start BITS
- net start CryptSvc
- net start wuauserv
- echo.
- echo Task completed successfully …
- echo.
- PAUSE
- Save the file as WUReset.bat.
- Right-click on the file to execute it.
- Click Run as administrator.
- Let the file run and restart your machine.
Fix #5: Install the Update Manually
If you suspect that the problem is with the Windows Update tool itself, then try installing the update manually. You can download cumulative updates and security patches from Microsoft’s website.
Follow these steps to install the update on your own:
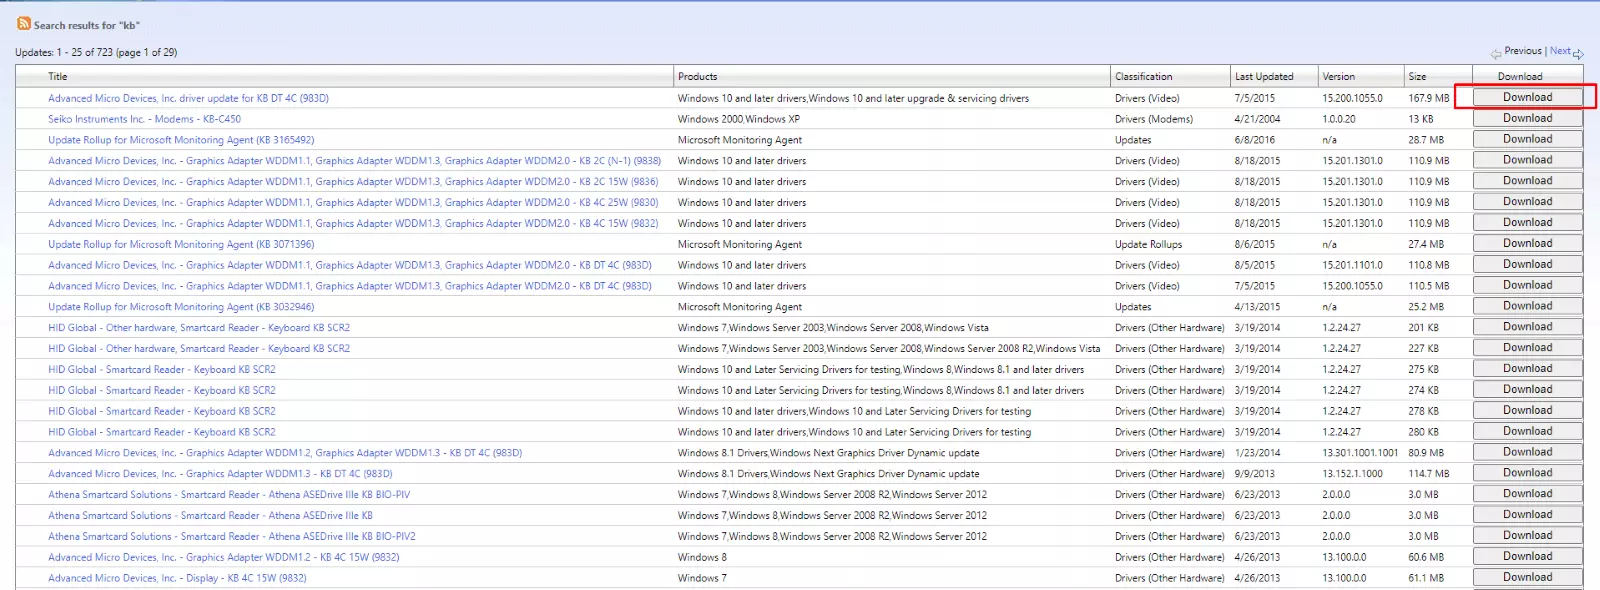
- Visit the official Microsoft Update Catalog.
- Type the KB number of the update you want to install into the search field.
- Click Search to start finding relevant results.
- Check the search results and download the update that meets your system requirements. Click the Download button next to it.

- Run the file you have downloaded and restart your PC.
Fix #6: Use the Media Creation Tool
Microsoft created a tool that allows for a multitude of installation procedures. It is called the Media Creation Tool. You can use it to force updates and get around those known issues that come with standard Windows Update procedures. Here’s how to use the Media Creation Tool:
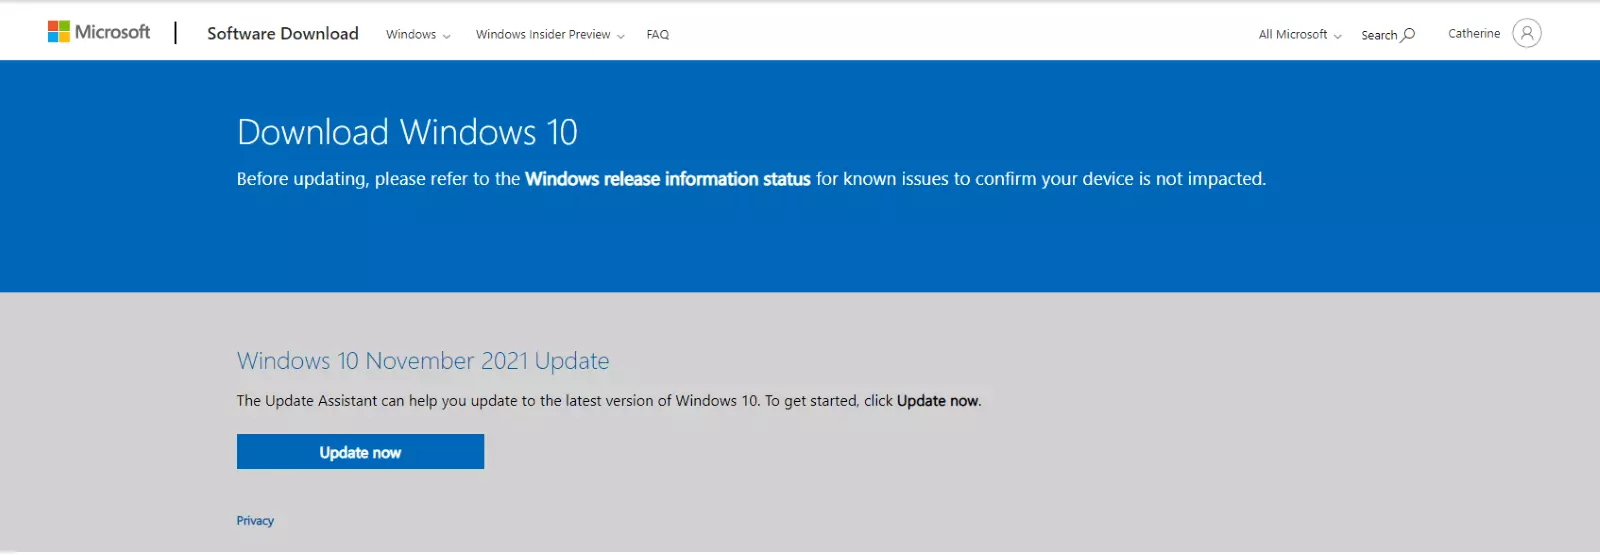
- Download the Windows Media Creation Tool.

- After that, run the Windows Media Creation client and click the Upgrade This PC Now button.
- The tool will start downloading and installing any available updates.
- Once done, restart your computer and the error should be gone.
Fix #7: Reset the Software Distribution Folder
Another solution that professionals recommend involves resetting the Software Distribution folder. But before proceeding with this fix, make sure you disconnect from the Internet first. Otherwise, Windows will think some files are in use and prevent other commands from being executed. Also, you have to restart your computer after disconnecting from the Internet. Once done, follow these steps:
1. Press the Win + X shortcut and choose Command Prompt (Admin).
2. Next, let’s stop the BITS, MSI Installer, Cryptographic, and Windows Update services by typing these commands followed by pressing the Enter key:
- net stop wuauserv
- net stop cryptSvc
- net stop bits
- net stop msiserver
3. Now, let’s rename the SoftwareDistribution and Catroot2 folders by typing these commands and hitting the Enter key after each of them:
- ren C:\Windows\SoftwareDistribution SoftwareDistribution.old
- ren C:\Windows\System32\catroot2 Catroot2.old
4. At this point, you should restart the services that you have stopped in the previous steps. You can do that by entering these commands one at a time:
- net start wuauserv
- net start cryptSvc
- net start bits
- net start msiserver
5. Finally, exit the Command Prompt and restart your device. Hopefully, the error is now fixed.
Fix #8: Perform a Clean Boot
Performing a clean boot is an effective method that can be used to resolve many Windows issues as it only loads essential Windows services. This means third-party applications that potentially trigger conflicts and errors won’t be running.
But before performing a clean boot, make sure that you are using a computer with an administrator account. Otherwise, you will not be able to execute some of the commands below:
- Start by typing msconfig into the search field.
- Click System Configuration from the search results.
- Go to the Services tab.
- Tick the Hide All Microsoft Services option and click the Disable All button.
- Next, navigate to the Startup tab and click the Open Task Manager link.
- Click on each item and disable them one by one.
- Exit the Task Manager and click OK to apply the changes.
- Restart your computer and check if the error has been resolved.
Fix #9: Run the System Restore Tool
If you have created system restore points on your computer, then this fix will work well. Performing a System Restore allows you to restore your system to a state when there were no problems or errors.
Here’s how to use the System Restore tool:
- Right-click on the Start menu and select Control Panel.
- Type recovery into the search field and click on the most relevant search result.
- Choose Open System Restore and click Next.
- Select a restore point. Ideally, you should choose the restore point created just before the occurrence of the error.
- Click Next and Finish.
Fix 10: Update Your Device Drivers
Outdated device drivers tend to mess with the Windows Update client, which may cause various error messages to appear. And in that case, updating them will resolve the problems.
Although device drivers often get updated when Windows updates are installed, you can also try updating them manually when troubleshooting the error in question. For that, you need to use a third-party driver updater tool.
If you don’t fancy the idea of downloading and using a third-party tool, you can perform the update via Device Manager. But we discourage doing so because you may end up installing incompatible drivers. So again, we would suggest taking the automatic route, which involves using a third-party tool.
Wrapping Up
There you have it! These fixes are very straightforward, and even a person without any technical know-how can easily apply them. And what’s great is that these solutions can also be used for a vast range of Windows Update-related issues. But we strongly suggest checking our blog section for more workarounds and explanations for other Windows Update errors.
If you wish to share your thoughts or suggestions, please use the comments section. We’re excited to hear from you.