
When using Microsoft Outlook, Windows Live Mail, or other mail clients on Windows 10/11, the error 0x800ccc90 is commonly encountered by users. If you’re experiencing this problem, don’t worry; this article will assist you in resolving the error and restoring your mail app’s functionality. This could be a problem with your email server or if the mail client itself is corrupt.
Though this error does not pose any security risks to your computer if not resolved immediately, it may limit your ability to send and receive emails using your email address. This article will go over the various causes and solutions for this error.
What Is the Server Error 0x800ccc90?
Windows Live Mail (formerly known as Windows Live Mail Desktop, code-named Elroy) was a Microsoft freeware email client. It replaced Windows Mail in Windows Vista, which replaced Outlook Express in Windows XP and Windows 98. Windows Live Mail is intended to run on Windows 7 and Windows Server 2008 R2, but it is also compatible with Windows 8.1 and Windows 10, despite the fact that Microsoft includes a new email client called Windows Mail with the latter.
WLM was discontinued by Microsoft but a lot of users are still using it. It was the successor to Windows Mail (Windows Vista), which in turn was the successor to Outlook Express (Windows XP and Win98).
Expert Tip: For smoother PC performance, consider using a PC optimization tool. It handles junk files, incorrect settings, and harmful apps. Make sure it's right for your system, and always check the EULA and Privacy Policy.
Special offer. About Outbyte, uninstall instructions, EULA, Privacy Policy.
Since around 2013, various blog sites have reported serious problems with Windows Live Mail. One of the errors often encountered is the Windows live mail error id 0x800ccc90. Another version of this error is the Microsoft Outlook error 0x800ccc90, which of course, happens when one is using the Outlook client.
Windows Live Mail received an invalid response from the POP3 server, as indicated by the error code 0x8000ccc90. This could be a problem with your mail server or, if the mail client is corrupt, with the mail client itself. Many people who have asked this question about how to get around this particular error code are left scratching their heads because it is not clear where the issue/error is coming from.
If this message appears on the screen, it indicates that no email messages from a malfunctioning WLM account are being sent to the recipients. They are routed to the Outbox folder and stored there for an indefinite period of time. According to reports, the 0x800ccc90 error may be caused by Avast or another third-party antivirus program. Furthermore, the server error 0x800ccc90 could be caused by corrupted data within the WLM app or by an outdated app.
Here are the error messages associated with this issue:
- There was a problem logging onto your mail server. Your User Name was rejected.
- Receiving’ reported error (0x800ccc90 ):
Your incoming (POP3) e-mail server has reported an internal error.
If you continue to receive this message, contact your server administrator or
Internet service provider (ISP).
- Unable to send or receive messages for the XXX account. An incorrect password was entered. The next time you send or receive messages, you’ll be asked to enter your user name and password for this account.
Server Error: 0x800ccc90
Server Response: -ERR Auth-Status: Invalid login or password
Server: ‘pop.rcn.com’
Windows Live Mail Error ID: 0x800ccc90
Protocol: POP3
Port: 110
Secure(SSL): No
Server Error: 0x800ccc90 Server Response: -ERR Auth-Status: Invalid login or password
Don’t be alarmed if you encounter the error 0x800ccc90! You can fix it yourself if you follow the DIY solutions listed below.
What Causes the Error 0x800ccc90?
Here are a few possible explanations for the Microsoft Outlook error code 0x800ccc90.
- This error usually occurs when there is a limit on the number of POP3 connections you can make at once. This limitation is set by the Internet Service Provider (ISP).
- If the port number you used for your Outgoing Server is changed to an incorrect one, you may encounter the error code 0x800ccc90. It’s also possible that your Internet Service Provider has blocked your port (ISP).
- One possible cause of this error is that you are using an invalid credential. You may encounter this issue if Outlook or WLM cannot match your username and password.
- If you have any external applications installed, such as an antivirus or firewall, your security detail may have been interfering with the smooth operation of your email on Outlook or WLM.
In this guide, we’ll show you how to resolve both the 0x800ccc90 Windows Live Mail error and the Outlook Express error 0x800ccc90. But before you do so, make sure to clean up your device first by running a professional PC Repair tool such as Outbyte PC Repair to make the troubleshooting process a lot smoother.
How to Fix the 0x800ccc90 Outlook Error
If you encountered this issue when using Outlook or Outlook Express, here are the steps you can take to fix it.
Fix #1: Create New Send/Receive Groups.
To resolve the Outlook error 0x800ccc90, divide your POP3 account into smaller groups and connect to these groups separately, making the process of sending and receiving emails easier. To accomplish this, simply follow the simple steps outlined below:
- To begin, launch Microsoft Outlook, navigate to the Send/Receive tab, and then click Send/Receive Groups > Define Send/Receive Groups.
- Choose the New tab. Next, enter a new name for the group in the Send/Receive Group Name box.
- Begin adding accounts to the group you’ve created by checking the box Include the selected account in this group.
- Tick the boxes next to Receive Mail Items and Send Mail Items.
- Choose Download complete item including attachments. After that, select OK.
- You can create as many Send/Receive groups as you need by simply following the steps outlined above, and when you’re finished, click the Close button.
- To send and receive emails with any of the groups, first, click on Send/Receive and then on the Send/Receive group name to transfer emails from it.
Fix #2: Change the Server Port Numbers.
You can also change your server’s port numbers by performing the following steps:
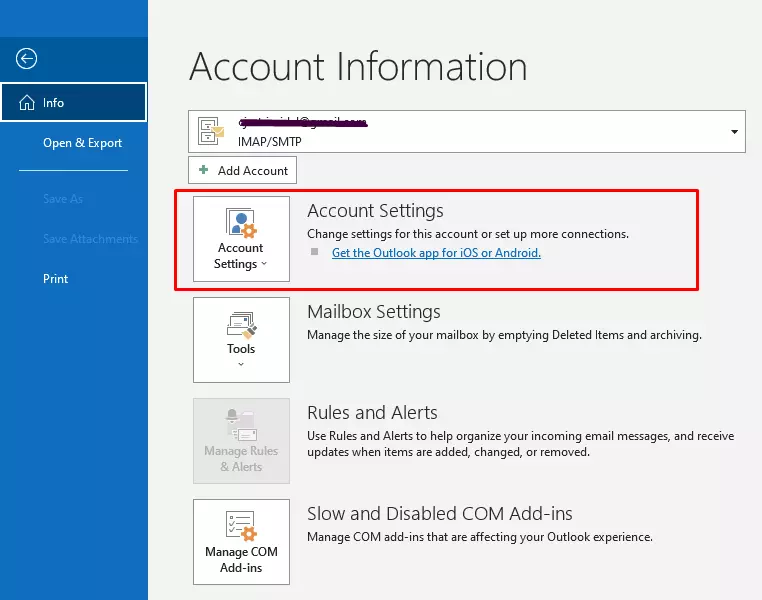
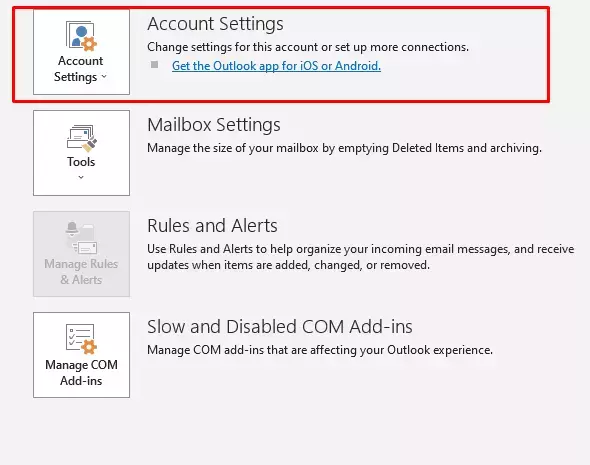
- Select Account Settings from the File menu.
- Choose Account Settings.
- Click Change after selecting the Email account.
- Click More Settings in the Change window.
- Under the Internet Email Settings, click on the Advanced tab and type 995 in the box next to Incoming Server (POP3).
Fix #3: Use the Outlook Inbox Tool.
To diagnose and repair errors in your Outlook data file, use the Inbox Repair tool (SCANPST.EXE). The Inbox Repair tool examines your computer’s Outlook data files to see if they are in good condition.
- Exit Outlook and navigate to one of the following folders:
- Outlook version 2019: C:\Program Files (x86)\Microsoft Office\root\Office19
- Outlook version 2016: C:\Program Files (x86)\Microsoft Office\root\Office16
- Outlook version 2013: C:\Program Files (x86)\Microsoft Office\Office15
- Outlook version 2010: C:\Program Files (x86)\Microsoft Office\Office14
- Outlook version 2007: C:\Program Files (x86)\Microsoft Office\Office12
- Launch the EXE file.
- Select Browse to find the Outlook Data File (.pst) to scan.
- After you’ve chosen your Outlook Data File, click the Start button to begin the scan.
- If the scan reveals any errors, select Repair to begin the repair process.
- When the repair is finished, launch Outlook with the profile associated with the recently repaired Outlook Data File.
However, if you are still unable to resolve the issue, it means that the PST files are corrupted or damaged and that there is no problem on the Server’s end. When this occurs, the best solution is to use a PST repair tool.
Fix #4: Double-check Your Outlook Profile Settings.
Incorrect Outlook profile settings can also result in the error 0x800ccc90. As a result, double-check that you’ve set them correctly.
Begin by reviewing your Outlook profile’s default settings. If you can’t figure out what’s wrong, delete the current default profile and start over. Then, make the newly created profile the default one. This procedure should assist you in resolving the 0x800ccc90 error.
Here’s how to make a new Outlook profile:
- Open Outlook and select File.
- Navigate to Account Settings and then to Manage Profiles.
- Then, select Show Profiles and press Add.
- Enter a profile name in the Profile Name section and click OK.
This should hopefully resolve the receiving reported error 0x800ccc90 on Microsoft Outlook.
How to Fix Windows the Live Mail Error ID: 0x800ccc90
There are several methods for resolving the Windows Live Mail login error 0x800ccc90. There is no workaround available to resolve this error. As a result, you must follow all of the steps outlined below.
Fix #1: Disable Your Antivirus Temporarily.
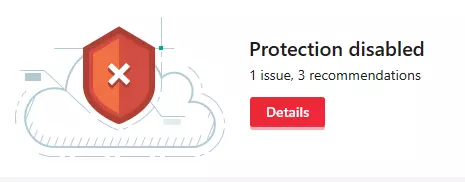
If you have Avast or another third-party antivirus installed, we recommend temporarily disabling or uninstalling it and then checking to see if Windows Live Mail continues to malfunction. If this method worked to resolve the 0x800CCC90 error, make sure to completely remove the offending software and install another reputable anti-malware program, such as Outbyte AVarmor.
Fix #2: Make Sure That Account Settings Are Updated.
The easiest way to do this is to call your ISP and get the settings mailed to you or have them written down. You’ll still be able to access your e-mails by getting into the webmail.
If you don’t know how to access webmail, go to www.google.com and search for isp name + webmail, for example, comcast webmail. This will help you retrieve the settings from its database.
Fix #3: Confirm Mail Account Settings in Windows Live Mail.

Open your account properties and match them with the settings you’ve received. Go to the Accounts tab and select Properties to inspect your Windows Live Mail settings. Check that the servers (incoming and outgoing), as well as the port numbers and SSL, are correct. Check to see if the problem has been resolved.
Fix #4: Repair Windows Live Mail.
Windows 10 / 8
- Access Control Panel by right-clicking on the Windows key.
- Locate Windows Essentials in Programs and Features.
- Click on it and then choose Uninstall/Change.
- Hit the Repair all Windows Essentials programs option.
Windows Vista / 7
- Select Control Panel from the Start menu.
- Select Programs and Features from the Programs menu.
- Click on Windows Essentials 2012.
- Hit Uninstall/Change and then Repair all Windows Essentials programs.
Windows XP
- Open Control Panel by clicking the Start button.
- Look for Windows Live Essentials under Add or Remove Programs.
- Select Repair from the Change/Remove menu.
- Finally, press the Continue button.
Fix #5: Uninstall and Reinstall Windows Live Mail.
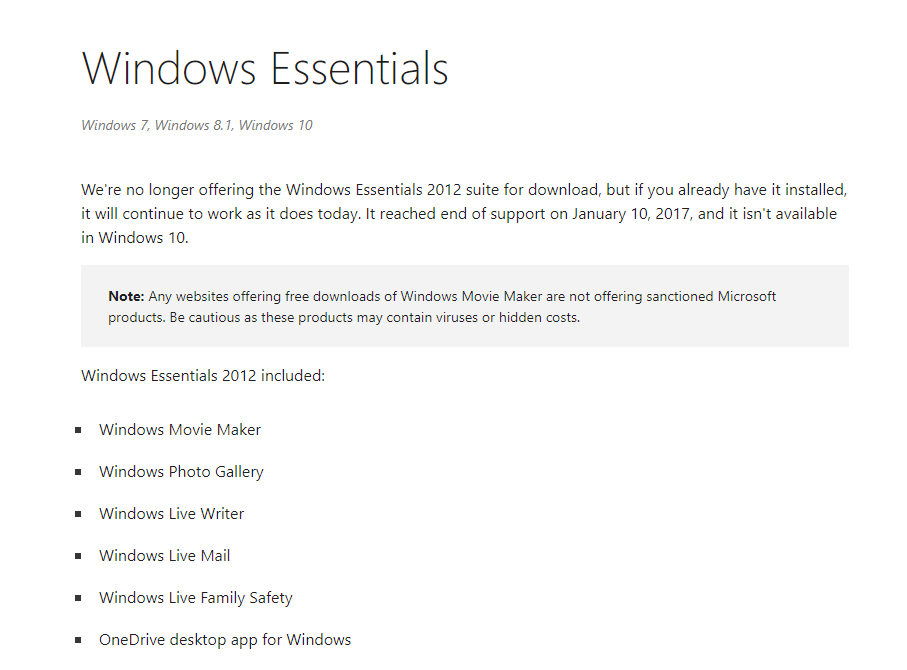
Before you do this, make a backup of your emails, contacts, and other data by selecting Export from the File menu, so you can import it later after reinstalling Windows Live Mail. To uninstall, navigate to Control Panel -> Programs & Features -> Uninstall a Program – locate Windows Essentials and double-click on it, then select Remove one or more programs, and finally uninstall Windows Live Mail.
After you’ve uninstalled it, go here to download the essentials and update to the most recent version of WLM. Once it has been reinstalled, open and reconfigure the client before importing any previously saved emails.
Wrapping Up
This error occurs when we attempt to send or receive an email using the Microsoft Outlook applications. Creating different groups with specific accounts will not only put an end to the error 0x800ccc90, but will also make it easier to send and receive messages for specific accounts. If the error persists, it is possible that it is being caused by one of the other reasons listed. Changes in port numbers can also help you deal with this error. You can now send and receive emails that include messages, journals, attachments, tasks, calendars, meeting schedules, lists, and many other features.