
In the midst of a time-sensitive task, encountering Error 0x80072ee7 can be frustrating. Rest assured, you’re not alone in facing this issue. The Error Code 0x80072ee7 has caused headaches for numerous Windows users, as it leads to additional complications within the operating system.
So, what is the Error 0x80072ee7 all about, and what triggers it to appear? Can it be resolved? We will answer all your questions below.
Code: 0x80072ee7
The Microsoft Warning Alert 0x80072ee7 appears in different situations. It may be caused by corrupted system files, registry problems, viruses, incompatible device drivers, defective Windows updates, or incorrect network connection configuration.
However, according to many Windows users, this error code notoriously appears when using Windows Store. It comes with the error message, “0x80072ee7 Windows 10/11 store: The server has stumbled.” Windows Store keeps on saying that there is no internet connection but browsers can successfully perform searches.
Expert Tip: For smoother PC performance, consider using a PC optimization tool. It handles junk files, incorrect settings, and harmful apps. Make sure it's right for your system, and always check the EULA and Privacy Policy.
Special offer. About Outbyte, uninstall instructions, EULA, Privacy Policy.
In other cases, it has been observed that the error shows when launching the Xbox app. It displays the “Xbox Assist 0x80072ee7 error” or “Error 0x80072ee7 on Xbox One.” Some users also say that the issue is more likely a result of an update because it sends the “Code 0x80072ee7 Windows 10/11 upgrade” error message.
Let’s delve deep into these Error 0x80072ee7 causes below:
- Windows 10/11 Store – If Windows Store is running when the error appeared, it is likely that you are dealing with corrupted files. Make sure to fix them and see if that resolves the issue. For this, you can perform a DISM or SFC scan.
- Windows Update – The Error 0x80072ee7 may appear while trying to install an update. To fix this, check if all the necessary services are up and running. You can also perform a Windows Update reset.
- Windows Upgrade – Are you trying to install the latest Windows 10/11 update? Then, you may have found the culprit behind the Error 0x80072ee7! In this scenario, it is possible that your antivirus is blocking some essential processes. What you should do is temporarily disable or uninstall your security program.
- Windows 10/11 Media Creation Tool – Some users reported that the error appeared while using the Media Creation Tool. In order to get rid of the problem, edit the host’s file and see if that works.
- Malware and Viruses – Viruses and malware may have entered your system via unknown means. As a result, they’re messing with crucial system processes. To deal with these entities, perform a quick malware or virus scan using a trusted anti-malware program.
11 Fixes for Windows 10/11 Error 0x80072ee7
We’ve enumerated the possible triggers of the Error 0x80072ee7. In this part, let’s further explain the fixes. Here you go:
Fix #1: Change Your DNS Server
According to online forums, changing the DNS server address will do the trick. Every device that is connected to the internet is assigned a unique IP address that serves as its identity. Changing it might just get rid of the Error 0x80072ee7.
To change your device’s DNS server, follow these steps:
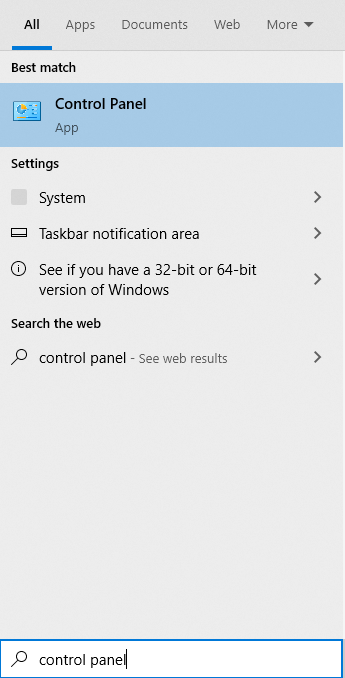
- Go to the search box and type “control panel” (no quotes). Then, click the top-most result.
- Navigate to the Network and Sharing Center section and select Change adapter settings.
- Select the network that you’re currently connected to and click Properties.
- Scroll down to the Internet Protocol Version 4 section and select Properties.
- Next, highlight the Use the following DNS Server addresses option.
- After that, input these values:
DNS Server – 8.8.8.8
DNS Server – 8.8.4.4
- Save your changes. Then, restart your Windows 10/11 device.
- Now, reinstall the Windows update and see if the Error 0x80072ee7 still persists.
Fix #2: Perform a System File Checker Scan
You’ve probably heard and used the built-in Windows 10/11 utility called the System File Checker. It is a tool that performs deep and thorough computer scans and resolves any problems it detects. You can use this tool to get rid of the Error 0x80072ee7 as well.
Here’s how to perform an SFC scan on your Windows 10/11 device:
- Press the Windows + X keys altogether to bring up the WinX menu.
- Then, select Command Prompt (Admin) or PowerShell (Admin)—whichever is available.
- Next, key in “sfc /scannow” (no quotes into the command line.
- The process may take minutes to complete, depending on the number of files stored on your device.
- Once done, exit Command Prompt or PowerShell.
If the Error 0x80072ee7 still shows, consider performing a DISM scan. To do that, launch PowerShell or Command Prompt with administrator privilege and input this command:
DISM /Online /Cleanup-Image /RestoreHealth.
Press Enter and wait for the entire scanning process to complete.
Fix #3: Execute the WUReset Script
The WUReset script is designed to fix any problems with the Windows Update utility. When it is run, it basically resets the processes associated with the Windows Update utility and deletes the SoftwareDistribution folder.
When you run this script, you are saving a lot of time and effort since you don’t have to manually do everything.
To run the WUReset script, do the following:
- Download the Windows Update Reset Script here.
- Once you have downloaded it, right-click on the file and select Run as Administrator. Wait for the scan to complete.
- Then, check for any updates once again.
Fix #4: Disable Your Antivirus Software
If you suspect that your antivirus program is causing the Error Code 0x80072ee7, then try to disable it temporarily and see if that helps. To do that, you just have to right-click on its icon from the notifications tray and select Disable.
However, if that doesn’t help, uninstall your antivirus permanently. Fret not because even if you disable it, you still have Windows Defender that protects your device against threats. So, you don’t have to overthink about your security and safety.
Fix #5: Check the Hosts File
Some users say that the Error 0x80072ee7 appears if there are changes to the host’s file. According to them, they saw 0.0.0.0 IP addresses in the host file, which they suspect has triggered the error.
The host’s file is stored in the Windows 10/11 installation directory, and it is generally protected from unwanted access. However, if you have to edit this file, you still can.
To edit this file, remove the 0.0.0.0 address or comment it out by adding the # symbol at the start of the line. Be careful, though. Modifying the host’s file can be a bit tricky.
Fix #6: Uninstall Problematic Applications
Sometimes, third-party programs and applications can mess with your system and cause error codes like 0x80072ee7 to surface. Don’t worry because you can do something to get rid of these faulty programs.
All you need to do is identify the problematic application and remove it. Now, there are different ways to do this. However, the easiest way is to use an uninstaller. Such a program is designed to remove any app, including its registry entries from your device. By using it, you are sure that there are no leftover files on your system.
If you prefer to take the manual route, here’s how to uninstall problematic applications:
- Launch Settings from the main Windows menu.
- From the window that appears, click Apps.
- Next, navigate to the left pane and select Apps and Features.
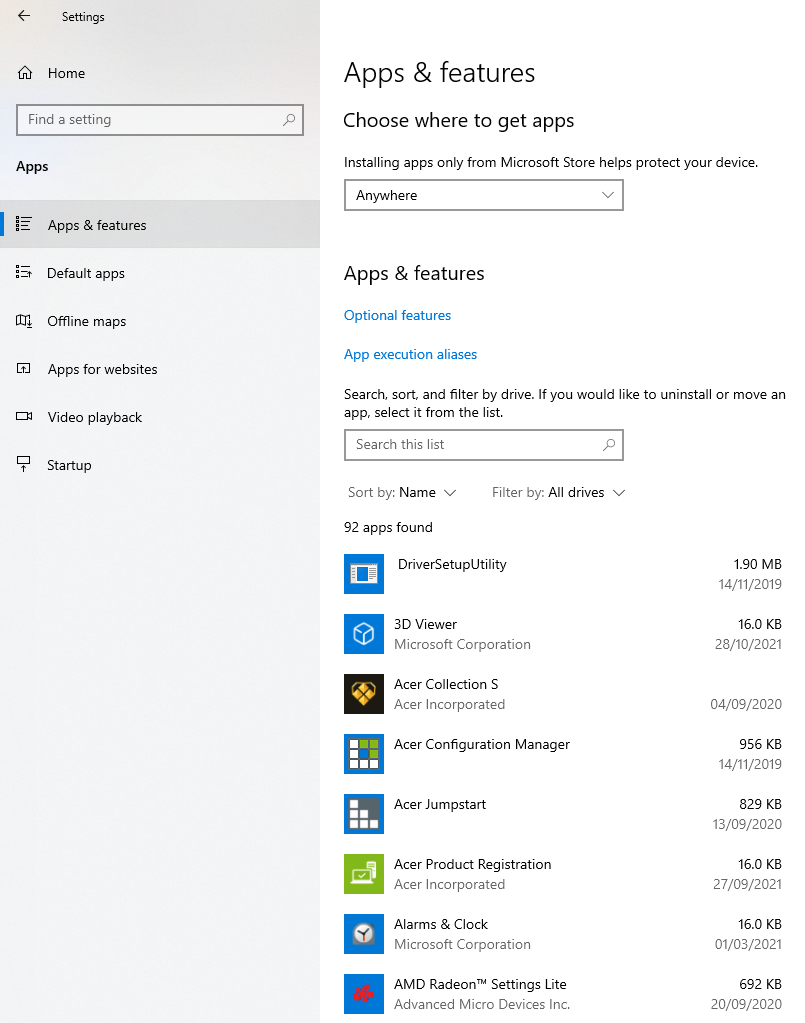
- Now, review the right pane of the window and check the list of programs currently installed on your device.
- Find the program or application you wish to delete. Once you find it, simply click on it.
- A pop-up will then appear on your screen. Hit the Uninstall button.
- Windows will now uninstall the program and delete all its files and data. In the event that the app comes with its own uninstaller, it should appear when you hit the Uninstall button.
- Once done, the program should be uninstalled.
- In case you notice that there are apps with an unclickable Uninstall button, it means that it’s a critical Windows program that can’t be removed.
Fix #7: Ensure That the DNS Client and Windows Update Services Are Running
The Error 0x80072ee7 may also appear if the DNS Client and Windows Update services are disabled. Many Windows 10/11 features use and rely on these services, so if they aren’t running, you are likely to encounter errors.
However, you can easily resolve this problem by following these instructions:
- Press the Windows + R keys to bring up the Run program.
- Next, type “services.msc” (no quotes) into the text box and hit OK.
- Now, the Services window will open. Find Windows Update and double-click on it to access its properties.
- Check the Startup type. If it is set to Disabled, change it to Manual or other available values.
- Hit Apply to save your changes.
Fix #8: Use a PC Repair Tool
Though it rarely happens, cluttered folders and unnecessary files can cause error messages to surface. They sometimes mess with important system processes and cause various system issues. However, this can be avoided.
Simply run a PC repair tool to get rid of any unwanted files that are only consuming a huge chunk of your disk space. In just a few clicks, this tool can remove the files you don’t need on your behalf, so you don’t have to.
Fix #9: Modify Your Registry Permissions
The registry is a collection of databases, and it contains configuration settings for different programs of the Windows operating system. If it is not properly configured, error codes like 0x80072ee7 may pop up.
To configure your registry properly, follow these steps:
- Press the Windows + R keys simultaneously to access the Run utility.
- After that, type regedit into the search box. Hit Enter to proceed.
- Now, the Registry Editor should appear.
- Navigate to this location: HKEY_LOCAL_MACHINESYSTEMCurrentControlSetServicesTcpip.
- Next, right-click on TCPIP in the left pane and select the Permissions option.
- Select Advanced.
- Then, tick the Replace all child object permission entries option and hit the Apply button to save your changes.
Fix #10: Register the WindowsStore Package
There are users who reportedly resolved the error by registering the WindowsStore package. Here’s a simple guide on how they did it:
- Launch Command Prompt with full administrator privilege.
- Run this command:
PowerShell -ExecutionPolicy Unrestricted -Command “& {$manifest = (Get-AppxPackage Microsoft.WindowsStore).InstallLocation + ‘\AppxManifest.xml’ ; Add-AppxPackage -DisableDevelopmentMode -Register $manifest}”.
- Close Command Prompt and restart your Windows 10/11 system.
Fix #11: Perform a Malware Scan
Even if you have already resolved the error at this point, it is important that you still perform a malware scan. This is to ensure that no other harmful entities or threats are hiding in your system.
To perform a malware scan, you have the option to download a third-party antivirus program or use the built-in Defender application.
Windows 10/11 Error Code 0x80072ee7 Summary
Windows 10/11 may sometimes force you to install updates. So, it’s quite understandable to get frustrated when things don’t go smoothly and errors are thrown at you.
Did you come across the 0x80072ee7 error while installing an update? Perhaps, you were just randomly scanning your files. Well, the best thing you should do is read this article and find the right solution.
Begin with the easiest fix, such as performing a System File Checker scan, using a PC repair tool, or even uninstalling all those useless applications. A quick device restart will sometimes suffice, too! If that doesn’t work, proceed to more advanced solutions like running the WUReset script and tweaking the host’s file.
Relax—we know that some steps seem too technical. However, as long as you go through each one of them one at a time, you should eliminate the error code!
Which of the above solutions has resolved the Error 0x80072ee7 on your end? Comment on it below!