
Windows, as a complex operating system, offers a multitude of features and functions. With thousands of processes and critical system files, it remains a popular choice due to its robustness and functionality.
Unfortunately, crashes and errors may occur to Windows in some cases. And when they do, it is likely that users cannot do the things they normally do on their computers. To fix them, users are advised to install Windows updates.
Windows updates are essential for the Windows operating system. They are rolled out every month and may include various improvements and fixes to bugs and errors. This means Windows updates should not be disabled.
Then again, some people cannot install these updates because of errors. The Windows 11 update error 0x8024a203 is just one of them. Let’s dig deep into this error code in Windows 11 through this article.
Expert Tip: For smoother PC performance, consider using a PC optimization tool. It handles junk files, incorrect settings, and harmful apps. Make sure it's right for your system, and always check the EULA and Privacy Policy.
Special offer. About Outbyte, uninstall instructions, EULA, Privacy Policy.
What Is Windows 11 Update Error 0x8024a203?
The most common reason behind getting an error message like 0x8024a203 on Windows 11 is due to an outdated or corrupted registry entry. It can be quite difficult to resolve this problem manually as there are a number of entries in Windows system files that are essential to keep your computer running smoothly. So, when the 0x8024a203 error code pops up on your computer screen, it’s easy to panic, especially if you are in the middle of an important work project.
But you don’t have to close your laptop and book an appointment with your tech support team just yet because there are some quick fixes you can try first to get rid of this error message as soon as possible. If you’re curious about what caused this error and how to fix it, just keep reading.
What Causes Windows 11 Update Error 0x8024a203?
The causes of Windows update error code 0x8024A203 are usually due to corrupt files, improper uninstallation of apps, missing files and some important system updates that did not install correctly.
Other possibilities include a lack of space, proxy server settings, and internet connectivity problems. When the data on your machine is up to date and there’s enough disk space on your computer, but you’re still getting errors after running the update, then it’s likely that there’s an issue with your Internet connection or proxy settings on your PC.
Ways to Fix Error 0x8024a203 on Windows 11
The 0x8024a203 error code isn’t the most user-friendly of error messages, but that doesn’t mean you have to put up with it! Follow these simple steps to fix this Windows 10/11 error and get back to your regular routine in no time at all.
Fix #1: Run the Windows Update Troubleshooter
You can run the Windows update troubleshooter to determine whether it’s an update-related issue. To use the troubleshooter on Windows 11, simply right-click Start, select Control Panel, and click Troubleshooting. You can then start troubleshooting from here.
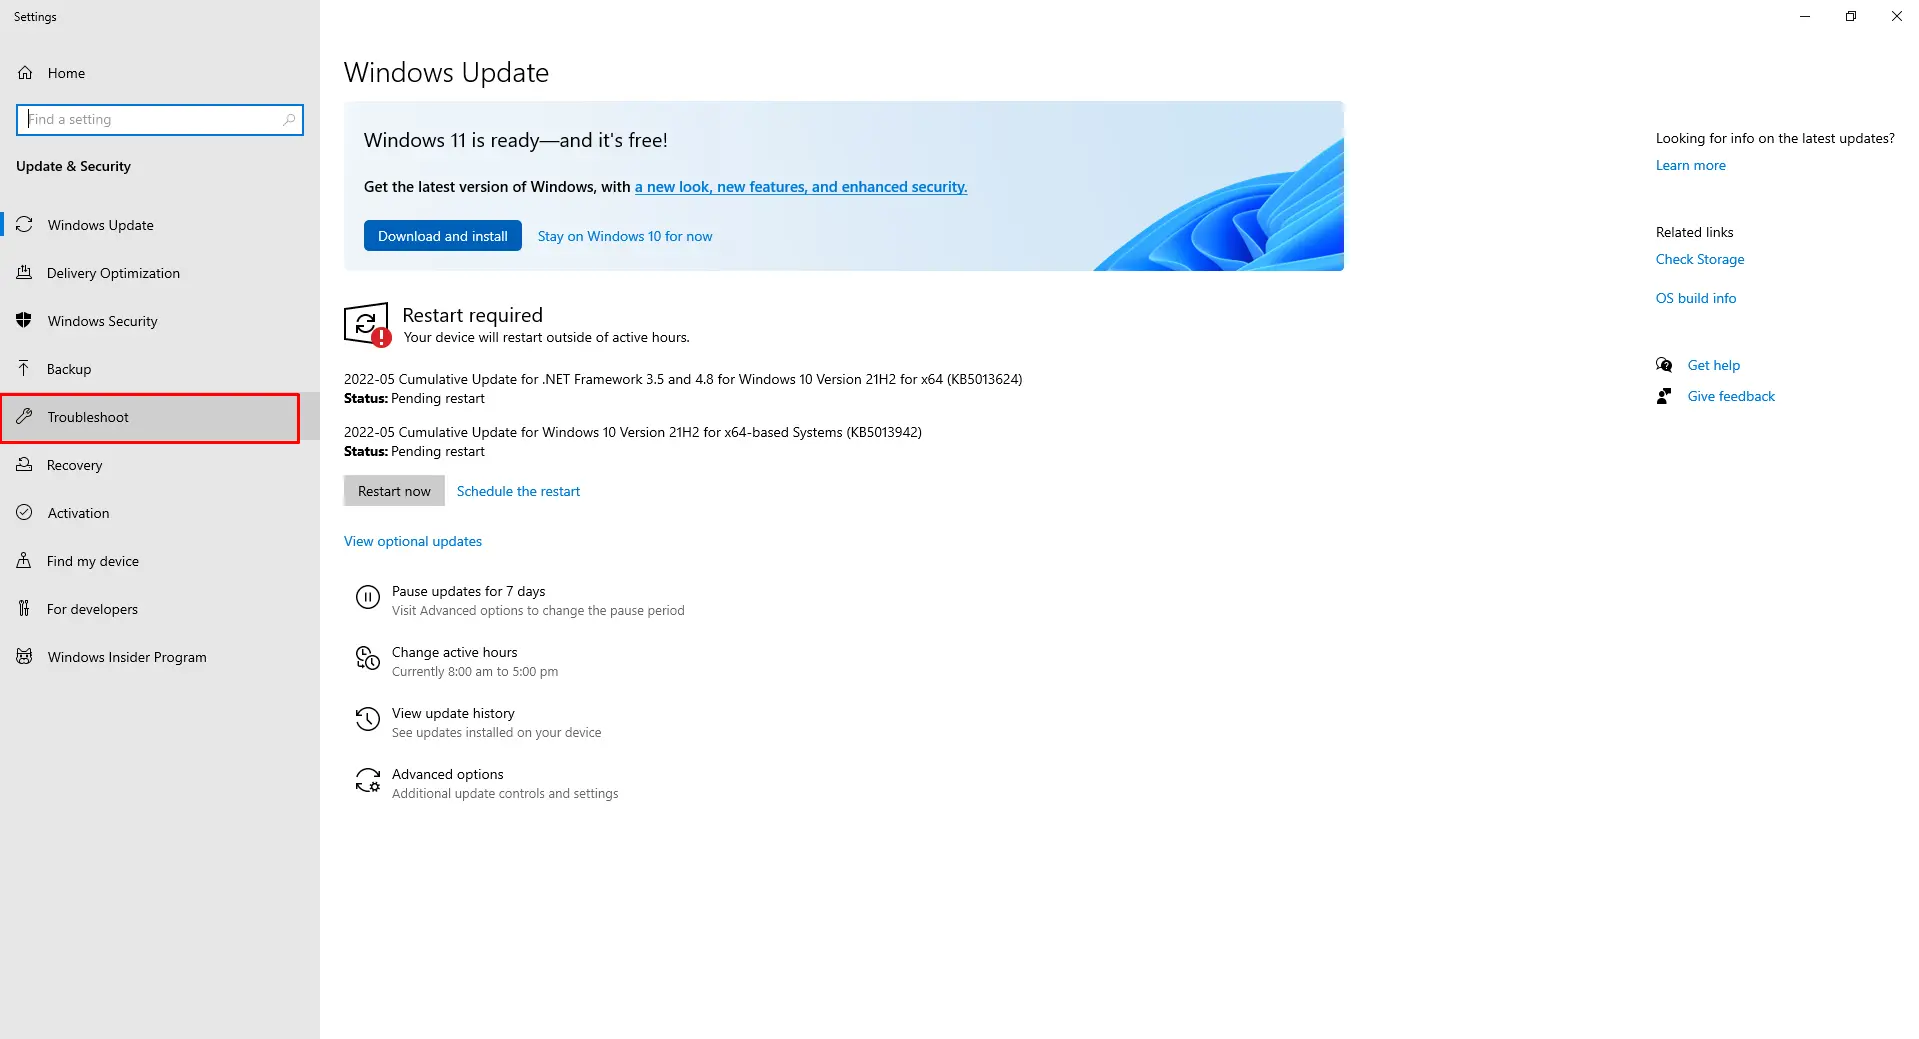
In Windows 8 and 10, choose System and Security > Troubleshoot. For Windows 7, choose System and Maintenance > Troubleshoot. Choose Update Problems, which are under Major Issues in some versions of Windows (in others it’s under Other).
If you have any problems with troubleshooting itself, perhaps your system won’t run any troubleshooters at all. Thus, your best bet is to contact Microsoft Support.
Fix #2: Delete Temporary Files
Temporary files are like clutter on your computer. Over time, these files accumulate and can take up a lot of space on your hard drive.
To prevent that from happening, it’s a good idea to clear them out once in a while. Doing so will make sure you don’t start running out of space without even realizing it. You might be surprised at how much room deleting temporary files can free up.
To delete temporary files, do this:
- Open This PC by clicking or tapping on its icon.
- Click or tap on View (usually located in the upper-left corner).
- Select Details from under Hidden items.
- Select all files under Temporary Files, right-click or tap and hold each one individually, then select Delete.
- When prompted with a warning message about using permanent storage space for temporary data, click or tap Yes to continue.
- Close File Explorer when finished.
If this doesn’t work for you, you can use a PC repair tool instead. This tool will automate the process of deleting temporary files, so you don’t have to. All you need to do is install a PC repair tool, install it on your device, and let it do what it is supposed to do. That’s it! Once done, check if the 0x8024a203 error is gone.
Fix #3: Run the SFC and DISM Tools
System File Checker (SFC) is a command-line tool that can scan and replace any corrupted or missing system files. SFC.exe and DISM are both included in Windows 10, but not in previous versions of Windows.
These two are very useful and powerful troubleshooting tools. The SFC tool can run a diagnostic check to see if there are any missing or corrupted system files and then attempt to fix them. You’ll have to run an elevated command prompt in order to use it, but SFC is easy enough to use if you follow these instructions.
Running DISM will help repair problems with system files by restoring them from a cached backup. For best results, launch DISM from within Command Prompt using the instructions below as a guide.
To run these commands, you must use an administrator account to sign in to your computer. And then, launch Command Prompt with administrator privilege and type sfc /scannow. Hit Enter to execute it. To perform a DISM scan, type dism /online /cleanup-image /restorehealth at a command prompt.
Fix #4: Reset the Windows Update Components
Windows Update Components are vital to your Windows system because they update and manage every aspect of your PC including security, software, and driver updates.
Before you reset them, the first thing to do is check your disk space. Make sure you have at least 15% free disk space available. If you don’t, free up some disk space by deleting unnecessary files, temporarily removing large files to OneDrive or moving them to an external hard drive if possible.
Once done freeing up system space, do this:
- Download the Windows Update Troubleshooter tool.
- Double-click on the WindowsUpdateDiagnostic.diagcab file to launch the troubleshooter.
- Click the Windows Update option and hit Next.
- Select the Try troubleshooting as an administrator option, then re-select the option.
- Hit Next and close.
- Re-launch the Windows Update Troubleshooter and choose Windows Networking Diagnostics.
- Hit Next and close the window.
- Restart your computer.
Fix #5: Install the Updates Manually
While there’s nothing wrong with using default security settings, a computer is only as good as its updates. The easiest way to keep your PC updated is to use Windows Update.
It’s not perfect though, because some of its updates require administrative rights. This means you either have to enter your password or be signed in under an administrator account. Either way, if you’re facing issues with update installation or don’t want to wait for automatic updates all day long, manually installing updates can help cut downtime and headaches later on.
To install these Windows updates manually, go to the official Microsoft Update Catalog and download the recent update for your Windows version.
Fix #6: Remove Any Third-Party Driver
If your computer is experiencing error 0x8024a203, there may be a corrupt or incompatible driver on your PC.
In some cases, you can download driver updates from your device’s manufacturer and reinstall them to fix the error. If that doesn’t work, you can try uninstalling third-party drivers through Device Manager.
Here’s how:
- Click Start, type devmgmt.msc in search box and hit Enter to open Device Manager.
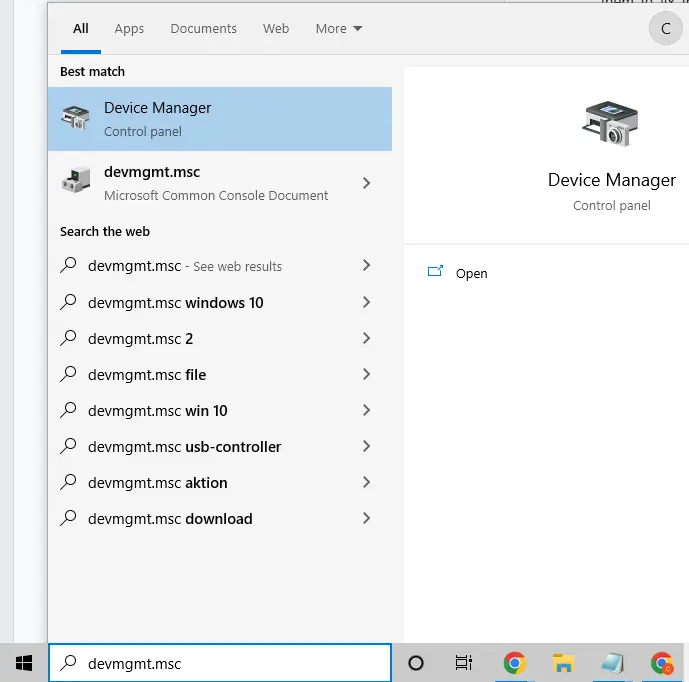
- Here, you will see a list of all devices attached to your computer.
- Find the faulty driver, right-click on it, and select Properties.
- Then click Driver Details on each entry.
- From here, you should see an option to Uninstall.
- Select that option and click OK.
- Restart your computer when prompted.
- Upon restart, Windows will automatically replace the deleted driver with a working version.
- You should now be able to access Windows Update without any issues.
Fix #7: Perform a Malware Scan
Malware is a general term used to describe software that runs without your knowledge and is used to either steal data or otherwise compromise your computer. It’s one of the most common ways to get infected by viruses, that is why there are lots of great, free malware scanning tools out there.
Take note, though. Malware is extremely tricky so always be careful when clicking links or downloading antivirus software from new websites and make sure that you have up-to-date antivirus protection before you download anything.
To perform a malware scan, launch the antivirus software of your choice and click the Scan button. It’s that easy!
Fix #8: Delete the Index.dat Files
If you are getting the error 0x8024a203 while using your browser, then it may be because your web browser stores temporary files (index.dat files) in your local hard drive memory. As these temp files pile up, your computer may start responding very slowly and even get unresponsive at times.
The solution to fix this issue is to delete those index.dat files by using a reliable registry cleaner tool. It will allow you to safely and effectively clean out registry errors and optimize system performance for better responsiveness. You can download and install any registry cleaner tool in just a few minutes on any version of Windows 10 or 11.
Fix #9: Disable Superfetch
Superfetch is a system service that manages and optimizes hard disk data for better responsiveness and performance. It loads frequently used programs into memory when your computer boots up. As such, disabling it should free up some RAM if you’re experiencing sluggishness or crashing after starting Windows.
It’s not enabled by default but can be manually enabled in services.msc (press Win + R, type services.msc, and click OK to launch it). If Superfetch is disabled, you’ll want to make sure its services are stopped as well. You can do so by opening Task Manager, clicking More Details (the gear icon) > Services, finding Superfetch under System Services, right-clicking it and selecting Stop. Now, if you want to disable Superfetch permanently, do this:
- Open Services (type services into Start Menu search), scroll down to find Superfetch and double-click it.
- Set Startup Type to Disabled, click Apply and then OK to save changes.
- Restart your computer.
- When asked if you’d like to use Superfetch during startup, select No.
Fix #10: Reset the SMART Drive
The SMART drive controls the way in which your hard drive functions. This may be the reason why you get the error code 0x8024A203. You can solve the problem by resetting the SMART drive to its original settings.
Follow these steps:
- Open the command prompt.
- Run diskpart and type list disk into it.
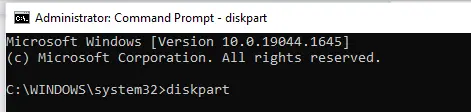
- Select your hard drive from the list of disks and type select disk n, where n is the number of your hard drive.
- Exit DiskPart by typing exit.
- Now, type clean all in Command Prompt, where all is your hard drive name without spaces.
- Exit Command Prompt again by typing exit.
- Restart your computer normally.
Fix #11: Disable Scheduled Tasks
If you’re getting an 0x8024A203 error message, it might be caused by a problem with one of your scheduled tasks. While you can manually run each task to fix it, an easier solution is to just disable all your scheduled tasks.
To do so, head to Settings > Apps > Tasks and features and toggle off Allow scheduled tasks. That should resolve any issues that may be causing your 0x8024A203 problem.
In Summary
0x8024A203 is a common error message that may appear while updating, installing, or uninstalling applications and Windows updates in Windows. But the good thing is that it can be easily resolved using the common fixes that we have listed above.
If you are faced with the same error, you know what to do. Just pull up this article, go through the suggested fixes, and try the best one that works for you.
Let us know your experience in resolving this error. Comment below!