If you’re experiencing a blue screen of death error on Windows 10/11, this post is here to help. We’ll delve into everything you need to know about a specific blue screen of death error known as Qcamain10x64.sys.
Before anything else, what is a blue screen of death error?
Blue Screen of Death: What You Should Know
Also known as a stop error, the Blue Screen of Death is a scenario where your computer screen turns blue with an error message. This normally happens because of a serious error that your system cannot recover from.
A BSOD can be a result of either a software- or a hardware-related issue.
Expert Tip: For smoother PC performance, consider using a PC optimization tool. It handles junk files, incorrect settings, and harmful apps. Make sure it's right for your system, and always check the EULA and Privacy Policy.
Special offer. About Outbyte, uninstall instructions, EULA, Privacy Policy.
Hardware-Related Triggers:
- Internal or external hardware devices are not properly installed.
- One of the hardware components is faulty.
- A new hardware peripheral is incompatible with the BIOS.
Software-Related Triggers:
- There is no sufficient space on the partition where you installed Windows.
- A hardware driver is outdated.
- An available update needs to be installed.
- A malware entity or virus has attacked the system.
- System files are corrupted.
- There is a bug in Windows 10/11.
- Your BIOS is outdated.
- Your BIOS is misconfigured.
Blue screen of deaths come in different forms. Some of the most common BSOD error examples are:
- IRQL_NOT_LESS_OR_EQUAL
- NTFS_FILE_SYSTEM
- DIVIDE_BY_ZERO_ERROR
- BAD_POOL_HEADER
- UNEXPECTED_KERNEL_MODE_TRAP
- INACCESSIBLE_BOOT_DEVICE
It is worth emphasizing that, even if BSODs look the same, they have varying triggers, which we have mentioned in the previous section. This means that their solutions also vary.
Here at Software Tested, we aim to help users find solutions to the most common computer problems, including BSODs. And in the next part of this article, we will tackle one particular BSOD error, the Qcamain10x64.sys BSOD.
To better understand this BSOD, let us first know what is Qcamain10x64.sys.
What Is Qcamain10x64.sys?
Qcamain10x64.sys is a system file that is categorized as a device driver. It is associated with the Qualcomm Atheros Extensible Wireless LAN device driver and was first developed in 2018 for the Windows OS.
Like other system files, the Qcamain10x64.sys file is no stranger to error messages. In fact, it’s associated with a number of problems, including the following:
- Qcamain10x64.sys could not be found.
- The file Qcamain10x64.sys is missing or corrupt.
- Qcamain10x64.sys failed to load.
- Windows failed to start – Qcamain10x64.sys.
What Is Qcamain10x64.sys BSOD in Windows 10/11?
The Qcamain10x64.sys BSOD is a common issue that appears randomly, even without any particular triggers. Because of this, many affected users came up with the conclusion that it is an error that has something to do with Windows Update bugs or security flaws.
According to some users, if you installed a Windows update but didn’t do it properly, your system may experience a crash, which will then result in this error.
What Causes Qcamain10x64.sys BSOD in Windows 10/11?
Upon investigation, we found that there are different triggers that can cause the Qcamain10x64.sys BSOD in Windows 10/11. These include the following:
- Faulty Windows Security Update – There was one Windows Security update that was rolled out in 2017, which is believed to trigger this BSOD. If you happened to install the update but did not install its hotfix, your best course of action to install any available Windows update.
- Outdated or Corrupted Device Driver – The Qualcomm Atheros Extensible Wireless LAN device driver and the Killer Wireless 1535 driver are two notorious culprits to this BSOD error. If you suspect that these device drivers are causing the Qcamain10x64.sys BSOD you are facing, then you can resolve it by uninstalling or updating the driver.
- Malware Entities – Malware entities and other forms of threat can interfere with important system processes, which can lead to the Qcamain10x64.sys BSOD error. To fix this, you need to get rid of the malware by performing a thorough malware scan.
What to Do About Qcamain10x64.sys BSOD in Windows 10/11
If you are having a hard time dealing with crashes caused by the Qcamain10x64.sys BSOD, then continue reading. We will provide you with a couple of troubleshooting recommendations that have been confirmed to work.
To ensure efficiency, we suggest that you follow the solutions in the recommended order and skip the steps that seem inappropriate for your case.
Solution #1: Install Any Pending Windows Update.
As mentioned, this BSOD error can be caused by a faulty Windows Security Update, which when installed, can cause instability in computers. Because this issue is known, Microsoft has already rolled out a hotfix. But if you haven’t installed it, there is still hope. Simply install any available Windows update, and that’s it!
Here’s a quick guide on what you should do:
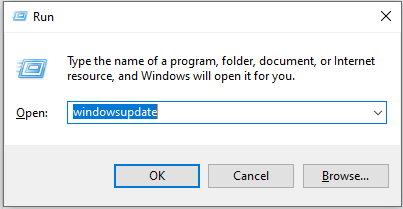
- Press the Windows + R keys to open the Run dialog box.
- Type ms-settings:windowsupdate into the text field and hit Enter.

- At this point, you will see the Windows Update tab of the Settings app.
- On this screen, click the Check for Updates button. This will then initiate your system to perform an update scan.
- Follow the on-screen instructions to ensure you don’t miss any pending Windows Update.
- When prompted to restart your computer, do so. But be sure that you return to the Windows Update screen to complete the update process.
- Once all updates are installed, restart your computer one last time and see if the BSOD error is resolved.
Solution #2: Update or Reinstall Your Wireless LAN Driver.
Another notorious culprit of the Qcamain10x64.sys BSOD error is a faulty or outdated wireless LAN driver, the Qualcomm Atheros Extensible Wireless LAN and the Killer Wireless 1535 device drivers in particular. But then again, there are other drivers that can cause the error. It’s just that these two are the most common.
If a faulty or outdated driver is causing the issue, either update it or uninstall it completely. Here’s how:
- First, check if you are connected to the internet. This way, Windows can search and download an updated device driver software.
- Next, press the Windows + R keys to launch the Run utility.
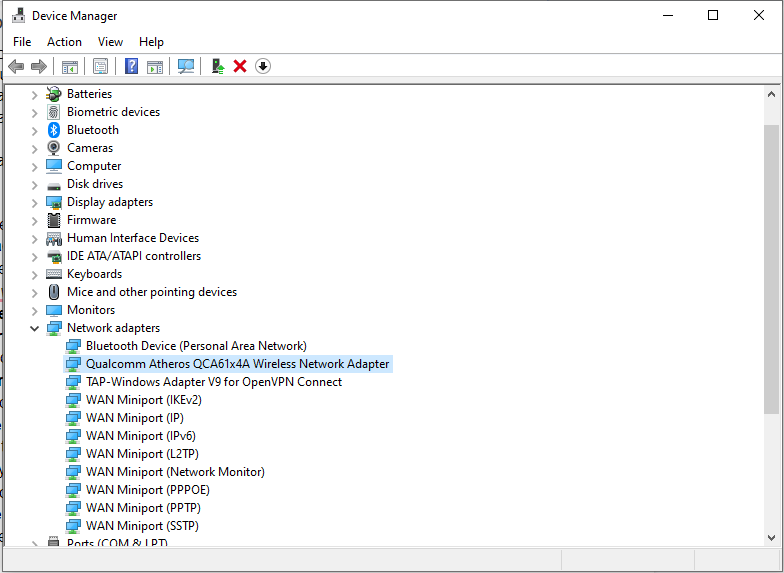
- Input msc into the text field and hit Enter to launch the Device Manager.
- In the Device Manager window, scroll the all the devices and expand the Network Adapters drop-down menu.

- Right-click on your Wireless Network Adapter driver and select Properties.
- In the Properties screen, go to the Driver tab and hit the Update Driver button.
- Next, click the Search automatically for updated driver software to install the latest version of the driver.
- Wait for the scan to complete and follow the on-screen instructions.
- Restart your computer and check if the issue has been fixed.
- If your computer still crashes after updating the driver, repeat the first four steps. But this time, click the Uninstall Device button.
- Once the driver is uninstalled, reboot your computer.
The steps above seem to be straightforward. However, if you are having a hard time following them, you can always go the automatic route. This involves using a third-party device driver updater software tool like Auslogics Driver Updater.
Using this tool, you can check your computer for any potential driver problems. And in just a few clicks, you can see a report of any missing or outdated drivers. From there, you can quickly update them to the most recent manufacturer-recommended versions.
Solution #3: Restore Your PC to a Previously Working State.
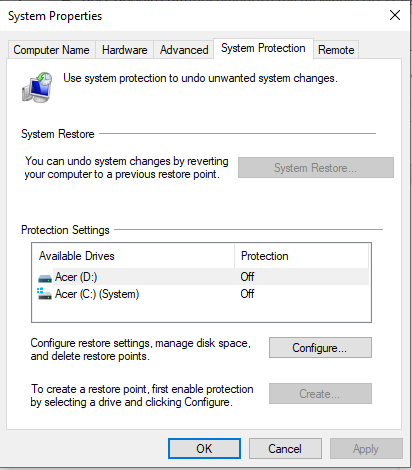
For some affected users, performing a system restore has resolved the error. System Restore is a tool designed by Microsoft to repair damaged system files. Using this tool, your system can take a snapshot of the current system files and registry entries and saves them as restore points. In the event of data corruption or system failure, the tool can bring back the system to a working condition without the need to reinstall the operating system.
By default, this tool creates restore points on a day-to-day basis. It is designed to monitor system activities and create restore points when significant activities take place. The activities that can trigger the automatic creation of restore points are:
- installing software
- installing new hardware drivers
- updating hardware device drivers
Now, if you need to use these restore points to restore your device to the latest restore point, here’s what you should do:
- Press the Windows button to start.
- Into the search field, input system restore and hit Enter.

- Find and click System Restore from the search results.
- If prompted, input your administrator password.
- Follow the on-screen instructions provided by the System Restore wizard.
- Once done, restart your computer.
Solution #4: Uninstall and reinstall the 3DP Net Software.
If you have recently installed the 3DP Net software, try to uninstall it first and reinstall it to resolve the issue. Here’s how to do it:
- Press the Windows button to begin.
- Into the search field, input uninstall and hit Enter.
- From the search results, select Add or Remove Programs.
- Next, in the window that opens, find 3DP Net 18.12 and click on it.
- Select Uninstall.
- Follow the on-screen instructions to complete the uninstallation.
- Once the software is uninstalled, restart your computer and reinstall the software once again.
Solution #5: Replace the Qcamain10x64.sys File.
If the first few solutions did not resolve the problem, then you may want to try a more aggressive approach. Download and replace the Qcamain10x64.sys file with a more appropriate and compatible version.
Follow the steps below to properly download and replace the Qcamain10x64.sys file:
- Find a reputable source of the Qcamain.sys file.
- Download the version that is compatible with your device.
- Restart your computer.
Solution #6: Scan for Virus.
Viruses can damage and corrupt your system files and lead to a blue screen. In this case, you should run a virus scan to rule out the possibility of a virus infection.
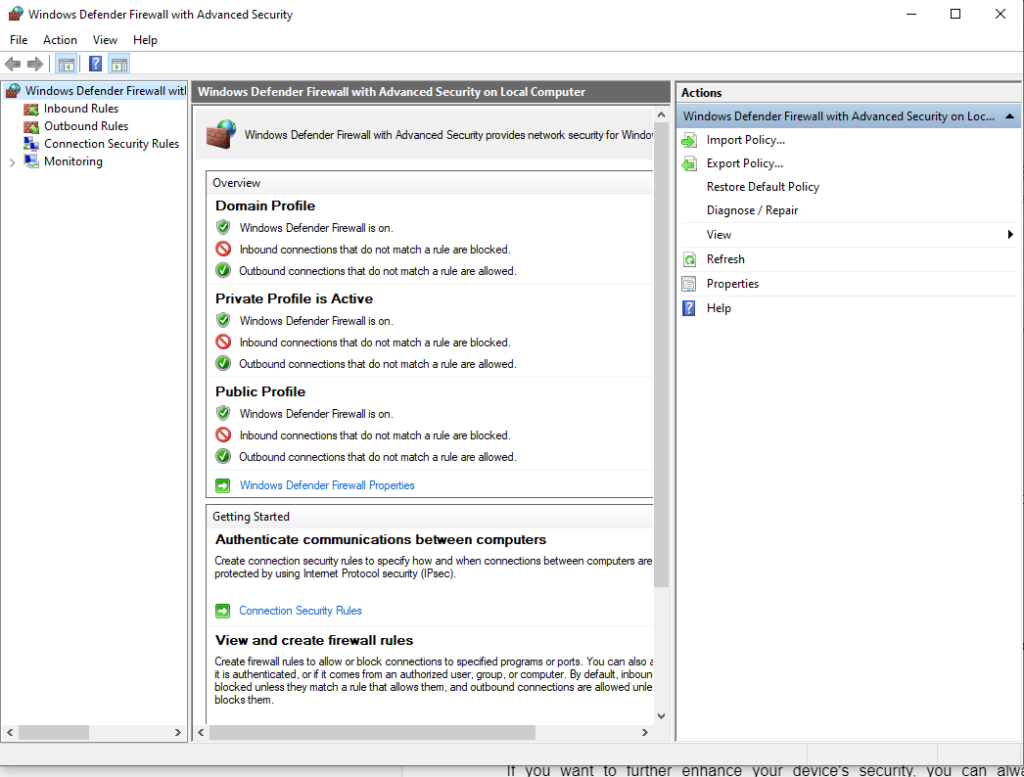
Good thing you have Windows Defender in your Windows 10/11 device to allow you to scan specific folders and files to ensure they’re safe. With this tool running, you will be notified if any threats are detected.
To scan specific folders or files, right-click on the folder or file. And then, click Scan with Microsoft Defender. Once the scan is complete, you will see the results on your screen. Follow the recommended actions to get rid of the virus.
To ensure that you’re protected against viruses even after the scan, make sure that Windows Defender is up and running in the background. To do so, do the following:
- Click the Start button and select Settings.
- Navigate to the Update and Security section and select Windows Security.
- Choose Virus and Threat Protection.
- In the window that opens, select Manage Settings and enable Real-Time Protection.
- At this point, Microsoft Defender will automatically turn on.
If you want to further enhance your device’s security, you can always use a third-party anti-malware software of your choice. Once you have downloaded and installed one on your device, launch it and perform a thorough scan. After the scan, consider following its recommendations to remove malware entities and keep them at bay.
Solution #7: Check Your Hardware Components.
If you don’t know what’s causing the Qcamain10x64.sys BSOD, try checking your computer’s hardware components. There are instances when a problematic RAM or other hardware components can trigger a blue screen.
To test your computer for any hardware failure, you can use Windows Memory Diagnostic. Here’s how:
- Press the Windows + R keys to launch the Run window.
- Into the text field, input exe and hit Enter.
- Windows will then ask you to restart your device.
- After that, the test will begin. When it’s over, your computer will restart.
- The results should be displayed on your screen the moment you return to your desktop.
- If you can’t see the results, launch the Event Viewer instead. You can do so by right-clicking on the Start menu, going to Windows Logs, and clicking System. Find and click the file called MemoryDiagnostic.
Solution #8: Run an SFC Scan.
Another tool that you can use to resolve BSOD errors is the System File Checker, which is also known as SFC. Using it allows you to fix any damaged system files that trigger BSOD errors.
To perform an SFC scan, do the following:
- Press the Windows + X keys.
- Select Command Prompt (Admin) or Windows PowerShell (Admin).
- Into the text field, input the sfc /scannow command.
- Hit Enter.
- Once the scan is complete, you should see the results.
Solution #9: Disconnect Any Non-Essential Component.
A BSOD crash can also appear as a result of a hardware-related issue. So, it’s worth trying to disconnect any non-essential component, including secondary monitors, printers, and other USB devices to minimize and avoid errors.
When the error appears during the update process, try reinstalling the update. However, make sure to connect only the important peripherals, such as the mouse, primary monitor, keyboard, and internet connection.
Once the installation is complete, reconnect other peripherals. If the issue continues, the error could be a result of an incompatibility issue. You can resolve this by installing the updated version of the device driver from the manufacturer’s website.
Conclusion
A well-functioning computer should not experience any blue screen issue at all. But no hardware or software is perfect. Even the latest and most expensive computer may experience a blue screen on rare occasions.
The Qcamain10x64.sys BSOD is just one of the many BSOD errors you can encounter in Windows 10/11. It can be triggered by a faulty Windows Security Update, an outdated device driver, or a malware entity. Though it has many different causes, it can be resolved.
One of the solutions you can try is to install any pending Windows update. If it doesn’t work, try to uninstall and reinstall your WLAN driver. Other solutions you can try is to restore your PC to a previously working state using System Restore, uninstall and reinstall the 3DP software, or replace the Qcamain10x64.sys file.
If you feel that you can’t carry out the above solutions on your own, it doesn’t hurt to ask for help. Take your device to the nearest authorized service center or seek help from Microsoft’s online support team.
Do you know other ways to resolve the Qcamain10x64.sys BSOD? We’d like to know. Share them in the comments.


