Screen resolution, measured in pixels per inch (PPI), determines the pixel density within a given area. Higher PPI on a screen of the same size enables better visibility and more content display while working.
Now, when we talk about screen resolutions, we often see two figures. Both suggest the total number of pixels on the display. While the first figure indicates the number of horizontal pixels, the latter tells you the number of vertical pixels.
Common Screen Resolutions in Windows 10/11 and What They Mean
In this section, we’ll tell more about the different screen resolutions available nowadays:
Expert Tip: For smoother PC performance, consider using a PC optimization tool. It handles junk files, incorrect settings, and harmful apps. Make sure it's right for your system, and always check the EULA and Privacy Policy.
Special offer. About Outbyte, uninstall instructions, EULA, Privacy Policy.
1,366 x 768 – High Definition
Also known as 720p, this is the first standard in terms of high-resolution screens.
1,920 x 1,080 – Full High Definition
It is also called 1080p, and it is considered the complete high-definition standard.
1,920 x 1,200 – Wide Ultra Extended Graphics Array
This is also known as 2K HD, and it is a standard in smartphone screens.
3,840 x 2,160 – Ultra High Definition, also known as 4K
Sometimes referred to as 2160p, this is a high-resolution standard that is way better than 2K HD. This is starting to be known as the normal resolution for televisions.
How to Adjust the Screen Resolution
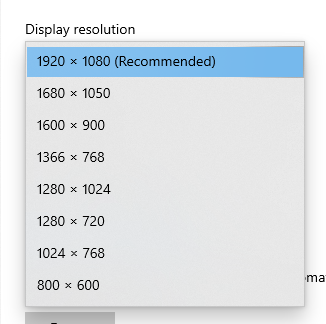
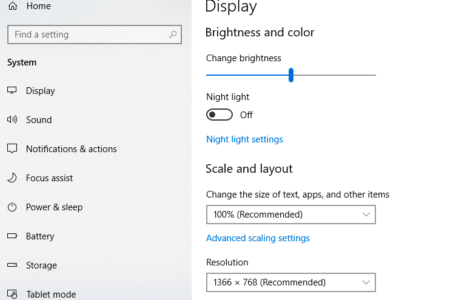
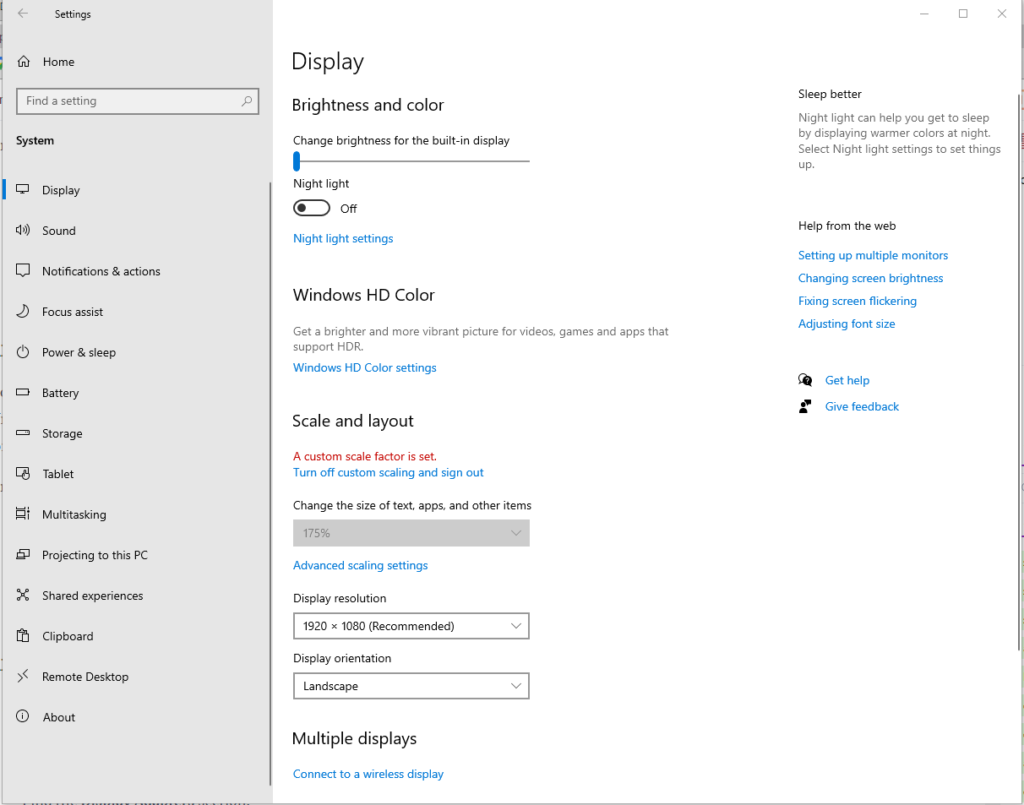
Changing your Windows 10/11 computer’s screen resolution should be a straightforward process. Simply right-click on the desktop, then choose Display Settings and go to Display Resolution.
Choose the screen resolution you want from the options, then click OK. Your computer will show you a preview of what your chosen screen resolution will look like, and you can choose whether to keep it or revert to the previous resolution.
However, some Windows 10/11 users have reported that they can’t change the screen resolution because the options are grayed out. According to the reports, the Windows 10/11 screen resolution settings have become grayed out after installing an update. The affected users can no longer click on the display resolution settings, so they are unable to change the screen resolution on Windows 10/11.
Other Windows 10/11 users, on the other hand, have reported that they can’t access the drop-down because the window freezes or crashes all of a sudden. There are also some odd instances where the user was able to complete the process of changing the resolution, only to have the screen revert back to the old resolution.
Luckily, this screen resolution setting problem is not a critical system issue because it does not affect the running of the Windows 10/11 operating system. But it is a huge hassle for those who work in graphic design or video editing or are engaged in other visual-intensive work.
Why Are the Screen Resolution Settings Grayed Out on Windows 10/11?
Based on the reports, most users facing this issue have recently upgraded to Windows 10/11 or installed system updates. This might be causing incompatibility between the operating system and outdated drivers, causing the affected computer to disable some functions related to the misconfigured drivers.
Although this is the most possible scenario, we can’t ignore other unwanted elements that might be causing your screen resolution options to be grayed out. These factors include the following:
- Malicious software
- Corrupted drivers
- Junk files
- Corrupted system files
- System glitches
What to Do If You Can’t Change the Screen Resolution
To rule out these factors from the equation, try these basic troubleshooting steps first:
- Restart your computer. If you have just completed installing an update, you need to restart your computer for the changes to apply.
- Clean up your system. Unnecessary files can clog your system, resulting in a whole slew of errors and performance issues. You can use a reliable PC cleanup tool to remove junk files from your PC completely, for example Outbyte PC Repair
- Scan your computer for malware. It is essential to get rid of any infected files. As an example, you could use this reliable antivirus software.
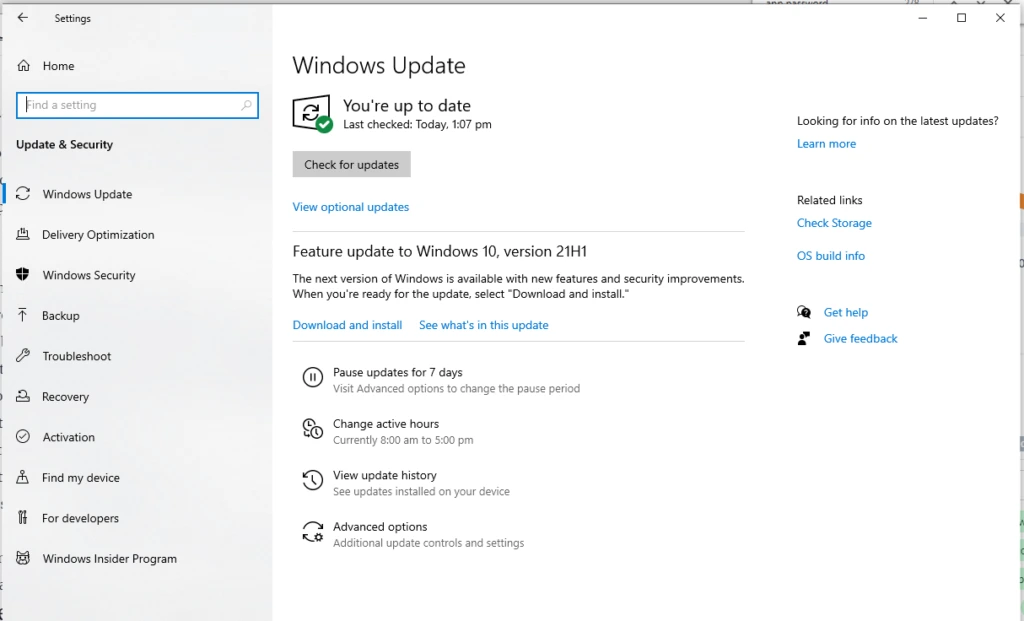
- Install all available updates. Press Win + S and search for Windows Update. And then, click the Check for updates
After performing all these steps, restart your computer once again and check if you can now change your screen resolution. If not, try your luck with the methods below:
Fix #1: Update Your Display Driver
Since this problem is mostly due to an outdated or corrupted display adapter or graphics driver, the first thing you need to do is update it. You need to uninstall the graphics driver first, then reinstall the latest version.
Here is how to do this:
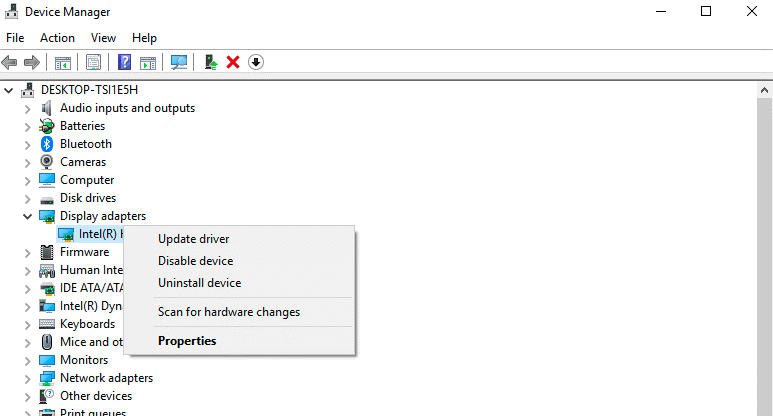
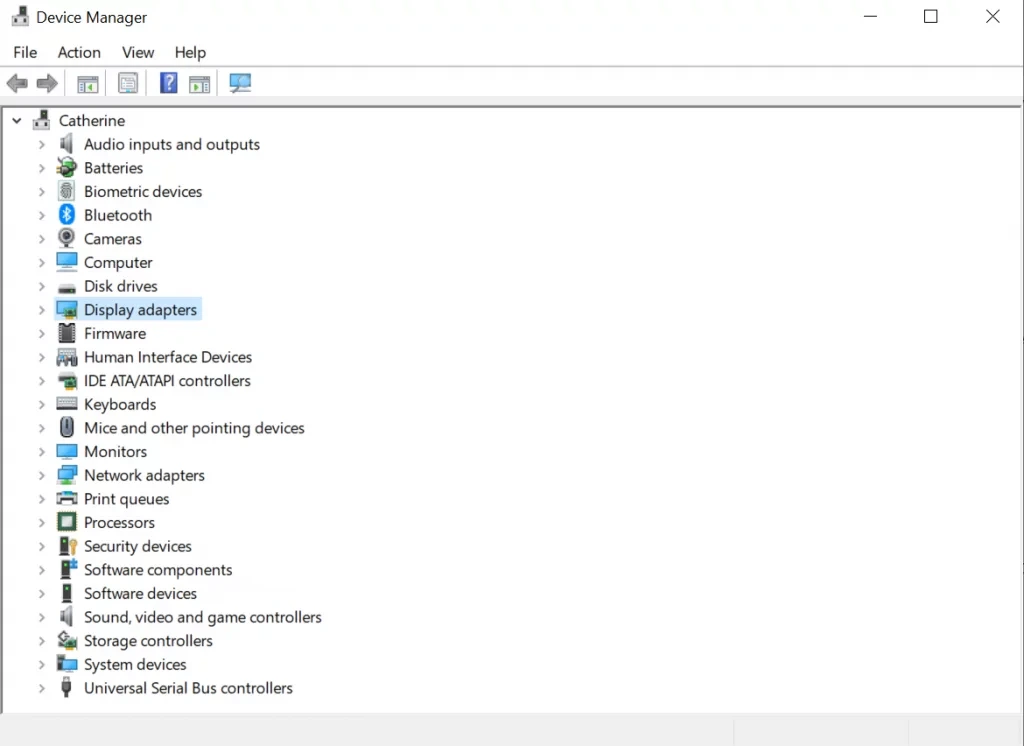
- Press the Windows key to launch the Start menu, then choose Device Manager from the list.
- Once the Device Manager opens, click on the Display Adapters section to expand it.
- Locate your display adapter, then click Uninstall.
- Click Yes when the confirmation dialog pops up.
- Follow the on-screen instructions to complete the uninstallation process.
- Once the graphics driver has been uninstalled, restart your computer. Windows 10/11 should automatically install the display or graphics driver when the operating system loads.
If your computer doesn’t automatically install the latest display or graphics driver after restarting, you can manually download it from the manufacturer’s official website. Install the graphics driver manually on your computer and check if updating the driver has fixed your screen resolution problem.
Fix #2: Enable GPU Scaling
GPU scaling allows computers to scale the images on the screen so that they fit the display vertically and horizontally. Most graphics cards, such as Intel, NVIDIA, and AMD, support this option. However, you need to access the graphics card’s control panel to enable this feature.
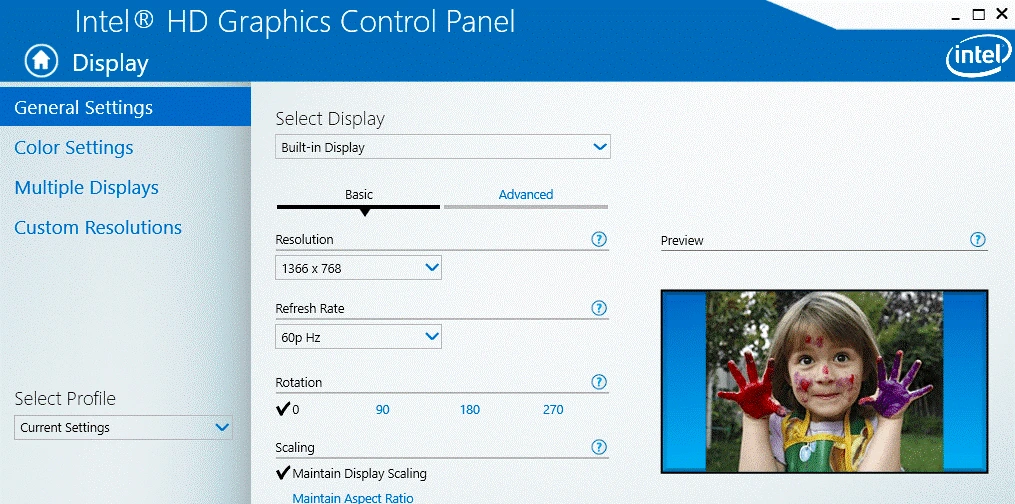
Intel:
- Click on Intel HD Graphics located in the Notification Area of the Taskbar.
- Click Display.
- Click Maintain Display Scaling, then click the Apply
- Restart your Windows 10/11 device for the changes to take effect.
AMD:
- Open your AMD Radeon control panel from the Taskbar.
- Click Display.
- Look for GPU Scaling and turn it on.
- Restart your Windows 10/11 PC.
NVIDIA:
- Click NVIDIA from the Taskbar to open its settings.
- Click on Adjust Desktop Size and Position from the left menu.
- Select your scaling mode: Full Screen, Aspect Ratio, or No Scaling.
- Choose GPU in the drop-down under Perform scaling on.
- Save your settings and restart your system.
Fix #3: Reset Your PC
Another option is to reinstall Windows 10/11 to reset all your settings. You don’t have to worry about your files because using the Reset This PC option does not erase your personal data. You also don’t need to rely on installation media to perform the reset, although the process might take some time.
Here is how to perform a factory reset on your Windows 10/11 device:
- Click Start > Settings.
- Choose Update & security, then click Recovery from the left menu.
- Click the Get Started button under the Reset this PC
- Choose whether you want to keep all your files or delete them.
- Click Next > Reset.
Wait for the reset process to be completed, which could take a while. Once done, all aspects of your device should function properly, including your screen.
Fix #4: Check Your Display Driver
Still can’t adjust the screen resolution in Windows 10/11? Then check if you have installed the correct display driver. More often than not, it is impossible to change the screen resolution without using the correct display driver. This is especially true if you have just switched from Windows 7 to Windows 10/11.
To check if you are using the correct display driver, do the following:
- Press the Windows key + R to launch the Run
- Type msc into the Run field and hit Enter to launch the Device Manager.
- All the installed device drivers will be shown on your screen. Expand the Display adapters
- If you see your current display adapter, then it means you have installed the correct driver software. Otherwise, you will see the basic display driver software provided by Microsoft. In such a case, you need to reinstall the display driver by using a driver updater tool.
Fix #5: Install the Most Recent Windows Updates
Microsoft regularly rolls out Windows updates with new features and different security improvements. They also come with bug fixes. Installing these updates may resolve issues related to your display driver.
To install the most recent updates and hopefully be able to adjust your screen resolution in Windows 10/11, do the following:
- Press the Windows key + I shortcut to launch Settings.
- Go to the Update and Security section and click the Check for Updates.
- Windows will now begin downloading and installing the latest Windows updates from Microsoft’s servers.
- Follow the on-screen instructions to complete the update process.
- Once done, reboot your device to apply the changes.
Fix #6: Have Your Display Checked by a Technician
If you suspect that the graphics card is not the reason why your screen resolution settings are grayed out, bring your device to a technician and have it checked. It could be an issue with the display itself.
In situations where there is physical damage to the device, updating the driver software or adjusting the display resolution in compatibility mode may not resolve the issue.
Fix #7: Check Your External Peripherals
For your screen to work properly, three main components need to do their job: the graphics card, the screen itself, and the display cable. If one of them is experiencing any issues, then your screen resolution settings may gray out. If the graphics card and the cable don’t support your default screen resolution, then you have another problem.
Some older or outdated graphics cards, especially those integrated into older computers, may not support UHD resolutions. The same is the case with specific cables. Thus, ensure you check this.
Fix #8: Review Your App’s Settings
Some apps and games are designed to take full control of your screen’s resolution as they need a certain resolution to look sharp. And when all the settings get mixed up, there is a chance that your screen resolution settings will gray out.
Double-check your app or game’s settings and review its display settings. See if it is the culprit behind your problem.
Final Notes
Having the correct screen resolution plays a huge role in how things are displayed on your screen. Adjusting your screen resolution in Windows 10/11 should be a simple process. Just go to Settings, select Display Settings and go to “Display resolution”. From there, you can easily change the screen resolution.
However, there might be instances when you can’t change the screen resolution due to technical glitches such as the resolution settings window freezing, crashing, or the options being grayed out. If this is the case, just follow our troubleshooting guide above to fix this issue.
First, restart your computer. Sometimes, a quick restart is all it takes to allow you to change the screen resolution in Windows 10/11. Also, try cleaning up your system, getting rid of junk files and scanning your system for malware.
If none of the steps works, update your display driver, enable GPU scaling, reset your PC, check if you installed the correct display adapter driver, and install the latest Windows updates.
Do you know of other ways to change the screen resolution in Windows 10/11 or other reasons why the resolution settings become grayed out? Let us know in the comments!

Updating drivers worked for. me. Thanks