
With Windows 10/11, Microsoft promises improved performance. Despite significant progress, some users claim that this operating system has slowed down their computers.
In addition, they state that after upgrading, Windows 10/11 has become extremely slow and unresponsive not only at startup but also when opening programs or folders.
On rare occasions, the operating system completely freezes – especially after automatic updates. If your computer is slow after a Windows update, it means that there are some compatibility issues between your OS and the new update.
Using a slow computer running Windows 10/11 is annoying and frustrating, especially if you don’t have an IT department to help you troubleshoot the problem. Whether it takes forever to boot up, load your favorite software, or simply open and close windows, a slow PC can make doing things you enjoy, such as gaming, more difficult. Furthermore, File Explorer might display a delayed response, which makes the situation even worse.
Expert Tip: For smoother PC performance, consider using a PC optimization tool. It handles junk files, incorrect settings, and harmful apps. Make sure it's right for your system, and always check the EULA and Privacy Policy.
Special offer. About Outbyte, uninstall instructions, EULA, Privacy Policy.
So, in today’s article, we’ll go over the causes of and solutions to the problem in the hopes of giving your OS a boost.
Why Is My Computer So Slow with Windows 10/11?
Is Windows 10/11 making your computer slow? Many individuals complain that their computers lag, take a long time to respond, or become stuck while running multiple programs at the same time. In fact, computer slowness has become a common topic for discussion among PC users, and many of them are curious about what makes Windows 10/11 very slow and unresponsive and how to resolve this problem.
It is not that hard to diagnose a slow computer running Windows 10/11. When a computer is slow with Windows 10/11, it could be caused by a variety of factors. The list below does not cover all possible causes, but it will get you started on understanding the problem of computer slowness and unresponsiveness in Windows 10/11:
- Too many active background programs
- Hardware incompatibilities and out-of-date drivers
- Malware
- Not enough free hard drive space
- Hard drive corruption
- Overheating
- The computer or laptop being old
- High CPU utilization
- Hardware issues
In the following section, we will demonstrate how to resolve the issue of Windows 10/11 being extremely slow and unresponsive and how to improve Windows 10/11 performance.
How to Fix a Slow Computer Running Windows 10/11
If you’re looking for the best fix for the “slow computer” problem in Windows 10/11 and you want to optimize your OS, try these tips to speed up your PC and make it less prone to performance and system issues.
Tip #1: Scan for Malware
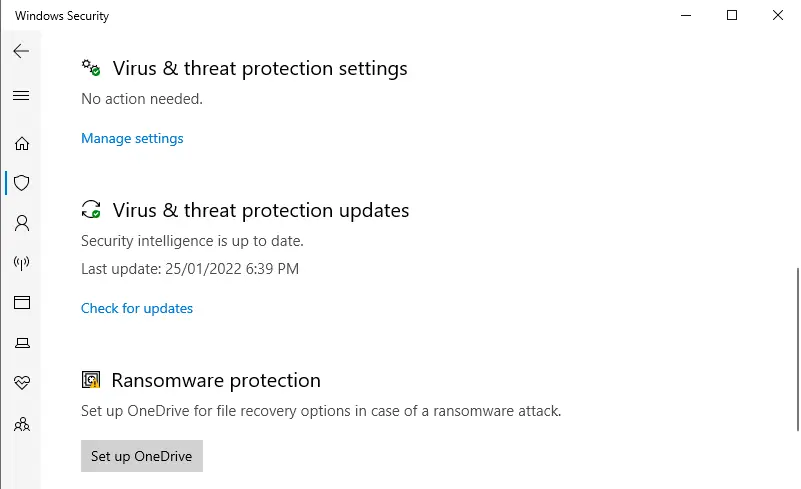
As previously stated, malware can cause Windows 10/11 to become very slow and unresponsive. To resolve the Windows 10/11 “very slow startup” problem, first ensure that your computer is not infected with malware.
Windows Defender, a built-in Windows security tool, can scan your computer for malware. So, you can launch Windows Defender and perform a full scan to check for and get rid of malicious threats. In addition to Windows Defender, any third-party antivirus software, such as Avast, is acceptable.
Removing the malware would help fix the “slow computer” issue in Windows 10/11.
Tip #2: Close Background Apps via the Task Manager
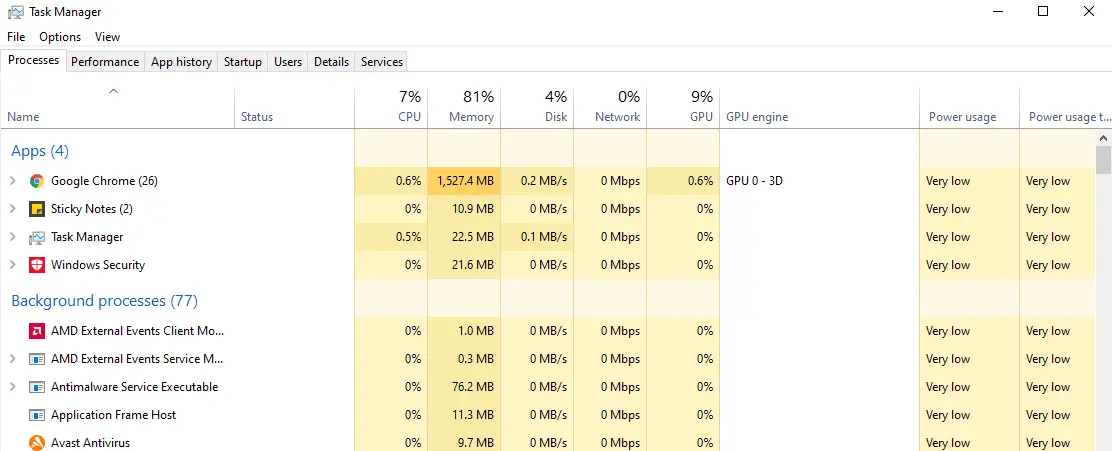
Consider the Task Manager to be a window into the health of your computer. The app shows you what’s straining the processor, how much memory something is consuming, and even how much network data a program has consumed.
To open the Task Manager in Windows 10/11, simply right-click on the Taskbar and select Task Manager from the menu that appears. In Windows 11, click the magnifying glass on the Taskbar and search for the Task Manager.
The default view of the Task Manager does not display much information other than which of your apps are currently running (which is extremely handy if you already know which one you want to close). Click More Details in the bottom left corner to see more information.
This list is divided into Apps and Background Processes by default. It is constantly refreshed, with the various columns constantly updating. Allow the Task Manager to run for a few minutes. Keep an eye out for apps that appear at the top of the list and then disappear a few seconds later. Also, look for processes that use a lot of memory or CPU power and stay at the top of the list. Are you unsure what a process is? You can learn more about it by Googling its name.
To close an app or process that you suspect is contributing to slow performance, click on the listing and then click End Task.
Tip #3: Clean Up Your Startup Programs
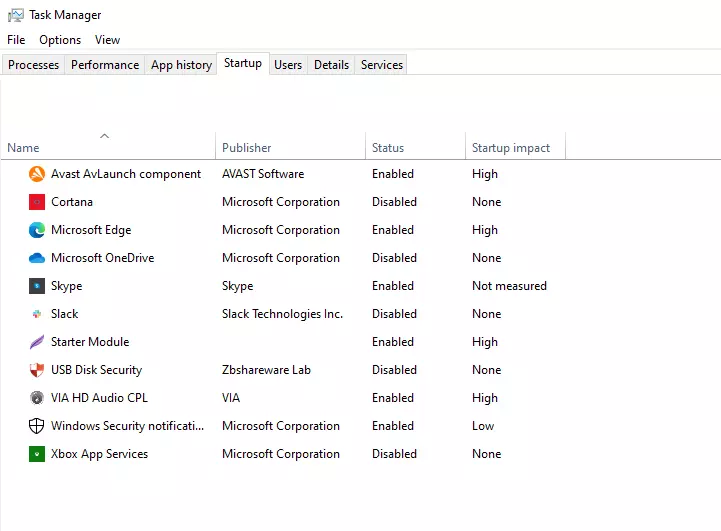
If your Windows 10/11 computer takes forever to boot up, you most likely have far too many apps trying to run at startup, which affects Windows 10/11’s startup and shutdown times. You should prevent unnecessary programs from launching at startup.
Here is how to disable startup programs on your Windows 10/11 computer:
- To open the Task Manager, press Ctrl+Shift+Esc.
- Switch to the ‘Startup’ tab to see a list of programs that start when Windows boots and their startup impact.
- Click ‘Disable’ next to any enabled program that you don’t want to launch at startup.
Tip #4: Optimize Your Power Settings
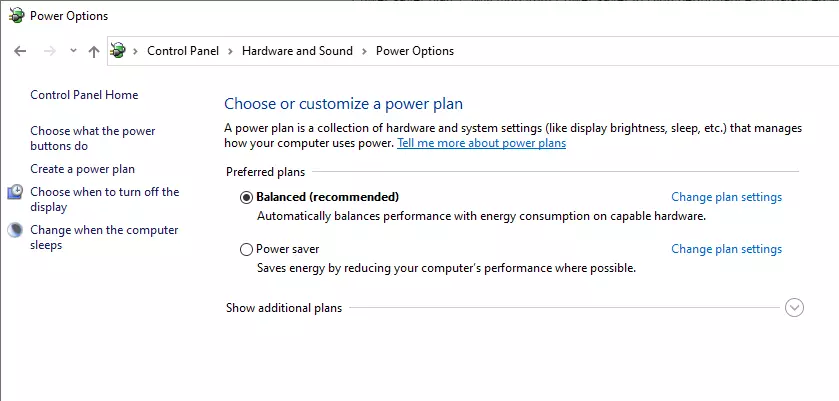
You’re slowing down your PC if you’re using Windows 10/11’s Power saver plan. In order to save energy, this plan reduces the performance of your PC. (Even desktop PCs typically have this plan.) Switching from Power saver to High performance or Balanced will give you an immediate performance boost.
To do so, open the Control Panel app and navigate to Hardware and Sound > Power Options. Typically, you’ll see two options: Balanced (recommended) and Power saver. (Depending on your make and model, you may also see other plans here, including some branded by the manufacturer.) To see the High performance setting, click the down arrow next to Show additional plans.
To change your power settings, simply select the desired option and then exit the Control Panel. High performance provides the most oomph but consumes the most power, Balanced strikes a happy medium between power consumption and improved performance, and Power saver does everything possible to maximize battery life. Desktop users should not select Power saver, and laptop users should select Balanced when unplugged and High performance when connected to a power source.
Tip #5: Use ReadyBoost for Faster Disk Caching
Windows 10/11 regularly stores cached data on your hard disk and then retrieves it when needed. The amount of time it takes to retrieve cached data is determined by the speed of your hard disk. If you have a traditional hard disk rather than an SSD, you can speed up your cache by using Windows’ ReadyBoost feature. It instructs Windows to save data to a USB flash drive, which is much faster than a hard disk. Getting data from the faster cache should help Windows run faster.
To begin, insert a USB flash drive into one of your PC’s USB ports. The flash drive must support USB 2.0 or higher, preferably USB 3.0 or faster. The faster your flash drive, the greater the speed boost you should experience. For maximum performance, look for a flash drive that is at least twice the size of your PC’s RAM.
After inserting the flash drive, launch File Explorer and navigate to This PC. Look for the flash drive. It could have an unusual name, such as UDISK 28X or something even more obscure. Right-click it, select Properties, and then select the ReadyBoost tab.
You’ll see a screen asking if you want to use the flash drive as a cache and recommending a cache size. You can leave the cache size alone or change it if you prefer. Then choose Dedicate this device to ReadyBoost, click Apply, and then click OK.
ReadyBoost will begin filling the cache with files as you use your computer, so you may notice an increase in disk activity. Depending on how frequently you use your computer, it may take several days for your cache to fill and provide maximum improved performance. If you don’t notice a performance improvement, try a larger capacity flash disk.
Tip #6: Clean Up Your Hard Disk
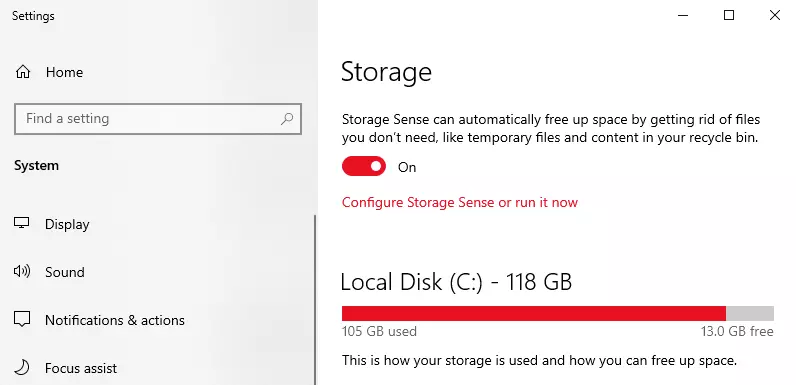
You could be slowing down your PC if you have a bloated hard disk full of files you don’t need. Cleaning it out can make your system faster. The easiest way to free up storage is by deleting junk files using a PC repair tool like Outbyte PC Repair. Your other option is Storage Sense. It is a useful built-in Windows 10/11 tool that can help with storage management. Navigate to Settings > System > Storage and switch the toggle from Off to On at the top of the screen. This will allow Windows to constantly monitor your PC and delete old junk files you don’t need — temporary files, Downloads folder files that haven’t been changed in a month, and old Recycle Bin files.
You can change how Storage Sense works and use it to free up even more space than it would normally. Click Configure Storage Sense or run it now beneath Storage Sense. From the screen that appears, you can change how frequently Storage Sense deletes files (every day, every week, every month or when your storage space gets low).
You can also instruct Storage Sense to delete files in your Downloads folder based on how long they’ve been there, and you can specify how long to wait before automatically deleting files in the Recycle Bin. You can also instruct Storage Sense to move files from your PC to Microsoft’s OneDrive cloud storage if they haven’t been opened in a certain amount of time.
Tip #7: Enable the Fast Startup Option

Microsoft added the Hybrid Startup and Shutdown feature to Windows 10/11, which puts your computer into a hibernation state and improves the startup and shutdown processes. So, to resolve the issue of the computer startup process being slow in Windows 10/11, enable Fast Startup.
Here are the steps:
- Launch the Control Panel.
- Select System and Security.
- Click Power Options.
- Select Choose what the power button does on the left panel.
- Click Change settings that are currently unavailable in the pop-up window.
- Tick off the Turn on fast startup (recommended) box and save your changes.
Following that, the issue of Windows 10/11 being extremely slow and unresponsive may be resolved.
Tip #8: Enable Automated Windows Maintenance
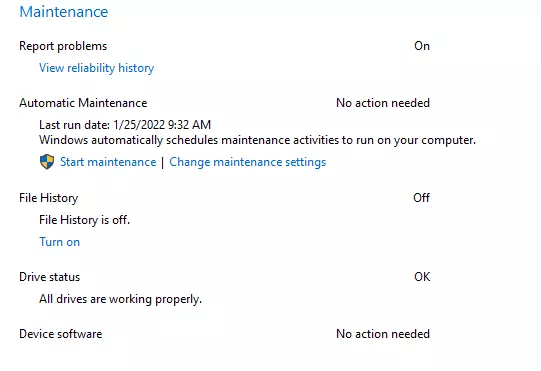
Every day, Windows 10/11 monitors and maintains your computer in the background. It performs security scanning and system diagnostics to make sure that everything is in working order and automatically fixes any problems that are discovered. This ensures that your PC operates at peak efficiency. This automatic maintenance is set to run every day at 2:00 a.m. as long as your device is plugged in and asleep.
However, there’s a chance that the feature has been accidentally turned off, or that you haven’t had your PC plugged in for a while, and thus the maintenance hasn’t been completed. You can make sure it’s turned on and running every day, and you can also run it manually if you want.
Select System and Security > Security and Maintenance from the Control Panel app. If you want it to run right away, go to the Maintenance section and click Start maintenance. To make it run every day, click Change maintenance settings, and then from the screen that appears, select the time you want maintenance to run, check the box next to Allow scheduled maintenance to wake up my computer at the scheduled time, and then click OK.
Tip #9: Turn Off Visual Effects and Transparency
Windows 10/11 has many beautiful visual effects and graphics, but these features can cause your computer to run slowly or even become unresponsive.
To resolve the issue of Windows 10/11 being very slow and unresponsive, disable visual effects and transparency using the steps below:
- To open Settings, press the Windows key and the I key at the same time.
- Then, select Personalization.
- Click Colors in the left panel.
- Scroll down to Transparency effects and turn the feature off.
After that, check to see if the problem of your computer running slow with Windows 10/11 has been resolved.
Tip #10: Always Shut Down Your PC
Turn off your computer on a regular basis. Don’t just restart it; turn it off completely and walk away for a few minutes. This allows your computer to clear its memory and restart from scratch the next time it is powered on.
Wrapping Up
It is a frustrating experience to use a slow computer. Hopefully, the suggestions provided here will make this a thing of the past. Some of these fixes, such as deleting unnecessary files, disabling startup applications, and scanning for malware, may also reveal and resolve other issues you were not aware of, such as the presence of junk files and malware in your system. We hope you’ll have a pleasant user experience from now on. If you have any questions or concerns, please leave a comment below.