
DISM is a tool on Windows used by administrators and non-administrators to repair and prepare system images and troubleshoot errors. It can also be used for Windows PE, Windows Setup, and Windows Recovery Environment.
The DISM tool has different commands you can use. In today’s article, we will focus on the dism online cleanup image checkhealth command. We’ll discuss everything about it, from what it does to how to use it smoothly in Windows 10/11.
What Is DISM /Online /Cleanup-image /Checkhealth?
DISM /online/cleanup-image/checkhealth is a Windows command for scanning the operating system for corrupted files. After scanning your device, the results show how healthy the scanned files are. If the files are corrupted, it specifies whether they are repairable or not. This command does not repair corrupt files.
Many people confuse the checkhealth command with the dism /online /cleanup-image /scanhealth command as they sound pretty similar. The truth is, these commands perform different functions.
Expert Tip: For smoother PC performance, consider using a PC optimization tool. It handles junk files, incorrect settings, and harmful apps. Make sure it's right for your system, and always check the EULA and Privacy Policy.
Special offer. About Outbyte, uninstall instructions, EULA, Privacy Policy.
What Is the Difference Between DISM /Online/Cleanup-image/Checkhealth and DISM /Online /Cleanup-image /Scanhealth?
The checkhealth command is simpler and faster to perform than scanhealth. It goes through existing logs to check for reported errors from Windows processes. It only checks for existing errors, which allows it to complete the scan pretty fast. However, note that it does not create any log file.
The scanhealth command, on the other hand, checks all items in the Windows Image Component store and calculates a hash value for the current file. It then compares the file to stored hash values to get the best working version. Unlike checkhealth, this command creates a log file during the process. Therefore, it takes a bit longer to complete because it digs deeper, hence more work.
Is DISM /Online/Cleanup-image/Checkhealth Good Enough?
You are probably wondering why you should use the checkhealth command if it does not perform deep scans. Whether or not to use this command usually depends on how healthy your system is.
The command lets you scan your PC for corruption and verify if there’s anything you can do about it. If it says the Windows image is healthy, then the process is done, and you don’t need to troubleshoot anything else. However, if the scanned files are corrupted but reparable, then you could use the scanhealth command to identify the exact reparable files to work on.
You can then use the Dism /Online /Cleanup-Image /RestoreHealth command to correct the repairable files. If the corrupted files are unrepairable, you have to restart the entire process, which can be time-consuming.
Sometimes, the checkhealth command fails to spot the problematic files causing errors on your PC. In such cases, use scanhealth to perform a deeper scan to help clear the stubborn issues.
How to Use the DISM /Online/Cleanup-image/Checkhealth Command
To scan your computer for corrupted files using this command, follow the steps below:
- Hit the Windows key on your keyboard.
- Go to the search box in the bottom left corner of the screen and type in “command” (without quotes).
- Right-click on the Command Prompt search result and select Run as administrator.
- Choose Yes when the User Account Control (UAC) prompt box appears.
- Once the CMD window opens, type in “Dism /Online /Cleanup-Image /RestoreHealth” (no quotes).
- Then hit Enter.
- The “The operation completed successfully” message should appear once the process completes.
What If I Run Into DISM Checkhealth Error 87?
Some users reported running into the “checkhealth option is not recognized in this context” error when using the DISM tool. This annoying issue prevents you from running the command you want. If you encounter it when trying to run the checkhealth scan, here are some workarounds you could try:
Solution 1: Check for Misspellings in the Command
The most common cause of error 87 is using the wrong command. Therefore, verify if you are entering the correct one. For instance, DISM commands have different slashes, which are mostly followed by spaces. Not following that format can easily trigger an error on your device.
For example, here is what the scanhealth command looks like:
dism /online /cleanup-image /scanhealth
Solution 2: Run the SFC Tool
Corrupted system files cause many issues on Windows PCs, including error 87. Using the System File Checker (SFC) can help you quickly scan your computer for corrupted files and automatically repair them.
Here is how to go about it:
- Press the Windows logo key + S combination to bring up the search bar.
- Type in “cmd” (no quotes) and then right-click on Command Prompt.
- Select Run as administrator.
- Click Yes in the User Account Control box.
- Type “sfc /scannow” (without quotes) into the open Command Prompt window.
- Then hit Enter.
- Wait for the scan to finish.
- Restart your computer.
- Finally, run the Command Prompt as an admin and try using the DISM tool to see if the error reappears.
Solution 3: Update Windows
If you have used Windows for a while, then you know the OS misbehaves when it’s outdated. Installing the latest Windows updates helps remove bugs that could be causing problems, such as error 87.
To update your operating system, use this quick guide:
- Right-click on the Windows logo key in the bottom left corner of your screen.
- Choose Settings from the menu.
- When the Settings application launches, navigate to Update & Security.
- Click on the “Check for updates” button on the right side of the window.
- Windows will automatically check for any available updates and automatically install them. If optional updates are listed, you could also download and install them.
- Restart your PC to complete the process.
The error should be gone by now. However, don’t worry if it is still bothering you. The following technique might help resolve it.
Solution 4: Run the Chkdsk Scan
The Chkdsk tool scans your device for existing errors and automatically fixes them. To see if it can remove error 87 from your machine, follow these simple instructions:
- Use the Win key + R combo to summon the Run dialog box.
- Type in “cmd” (no quotes) and then use the Ctrl + Shift + Enter combination to launch the Command Prompt as an administrator.
- Type “chkdsk /offlinescanandfix” (without quotes) into the CMD window and then press Enter.
- Wait for the process to end and then restart your Windows PC.
Solution 5: Use System Restore
System Restore is a crucial Windows feature that allows you to reverse any destructive changes you’ve made on your device, such as tweaking registry keys. It’s usually disabled by default, so you have to enable it manually. Therefore, if you have never used it to create a restore point, this solution is not for you. However, if you have created a restore point, then this tool can help revert any recent changes that may be causing the error in question.
These instructions will help you through the process:
- Hit the Windows key to open the search box.
- Type in “restore point” (no quotes) and then choose the “Create a restore point” search result.
- On the System Properties page, click on the System Restore button. If you don’t have any available restore points, this button will be greyed out, meaning you can’t proceed to the next step.
- Now click the Next button.
- Select your preferred restore point from the presented options.
- System Restore will uninstall any software that was installed after the selected date. Click on the “Scan for affected programs” button to see which ones will be removed. Then choose Close.
- Click on the Next button when ready to proceed.
- Then choose Finish to initiate the process.
System Restore will take your computer back to its previous healthy state. You should now be able to perform any DISM command without further errors. If error 87 reappears even after using this method, then the only option left is to reinstall Windows. Remember that doing so will delete all your files, so make sure to back them up before starting the process.
Pro Tip: Use a Professional Repair Tool
Using a professional PC repair tool such as Outbyte PC Repair helps ensure your computer always stays healthy. It checks your machine for any issues affecting performance and automatically eliminates them. Outbyte PC Repair is among the best repair tools you can get out there today. It carefully scans and cleans your drive, optimizes performance, and boosts your devices’ security and privacy. It is also secure and seamless to use.
If you want to try this software, follow this guide:
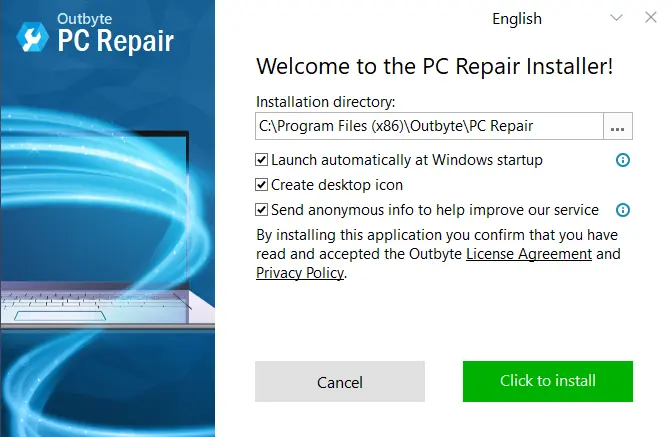
- Visit the Outbyte PC Repair page to download the software.
- Open the downloaded file and choose Yes in the UAC confirmation box.
- When a new page opens, select where to install the software. Then pick any of the listed optional features.
- Choose the “Click to install” option to start the process.
- Wait for the installation to finish. Then click on the checkbox that says “Launch PC repair and scan PC”.
- Click on the Finish button.
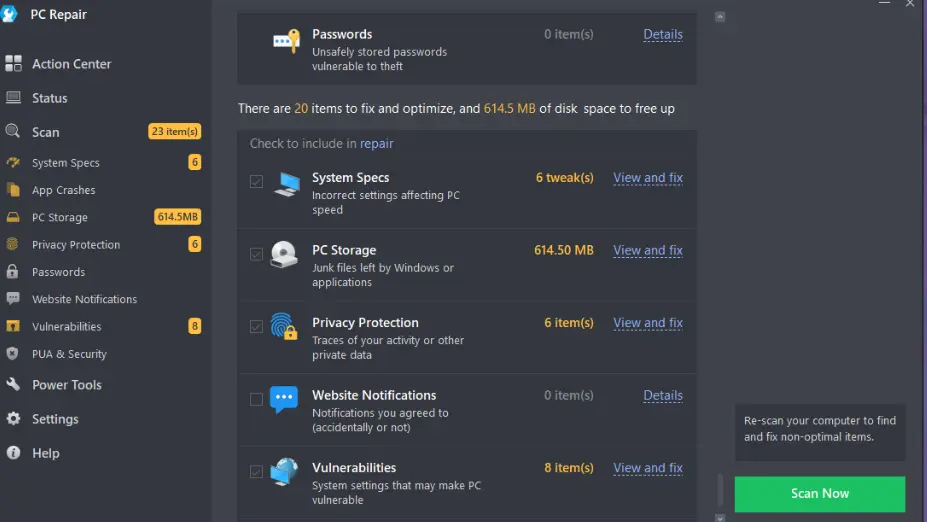
- Outbyte PC repair will launch and automatically start scanning your computer for performance-affecting issues. This could take a few minutes, so feel free to do something else as the software works in the background.
- Once done, the tool will show the discovered issues. You can then view and fix them with one click.
- Close the application and restart your PC to notice the boosted performance.
Conclusion
The dism exe online cleanup image checkhealth scan is vital as it lets you check your system for corrupted files that could be affecting performance. Fortunately, this detailed article has taught you how to perform the checkhealth command. It has also covered how to eliminate any issues you might experience when running the scan. So, we hope that you are now good to go. However, if you have any problems or questions about today’s topic, feel free to drop them in the comments section below.