
Long gone are the days when we had to manually take photos using our cameras. Today, taking pictures is easy as pie. Using our Windows 10/11 device, we can take photos in an instant!
Windows 10/11 devices have an in-built app called Camera that allows you to use your webcam to take photos and record videos. And it’s an app that is so much better than other malware-ridden camera apps out there. So, what is it called? It’s the Camera app!
About the Camera App
 The Camera app on your Windows 10/11 device allows you to point and shoot to take photos automatically on your device. For it to run, your device has to meet all minimum system requirements.
- Operating System: Xbox One, Windows 10 version 17763.0 or higher, Windows 10/11 Mobile version 14393.0 or higher
- Architecture: ARM, x64, x86
How to Launch the Camera App
Excited to take photos using this in-built feature? Below are 4 easy ways to open Windows 10/11’s in-built Camera app:
Expert Tip: For smoother PC performance, consider using a PC optimization tool. It handles junk files, incorrect settings, and harmful apps. Make sure it's right for your system, and always check the EULA and Privacy Policy.
Special offer. About Outbyte, uninstall instructions, EULA, Privacy Policy.
Method #1: via Cortana Search
Click the Cortana search field and input camera. You will then find the Camera app from the search results. Click on it.
Method #2: via the Start Menu
Click the Start button to launch the Start menu. From the list of apps, find Camera.
Method #3: via the Run Utility
Press the Windows + R keys to launch the Run utility. Into the text field, input microsoft.windows.camera and hit Enter. The Camera app will now open.
Method #4: via the Command Prompt
Launch the Command Prompt by typing cmd into the Cortana search field. Type the start microsoft.windows.camera command into the command line and hit Enter to open the Camera app.
How to Use the Camera App
Now that you know how to launch the app, how do you use it? Like most Windows 10/11 apps, the Camera app is easy to use. It has a straightforward interface, which makes it easy for you to identify what needs to be clicked when taking photos and videos.
Taking Photos or Videos
Taking photos and recording videos using the Camera app can be done in just a few clicks. Do the following:
- First, check if you have a camera connected to your device. To do so, launch it by typing camera into the Cortana search field. If Windows can’t find it, you will see a black screen with a message that says “We can’t find your camera.” In this case, you simply have to connect your external camera and try launching the app again.
- Once Windows detects your external camera, it will ask your permission to use it inside the Camera app.
- Hit the Allow button.
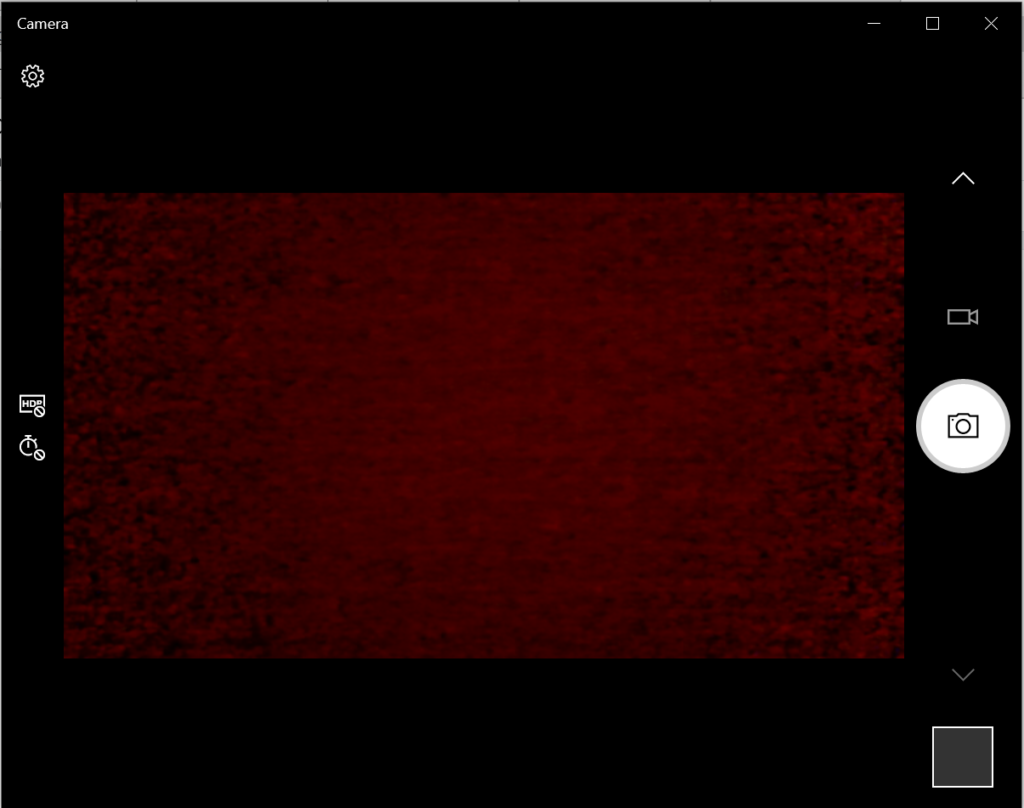
- At this point, you should see your webcam on full screen with several buttons on top and at the bottom.
- Now, to proceed with taking a photo, just click on the Camera icon. When taking a photo, you will hear a snapping sound and the image will be stored in the Camera Roll folder.
- If you wish to start recording a video, tap the video camera icon and it will begin recording. You will notice that there is a timer at the bottom of the screen while you are recording. It will stop the moment you stop recording as well. Like when taking a photo, the video will be stored in the Camera Roll folder.
Changing the Camera Settings
To change the app’s settings like photo quality or framing grid, go to Start and select Camera. Next, navigate to Settings and make the necessary changes.
Zooming In or Out
Take note that the Camera app is not capable of doing a digital zoom, but you can experience the same effect when taking photos by cropping. For a clear guide on what to do, consider these steps:
- Go to Start and select Photos.
- Select a photo that you want to zoom.
- Click Crop and Rotate.
- Select the Aspect Ratio option and choose from the available preset options.
- Once done, hit the Save a Copy button then Save.
Disabling Apps from Accessing the Camera App
You can set which apps can access the Camera app. But if you want to block all apps from accessing it, follow these steps:
- Go to Start and select Settings.
- Navigate to Privacy and select Camera.
- Now, disable the Allow apps to access your camera option.
Disabling the Camera App Completely
If you wish to disable the Camera app completely, do the following:
- Into the search box, input device manager.
- Select the most relevant search result.
- Next, click the arrow next to Cameras.
- Right-click on your Camera device to turn it off.
- Hit the Disable Device button.
What Is Camera App Error 0xA00F4288 on Windows 10/11?
Like other Windows apps, the Camera app may encounter problems like the Discord camera not working. Another is the Camera app error 0xA00F4288.
This error can occur in all devices that run in Windows 10/11, particularly those that have installed the latest Windows update. It is often accompanied by the error message, Close other apps. It looks like another app is using the camera already. If you need it, here’s the error code: 0xA00F4288<AllCamerasAreReserved>.
But what causes the Camera app error 0xA00F4288 on Windows 10/11?
According to reports, this error can appear because of a missing camera driver. It can also be caused by third-party apps interfering with the Camera app’s functions. But aside from that, there are other potential triggers to this error. These include:
- a faulty Windows update
- malware or virus attack
- OS crashes
- file corruption
- compatibility problems
- missing or altered system files
Ways to Resolve the Camera App Error 0xA00F4288 on Windows 10/11
Are you getting this Camera app error, too? We know how frustrating it can be, especially if it is keeping you from being productive at work. So, let us help you deal with it.
First, let us try some basic troubleshooting steps:
- Plug your external webcam into another USB port. If your Windows 10/11 device cannot detect your webcam, try another port.
- Restart your device. It is a trick that is old as time but still works. In case you didn’t know, restarting your device can resolve a multitude of problems, including webcam issues.
- Unplug and restart your device. In this troubleshooting method, try to unplug your external webcam and restart your computer. After that, plug it back in and see if it resolves the problem.
- Check the webcam. The error code may arise if your webcam is damaged and needs repair. If there are no visible signs, the next course of action is to connect the webcam to another compatible device. If it does not work on another device, then your webcam may need a replacement.
- Check for any pending Windows update. Sometimes, updating Windows 10/11 can fix issues that are associated with the webcam. To install a pending Windows update, go to the Start menu, select Settings, and click Update and Security. If an update is available, click the Windows Update button.
- See if the app that you’re using is at fault. There are cases when the webcam is working just fine but the app is causing the problem. To check this, use the Camera app in another Windows app like Skype.
- Check the webcam’s software settings. Some webcam manufacturers design their products with certain device settings. For instance, the Lenovo Settings app has a Privacy Mode setting that completely blocks the use of a webcam.
- If you are using a Bluetooth webcam, check its connection. Be sure that Bluetooth is enabled in your device so your webcam can detect it.
If the above troubleshooting steps did not work, then proceed with the workarounds below. Most of them have worked for other affected users, so they’re worth trying, too:
Solution #1: Verify Access to the Camera App
First, you need to check if the Camera app’s access is enabled or not. Below are the steps on how to check and enable access to your Camera app:
- Navigate to the Cortana search field and input settings. This will launch the Settings utility.
- Locate Privacy and click on it to open it.
- From the list of apps, find Camera and click on it.
- Check if the Camera Access option is turned off or on. If It is disabled, make sure to switch it on.
- After that, scroll down and check the apps that you want to give access to.
- Finally, check if the error message still appears when opening the Camera app.
Solution #2: Reset the Camera App
You can also resolve the most common Camera app errors by resetting the app itself. Here’s how to reset the Camera app:
- Go to Settings -> Apps -> Apps and Features.
- In the list of apps, find Camera and click on it.
- Select Advanced Options.
- Scroll down to the bottom section and click the Reset button.
- Once the app has been reset, check if the error still appears.
Solution #3: Update the Webcam Driver
As mentioned above, an outdated camera driver can trigger the error code on your Windows 10/11 device. So, make sure that the camera driver is up to date. You can easily update your camera driver on Windows 10/11 by following these steps:
- Into the search field, input device manager and hit Enter. This will open the Device Manager utility.
- Find Camera from the list of devices. If you cannot see it, go to View and select Show Hidden Devices.
- Next, right-click on the Camera app and select the Update Driver option.
- Choose Search automatically for updated driver software.
- If an update is available, click the Update button and wait for the update process to finish.
- Once the camera driver has been updated, re-launch the Camera app and see if the error message still shows.
Now, because updating device drivers is no easy task, not to mention the risks involved in installing the wrong driver, we highly recommend using a third-party device driver updater tool instead. In just a few clicks, you can update your PC drivers without having to worry about device conflict. Plus, you can ensure a smooth update process.
Solution #4: Use the Registry Editor
 If none of the methods above worked in your case, then try using the Registry Editor. This is the hierarchical database of Windows that is responsible for storing low-level settings for the operating system and other applications.
Considering the important settings that the Registry Editor holds, we recommend creating a backup first. With a backup in handy, you can easily restore your settings, should anything wrong happen in the process of resolving the Camera app error.
To create a backup of the registry, go to the Start menu and input regedit.exe into the search field. And then, hit Enter. You will be asked to enter your administrator password at this point. Type it to proceed. The Registry Editor should now open. Click the registry key that you want to back up, click File -> Export, and select the location where you want to save a copy of the backup. Finally, give it a name and hit the Save button.
Assuming you already have a backup of your registry, you can proceed with using it to fix the Camera app error that you’re currently facing. Here’s how:
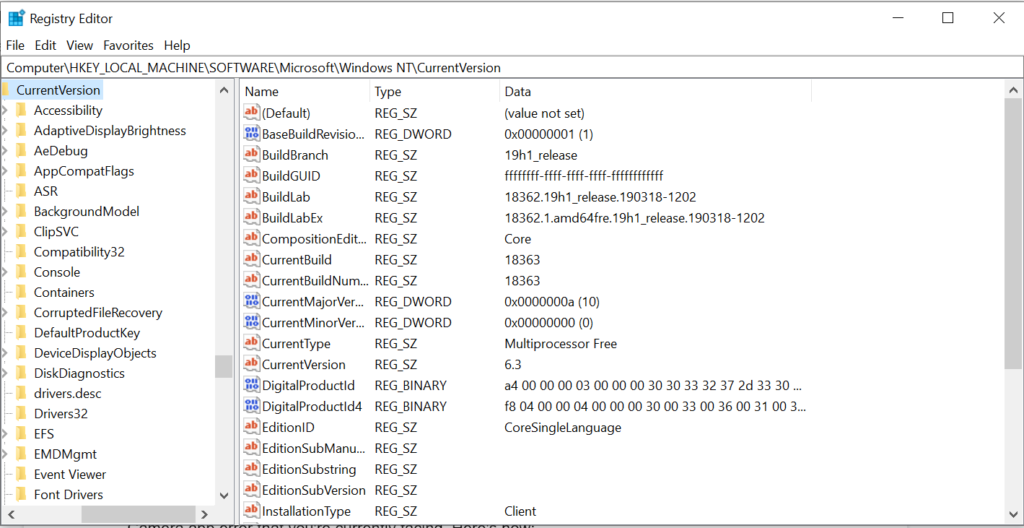
- Into the search field, input regedit and hit Enter. This will open the Registry Editor.
- Follow this path: HKEY_LOCAL_MACHINE -> Software -> Microsoft -> Windows Media Foundation -> Platform.
- Right-click on Platform and select New -> DWord 32-bit Value.
- Set the name to EnableFrameServerMode.
- Also, set the value to 1.
- Now, try to launch the Camera app again and check if the issue is still occurring.
Solution #5: Check the App’s Privacy Settings
In some cases, changing the Camera app’s privacy settings will do the trick. Here’s a guide on how to do it:
- Click the Start menu and select Settings.
- Into the search field, input webcam.
- Hit Enter.
- Click Camera Privacy Settings and make sure the toggle next to the Let apps use my camera option is set to On.
- After that, check if the Camera app error still shows.
Solution #6: Scan Your Device for Virus or Malware
Your device may throw the Camera app error because of malware or virus infection. If this is the case, scan your device for malware using Windows Defender. Follow these steps: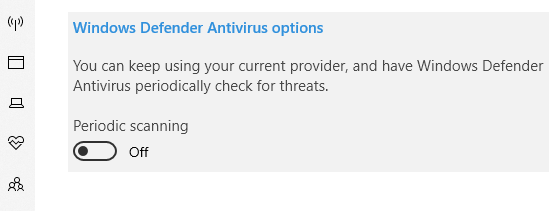
- Click Windows Defender from the notification tray.
- Select Virus and Threat Protection.
- Hit the Scan Offline button.
- Your PC will then restart and proceed with the scanning process.
- Once done, click Windows Defender from the notification tray again.
- Choose Virus and Threat Protection and enable the Cloud-Based Protection option.
- Restart your device and check if the error still appears.
Now, if the real culprit behind the error is malware or virus, then this solution should prove efficient. But if it still shows, then the problem could be the antivirus software itself. To fix this, you may need to turn off the antivirus software tool temporarily to check if the error message shows.
Once the error has been fixed after disabling the antivirus, make sure to enable it again. This way, your device remains protected.
Solution #7: Run the Windows Store App Troubleshooter
 Running the Windows Store App troubleshooter may sometimes resolve the issue. The Windows Store Apps troubleshooter is an app that scans and resolves any issues that may keep apps you downloaded from the Windows Store from working properly. This includes the Camera app.
To run it, follow these steps:
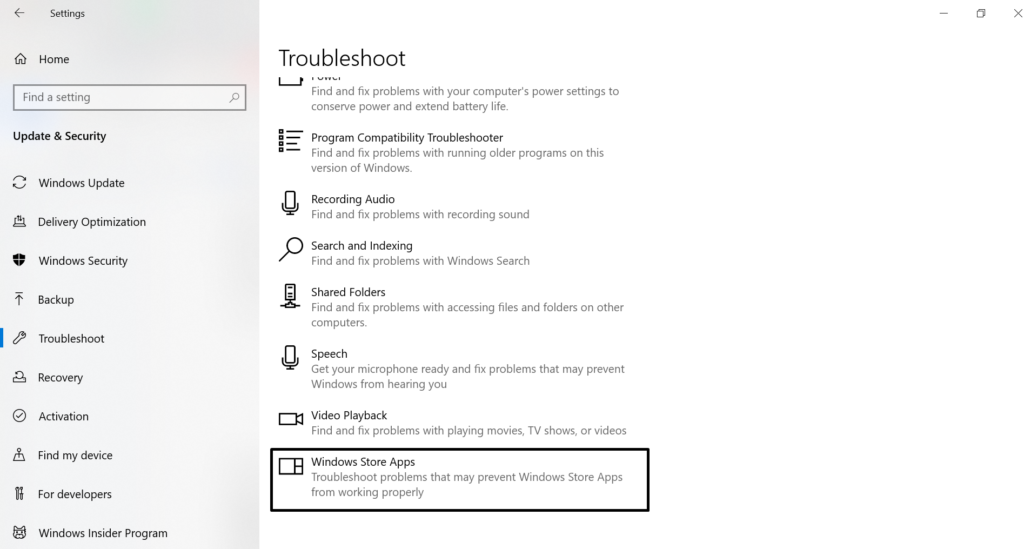
- Press the Windows + I keys to launch the Settings utility.
- Select Update and Security.
- Choose Troubleshoot and scroll down to the Store Apps section.
- Hit the Run the Troubleshooter button.
- Once the troubleshooter has identified and resolved the Camera app problem, close it. Otherwise, consider other solutions.
Solution #8: Reinstall the Camera App
Sometimes, reinstalling the Camera app can fix the error because it restores everything to its default state. To uninstall the Camera app, right-click on the Start button, select Windows PowerShell(Admin), and input this command: Get-AppxPackage *Microsoft.WindowsCamera* | Remove-AppxPackage. Next, download the Camera app from the Windows Store and install it. See if the problem is fixed.
Solution #9: Roll Back Your Webcam Driver
An incompatible driver could be causing the Camera app not to function properly. If you notice that the error started showing after updating Windows, try rolling back your camera driver to the previous version. Here’s how: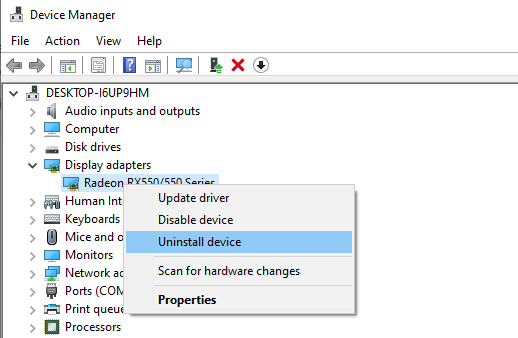
- Launch the Device Manager by typing device manager into the search field and hit Enter.
- Locate your webcam device and choose Properties.
- Navigate to the Driver tab and click Roll Back Driver.
- Select the most appropriate reason why you wish to roll back to the previous driver version.
- After making a choice, hit Yes.
- Restart your computer and check if the error still appears.
Solution #10: Consider Using Other Camera Apps for Windows 10/11
If none of the above solutions sufficed, we can only suggest using other alternative camera apps. Here are the camera apps that we recommend:
1. Logitech Capture
Logitech Capture is a free webcam recording software designed for Windows 10/11. It has a studio control feature that allows you to adjust images, create frames, adjust transitions, and enable ChromaKey.
Pros:
- Rich in effects and transitions
- Portrait optimization for mobile devices
- Allows direct streaming to YouTube via the Capture app
- Takes still images and passports
Cons:
- An account is necessary
- Limited YouTube channels
2. CyberLink YouCam
If you fancy video chatting and video recording sessions, then CyberLink YouCam is the app for you. It has more than 200 fun effects that allow you to make your real-time videos as enticing as possible. It also allows for a seamless app integration to keep your live streaming chats without having to buffer.
Pros:
- Lots of animated emojis
- Best for video conferencing
- Many interactive colorful distortions and particles
- Face enhancement tool
Cons:
- Limited to the Windows OS only
- The free plan has limited features
3. SplitCam
One of the most popular webcam software for Windows 10/11 is SplitCam. It competes well with other webcam tools out there because it allows you to stream, take photos, and record videos for Skype, YouTube, and Windows Live Messenger. It is also packed with fantastic webcam effects.
Pros:
- Straightforward and simple interface
- Supports a wide variety of resolutions
- Can be easily integrated with messaging apps
Cons:
- Undefined supported file formats
4. ManyCam
For smooth streaming and flawless recording of videos, ManyCam is the app for you. Because its interface is intuitive and user-friendly, it is best used for game streaming, online education, telehealth communication, and mobile live streaming.
Pros:
- Allows for streaming 4K videos
- Real-time camera control
- Screencasting feature
- No watermark on images
- Screen recording feature
- Supports real-time dragging and dropping effects
Cons:
- No light enhancement feature
- Expensive subscription plans for businesses
- The majority of the features are manual
5. YAWCAM
A free webcam software program for Windows 10/11, YAWCAM has many amazing features, such as motion detection and overlay images and texts. To use it, you need a supported device like DV-camera or DirectX compatible webcams.
Pros:
- Easy to use
- User-friendly interface
- No watermark
Cons:
- Few effects and transitions
6. Fake Webcam
Contrary to its name, Fake Webcam isn’t fake. It actually has features that allow you to broadcast, add filters and effects, fake your voice, and record your screen. Its standout features are the free video toolkit and free video converter.
Pros:
- Supports all audio and video formats
- Screen recorder feature
- Plenty of support tools
- Can be integrated with almost all messengers
- Can convert different file formats
- Allows streaming to any channels
Cons:
- Some tools are not for free
7. IP Camera Viewer
If you are running a supermarket store, then this is the best webcam camera software for you. It is compatible with almost all models of IP cameras, including Canon, Toshiba, D-Link, Sony, and Panasonic. Some of its best functions include zoom or tilt images, detect motions, and adjust image settings.
Pros:
- Easy to use
- Compatible with lots of IP camera models
- Uploads recorded videos and photos to the server
Cons:
- Cannot adjust the video and image quality
- No built-in media player
How to Improve Your Webcam Quality
Assuming that you have already resolved the 0xA00F4288 error code in the Camera app but the quality of your webcam footage appears grainy, then we have a few tips for you. These should drastically improve the quality of the footage and image captured by the webcam.
Tip #1: Adjust Your Webcam Settings.
You can try adjusting the settings of your webcam, particularly the saturation, contrast, and brightness, to match the room’s lighting. To access your webcam’s settings, go to Start and select Control Panel. Next, navigate to the Hardware section and select your internal webcam from the menu. Go to the Properties tab to open the control settings. Slide each bar until you are satisfied with the visual settings.
Tip #2: Increase the Lighting Behind You.
When video chatting or taking photos, try to increase the lighting behind you. But make sure you do not increase the lighting near your webcam. Insufficient back lighting will only create a dark image that is close to graininess. Too much light will only dissolve the image.
Tip #3: Adjust Your Screen Resolution.
If the image quality projected on your screen is distorted or blurred, try adjusting your screen’s resolution. To lower it, right-click on your desktop and select Properties. And then, choose Screen Resolution. Make the necessary adjustments until you achieve the image quality you desire.
Tip #4: Check Your Bandwidth Settings.
If the traffic on your network is high, your bandwidth will be affected, reducing the video or image projection’s quality. To ensure you enjoy a great video session, you must meet a minimum bandwidth requirement of 128 kbps.
Tip #5: Improve the Background.
Changing your background can greatly affect how an image is being projected on the Camera app. Use a pastel-colored background if possible. Also, make sure that its size is about 5 x 7 feet. If it’s smaller, then the wall behind will show.
Wrapping Up
That’s it! This is pretty much everything about the Camera app error 0xA00F4288. Aside from providing you with the basic information you need to know about the error, we hope we have provided you with effective solutions to get rid of it.
This Camera app error may arise due to different reasons – privacy settings, malware or virus infection, outdated device driver, or faulty Windows updates.
Good thing that you have come across this article, so you don’t have to worry the next time you encounter the Camera app error code 0xA00F4288. You may scan your device for malware or viruses, change its privacy setting, reset it, update the driver, use the Windows Store Apps troubleshooter, revert to a previous driver version, or tweak the registry settings.
If you really need to take a photo but the Camera app still throws the error code, then we suggest using third-party camera apps instead. Among the apps that we recommend are Logitech Capture, CyberLink YouCam, SplitCam, and ManyCam.
Let us know if the solutions above have helped you get rid of the error. Share your experience or thoughts in the comments!
Thanks, it’s working again.