Disk Utility is a crucial tool for resolving disk issues on your Mac. It can check the health of your hard drive and repair any disk errors. Use it when your apps quit unexpectedly, your external drive isn’t working, or your Mac won’t start up.
Disk Utility usually works smoothly, but there are times when frustrating errors occur and prevent the process from being completed. One of the common errors encountered when using Disk Utility is the “Couldn’t Unmount Disk” error. When this error pops up, any attempted task gets stopped right in its tracks.
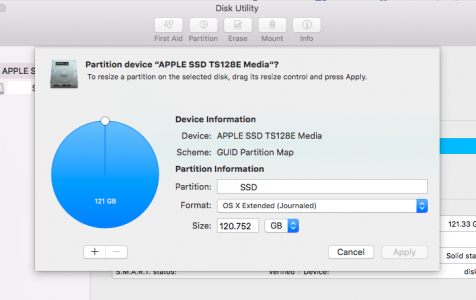
What is the “Couldn’t Unmount Disk” Error on Mac?
The “Couldn’t Unmount Disk” error can happen during formatting, partitioning, disk verification and repair, or any task that the Disk Utility undertakes. What makes this error frustrating is that there is usually very little to no additional information provided by the error message, making it more challenging to resolve the problem, And based on the error message, it is even harder to determine what the problem is all about.
Here are some variations of the error message that Mac users encounter, depending on the process being executed when the error happened:
Pro Tip: Scan your Mac for performance issues, junk files, harmful apps, and security threats
that can cause system issues or slow performance.
Special offer. About Outbyte, uninstall instructions, EULA, Privacy Policy.
- Disk Erase failed.
Disk Erase failed with the error:
Couldn’t Unmount Disk. - Partition failed
Partition failed with the error:
Couldn’t Unmount Disk. - Disk Utility stopped verifying (letter of the hard disk)
Couldn’t Unmount Disk. - Volume Erase failed
Volume Erase failed with the error:
“Couldn’t Unmount Disk”.
Once this pops up, the current process gets halted and could no longer proceed, affecting any troubleshooting process or disk repair you might be doing.
What Causes the “Couldn’t Unmount Disk” Error in Disk Utility for Mac?
When your Mac is getting the “Couldn’t Unmount Disk” error when using the Disk Utility, it is possible that the boot drive cannot be modified because it is being used by some process or an application. For example, a file from the disk you are trying to erase could be open, which means that you can’t proceed with the erasing unless all the files are closed.
Another possible reason is the presence of malware. When a malicious software is running in the background and wreaking havoc on your Mac, you might get the “Couldn’t Unmount Disk” error when you try to do something with your hard drive. This is because the malware might be making changes to your hard drive without you knowing it.
Other factors you should look into include corrupted system files, bad hard drive sectors, or insufficient permissions. Whatever the reason is, resolving this “Couldn’t Unmount Disk” error should be your priority because it might lead to further disk damage or other hard drive issues.
How to Fix the “Couldn’t Unmount Disk” Error on Mac
If your Mac is getting the “Couldn’t Unmount Disk” error, don’t worry because there are several ways to handle this problem. But before you do so, here are some of the basic troubleshooting you should take care of first:
- Close all applications and files before attempting the repair.
- Make sure you have enough permissions to read and write to the drive you want to modify.
- Run a scan to check for the presence of malware. Delete any malicious software detected using your antivirus and delete all related files.
- Disable your security software after running the scan because it might prevent the processes from pushing through.
- Declutter your system by cleaning up your computer with a Mac cleaning tool. This should fix any errors related to corrupted junk files or cached data on your Mac.
- Restart your computer.
Once you’ve completed the steps above, you can now proceed with the main solutions:
Solution #1: Use a USB Boot Drive to Repair the Hard Drive.
If “Couldn’t Unmount Disk” error occurs when you are trying to modify the boot drive, the easiest solution is to boot your Mac using another drive, and then run Disk Utility from that disk. You can use an installation drive or a recovery drive, as long as it is bootable and it is separate from the primary boot disk where your macOS is installed.
Here are the steps you need to follow to resolve this error using a USB boot drive:
- Connect the USB boot drive to your Mac, then reboot.
- While restarting, hold down the Option key button and choose the attached boot drive.
- In the boot menu, choose Disk Utility.
- Click First Aid at the top menu to verify the disk.
- Once your disk has been verified, you can then proceed with the task you were trying to perform when the error occurred.
Solution #2: Use the Recovery Partition.
If the “Couldn’t Unmount Disk” error message appears when doing First Aid on your disk or formatting a non-boot disk, the first solution will not work. If this is the case, you can try resolving the error using Recovery Partition.
Here’s how to do it:
- Reboot your Mac.
- While booting up, hold down the Option key to boot using the Recovery Partition.
- Next, click on Disk Utility from the boot menu.
- Click First Aid to verify the disk or select Erase to format the disk if needed.
Keep in mind that this method will only work if the disk that is throwing the error is not the same as the primary boot partition where the Recovery Partition is saved.
Solution #3: Use Command Prompt to Force Unmount the Disk.
If the above methods don’t work and your disk is pretty stubborn, you can attempt to fix this error by forcing to unmount the disk using commands.
To do this, follow the steps below:
- Launch Terminal by navigating to Finder > Go > Applications > Utilities.
- In the Terminal window, type in the following command: diskutil list
- This will list down all the available disks on your Mac.
- Look for the disk that you want to force unmount and take note of the number of the drive.
- Type in this command next: sudo diskutil unmountDisk force /dev/diskx
- Replace /dev/diskx with the disk number of the drive you want to unmount (for example, dev/disk1).
- Wait for the process to be completed.
Solution #4: Use a Third-Party App.
If you don’t want to go through the trouble of booting using the USB boot drive or typing in commands in the Terminal, you can use a third-party tool instead. There are a lot of repair utilities to help you deal with this “Couldn’t Unmount Disk” error. These utilities can also be used to format, partition, erase, or modify your disk. Just make sure to choose a reliable app that can help you perform these tasks without any error.
Summary
The Disk Utility on macOS is a useful tool for fixing any disk-related issues or performing tasks that involve the hard drive. But this tool is not impregnable. Flaws, such as the “Couldn’t Unmount Disk” error, can happen from time to time. When this happens, simply follow the solutions listed above and you’ll be good to go.