You can block specific contacts on Messages and FaceTime to stop receiving unwanted messages. This is useful if you have a friend, significant other, or business contact who keeps texting you against your wishes. Blocking contacts is a simple process and can be done in a few steps. Regrettably, not everyone seems to have an easy time using the blocking feature on their Mac. Some folks have complained about blocked numbers not appearing on Mac. Normally when you block someone on iPhone, the change should reflect on your other Apple devices. Moreover, when you block someone from sending you iMessages means you have blocked them from FaceTiming you.
If you have contacts who won’t stop pelting your Mac with a flurry of messages and you suffered a setback while trying to block them, this guide on how to block someone on Mac will help you tune this annoyance out.
How to Block Someone on Mac?
To block unwanted messages and calls on your Mac, follow these tips:
-
How to Block iMessages on Mac
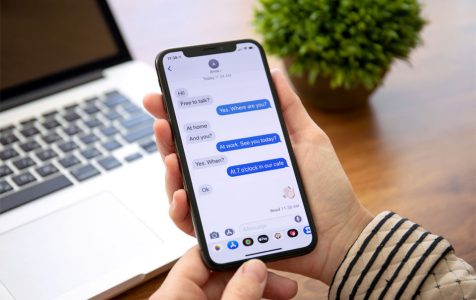
You can block and unblock contacts right from the Messages app. This way, you will not receive iMessages from blocked numbers. Here is how to accomplish the task:
Pro Tip: Scan your Mac for performance issues, junk files, harmful apps, and security threats
that can cause system issues or slow performance.
Special offer. About Outbyte, uninstall instructions, EULA, Privacy Policy.
- Launch the Messages app on your Mac.
- On the Menu bar, go to Messages > Preferences.
- Select the Accounts tab and locate your iMessages account on the left-side menu.
- After that, click on the Blocked tab.
- Click the plus (appears as +) button to select the sender(s) you intend to block.
- Choose the contacts you want to block.
- Their names, numbers, and email addresses will be added to your list of blocked contacts.
Pro tip 1: When you activate the add (+) button, a search field will appear on the top of the window. Use this search field to find the contacts you want to block.
Pro tip 2: If the person you want to block is not captured in your Contacts, add them to the Contacts app first. Sometimes when you add phone numbers directly to the Block list, the messages from these contacts may still get to you through your other Apple devices.
-
How to Block FaceTime Calls on Mac
Besides blocking users from sending messages, you can also block them calling you through FaceTime. This strategy seems to be effective in fixing this glitch. Even some users who complained about the issue of blocking contacts on Mac not working have resolved the problem by blocking unwanted contacts via the FaceTime app. As you already know, blocking contacts in macOS and iOS is pretty all or nothing. In other words, you cannot block users from calling you without also blocking them from messaging you.
To block someone from FaceTiming you, follow the instructions below:
- Launch the FaceTime app on your Mac.
- Find the specific caller you want to block on the left-side panel.
- Once you have identified the contact, control-click or right-click on it and choose the Block this caller option from the drop-down menu.
- After that, his or her number, associated email address, and name will be added to your list of blocked contacts.
-
Adjust Your iCloud Settings
iCloud lets you access all your contacts from your Mac, iPhone, and iPad. So when you change contacts on one device, the Contacts app will update automatically.
If you blocked someone on iPhone but not on Mac, there is a high chance that your iCloud setting has not been activated to sync all your devices. When you turn on your iCloud Contacts, all the contacts you blocked on your iPhone will carry over to your Mac, and vice versa. Please follow these instructions to set up iCloud Contacts on your Mac:
- Go to Apple menu and select System Preferences.
- Select iCloud > Contacts.
- All the information stored in Contacts will transfer to iCloud automatically.
Anything Else?
If you’re experiencing issues on your Mac, a tool like Outbyte macAries could help you remove junk files. Make sure the tool aligns with your system cleanup requirements.
Conclusion
There are a few things that are more annoying than being spammed with text messages. But now you can smile because you can block and unblock any contact as you wish. So don’t overlook this great feature when scouring around your Messages app preferences.
If what you want is temporary peace, then a better option is to activate the ‘Do Not Disturb’ feature on your Mac. Activating this option will prevent annoying notifications.
If you followed everything above, then you shouldn’t expect any problem blocking unruly senders. We would love to hear your story. Please share it in the comments section.