
This article covers solutions for common problems that can prevent a MacBook from charging, including issues with charging cables, software, and power adapters. It’s important to use the correct wattage charger for your MacBook, and this article provides effective solutions for a MacBook battery not charging.
Why is my MacBook not charging?
Your MacBook’s battery is only good for about 1,000 cycles. After that period, Apple considers the battery to be consumed, which means it may no longer hold a charge.
If your MacBook battery is depleted, your power cable will not charge it. Instead, unless you pay for a battery replacement, you’ll only be able to use your MacBook while it’s plugged in.
Pro Tip: Scan your Mac for performance issues, junk files, harmful apps, and security threats
that can cause system issues or slow performance.
Special offer. About Outbyte, uninstall instructions, EULA, Privacy Policy.
However, some users have reported that their MacBook says “Not Charging” even when the battery is fully charged. This could be due to a faulty power cable, corrupt system settings, or dirt in your charging port.
The troubleshooting steps below will show you how to determine why your MacBook isn’t charging and what you can do to resolve the issue.
Basic Troubleshooting Steps If Your MacBook Battery is Not Charging
Before you turn to drastic measures, let’s start with the basic fixes for when the battery is not charging on your MacBook Air. A simple restart of your laptop may allow the hardware to rest and restore your Mac charger’s functionality. Turn off and on your device by clicking the Apple logo in the upper right corner of the screen and then Restart.
If it did not work, here are the next steps:
Step 1: Check the charger and cable.
First, look for a faulty adapter and a broken charging cable. To do so, make sure your MacBook is turned on and plugged in. If it’s running on battery power and won’t charge, there could be a problem with your adapter or cord; if it charges when plugged in but then stops charging when unplugged, one of those components is most likely faulty (or both).
If your MacBook isn’t charging when you plug it in, check the charger and cable for damage. Also, make sure the charging brick is not overheating. If it becomes excessively hot, unplug it from the wall socket and the MacBook and allow it to cool.
It should be noted that not all USB-C cables are the same. The USB-C cable that came with your Android phone or that you purchased for a few dollars may not be able to charge your MacBook. Use the one that came with your Apple notebook if possible. Alternatively, use a reputable one whose product description states that it is compatible with charging MacBooks.
Does your MacBook charge via a MagSafe connector? Is the MacBook charger not working and does not have a light on it? If so, think about reversing the MagSafe. That is, if the wire was previously coming from behind the screen, flip it so that it now comes from the front.
Step 2: Check the connection.
It is also critical to ensure that the charging cable fits snugly into the charging port on the MacBook. USB-C cables and ports frequently become loose over time. Some of the older MacBooks in our office, for example, have loose, wobbly ports. It takes great care to ensure that they do not feel even the slightest tug. Otherwise, the charging will stop.
Fortunately, none of the early MacBooks with MagSafe had this problem. The magnets are perfectly positioned.
Step 3: Check for defective battery.
Apple recalled several MacBook models from 2015 to 2017 in 2019 due to battery issues. If your MacBook is one of the affected models, you are entitled to a free battery replacement.
To see if your MacBook is part of the recall, go to the Apple Service Program page and enter your serial number. If your MacBook model was affected, a message should appear advising you to contact Apple Support to arrange for a replacement.
Step 4: Clean the charging port.
A clogged charging port is another reason your MacBook may not be charging. This could explain why your MacBook does not charge when you plug it in. To try to fix it, turn off your MacBook and carefully clean your USB-C port or MagSafe charging adapter with a dry brush. Another option is to clean the MagSafe or USB port with compressed air to remove any dirt or debris. Alternatively, a plastic dental pick, cotton buds, or a soft bristle toothbrush can be used. If that isn’t possible, you may need to contact Apple about a physical repair.
Step 5: Check for defective AC plug.
If the light on your charger does not illuminate, a faulty plug could be the cause of your MacBook not turning on or charging. All MacBook chargers have detachable plugs, so use one from another charger or an Apple power adapter extension cable to see if that’s the problem.
Step 6: Let your Mac cool down.
Surprisingly, the cause of your MacBook battery not charging could be as simple as overheating. If the thermal sensors in your laptop detect a significant increase in temperature, they will disable access to the battery as a precautionary measure.
What should you do if your MacBook is too hot to touch? Simply turn it off and leave it alone for a while, or place a fan near your Mac to cool it down immediately. If you work outside, move to the shade because direct sunlight can cause your Mac to overheat.
Step 7: Try a different charger.
It’s also possible that the problem isn’t with the MacBook, but with another component of the charging system. Check that the outlet you’re plugged into has power; either plug in something else to test the outlet or plug the charger into a different outlet.
You should also try another charger and, if necessary, replace the charging cable. Ideally, try the charger and cable on a different MacBook to rule out any potential problems with those components.
Step 8: Try removing the MagSafe adapter horizontally.
The latest MacBook models charge via a USB-C port. However, Apple has long used its proprietary MagSafe adapter as a charging port. A magnet is used to connect and disconnect this clever design. As a result, you’ll never trip over the power cable and knock your MacBook off the desk.
The majority of people remove their MagSafe adapter by angling it upwards. However, some users discovered that horizontally “yanking” their MagSafe fixed charging issues with their MacBook.
Before you begin, brace your MacBook and take care not to damage the cable by pulling too hard on it. You may also need to connect and disconnect the MagSafe connector in this manner several times for the fix to be effective.
This method appears to work by using magnetic force to unstick the metallic pins within the MagSafe connector. These pins occasionally become stuck in a depressed position, preventing them from connecting to your Mac when you plug it in. The cable canbe “yanked” horizontally to force them out of this position.
Step 9: Check for line noise issues.
Unplug the power adapter from the wall, then wait 30 seconds before plugging it back in:
- If your Mac notebook begins charging after you reconnect the power adapter, it could be due to line noise (disruption caused by stray electromagnetic signals) from your power outlet. When the power adapter’s built-in voltage protection feature detects line noise from an outlet, it automatically shuts down.
- Lights with ballasts, refrigerators or mini-refrigerators on the same electrical circuit as the outlet you’re using are all potential sources of line noise. Plugging the power adapter into a different circuit or an uninterruptible power supply (UPS) can help.
If your power adapter continues to turn off when plugged into a known good outlet, take it to an Apple Authorized Service Provider or an Apple Store for further evaluation.
Step 10: Update your Mac.
When Apple released the macOS Monterey 12.2 update, it appears that a bug was introduced, causing some Mac batteries to drain extremely quickly while in sleep mode. The problem was discovered to be related to a Bluetooth issue, and a subsequent macOS 12.2.1 update fixed the battery drain issue.
With examples like the ones above, it is clear that a software update may sometimes resolve your Mac charging issues. Sometimes the overheating issue is caused by a recent update.
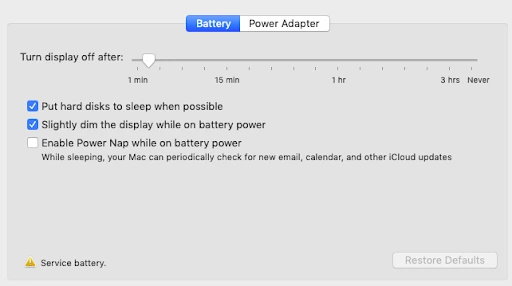
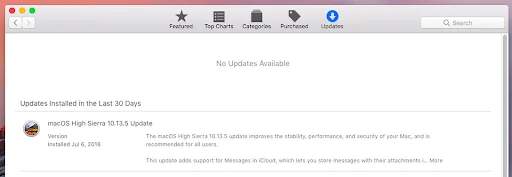
Check that your Mac is running the most recent macOS software version. To check, go to System Preferences > Software Update.
Step 11: Reset your Mac’s battery.
The method you use to reset the battery in your MacBook, MacBook Pro, or MacBook Air will be determined by the age of your Mac and whether it is equipped with an Intel or an Apple chip.
You can remove the battery if it’s old enough to have a removable battery, those that were purchased before 2012. After that, unplug the power adapter and hold down the power key for 10 seconds before replacing the battery and plugging it back in. Restarting the Mac should resolve the issue.
But, since your Mac is unlikely to have a removable battery, how can you reset the battery? In this case, you’ll need to reset the SMC, or System Management Controller, a chip on your Mac’s logic board that controls power. We’ll discuss more of this below.
Advanced Troubleshooting Methods When MacBook Air Is Not Charging
If the above steps did not work, it’s time to turn to more advanced solutions. But before you proceed, make sure to optimize your Mac first using Outbyte MacAries to prevent other issues from popping up. Once your Mac is ready, follow the fixes below.
Fix #1: Reset SMC.
Resetting the SMC can help with battery and power issues; however, the procedure for resetting the SMC varies depending on the age of your Mac.
How to reset the SMC on a removable-battery Mac:
If you’re fed up with your MacBook Pro battery not charging, resetting the SMC may be the answer. The System Management Controller (SMC) is a powerful chip on the Mac logic board that manages the battery and the status indicator lights.
The method you use to reset your MacBook Pro or MacBook Air’s battery will be heavily influenced by the age of your laptop. If your device is older than 2012, a rectangular section at the bottom will be visible. This is the location of the battery.
To reset the SMC on a laptop like that, follow these steps:
- Turn off your Mac.
- Take out the battery.
- Hold down the power button for 5 seconds.
- Reconnect the battery and restart your Mac.
How to reset the SMC on a newer Mac:
Do you own a Mac that does not have a removable battery? In this case, you can reset the SMC by using the following keyboard shortcut:
- Turn off your MacBook.
- Plug in the Apple laptop charger.
- For four seconds, hold down Control + Shift + Option and the power button.
- Restart your laptop by pressing the power button.
How to reset the SMC on Macs with a T2 security chip:
The algorithms for a laptop with T2 and a desktop Mac are different, so let’s start with the laptop.
First, try to solve the problem without performing a reset, as recommended by Apple. Shut down your Mac and hold the power button down for 10 seconds. After that, restart your Mac.
If the problem persists, reset the SMC. Shut down your Mac, then hold down Control + Option + Shift (the one on the right side of the keyboard). Hold for 7 seconds before adding the power button to the combination. You are now pressing and holding four keys on your keyboard for 7 seconds. Finally, let go of all keys, wait for a beat, and then restart your Mac.
A desktop Mac with a T2 chip necessitates a unique SMC reset procedure. First, turn off your computer, then unplug it completely. Wait for 15 seconds before plugging the cord back in. Wait 5 seconds after plugging the Mac back in before turning it on.
If you have an Apple silicon Mac, simply restart it and the SMC will be reset.
Fix #2: Check your MacBook’s battery health.
If your MacBook has been around for a few years, it’s possible that the battery has reached the end of its useful life. Every rechargeable battery has a limited number of recharges, and if your laptop is more than a few years old, the battery may have reached the end of its useful life. Apple allows you to monitor the health of your MacBook battery.
To test, press and hold the Option key on your keyboard while clicking the Apple icon in the menu bar. Apple classifies batteries as either Normal or Service Recommended based on the amount of charge they can hold in comparison to the number of cycles they have gone through.
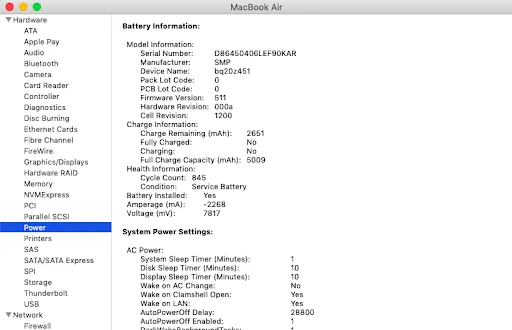
Navigate to System Information. Click Power in the Hardware section of the left navigation pane. Find the Cycle Count in the Battery Information section. Now, in the Find your battery cycle count section of this Apple support article, compare that number to your laptop. If the two numbers are similar, your MacBook battery may have reached the end of its useful life and will no longer be able to accept additional charge.
Fix #3: Contact Apple Support.
Finally, if nothing seems to be working, please contact Apple Support. They may also assist you in scheduling an appointment to have your MacBook inspected at the nearest Apple Store or Service Center.
Tips for taking care of your battery
MacBook batteries, which are made of lithium-ion, charge quickly and last for a long time. However, the longevity of your battery is also determined by how well you care for it. For example, it’s best not to leave your MacBook batteries uncharged for an extended period of time. Apple also includes a number of battery health management features that you should use to keep your MacBook battery healthy for as long as possible.