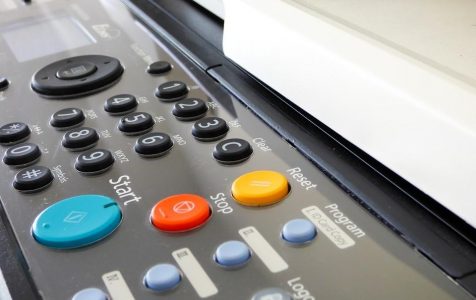
Printing on a Mac has become much easier these days because of new printing technologies such as wireless printing and cloud printing. There’s no need for messy wires and you can print anywhere (within the network range) with your Mac. Plus, there’s no need to set up the printer because your Mac will do it automatically for you.
However, it doesn’t mean that printing on a Mac is a flawless process. There are times when users encounter printing errors that frustrate Mac users because they are not able to print the document they need.
One notorious occurrence that is common to all Mac users is running into a printing problem at some time. It happens when your Mac cannot find your printer on the network or when there is a traffic jam with all the other documents waiting in line to be printed. There are also times when the printer cannot be detected by the computer even if it is connected by wire or the printer simply fails to respond.
When these printing issues happen, don’t panic. There are quite a handful of solutions that can be used to reset the printing system on a Mac. This guide will show you a few tips on how to resolve printing problems on a Mac, including how to reset your printing system. One of these might get your Mac printing system up and running smoothly in no time.
Pro Tip: Scan your Mac for performance issues, junk files, harmful apps, and security threats
that can cause system issues or slow performance.
Special offer. About Outbyte, uninstall instructions, EULA, Privacy Policy.
Quick Fixes for Printing Problems on Mac
If your printer takes too long to print documents or does not print at all, you can try some of the quick fixes to see if you are able to resolve the issue. Here are some of the steps you can try:
Update the printer driver software.
When you have a printer that you’ve been using for some time, it is possible that the printer driver software is already outdated and you need to update it for it to work smoothly again. This is particularly true for printers that were installed before macOS Catalina was released. After every major update, make sure that all your software, including your printer, is updated to avoid performance problems.
To update your printer software, you need to check the Software Update service on your Mac using the steps below:
- Click the Apple menu and choose System Preferences.
- Click on Software Update.
- Look for any update for your printer on the list.
If there is no available update for your printer from the list, check the manufacturer’s website and check if there is a new driver version for your printer’s model. If there is, download the updater from the website and install it on your Mac manually.
Clean up your Mac.
Encountering new system errors might indicate a need for a system cleanup. Outbyte macAries claims to remove junk and cached files. Make sure the tool is appropriate for your specific needs before use.
Double-check for connectivity.
This is to ensure that the printer is connected either to the Mac or the correct network – the same one your Mac is using. If you’re using a wireless printer, reset the printer’s wireless settings according to the manufacturer’s instructions. If it doesn’t work, try connecting via USB and print from there.
Restart the printer and your Wi-Fi router.
Sometimes, a printer problem can be caused by a simple glitch somewhere and restarting your devices can quickly resolve it. Start by turning off your printer by pressing the Power button, then shut down your Wi-Fi router. After a few seconds, turn your Wi-Fi router back on and restart your Mac. Then turn your printer back on and see if you are now able to print.
Delete the printer’s .plist file.
If you are having any problem with your printer, resetting the configuration by deleting the .plist file associated with it should do the trick. The .plist file contains all the settings of your printer system and deleting it should not be a problem because a new .plist file will be generated when you use the printer again.
To delete the .plist file, follow the steps below:
- In the Finder window, hold down Option then click Go > Library.
- Look for the Printer folder and open it.
- Search for the .plist file for your printer and move it to the Trash.
- Close the folder and try to see if your printer is now working fine.
Re-add your printer.
If the above steps don’t work, you can try removing your printer and then re-adding it to your Mac. To do this, follow the steps below:
- Remove your printer from your Mac by going to System Preferences > Printers & Scanners.
- Click on the printer you want to remove from the list on the left-side panel.
- Click the (-) button below to delete it.
- If your printer is connected via USB, remove the cable and restart your printer.
- The next step is to re-add your printer to your Mac.
- First, you need to install the Mac software that came with your printer.
- If you’re using a Wi-Fi printer, use the printer’s assistant to connect it to your Wi-Fi network.
- Next, go back to Apple menu > System Preferences > Printers & Scanners.
- Click the add button (+) at the bottom of the left-side panel.
- Look for the printer you want to add from the dialog that pops up.
- Select your printer, then click the Add button.
- You should now be able to use that printer again.
At times, checking your printer drivers, re-installing the printer, or selecting to reset the printing system doesn’t get the printer working again. If this is the case, then you need to bring in the big tools and avoid stalling on your print jobs.
How to Reset the Printing System on Mac
From your MacOS, you can easily reset the printing system on your Mac. Resetting the command clears out all the devices that are used to fax, print or scan from the Printers & Scanners’ preference pane. In addition to removing all printing devices, if you click reset on that command, it runs a full-on behind-the-scenes housekeeping job. It’s so much work it will easily confuse you, the less you know, the better.
The easiest way to reset your printer is via the Printers & Scanners panel. To do this:
- Find the Apple menu icon and click on it.
- Go to System Preferences.
- Open Printers & Scanners.
- Control-click or right-click on the List of devices on the left side of the window.
- Select to Reset printing system by clicking the option.
- When prompted, click Reset and confirm the move to reset the entire printing system on your Mac.
- If prompted, enter the administrative account Password and click Ok. If not prompted, go to the next step. (After the reset process is fully completed, the lost of scanners is left empty. This is when you might have to re-add your printer).
- Select the option which looks like a plus symbol to add the printer.
- If a list with options appears, click on your printer to automatically add the particular printer to your Mac’s system.
- If, instead of a list of options, a window appears, select your printer from the list displaying the available options.
- Click on add.
- Your Mac creates another printer and automatically adds it to your list.
- Printing System. This should reset all your printer’s configurations.
Going to your Printers and Scanners preferences is easy and doesn’t do heavy changes, so the tip is easily shared among most of Mac’s standard menus.
The other method of resetting your printer involves running a command via terminal. However, this command serves best when used as the last resort, it’s almost always never mentioned in Mac standard menus. Accidental invocation is almost impossible. You can find the command and prompt it to reset your Mac’s printing system.
To reset the printing system using a command, follow the instructions below:
- Launch Terminal under the Utilities folder or search for it via Spotlight.
- In the command prompt window, copy and paste the following commands:
- sudo cp /etc/cups/cupsd.conf /etc/cups/cupsd.conf.old
- sudo cp /etc/cups/cupsd.conf.default /etc/cups/cupsd.conf
- Wait for the commands to be completed, then check if your printer is now working as it should.
Conclusion
Resetting or changing your printers and scanners options should first involve the simpler methods. However, if the printer is still lost, or not responding, then roll out the big guns by invoking the ultimate reset command. When it’s done, not only will you be left with a responsive printer that does what it’s meant to, but your system will also receive a much-needed spruce-up.