There are times when despite our best efforts, our Mac encounters errors due to some unforeseen circumstances. It could be a system update that has gone wrong because of the power going out in the middle of the process or a virus attack that targets macOS. There are also other glitches that can happen, including bugs that are undiagnosable.
If your Intel Mac with a T2 security chip or M1-powered Mac won’t boot up normally, even when using recoveryOS, you can opt to revive it by tweaking the firmware inside these chips that manages aspects of security and startup tasks, while preserving all your data. If that doesn’t work, you can choose to restore it. This will get your Mac working again, but take note that this process wipes the machine clean. Both processes are created for system admins but can be used by any user.
You can launch the recoveryOS environment by booting up or restarting your Mac while holding down Command + R held down. Or you can shut down your M1 Mac completely, then hold down the power button for around 10 seconds until the Options gear appears.
Keep in mind that the revive or restore process only works for Intel Macs equipped with the T2 chip, which includes all Mac Intel models released starting in 2018, the 2017 iMac Pro, and the three M1-based Macs shipped in 2020. Out of all those models, only the 2019 Mac Pro shows a visual indication whenever there is something wrong with its firmware or startup process. You’ll see its status light turn amber and an SOS flashes in Morse Code if it needs to be revived.
Pro Tip: Scan your Mac for performance issues, junk files, harmful apps, and security threats
that can cause system issues or slow performance.
Special offer. About Outbyte, uninstall instructions, EULA, Privacy Policy.
Apple offers a complicated set of instructions for affected Intel Macs and all M1-based Macs, but these are aimed at school and computer experts. It’s a lot to process for regular Mac users, so we have simplified the guide for you to help you get through it. We’ve also listed down Apple’s Thunderbolt port locators to make it easier for you.
How to Revive or Restore an Unresponsive Mac from Another Mac
 There are instances where your Mac may not work properly, to the extent that it won’t boot up at all. This happens if a power cut happens during an upgrade of macOS or a glitch has broken something in Apple’s firmware. Apple has provided instructions to enable users to revive the affected Mac, allowing it to boot and function normally.
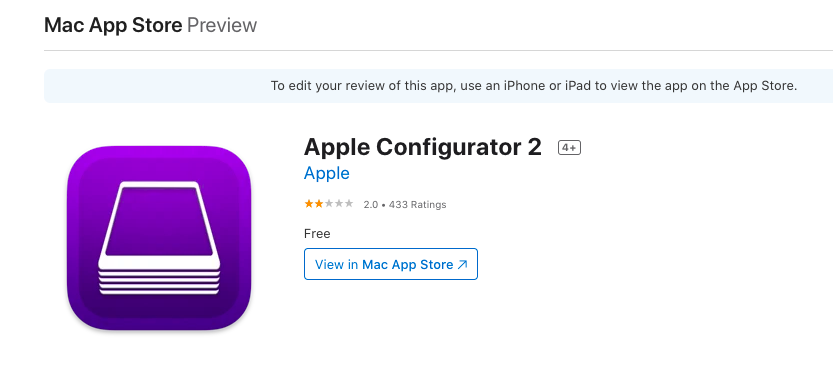
But users who have needed to revive their M1-equipped Mac mini, MacBook Air, or 13-inch MacBook Pro encountered problems following through the same process, with Apple Configurator 2 showing up errors in some situations.
Apple has provided updated instructions for restoring Macs, with specific details outlined for M1 Macs. Just like the Intel version, the Mac Apple Silicon version still needs the Apple Configurator 2 installed on the secondary Mac. They also need supported USB-C and USB-A cables for charging and data transfer, and for configuring their proxy and firewall ports to let in all network traffic to work with Apple’s network.
The instructions mainly involve:
- Launching the Apple Configurator 2 software on the secondary Mac
- Connecting the two Macs together
- Restarting the non-functional Mac using a special key sequence
- Using Configurator 2 to revive or restore the firmware and recoveryOS
There are also options available to erase the Mac completely and reinstall the operating system from scratch. But before we proceed, let’s look at the complete instructions to understand more about the revive and restore process.
Revive vs Restore
We’ve been talking about the revive and restore processes earlier, but what do these terms actually mean? Simply put, a Revive updates your Mac’s firmware as well as recoveryOS to the latest version. This is done when your Mac becomes unresponsive and cannot boot normally. For instance, if your macOS upgrade was interrupted by a power failure or corrupted files in some very rare circumstances, your Mac may freeze up and must be revived. You don’t have to worry about data loss because it is designed to not make any changes to your startup volume, the user’s data volume, or any other volumes on your Mac.
A Restore, on the other hand, is a lot more complicated. Restoring the firmware and erasing the internal flash storage is necessary if the computer won’t start from the startup volume or the recoveryOS or when reviving the firmware does not work.
Make sure to back up your data before you restore your Mac. Restore a Mac involves:
- Restoring the firmware
- Updating recoveryOS to the latest version
- Erasing and installing the latest version of macOS on your internal storage
Once completed, any data on all your internal volumes will be gone.
Restoring works for the following Mac computers with Apple silicon:
- Mac Mini (M1, 2020)
- MacBook Pro (13-inch, M1, 2020)
- MacBook Air (M1, 2020)
What You Need to Fix Unresponsive Macbook by Using Another Mac
To perform a revive or restore process, you need to have the following ready:
The latest version of Apple Configurator 2 installed on one of your Macs
- A stable internet access (You might need to configure your Mac’s web proxy or firewall ports to route all network traffic from Apple devices to Apple’s network 17.0.0.0/8.)
- A supported USB-C to USB-C charge cable
- A supported USB-A to USB-C cable
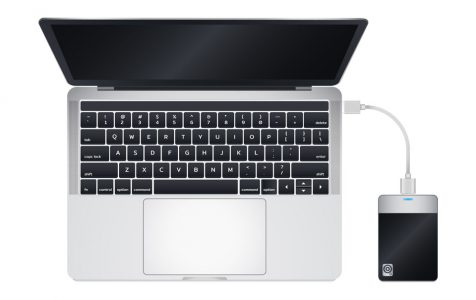
The USB-C cable must be able to support both power and data. Thunderbolt 3 cables are also not supported.
The revive or restore processes generally involve the following steps:
- Launching the installed Apple Configurator 2 on the second Mac, then connecting the two Mac computers
- Rebooting your Mac using a special key sequence
- Using Apple Configurator 2 to do one of the following:
- Revive the firmware and reinstall the latest version of recoveryOS.
- Restore the firmware, erase all data, and reinstall the latest version of recoveryOS and macOS.
Here are the complete steps to revive or restore your Mac M1’s firmware:
Step 1: Set up Apple Configurator 2.
 Before you proceed, you need to verify that:
- You have the updated version of Apple Configurator 2 installed
- Your Mac is plugged into a power source
- You have stable internet connection
Once ready, plug in the USB-C cable to connect the two Macs. Next, launch Apple Configurator 2 on the computer where it is installed.
Step 2: Prepare your Mac mini.
- Turn on your monitor so you can check when the process is completed.
- Unplug your Mac mini from power for at least 10 seconds.
- Next, press and hold the power button, then plug it back in while still holding the power button.
- Release the power button and you should see the status indicator light turn amber in color.
You should not see any screen activity from your Mac mini. If you do, repeat the steps above.
To prepare your Apple notebook computer, follow the steps below:
- Press and hold down the power button.
- At the same time, press and hold down the following keys for about 10 seconds:
- Right Shift key
- Left Option key
- Left Control key
- After 10 seconds, release all the three keys immediately except for the power button. Continue to hold the power button down until it appears in Apple Configurator 2.
You should not see any screen activity from your Apple notebook computer. If you do, repeat the steps above.
Step 3: Revive the firmware and update recoveryOS.
On your Mac with the Apple Configurator 2 device window, choose the Mac whose chip firmware you want to revive and recoveryOS you want to update to the latest version.
Do any of the following:
- Click Actions > Advanced > Revive Device, then click Revive.
- Control-click the selected device, then select Advanced > Revive Device, then click Revive.
If your Mac shuts down during this process, begin the revive process again.
Wait for the process to be completed. Don’t worry if the Apple logo will appear and disappear during this process, it’s normal. Once completed, your Mac will reboot. Quit Apple Configurator 2, then unplug any adapters and cables.
Keep in mind that when you revive the firmware, you should confirm that the process was successful because Apple Configurator 2 will not notify you.
Step 4: Restore the firmware.
If reviving does not work, your next option is to erase all data and reinstall the latest version of recoveryOS and macOS. To do this, follow the instructions below:
In the Apple Configurator 2 device window, choose the Mac to be restored.
Do any of the following:
- Choose Actions > Restore, then select Restore.
- Control-click the selected device, then click Actions > Restore, then select Restore.
If your Mac shuts down during this process, begin the restore process again.
Wait for the process to be completed. Don’t worry if the Apple logo will appear and disappear during this process, it’s normal. Once completed, your Mac will reboot. Quit Apple Configurator 2, then unplug any adapters and cables.
Keep in mind that when you restore the firmware, you should confirm that the process was successful because Apple Configurator 2 will not notify you.
If the restore process was successful, you will see the macOS Setup Assistant window.
How to Revive an Unresponsive Mac Using Another Mac with a Personalization Error
Although the main instructions above work for the majority of M1 Mac users, a special set of instructions is needed to deal with a particular personalization error that may appear during the process. According to Apple, this specific error occurs if you erased the M1 Mac before upgrading to macOS Big Sur 11.0.1, prompting the following message to appear:
“An error occurred while preparing the update. Failed to personalize the software update. Please try again.”
When this happens, Apple recommends using a secondary Mac and an external hard drive to create a bootable installer. A secondary set of instructions is available for users who cannot use the first option.
The second version includes going through the startup menu and accessing the Terminal, before going through a series of steps that involve copying commands and running them via Terminal.
If you get the above message when you erase your Mac with Apple M1 chip, you can use either of these solutions to reinstall macOS.
Option 1: Use Apple Configurator
If you have the following items, you can quickly fix the issue by reviving or restoring your Mac’s firmware:
- Another Mac with macOS Catalina 10.15.6 or later
- The latest version of Apple Configurator 2 installed on one of your Macs
- A stable internet access (You might need to configure your Mac’s web proxy or firewall ports to route all network traffic from Apple devices to Apple’s network 17.0.0.0/8.)
- A supported USB-C to USB-C charge cable
- A supported USB-A to USB-C cable
If you don’t have all these items, you can try the steps in the next section instead.
Option 2: Erase your Mac and Reinstall
You can use Recovery Assistant to erase your Mac, and then reinstall the operating system. But before you proceed, make sure you have enough time to finish all steps.
- To erase your Mac using Recovery Assistant, follow the steps below:
- Turn on your Mac.
- Continue to press and hold the power button until the startup options window appear.
- Select Options > Continue.
- When asked to choose a user you know the password for, click on that user.
- Hit Next, then type in the administrator password.
- Once the utilities window appears, click on Utilities > Terminal from the menu bar.
- Type in resetpassword in the Terminal window, then press Enter.
- Click on the Reset Password window to bring it to the front.
- Choose Recovery Assistant > Erase Mac from the menu bar.
- Click Erase Mac in the pop-up window, then click Erase Mac again to confirm.
- Once done, your Mac should restart automatically.
- Choose your preferred language during startup.
- If a notification appears saying that the macOS version on the selected disk needs to be reinstalled, click on macOS Utilities.
- Your Mac will begin activating, which needs a stable internet connection.
- After your Mac has been activated, click Exit to Recovery Utilities.
Go through steps 3 to 9 once more, then proceed to the next section below. You can use any of these methods to reinstall macOS.
Reinstalling macOS
After you’ve erased your Mac using the methods above, use any of these options to reinstall macOS.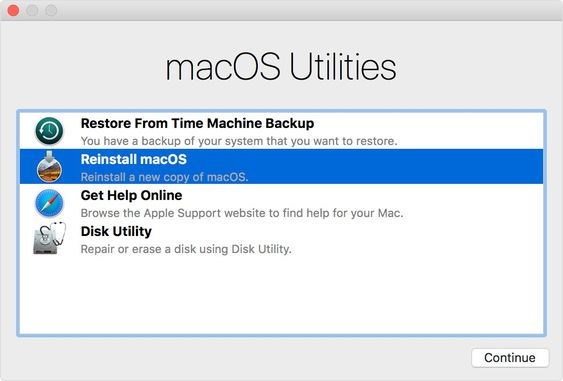
1. Use the Reinstall macOS Big Sur Utility
If your Mac was running macOS Big Sur 11.0.1 before you erased it, you can click Reinstall macOS Big Sur in the utilities window. Follow the onscreen instructions to complete the process. If you’re not sure what macOS version you were using, choose one of the other methods instead.
2. Use a Bootable Installer
If you have an extra Mac and an external flash drive with enough storage to store the macOS installer, then you can create and use a bootable installer for macOS Big Sur or other macOS version you want to install.
3. Use Terminal to Reinstall
If neither of the above options works for you or you don’t know which version of macOS your Mac was running, you can use commands to reinstall instead. Follow these steps to complete the process.
- Choose Safari in the Utilities window in macOS Recovery, then hit Continue.
- Open this web address in the Safari address field: https://support.apple.com/kb/HT211983
- Highlight this block of text and copy it to the clipboard by pressing Command + C:cd ‘/Volumes/Untitled’
mkdir -p private/tmp
cp -R ‘/Install macOS Big Sur.app’ private/tmp
cd ‘private/tmp/Install macOS Big Sur.app’
mkdir Contents/SharedSupport
curl -L -o Contents/SharedSupport/SharedSupport.dmg
http://swcdn.apple.com/content/downloads/12/32/071-14766-A_Q2H6ELXGVG/zx8saim8tei7fezrmvu4vuab80m0e8a5ll/InstallAssistant.pkg - Drag the Recovery window to the front by clicking outside of the Safari window.
- Select Utilities > Terminal from the menu bar.
- Press Command + V to paste the block of text you copied above, then press Enter.
- Your Mac should now begin downloading macOS Big Sur.
- Once done, type in this command in the Terminal and press Enter: ./Contents/MacOS/InstallAssistant_springboard
- This will open the macOS Big Sur installer.
- Follow the onscreen instructions to reinstall macOS.
If you need more help or these steps aren’t successful, you may contact Apple Support.
Which Port to Use
Another important feature that Mac users need to be aware of is the location of the Thunderbolt ports that can be used for this revival and restoration feature. Here’s the rundown of the ports for Intel Macs and M1 Macs. Remember that the ports are facing you directly, so when we say left and right, that will be your left and right.
- Intel Mac mini: Right-most Thunderbolt port
- Intel Mac laptops: Look at the left side of the laptop and the Thunderbolt port should be on the right
- Intel 2020 iMac or iMac Pro: The right-most Thunderbolt port at the back of the device, whether it’s four for iMac Pro or two for iMac
- Intel 2019 iMac Pro Tower: the Thunderbolt port located farther away from the power button at the top of the computer
- Intel 2019 iMac Pro Rack-mounted: the Thunderbolt port that is closer to the power button
- M1 Mac mini: the Thunderbolt port on the left, located farthest from the HDMI port
- M1 Mac laptops: Check the left side of the laptop, the Thunderbolt port on the left (there are actually no Thunderbolt ports on the other side of these devices)
Summary
Reviving or restoring your M1 Mac is a pretty straightforward process, except for when you encounter the “An error occurred while preparing the update. Failed to personalize the software update. Please try again.” error. When this happens, you can refer to the second set of instructions to complete the revive or restore process successfully. Should the process be too complicated for you or you encounter other problems along the way, you need to contact Apple Support for more help.