Wi-Fi not working on Mac is a common problem that many people face, preventing them from connecting to their home or office network.
There could be a number of reasons why your Mac won’t connect to a Wi-Fi network — it could be a problem in your own computer, but it can also be an external issue. Furthermore, other related problems may also occur, such as:
- Mac is able to connect to Wi-Fi, but there’s no internet access
- Wi-Fi connection turns off from time to time
- Slow Wi-Fi connection
In this article, we will take a look at every possible cause of these problems and the solutions for each of them.
Ruling Out Router Problems
When there’s no Wi-Fi on MacBook or iMac, it’s important to rule out router problems first before you get mad at your computer. Here are some tips:
Pro Tip: Scan your Mac for performance issues, junk files, harmful apps, and security threats
that can cause system issues or slow performance.
Special offer. About Outbyte, uninstall instructions, EULA, Privacy Policy.
- Reboot your router – Sometimes, all it takes is a router restart. To power-cycle, a router, unplug it and let it rest for a few seconds before turning it back on again. If your router is connected to another router and/or modem, you may also need to restart those, too.
- Let it cool – Make sure that your router and modem are not overheating. If they are too hot to the touch, turn them off and do not turn them on until they’ve cooled down. To prevent them from overheating again, ensure that they are placed where there’s enough ventilation.
- Keep it open yet close – Make sure that nothing is blocking the signal and that you are not too far from the router. If you have no choice but to work a bit far from the router, you may want to consider setting up a Wi-Fi extender.
- Keep it away from metal and other electronic devices – Metal surfaces and some electronic appliances, especially those that use or produce radio waves, can affect Wi-Fi signal, so you need to avoid putting your router on or near one.
Oldie But Goodie: Rebooting Your Mac
Most of the time, issues can be resolved by simply restarting your computer. It’s possible that it just needs to rest, especially when it’s been working for hours already. Simply turn your Mac off and on again.
If this doesn’t solve the problem, try turning the Wi-Fi connection off and then on again to allow it to scan for available networks.
What Does Apple Recommend?
Whenever your Mac attempts to establish a connection with a Wi-Fi network, the macOS automatically checks for errors and possible sources of problems. If one is detected, you are likely to see recommendations in the Wi-Fi status menu. To access this, simply click on the Wi-Fi logo on the screen’s top right.
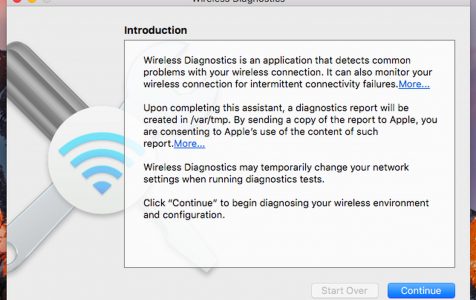
Alternatively, you can also use your Mac’s built-in Wireless Diagnostics utility. It will give you an idea what’s possibly wrong with your computer or the network. There are two ways to access it:
- Search for it using Spotlight. Press Command + Spacebar.
- Hold down Option, click on the Wi-Fi icon, then click Open Wireless Diagnostics. Enter your administrator name and password when asked.
Wireless Diagnostics will now analyze your wireless network. Once done, it will show whether your Wi-Fi connection is working as expected or if an error was detected. Click on Continue to Summary to see what your Mac recommends for you to do to improve connectivity.
Forget the Network
In some cases, forgetting the Wi-Fi network and reconnecting to it afterward works. To do this, just follow these steps:
- Go to System Preferences > Network.
- Select Wi-Fi, then click Advanced.
- Choose the network you want to forget, then click on (-).
- Agree to Remove.
Now, your Mac will not automatically join that particular network. Instead, it will show up as a newly detected network. Try connecting to it again, entering the password when prompted.
Delete and Reset Wi-Fi Network Settings
If forgetting the network isn’t enough, you can also try deleting and resetting the Wi-Fi network settings altogether. Doing so will reconfigure your current Wi-Fi settings, launching the network from scratch. However, before you perform this reset, consider backing up your Mac using Time Machine.
Now, to delete and rest Wi-Fi network settings, follow these steps:
- Turn off Wi-Fi and exit all browsers.
- Go to Finder -> Go -> Go to Folder…
- Type or paste this: /Library/Preferences/SystemConfiguration/
- Select the following files:
- plist
- apple.eapolclient.plist
- apple.wifi.message-tracer.plist
- plist
- apple.airport.preferences.plist
- Move the files to the Trash. Note: Do not delete. You may also move them to a new Desktop folder.
- Restart your Mac.
- Go to Wi-Fi preferences by clicking Open on Network Preferences under the Wi-Fi icon.
- Turn on Wi-Fi and select chosen Wi-Fi network. Enter the password as required.
Flush Your DNS Cache
A Domain Name Server (DNS) is like a phonebook of internet networks. Its primary role is to keep a directory of domain names, which are then turned into Internet Protocol (IP) addresses. With the help of DNS, your Mac is able to remember and access wireless networks, other computers, and websites.
DNS has its own cache folder, and as you might already know, having too many cache files on your computer — particularly obsolete ones — can affect its performance. Removing DNS cache files might help when your Wi-Fi slows down or won’t connect.
However, flushing DNS cache is quite technical. It typically involves the use of the Terminal app, which can be found in /Applications/Utilities/. You may also access it through Spotlight. Furthermore, different command strings must be used on each version of macOS.
An easy way to flush the DNS cache is to use a Mac cleaner such as Outbyte macAries. Such tools usually have a feature that allows a user to flush the DNS cache automatically.
Customize Your MTU and DNS Settings
Now that you have an idea what DNS means, you may also try customizing its settings, as well as the MTU, which stands for Maximum Transmission Unit. By lowering the size of the MTU, which pertains to the packet size exchanged over the network, your Wi-Fi connection might improve.
Although they may sound a bit technical, these terms shouldn’t intimidate you. Just carefully follow these steps:
- Go to System Preferences -> Network.
- Choose Wi-Fi on the left panel.
- Go to the Location menu.
- Click Edit Locations…
- Click on (+) to create a new location. Name the new location as you wish, then click Done.
- Under Network Name, choose your standard Wi-Fi connection, then click Advanced.
- Go to the TCP/IP tab, then click Renew DHCP Lease.
- Go to the DNS tab, then click (+).
- Copy your current DNS server addresses.
- In the DNS Servers box, enter the following in separate lines:
8.8.8.8
8.8.4.4
(These are Google’s alternative DNS servers.)
- Go to Hardware tab.
- In the Configure drop-down, choose Manually.
- Click on MTU, then set the custom size to 1453.
- Finally, click Apply.
Check Your Mac’s Software
Sometimes, when Wi-Fi doesn’t work in OS X, it’s because of software update errors, particularly when you just recently upgraded to a new version of macOS. This is an error that users of the original El Capitan version could be familiar with, as many users complained not being able to connect their Macs to wireless networks.
Most of the time, errors arising from a software update are solved by another update. But since you cannot connect wirelessly, you’ll need to switch to a wired connection to download the update. However, if you have a MacBook Air, you will have to depend on USB data tethering, so you’ll probably need to consider your data allowance.
For addressing potential issues like incompatibilities and corrupted files, especially during software updates, you might consider using tools such as Outbyte macAries to scan your Mac for software issues that could affect performance. Make sure the tool fits your specific needs.
Update Your Airport’s Firmware
If you’re using an Apple Airport router, it might be in need of a firmware update. Since you can’t connect to the Wi-Fi, you need to find a way to connect via cable or tethering.
To check if a firmware update is available for your Airport…
- Go to Applications.
- Type in Airport Utility in the search bar.
You will then be directed to the Airport base station. Click on the red notification badge if there’s any. Choose Update if an update is available.
Turn Off Bluetooth
Bluetooth devices can interfere with Wi-Fi signals. After all, these signals occupy the same environment and both of them rely on radio frequencies. Moreover, stronger Bluetooth signal can easily overpower a weak Wi-Fi signal. Here are the steps to turn Bluetooth off:
- Go to the Apple menu, then choose System Preferences.
- Choose Bluetooth.
- Click on Turn Bluetooth Off.
Check Your Security Settings
If you just recently configured your wireless network, chances are you tried to set its security settings for safety by hiding it. However, hiding a network does little in protecting it and can even cause reliability issues.
Here’s a tip: Do not hide your network. If you want to make it more secure, it’s recommended that you use WPA2 Personal security.
Did any of these fixes solve your Mac Wi-Fi connectivity issues? Let us know in the comments!