Zsh Permission Denied Mac
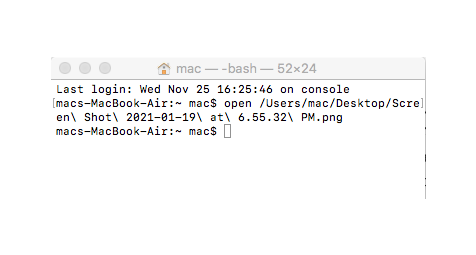
Opening a file on a Mac is a straightforward process — you can either double-click it or use the Terminal to navigate to the file location and open it with a command. However, there may be cases where the Terminal displays the “permission denied” error message when you try to open a file. This could be due to an issue with either the file itself or with the macOS system.
By the way, you can become a Terminal pro and streamline your workflow with these top Mac tricks and shortcuts.
Unpacking Common ‘Permission Denied’ Errors
Mac users often face the frustrating “permission denied” error when running commands in Terminal. This error can take on different forms, such as the examples below:
- zsh: permission denied: ./foo.rb
- Bash: bash: ./foo.rb: /usr/local/bin: bad interpreter: Permission denied
- aftheers-MacBook-Air:scripts root# ./ArduinoWifiShield_upgrade.sh
- sh: ./ArduinoWifiShield_upgrade.sh: Permission denied
Although not a new issue, there have been recent reports of Mac users encountering this error after upgrading to Catalina and Big Sur. It can be especially frustrating if you have no other way to access the file you need, such as when trying to open a file with no associated program or that doesn’t respond to clicks. In this article, we’ll explore the Zsh permission denied error and its possible solutions on your Mac OS device. But first, some definitions – because we don’t want to get lost in a sea of tech jargon, do we?
Pro Tip: Scan your Mac for performance issues, junk files, harmful apps, and security threats
that can cause system issues or slow performance.
Special offer. About Outbyte, uninstall instructions, EULA, Privacy Policy.
What Is MacOS Terminal?

Mac’s Terminal app is a the ultimate power tool for those who like to live life on the command line edge. While some may find it challenging to use, others find it incredibly convenient. To get started, all you need is a basic understanding of its functions and commands, which you can enter into the command line. Once you get the hang of it, you can delve into more advanced commands and explore a wide range of features to accomplish more complex tasks, feeling like a hacker in a spy movie.
Opening the Terminal App on Mac
There are two ways to open the Terminal app on your Mac.
via the Applications Folder
This app is located in the Utilities folder under Applications. To launch it, open your Applications folder and select Utilities. After that, double-click on the Terminal app.
via Spotlight
Alternatively, you can press the Command key and the Space bar. This will launch Spotlight. Here, type terminal and double-click on the search result.
Customizing the Terminal App
Now, you will see a small window with a plain white background. You will see your username in the title bar. Also, the word “bash” and the dimensions of the active window in pixels are displayed.
Should you want to make the window bigger, simply click the bottom right corner of the window and drag it outwards.
If you wish to change the colors of the background and the font, open the Shell menu and select New Window. From here, you can select the best option from the list.
Basic Mac Commands You Need to Be Familiar With

The best and quickest way to be familiar with the Terminal app is to start using it. But before you can proceed with that, you have to be familiar with how to enter a command. Well, that is easy because you just have to type the command at the command line and hit Return to execute it.
Each command has three elements: the command, an argument that tells that command what resource/s it should be running on, and an option that allows you to modify the output.
For instance, if you want to move a system file from one folder to another, you have to use the move command “mv” and type the location where you want to move the file.
Some Advanced Commands to Use on the Terminal Command Line
Here are a few examples of more advanced Terminal commands:
Copying Files from One Folder to Another
To copy files from one directory to another directory, follow these steps:
- Type the ditto [folder1] [folder2] command into the command line. Change the value of folder1 to the folder that hosts the current files. Folder2 should be the folder where you want to move them.
- To view the files being copied, type -v after the command.
Downloading Files from the Web
To download files from the web using the Terminal app, do the following:
- Open the Terminal app and type the cd ~/Downloads/ command.
- And then, input this command: curl -O [URL of file you want to download].
Changing the Default Location of Screenshots
If you want to change the default location where you want to save your screenshots, follow these steps:
- Type this command into the command line: defaults write com.apple.screencapture location [path to folder where you want screenshots to be saved].
- Press the Return key.
- Next, type this command: killall SystemUIServer.
- Hit the Return key once again.
Changing the Default File Type of Screenshots
If you want to save your screenshots in .jpg format, here’s what you should do:
- By default, Mac screenshots are saved using the .png file extension. To change this to .jpg, type this command: defaults write com.apple.screencapture type JPG.
- Press the Return key.
- And then, type this command: killall SystemUIServer.
- Press the Return key once again.
Deleting All Files in a Directory
To delete folders and sub-folders in a directory, do this:
- To delete all the files in a directory, type this command: rm -R directoryname.
- Confirm the deletion by using this command: rm -iR directoryname.
What Is Zsh?
The Z shell or the Zsh is a Unix shell that is designed and built on top of bash — macOS’ default shell. Experts recommend using zsh over bash because it is so much easier to use when configuring plugins and themes. Also, its themes look more beautiful and neat. Most importantly, it doesn’t require strict user permissions.
What Is Permission Denied in Terminal to Open a File?
Just like what the name says, this is a permission error that prevents Mac users from opening a file using commands. It can occur with sudo commands or even bash commands. According to several reports, the Permission Denied error can also happen even when the file is being opened in root.
Most of the reports say that the error appears when they are trying to open the file installer via Terminal. When the file is dragged to the Terminal window, the “Permission Denied” error pops up. However, this can also happen with any other file.
Why You’re Getting “Permission Denied” Error in Mac

There are many possible reasons why you’re getting the Zsh permission denied error on your device. The most common ones are as follows:
The File Is Locked
You will most likely encounter the “Permission Denied” error if you are trying to install a program or modify a file that is locked. It could be because you do not have administrator privileges or because the creator of the file used chmod to lock the file.
This error is an indication that your command is attempting to write to a directory that your user account does not own.
Insufficient File Permission
You can check the permissions of the file in question by typing in ls -l file.ext in the Terminal. The “file.ext” represents the file and extension of the file you’re trying to open or modify. You can also try to force a command that requires administrator permission using “sudo”.
Incorrect Chmod X or System Command
Another reason you are getting this error is that you probably entered an incorrect chmod x or other system commands.
Check for errors in your syntax and make sure you’re trying to use the right command. If you’re trying to run an application, make sure that the program command is valid and installed on your computer.
How to Fix Permission Denied Error in Mac

When you’re getting this error, the first thing you need to do is try to open the file using the normal method. Double-click on the file to see if you are able to open it. If you’re not successful, then you can try some of the solutions below.
After that, make copies of any relevant files you have. You might need a backup file later in case anything goes wrong. After all, when you try to force a command to work, there are potential downsides that could mess up your system and result in more problems. It’s better that you come prepared.
Also, ensure to keep your Mac optimized to prevent other issues from emerging. Using a Mac optimization tool, like the one represented by the shortcode Mac repair app, could help clean up your system and enhance the smooth running of your processes. Once done, restart your Mac and refer to our troubleshooting guide.
Step 1: Check your permissions
As mentioned earlier, this error usually happens because you do not have sufficient permissions to access the file. To check whether this is the case:
- Launch Terminal from Utilities.
- Type the following command, and add a space after the final character. DO NOT press Enter: ls -l
- Drag the file you want to open and drop it into the Terminal window. This will automatically append the file’s location to the existing command. However, this will not actually move the file.
- Now click on the Terminal window and press Enter.
This will show you whether you have permission to write or modify the file.
Step 2: Change the ownership of the directory
Take ownership of the directory with the chown command before attempting to write to it.
You can enter this command in Terminal, then press Enter: chown -R $USER:$USER /path/to/directory
Change $USER with the current logged in user and /path/to/directory with the path to where you want to write to.
Step 3: Give Terminal full access to the disk
It is also possible that the Terminal does not complete access to the disk, which is why you can’t open the file using commands. To fix this, go to System Preferences > Security & Privacy > Privacy panel, then add Terminal to the list of apps that are able to control your computer.
Step 4: Use SUDO commands
Sudo may be simple but it is powerful enough to allow you to run commands with administrator privilege. So, if you have encountered denied commands caused by permission issues, then enter sudo.
The sudo command executes the commands that follow its superuser or root privileges. This command should allow you to execute almost any command from the Terminal. To do this, simply add sudo before the original command. Here are sample commands:
- sudo chmod 755 /dvtcolorconvert.rb
- sudo chmod 755 ~/Themes/ObsidianCode.xccolortheme
You will be prompted to enter your password if this is your first time using the sudo command. But after that, you won’t have to enter it every time you use a sudo command.
Other Ways to Resolve the Zsh Permission Denied Error in Mac
If you are still getting the Zsh permission denied error on your Mac while trying to open a file on macOS Catalina or other versions, fret not. Here are other solutions you can try:
Solution #1: Download Oh My Zsh
Sometimes, the Zsh permission denied error can be resolved by trying to improve your existing Terminal app. One way to do so is by using Oh My Zsh.
Oh My Zsh is an open-source, user-friendly, and community-driven framework that can be used to manage Zsh configurations on MacOS Catalina or other macOS versions. It comes bundled with various functions, plugins, themes, and other relevant stuff for your macOS device.
Once you install this framework, you will have access to hundreds of powerful plugins and neat themes. Your new Terminal app will look customized to your preferences.
To download it, visit the ohmyz.sh website. Once the executable file has been downloaded, install it by running this command in your terminal: $ sh -c “$(curl -fsSL https://raw.github.com/ohmyzsh/ohmyzsh/master/tools/install.sh)”.
Solution #2: Configure the .zshrc File
Are you still seeing the Zsh permission denied error? If that is the case, try configuring the .zshrc file. This file contains the script that is needed to run a new zsh shell. So, if you change this file, you need to start a new shell for the changes to take effect.
You can then customize your terminal by running the open ~/.zshrc command. This will open the .zshrc file in your system’s root folder.
Take note that if you are running macOS Catalina or other later versions, you may still get the same Zsh permission denied error. For this, you need to configure permissions by opening the file using the chmod +x ~/.zshrc command.
Solution #3: Change the Theme of the Terminal App
If you installed the Oh My Zsh framework, then you can proceed with this solution. Change your current Terminal app’s theme by using the ZSH_THEME=”theme_name” command.
Solution #4: Change the Default Shell of Your System

Another way to get rid of the Zsh permission denied error is to change the default shell of your system. To do this, follow these steps:
- Go to the Apple menu and select Preferences.
- Navigate to Users and Groups.
- Click the lock icon and input your user account name and password.
- Control+Click your user account name from the list of users.
- Choose Advanced Options.
- Select a shell from the Login Shell menu.
- Hit OK to apply your changes.
How to Avoid Permission Issues on Your Mac
To avoid permission problems in the future, you can always change the permission settings to define who can view and alter files on your device. Below are some ways to do so:
Method #1: Assign Permissions to Users and Groups
You may assign permissions to various users and groups to avoid permission issues on your macOS device. Here’s how:
- On your Mac device, choose a folder or directory.
- Go to File and select Get Info.
- If the information is not available, hit the arrow.
- Select a user or group and select a privilege from the pop-up menu.
- Hit OK to save the changes.
Method #2: Apply Permissions to All Items
Apply permissions to all items to ensure they can only be accessed by the right people. Follow these steps:
- Select a directory and go to File.
- Click Get Info.
- Check the Action Pop-Up menu and select Apply to Enclosed Items.
- Hit OK to save the changes.
Method #3: Change the Item’s Owner
If an item is owned by another user, then you will have problems with its permission. Fix it by doing this:
- Select an item and go to File > Get Info.
- If the name of the new owner is not in the list, click the Add button to add a new owner.
- Choose the new owner and click the Action Pop-Up menu.
- Click Make <new owner> the owner.
- Apply and save the changes.
Method #4: Add or Remove a User or Group
Adding or removing a user or group can also resolve permission issues. Here’s how to do so:
- Select an item.
- Go to File and click Get Info.
- Navigate to the Sharing and Permissions section.
- Select Add a User or Group to add a user or group or click Remove a user or group to remove a user or group.
- Save the changes.
Summary
If you get a “permission denied” error on your Mac, it’s likely a permissions issue. First, check your file’s permissions and try changing ownership with the chown command. If that doesn’t work, take a more forceful approach by granting full access to Terminal or using the mighty SUDO command to assert your dominance. If all else fails, try downloading Oh My Zsh or changing the Terminal theme, and if the error persists, change your default shell. If you still can’t fix the issue, seek help from a Mac expert. Have you encountered any other Mac errors? Share your stories in the comments below!
Hi
thank you for the help with the numerous options. I just cant seem to be able to run any code in the terminal so far. I’m getting errors with the ls -l part; Can I share my screenshots with you via email maybe so you can see if you can assist.? I have tried stack overflow and the likes and I’m feeling defeated.
Thanks
Hi, thank you for such a strong guide. However, there seems to be a difference if for example I want to give access to a group to change applications (such as terminal) permissions. Lets say I don’t want my nephew to have access to terminal and he is on staff under user nephew, but I want only wheel group to be able to change permissions for any utilities or apps. How can I do that?