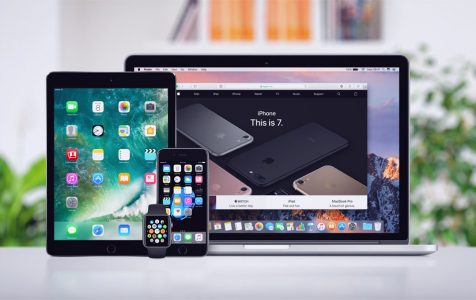
One of the things you will easily love about Apple products is the ability to connect all of your Apple devices with one another. Through this, moving items from one device to another is quick, easy, and hassle-free. This feature allows you to continue work in between different Apple devices. For instance, if there’s a text message or email you need to send and you realize that it’s too long to type in your iPhone, you can continue creating the message on your MacBook.
This collective feature is made possible through Continuity. It is essentially a suite of features available from the latest versions of Apple devices’ operating systems (from Yosemite and iOS 8 onwards). It includes Handoff, Universal Clipboard, iPhone Cellular Calls, SMS/MMS Messaging, and Instant Hotspot. All of these features, when properly set up, allows you to move seamlessly between your Apple devices. Through Continuity, you can connect your Mac to your iPhone, iPad, and iPod touch to maximize and enhance your Apple experience. Follow these easy steps to set up the feature under Continuity, so you can begin maximizing your devices:
Handoff Feature
With this feature, you can begin work on one device, switch to another Apple device, and continue where you left off. Here’s how to set up Handoff:
- Make sure all of the Apple devices you want to connect with one another are signed in to iCloud using the same Apple ID.
- Make sure Bluetooth and Wi-Fi, on all devices, are turned on.
- Make sure Handoff is turned on on all devices.
*On Mac, go to the Apple menu > System Preferences > General. Choose “Allow Handoff between this Mac and your iCloud devices”.
Pro Tip: Scan your Mac for performance issues, junk files, harmful apps, and security threats
that can cause system issues or slow performance.
Special offer. About Outbyte, uninstall instructions, EULA, Privacy Policy.
*On your mobile Apple devices, go to Settings > General > Handoff. Turn it on.
Handoff can be used with a number of apps including Mail, Reminders, Calendar, Pages, Keynote, and Safari, as well as other third-party apps. When using any of these compatible apps and you decide that you want to switch to another device, here are the steps to follow:
- If switching from mobile devices to Mac, click the Handoff icon in the Dock.
- If switching from Mac to your mobile devices, unlock your device and then open the multitasking screen. Next, tap the app banner shown on the screen’s bottom.
Now, you can continue doing what you were doing on your other Apple device earlier.
Universal Clipboard Feature
This feature allows you to copy content, such as images and texts, from one Apple device and paste it into another. Universal Clipboard setup procedures are the same as that of Handoff, log in to iCloud and turn on Bluetooth, Wi-Fi, and Handoff on all devices.
Here’s how you can get Universal Clipboard in action:
- Copy content (text, image, etc.) on one device as you normally would. The content will automatically be added to the nearby Apple device’s clipboard.
- Using the other Apple device, simply paste the content.
iPhone Cellular Calls
With this feature, you can make and receive calls on your Mac as long as it is connected to the same network as your iPhone.
To set up this feature, follow these steps:
- Make sure your Mac and iPhone are signed in to iCloud using the same Apple ID.
- Make sure both devices are signed in to FaceTime using the same Apple ID.
- Make sure Wi-Fi is turned on on both devices using the same network.
- On your iPhone, go to Settings > Phone > Calls on Other Devices. Turn it on.
- On your Mac, launch the FaceTime app, then go to FaceTime > Preferences > Settings > Calls from iPhone.
To make a call from your Mac, choose the contact you want to call. Click the arrow in the box that encloses the phone number. Select “Call (phone number) using iPhone”.
To answer a call on your Mac, when a call notification appears, answer the call right there and then, forward it to voicemail, or send a message to the caller.
SMS and MMS Messaging Feature
This feature lets you view and reply to your iPhone text messages on your Mac. Here are the steps to set up the feature:
- Make sure your Mac and iPhone are signed in to iCloud using the same Apple ID.
- On your iPhone, go to Settings > Messages > Text Message Forwarding. Choose your Mac.
- Perform verification/authentication process.
- On your Mac, go to Messages > Preferences -> Accounts > iMessage. Check your phone number and email address.
Now, you will be able to receive and reply to messages on both devices.
Instant Hotspot Feature
This allows you to use your mobile device’s personal hotspot to provide your Mac laptop with an Internet connection without having to enter the password every time. To set this up, follow these steps:
- Make sure that your iPhone or Wi-Fi + Cellular iPad is Personal Hotspot-capable. (Some carriers may or may not allow this depending on your mobile plan.)
- Make sure that all devices are signed in to iCloud using the same Apple ID.
- Make sure Bluetooth and Wi-Fi are turned on on all devices.
To use Instant Hotspot on your Mac, simply go to the Wi-Fi status menu and then choose the name of your iPhone or iPad that will provide the Hotspot.
To maximize the potential of your Mac’s features, keeping it in optimal condition is advisable. Tools like Outbyte macAries can help scan for errors and issues. Make sure to verify if this tool is suitable for your system’s needs.