Though we have already built a strong relationship with them and spent several hundreds of bucks for customization and maintenance, at some point, we just have to say goodbye to our old Macs and upgrade to the most recent version. To cope with the heartbreak, some of us prefer to donate them to worthy individuals or organizations, while others just want to dispose of their Mac laptop.
Just in case you belong to the latter group, we want to teach you a few important things to do before you go dispose of it. Note that your Mac contains a lot of your personal details and is connected to several applications. If you just dispose of it like a paper thrown in a bin, it’s likely that you are also throwing away your personal information and letting others use them. That is not what you want to happen. Now, before you dispose of old Mac away, here are some things you should do.
1. Back it up.
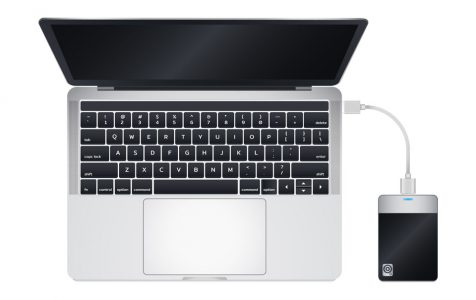
Before you go over the next few steps, start backing up your Mac because it will definitely take time. Copy all files you have. If possible, clone your machine’s drive. By doing that, you can easily and conveniently start using your upgraded Mac. No need to download and reinstall apps you’ve been using in your old Mac All settings from your old Mac will be saved and recovered if you clone your drive.
2. Sign out of your iCloud account.
Once you have successfully backed up your files, it’s time to sign out of your iCloud account. Simply go to System Preferences -> iCloud, then click the Sign Out button. If your Find My Mac is enabled, you need to switch it off as well.
Pro Tip: Scan your Mac for performance issues, junk files, harmful apps, and security threats
that can cause system issues or slow performance.
Special offer. About Outbyte, uninstall instructions, EULA, Privacy Policy.
3. Sign out of iMessages.
Aside from iCloud, there is another account you have to sign out of iMessages. To do this, head over to Messages -> Preferences -> Accounts. Select iMessages. Next, click the Sign Out button.
4. Delete everything on your drive.
After you have backed up your files and signed out of all your accounts, it is now safe to erase the contents of your Mac’s drive. Do not just delete them. If you do that, anyone who uses a disk recovery tool or software can still recover your files. Here is what you should do:
- Go to Applications -> Utilities.
- From the list of available drives shown on the screen, select the hard drive you want to erase.
- Click the Erase
- You will then be asked to name the drive once deletion is completed. You will also be asked how you want to format it. Although you can use the default settings, you can always rename it as you please.
- Click the Security Options Another window should pop up asking how thoroughly you want to delete the drive. Of course, the default option is the fastest way to delete the drive. But, be careful because some data recovery tools might still be able to retrieve the deleted files. To securely erase your drive’s data, adjust the slider and check what each security option offers.
5. Ensure your machine is running smoothly and efficiently.
If you’re considering passing on your functional Mac laptop to someone else, ensure it’s running smoothly. Tools like Outbyte macAries can scan for issues and remove unnecessary files. Confirm that this tool is appropriate for your situation before using it.
6. Clean your Mac.
Of course, you don’t just take care of your Mac’s software. You have to clean up its physical parts, too! Just because you are disposing of your Mac does not mean you leave it dirty and dusty. Get a microfiber cloth, dampen it with water, and clean your Mac one last time. Wipe the screen and vacuum the keyboard. At least, it gets cleaned before disposal.
7. Put it back in its box.
Did you keep the original packaging of your Mac, didn’t you? If you did, you can quickly dispose of Mac laptop. Put everything back together. Wrap it in whatever packaging it came with when you first got sit. And finally, put it back into the box. Well, if the box is no longer with you, just make sure you package your machine properly. After that, take it to the nearest recycling center. Failure to dispose of electronic devices properly can harm the environment as they contain toxic substances such as mercury, lead, and hexavalent chromium.
In Conclusion
Since you are already equipped with the right knowledge on how to dispose of your Mac laptop securely and properly, you can welcome your new Mac into your home and set it up for work!
Are there any important steps we missed? Let us know. Share them below!
