
It’s normal to encounter error messages on your device; they usually signal that something needs fixing. They may point towards blocked processes or hardware issues.
This article delves into the Windows Subsystem for Linux (WSL) tool and a frequent error it presents, particularly on Windows 10/11 – “WslRegisterDistribution Failed with Error: 0x80370114.”
Let’s explore this error message and understand its potential solutions.
What Is the Windows Subsystem for Linux?
To understand this error, let’s first familiarize ourselves with the Windows Subsystem for Linux, also known as WSL.
Expert Tip: For smoother PC performance, consider using a PC optimization tool. It handles junk files, incorrect settings, and harmful apps. Make sure it's right for your system, and always check the EULA and Privacy Policy.
Special offer. About Outbyte, uninstall instructions, EULA, Privacy Policy.
The Windows Subsystem for Linux is a tool that allows developers to run a Linux platform on a Windows device. With the WSL, developers can select their favorite Linux distributions from the official Microsoft Store. They can also execute some command-line commands and tools, including sed, awk, and grep.
In addition, the WSL tool lets developers run Linux applications on Windows and run Bash shell scripts in command-line programs.
To install the WSL tool on Windows, you must do the following:
Step 1: Enable the WSL Tool
First, you have to enable the Windows Subsystem for the Linux feature for the tool to run on Windows. To do this, launch the PowerShell with administrator privileges. And then, execute this command: dism.exe /online /enable-feature /featurename:Microsoft-Windows-Subsystem-Linux /all /norestart. Once done, restart your computer.
Step 2: Install Your Choice of Linux Distribution
First, open Microsoft Store and choose a Linux distribution. Options include:
- Ubuntu
- openSUSE Leap 42
- SUSE Linux Enterprise Server 42
- Kali Linux
- Debian GNU/Linux
After picking, click it and you’ll be directed to its page. Click the ‘Get’ button to start installation. A console window pops up during the first installation, asking you to wait for file decompression. Future installations should be quicker.
Make sure the Hyper-V Host Compute service is running to avoid the ‘WslRegisterDistribution failed with error: 0x80370114’ error.
What Is the WslRegisterDistribution Failed Error in Windows 10/11?
The error ‘WslRegisterDistribution failed with error: 0x80370114’ typically occurs when the Hyper-V service is blocked during a Linux distribution installation using the WSL tool. It usually comes with the complete error message, “Error: 0x80370114 The operation could not be started because a required feature is not installed.”
When you see the error, you are likely not able to access the WSL command-line tool.
What Triggers the ‘WslRegisterDistribution Failed’ Error in Windows 10/11?
As mentioned, this error appears if the Hyper-V service is blocked during the installation of a Linux distro using the WSL tool. However, there are instances when it shows because of the absence of an essential supporting Windows 10/11 feature.
Basic Fixes for the ‘WslRegisterDistribution Failed’ Error in Windows 10/11
The following fixes may take a bit of time to implement. But before you try them, reboot your computer first. There are times when all your computer needs is a quick reboot. You might be surprised to find that the error disappears after a reboot. This is especially true if you haven’t shut down your computer for a while.
Now, if you think you are suffering from a more complicated error that you cannot reboot normally, consider other advanced reboot options. After you reboot and you see the problem persists, troubleshoot!
To troubleshoot the problem, you will need to enable the Windows Subsystem for the Linux feature first. And to do so, there are two methods.
Method #1: Enable the Windows Subsystem for Linux Feature via the Turn Windows Features On or Off Option
To enable the Windows Subsystem for Linux feature via the Turn Windows Features On or Off option, search for the option using the search field. From the list of results, tick the option next to Windows Subsystem for Linux. Hit OK to proceed.
At this point, your system will find and install all the required system files. Once it is done, it will ask you to restart your computer. After your computer has restarted, there should be no more problems.
Method #2: Use the Windows PowerShell
Another way to troubleshoot the problem is by using Windows PowerShell. For this method to work, you need to open the Windows PowerShell with administrator privileges. And then, input the following command to enable the WSL feature: Enable-WindowsOptionalFeature -Online -FeatureName Microsoft-Windows-Subsystem-Linux.
After entering the command, your system will then begin searching and installing all the required system files. When asked, input Y to restart your computer.
How to Fix the WslRegisterDistribution Failed Error in Windows 10/11
Now, if the above troubleshooting methods don’t work, then proceed with the fixes we have listed below.
Fix #1: Unblock the Hyper-V Host Compute Service
To unblock the service, you have to check first if you are using an antivirus solution. If you are using Windows Defender, proceed by doing these steps:
- Into the search field, input windows security. Hit Enter to launch the Windows Security window.
- Go to the App and Browser Control section.
- Click Exploit Protection Settings.
- Navigate to the Program Settings tab.
- Find the Hyper-V Host Compute service by going to this path: C:\WINDOWS\System32\vmcompute.exe.
- Select the service and click on the Edit button.
- Find the Code Flow Guard (CFG) section and untick the Override System Settings option.
- Next, open Windows PowerShell with administrator privilege.
- Execute this command: net start vcompute.
It is worth noting that the App and Browser control under Windows Security plays a vital role in your PC. It protects your device from threats and potentially dangerous, files, downloads, apps, and websites. So, be sure that it is not disabled. If needed, you can just add an exception so other programs that depend on it can run as expected.
Fix #2: Restart the Lxss Manager Service
Another service that is associated with the WSL is the Linux Instance Life Cycle service. It runs in the background to somehow keep things in control. But if this service is blocked or is experiencing problems, then you can encounter the error. In this case, restarting the service can resolve the glitch.
To restart the service, here’s what you should do:
- Press the Windows + R keys to launch the Run dialog box.
- Input services.msc into the text field and hit OK.
- From the list of services, find the LxssManager service and restart it.
- Once done, relaunch the WSL tool and check if the error message is gone.
Fix #3: Launch the WSL tool from Microsoft Store
There are cases when the Linux distribution you installed has a bug, resulting in an error upon launch of the WSL tool. The good thing is that it can be easily cleared by relaunching the WSL app directly from the Microsoft Store’s interface.
For a detailed guide on what to do, follow these steps:
- Go to the Taskbar and click the Windows Search field.
- Here, type Microsoft Store and hit Enter.
- A list of results will be displayed on your screen. Click on the most relevant result.
- In the upper-right corner of the window, click the three-dotted menu.
- Select My Library.
- Navigate to the left pane of the window and click Installed.
- Next, go back to the right pane and choose your Linux Distribution app.
- Click the Launch button and see if the problem is resolved.
Fix #4: Update the Linux Terminal via Command Prompt
If you are running an older version of the distribution, then you may likely encounter the error. But again, this can be fixed. Updating the app will do the trick.
To update your Linux distribution, use the Command Prompt. This way, you don’t need to reinstall the application. Here’s a guide on what to do:
- Go to the Taskbar and click the Windows Search field.
- Input Command Prompt and hit Enter.
- In the list of results, right-click on Command Prompt.
- Select Run as Administrator.
- Next, input the following commands into the command line. Make sure to hit Enter after each command:
- C:\> bash
- $ sudo apt-get update
- $ sudo apt-get dist-upgrade
- $ <CTRL-D>
- C:\> exit
- Now, launch the WSL tool to see if the error has been cleared.
Fix #5: Repair the WSL App
If nothing has worked so far, then it is possible that the error is caused by a corrupt installation of the WSL app. To repair this, use the Repair feature of Windows.
Here’s how:
- Right-click on the Windows button and select Settings.
- Go to Apps.
- Find and click on the WSL application.
- Select Advanced Options.
- Scroll down and find the Repair button.
- Once the app is repaired, check if the error is fixed. Otherwise, go back to the Advanced Options section.
- And then, click the Reset button. Take note that this action will cause you to lose your data and other settings.
- Relaunch the app and see if the error is cleared.
Fix #6: Reinstall the WSL Application
If repairing the app has not fixed the problem, then the damaged module of the app must have incurred so much damage that the repair process can no longer fix it. For this, you need to manually uninstall the app and reinstall it again.
Follow these steps:
- Right-click on the Windows button and select Settings.
- Find the WSL application and choose Uninstall.
- Once it is uninstalled, disable the Subsystem for Linux option and restart your device.
- Upon restart, try to enable the Subsystem for Linux option once again.
- And then, reinstall the WSL app. Hopefully, this will fix the problem.
Fix #7: Reset Your Windows PC
Microsoft provides a reset feature for Windows 10 and Windows 11 users. Doing this will return your operating system to the way it was when it was accessed the first time, meaning any third-party applications are no longer present.
Performing a Windows 10/11 reset gives your computer a fresh start. This is a handy solution if you’re facing a software-related issue that you can’t seem to resolve.
There are two ways to reset Windows 10/11. Refer to the sections below.
Method #1: Reset Windows from Within
If you can successfully log in to Windows, then resetting it would be a straightforward process. Just follow these steps:
- Go to the Start menu.
- Select Settings.
- Navigate to Update and Security and select Recovery.
- In the right pane, go to Reset This PC and click Get Started.
- You have two options at this point: Keep My Files and Remove Everything. If you plan to choose the second option, be sure that you have already created a backup of your important data as they will be lost in the succeeding steps.
- If a warning appears, just click Next.
- In the window that appears, review the particulars of the action you will be doing. If you are happy with them, click the Reset button. This will initiate the reset process.
- The process will take a few minutes to complete. Also, your computer will restart several times along the way. The moment you see a screen that gives you three options, select one and hit Continue.
Method #2: Reset Windows 10 or Windows 11 without Logging In
If you are unable to log in to your Windows 10/11 account, you still have another way to reset your device: Use the Boot Options menu. This menu will appear automatically if your device fails to boot properly two to three times consecutively. But if it doesn’t, you can call it up by pressing the Shift and Power button. And then, click Restart. Once your device reboots, you will see the Boot Options menu. From here, you can proceed with performing a Windows 10/11 reset.
Here’s how to proceed:
- Click the Troubleshoot
- Select Reset This PC.
- Follow steps 6 to 8 from the previous method, then wait for your device to restart and complete the reset.
- When asked to select one of three options after your device has been reset, select Continue.
Fix #8: Perform a Clean Install of Windows
Before you can proceed with performing a clean install of Windows 10/11, make sure that you meet the following requirements first:
- 1 GB RAM for 32-bit and 2 GB for 64-bit
- 1 GHz processor or faster
- 20 GB free hard drive space
- 800 x 600 display
- DirectX 9 Graphics Processor
- Stable Internet Access
- A valid Microsoft account
To perform a clean install, you have to consider a few things first. If you have downloaded the Windows 10/11 ISO file, but plan to install it on another computer, you can do so by using a DVD or a USB. To start, you should have a flash drive that has at least 4 GB of free space. If you are planning to use a DVD, make sure that the computer where you will be installing the OS has an optical drive.
Once you have all these requirements, you can proceed with creating a bootable drive. Insert the USB into your computer and load the burner software program of your choice. Follow the on-screen instructions to create the bootable disk. And then, choose a drive and find the ISO file you have downloaded. The process will then start and it should take around 10 to 15 minutes to complete.
After creating a bootable media device, install it on the computer. Insert the DVD or USB and switch off the computer. Next, switch it back on and hit the F2 or F12 button to access the BIOS boot menu. Here, select where your PC will boot from. Select your bootable drive. Follow the instructions from here.
Fix #9: Conduct a Malware Scan
There are times when malware entities or viruses successfully infiltrate your system and affect important system processes or disable vital services. If that happens, you may encounter error messages like ‘WslRegisterDistribution Failed with Error 0x80370114’.
So, make it a habit to perform regular malware scans to protect your device against threats. Luckily, you don’t have to stress yourself out looking for the perfect malware scanner out there. You can use Windows 10/11’s in-built malware scanner: Windows Defender.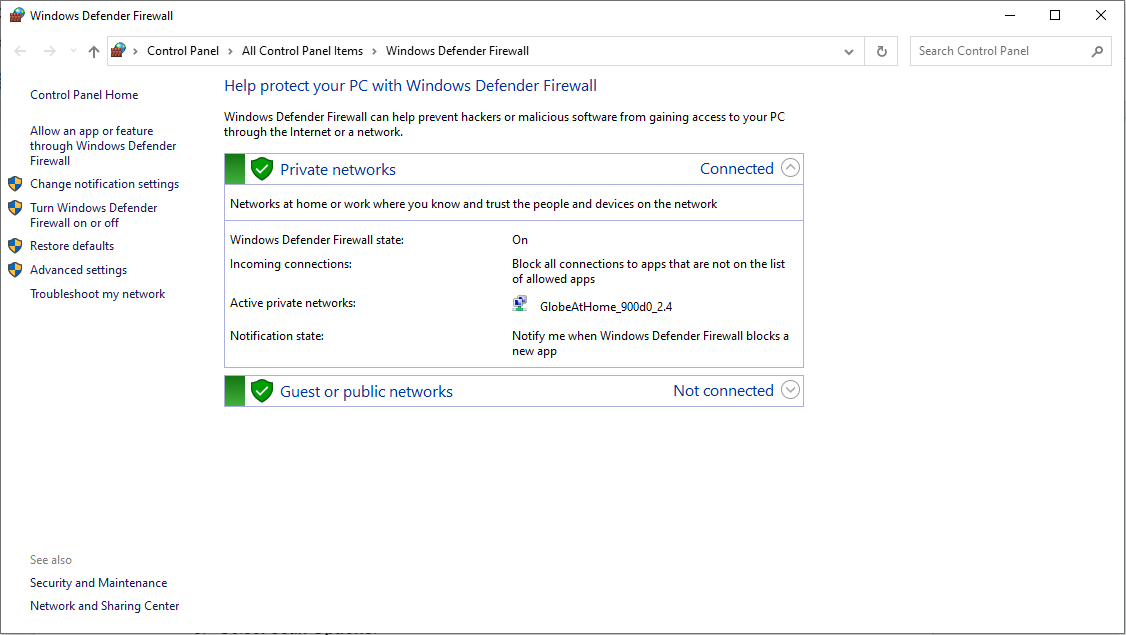
Here’s how to use it.
- Launch the Windows Security settings.
- Choose Virus and Threat Protection.
- Select Scan Options.
- From here, click Windows Defender Offline Scan.
- Hit the Scan Now button.
- The scan will take about 15 minutes to complete. After that, your device will restart.
- Once the scan is done, view the results by opening Windows Security Settings. Select Virus and Threat Protection, and then click Protection History.
- Follow the recommended actions.
If you feel that the initial scan was not sufficient, you can conduct an additional scan using a reputable third-party antivirus program.
Simply download an antivirus program of your choice and launch it. Again, perform a scan and remove the malware to keep your device protected against threats.
Fix #10: Use the System File Checker
The System File Checker is a tool that allows Windows users to scan and restore damaged corrupted system files that trigger errors on the Windows 10/11 platform. To use it, do the following:
- Press the Windows + X keys to launch the main menu.
- Select Command Prompt (Admin) to launch Command Prompt with administrator rights.
- In the command line, enter the sfc /scannow command and hit Enter.
- The repair process should now start. Make sure you don’t close the window or interrupt the process.
- Once the scan is complete, restart your computer.
Fix #11: Free Up System Space
In some cases, the error message appears because there is no enough space on your drive, so the system cannot complete the process. One way to deal with this problem is to free up space on your drive.
For this, you can use the Disk Cleanup tool which is built-in on most Windows 10/11 devices. To use it, follow these steps:
- Click the Start menu.
- Go to All Programs.
- Select Accessories and click System Tools.
- Choose Disk Cleanup.
- Under the Files to Delete section, select all file types that you want to remove.
- Once you have made a choice, hit OK.
You could also manually free up system space by examining your folders one by one, though this could be time-consuming. We suggest that you use the Disk Cleanup tool or a third-party PC repair tool.
Fix #12: Ask for Professional Help
If you have done everything but nothing seems to work, then do not be afraid to ask for help. Experts will always be willing to lend you a helping hand.
You can reach out to the support team of Microsoft through their website and inquire about a solution tailored to your needs. If you require an urgent fix, consider seeking help from professionals in your area. They can handle the error on your behalf, saving you time and effort.
Wrapping Up
Understanding the Windows Subsystem for Linux tool can be beneficial, even if it’s mainly used by developers. Being aware of its common errors, such as WslRegisterDistribution Failed with Error: 0x80370114, and their solutions is crucial.
In case you encounter this issue, try basic troubleshooting: activate the Windows Subsystem for Linux via PowerShell or Windows Features. If unsuccessful, other fixes include unblocking the Hyper-V Host Compute Service, restarting the Lxss Manager, launching WSL from Microsoft Store, updating the tool via Command Prompt, reinstalling WSL, or resetting Windows.
Should these attempts fail, don’t hesitate to contact Microsoft’s support team or visit a certified service center. We’d love to hear your thoughts or any other solutions for the WslRegisterDistribution error in the comments below!