
Updates are an essential component of any operating system. You must keep your system software up to date in order to reap the most benefits. Running an out-of-date version of any software can put your PC at risk of bugs, errors, and crashes. Therefore, you must constantly check for updates and install them as soon as they become available.
The same is true for Windows. Critical Windows updates are occasionally released by Microsoft and must be installed as soon as they are available.
Unfortunately, things do not always go smoothly. Some Windows users have reported “Feature update to Windows 10/11, version 1903 – error 0xc1900130” appearing on their screens while trying to perform an update.
Expert Tip: For smoother PC performance, consider using a PC optimization tool. It handles junk files, incorrect settings, and harmful apps. Make sure it's right for your system, and always check the EULA and Privacy Policy.
Special offer. About Outbyte, uninstall instructions, EULA, Privacy Policy.
If left unaddressed, this error can prevent you from fully utilizing your system’s functionality. If you have run into the Windows 10/11 update error 0xc1900130 on your PC, then this article is for you. We will walk you through all of the possible causes of the 0xc1900130 error and provide you with every possible solution you can apply to resolve the problem.
What Is the Windows 10/11 Update Error 0xc1900130?
Windows update errors are fairly common, especially if you have a poor Internet connection. Similarly, the Windows 10/11 update error 0xc1900130 is often caused by a bad Internet connection and occurs when your system loses Internet connectivity while downloading the Windows 11 update. A network interruption causes the update process to pause/stop, resulting in the Windows 10/11 update error 0xc1900130 appearing on your screen.
Here are the different error messages you might encounter along with this error:
- Error Code: 0XC1900130
Message: MOSETUP_E_INSTALL_HASH_MISSING
Description: The install cannot continue because the instance hash was not found.
- There were problems installing some updates, but we’ll try again later. If you keep seeing this and want to search the web or contact support for information, this may help: Feature update to Windows 10/11, version 1903 – error 0xc1900130
Other versions of this error are as follows:
- Feature update to Windows 10/11, version 1803 – error 0xc1900130
- Feature update to Windows 10/11, version 1809 – error 0xc1900130
What Causes the Error 0xc1900130?
- Poor internet connection – The update error 0xc1900130 in Windows 10/11 is typically caused by Internet connection problems during the download process, resulting in the updates not being downloaded correctly.
- Not enough storage – Another cause of the Windows 10/11 update errors 0xc1900130 and 0x80240034 is a lack of free disk space for downloading (or installing) the updates.
- Third-party antivirus interference – As it turns out, an overprotective AV suite or firewall can be to blame for the client machine’s relationship with the Windows Update server being frozen. AVG is frequently blamed for facilitating the appearance of this error code. If this scenario applies to you, you should be able to resolve the issue by either disabling real-time protection while the update is being installed or uninstalling the third-party suite entirely.
- Conflict between Intel RST Driver and Windows 10/11 – The iastorac.sys file is frequently blamed for preventing communications with the update server. This Intel RST file has been known to interfere with older Windows 10/11 builds, specifically builds 1900 and earlier. In this case, you can resolve the problem by renaming the iastora.sys driver, which will cause your Windows installation to ignore it.
- Corrupted WU component – As previously stated, this error code can also occur as a result of a glitch or a corrupted dependency, which causes the updating process to fail. If this scenario applies to you, you should be able to resolve the problem by using the Automated WU agent to reset all relevant components or by doing it manually from an elevated CMD prompt.
Now that you have an idea about the common triggers of this error, it will be easier to plan your troubleshooting steps.
What to Do When You Get the Windows 10/11 Update Error 0xc1900130
There are several possible causes of this Windows update failure and several possible fixes for it. We will address each possible issue one at a time, eventually providing you with relief from the problem. So, here is a list of potential solutions to the Windows 10/11 update error 0xc1900130.
Fix #1: Restart Your Windows 10/11 PC
If you suspect there are minor system bugs or issues, a quick restart is the best way to go. Restarting your Windows PC is the most convenient way to clear your system of bugs (if any) and resolve any issues that may be interfering with your updates. Restart your computer and then try installing the updates again. Restarting your computer is required for Windows updates to take effect.
It is also recommended that you optimize your computer before every update to prevent errors like 0xc1900130 from popping up. A reliable PC repair tool should do the trick.
If you still see the Windows 10/11 update error 0xc1900130, apply the fixes listed below.
Fix #2: Use the Built-In Troubleshooter
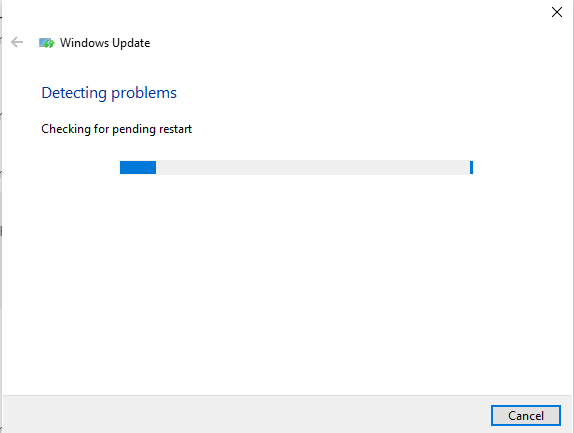
If you encounter an error code while downloading and installing Windows updates, the Update Troubleshooter can assist you in resolving the issue.
Go to Start > Settings > Update & Security > Troubleshoot > Additional troubleshooters. Next, select Windows Update > Run the troubleshooter from the Get up and running menu.
It’s a good idea to restart your device after the troubleshooter has finished its job.
Then, check for any new updates. Choose Start > Settings > Update & Security > Windows Update > Check for updates, and then install any updates that are available.
Fix #3: Make Sure All Required Windows Update Services Are Running
To ensure that your updates work, make sure that all Windows Update services are turned onenabled. Follow the steps below to do so:
- Close all open applications.
- Navigate to the Start menu.
- Enter cmd into the search bar and right-click on the Command Prompt result.
- Click Run as Administrator.
- Inside cmd, type the following commands, pressing Enter after each:
- sC config wuauserv start= auto
- sC config bits start= auto
- sC config cryptsvc start= auto
- sC config trustedinstaller start= auto
Running the above commands in your Command Prompt window will start all the necessary update services.
Fix #4: Rename the Iastorac.sys Driver
As it turns out, the most common cause of this problem is a software incompatibility between Microsoft and Intel products. An issue with the iastorac.sys driver may result in the Windows Update component effectively being blocked on Windows 10/11 PCs.
If this scenario applies to you, you should be able to resolve the issue by locating the conflicting driver iastorac.sys and renaming it using the ‘.old’ extension to force your operating system to ignore it.
Several affected users have confirmed that after doing this and restarting their computers, they were finally able to install all pending updates without any problems.
Here’s a quick guide to renaming iastora.sys:
- Open File Explorer and make sure that extensions are visible by going to View and checking the box next to “File name extensions”. If the option isn’t already enabled, enable it now.
- Next, go to the following address: C:\Windows\System32\drivers.
- When you arrive at this location, scroll through the list of drivers until you find iastora.sys.
- When you’ve found the correct driver, right-click it and select Rename from the context menu.
- To force Windows to ignore iastora.sys, rename it iastora.sys.old.
- Click Yes to grant admin access and allow the editing to take place at the UAC (User Account Control) level.
- Restart your computer and wait for it to complete the next startup.
Once the boot sequence is complete, try installing the problematic Windows update again to see if the problem has been resolved. If you continue to receive the Error Code 0xc1900130 when attempting to install the update, proceed to the next method below.
Fix #5: Reset Every Windows Update Component
As several affected users have confirmed, this issue can also occur as a result of a glitch or corrupted dependency, which causes the updating process to fail entirely. This problem is much more common in Windows 8.1, but it can also happen in Windows 10/11.
If this scenario describes your current situation, you should be able to resolve the issue by resetting all relevant WU components involved in the updating process. When it comes to doing this, there are two options:
- A WU reset via the automated WU agent
- A manual WU reset via the elevated Command Prompt
We’ve explained both methods below, so feel free to use whichever one makes you feel more at ease:
A. A WU Reset via the Automated WU Agent
- To download the Reset Windows Update Agent script, go to the official Microsoft Technet webpage and click the Download button.
- Once the archive has been downloaded, open it with a utility such as WinRAR, WinZip, or 7Zip to extract its contents.
- After that, double-click the ResetWUENG.exe file and select Yes on the UAC (User Account Control) prompt to grant administrative privileges.
- To run the script on your computer, follow the on-screen instructions. When the operation is finished, restart your computer and check to see if you can install the update after the next startup sequence is finished.
B. A Manual WU Reset via the Elevated Command Prompt
- To open the Run dialog box, press Win + R. After that, type ‘cmd’ and press Ctrl + Shift + Enter to launch an elevated Command Prompt window. When you see the UAC (User Account Control) dialog box, click Yes to grant administrative privileges.
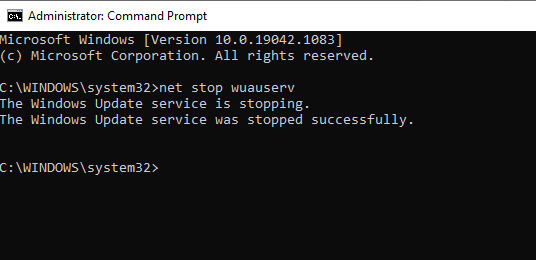
- To stop all relevant Windows Update services, enter the following commands into the elevated CMD prompt and press Enter after each command:
- net stop wuauserv
- net stop cryptSvc
- net stop bits
- net stop msiserver
These commands will temporarily disable the Windows Update service, MSI Installer, Cryptographic service, and BITS.
- After you’ve frozen all relevant services, run the following commands to rename the two folders used by the WU component (SoftwareDistribution and Catroot2):
- ren C:\Windows\SoftwareDistribution SoftwareDistribution.old
- ren C:\Windows\System32\catroot2 Catroot2.old
- After renaming the two folders, run the following commands and press Enter after each one to re-enable the previously disabled Windows services:
- net start wuauserv
- net start cryptSvc
- net start bits
- net start msiserver
- Restart your computer and check to see if the problem is resolved on the next startup
If you’re still getting the 0xc1900130 error when attempting to install a pending update, proceed to the next possible solution below.
Fix #6: Manually Install the Recent Cumulative Update
If you are having trouble upgrading your device’s current OS version, you should manually download and install the most recent standalone package. To do so, navigate to the Microsoft Update Catalog and enter the corresponding KB number into the search bar.
Every second Tuesday of the month, the company releases new patches. Check your system architecture (32- or 64-bit) before downloading the relevant update.
Alternatively, you can locate the failed cumulative update by selecting View Update History. Simply go to the Microsoft Update Catalog website and enter the exact KB number of the update that did not install on your PC, which you can find in Settings > Update and Security > View Update History.
Return to the Microsoft Update Catalog webpage and type the KB number into the search bar. In the following window, click the Download button next to the specific patch.
Fix #7: Flush the DNS cache
We discovered that flushing the DNS cache may indeed resolve the Update Error 0xc1900130 on Windows 10/11 in some cases. All you have to do is launch the Command Prompt as an administrator and type in the following command: ipconfig /flushdns.
If the above command runs successfully, you will receive the following message:
Windows IP Configuration
Successfully flushed the DNS Resolver Cache.
You can also test your Internet connection by rebooting your router, plugging out and then plugging back in your Ethernet cable, or accessing various websites and services on the Internet to ensure the reliability and integrity of your connection.
Fix #8: Use System Restore
If the Windows Update component began failing after the installation of a driver or third-party app, it’s very likely that whatever you installed is currently interfering with your operating system’s ability to install new updates.
Several affected users have reported that iastorac.sys was preventing the installation of new updates in their case. If this scenario applies to you, you should be able to resolve the problem by using System Restore to restore your computer to a healthy state when the conflict was not present.
It is critical to remember that all recent Windows versions (Windows 7, Windows 8.1, and Windows 10/11) are designed to save restore snapshots on a regular basis (at important system events) by default. You should have plenty of restore snapshots to choose from unless you’ve changed the default behavior.
Before you begin, keep in mind that any changes you made after a certain snapshot was created will be lost if you mount that snapshot using the System Restore utility. Any applications, games, or system changes you made during that time period will be undone.
If you are willing to take this step and are aware of the consequences, follow the instructions below to use the System Restore utility:
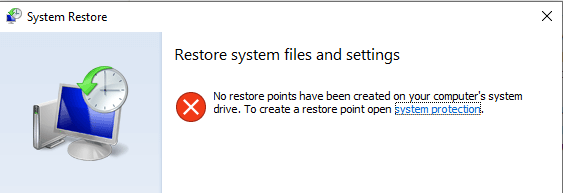
- Pressing Win + R should bring up the Run dialog box. Once inside, type ‘rstrui‘ and press Enter to bring up the System Restore menu.
- Once you’ve arrived at the initial System Restore screen, click Next to proceed.
- When you get to the next screen, check the box next to Show more restore points.
- Next, compare the dates of all saved restore points and choose the one that was created just before the occurrence of the problem.
- Once the correct system restore point has been chosen, click Next to proceed to the next menu.
- When you reach this point, the utility is ready to use. All you have to do now is click Finish to begin the restoring process.
- The previous working state will be restored during the next startup. Once the booting process is complete, try installing the update that was previously failing to see if the problem has been resolved.
Conclusion
As we mentioned at the beginning of the article, there could be a variety of reasons for a failed Windows update. Most of the time, the problem is caused by a lack of Internet connectivity. However, when troubleshooting the issue, you need to address each possible culprit. All of the fixes above are listed in order of severity of the problem. Therefore, you must proceed sequentially.