Windows Update Error 0x80070643 occurs during the installation of a cumulative update and can be caused by various factors. Possible causes include a corrupted Windows Update database, the need for .NET framework requires repair, or a missing system file triggering the error.
The first step is to examine the operating system and install the most recent version of .NET Framework. If that doesn’t work, running SFC, installing updates manually, and updating Windows Defender manually should help. In this article, we will show you different methods to resolve the install error – 0x80070643.
What Is the Windows 10/11 Update Error 0x80070643?
Windows 10/11 updates generally offer quality enhancements and fix security issues. However, sometimes error 0x80070643 appears when users attempt to install an update. Error 0x80070643 is a common Windows Update installation error message that may appear on your screen during the installation process.
You might encounter the (kb3122947) – error 0x80070643 or (kb4023057) – error 0x80070643 after updating your operating system. The 2018-11 update for Windows 10 version 1803 for x64-based systems (kb4023057) – error 0x80070643 can also pop up when you install this particular update. Error 0x80070643 can also occur when installing or updating any Windows application.
Expert Tip: For smoother PC performance, consider using a PC optimization tool. It handles junk files, incorrect settings, and harmful apps. Make sure it's right for your system, and always check the EULA and Privacy Policy.
Special offer. About Outbyte, uninstall instructions, EULA, Privacy Policy.
Here are some of the error messages you might encounter:
- 2018-11 Update for Windows 10/11 Version 1803 for x64-based Systems (KB4023057) – Error 0x80070643
- Update for windows 10 version 1511 for x64-based systems (kb3106246) – Error 0x80070643
- Failed to install on (date) – 0x80070643
- Error 0x80070643 Failed to install MSI package
There are different variations to this error notification, but they all mean the same thing: the update installation has failed and you won’t be able to proceed without fixing the error first.
We’ve put together a comprehensive guide to resolve the Windows Update error 0x80070643.
What Causes Windows 10/11 Update Error 0x80070643?
If your Windows PC displays the install error – 0x80070643, you don’t have to worry because you are not alone. This problem has been reported by a significant number of Windows users over the years.
This problem is often triggered by one or a combination of the following factors:
- Incomplete/Faulty Update Installation— In most cases, error 0x80070643 occurs when you have installed a faulty update on your computer, and now the system keeps on processing or accessing the older installation and does not recognize the new files while installing the update.
- Windows Installer Service — If your computer’s Windows Installer service is malfunctioning, this error may occur because the computer is unable to correctly install the new update.
- Windows Update Components — We’ve observed instances, where the Windows Update components were wrongly initiated during startup or their launch, which was compromised, resulting in error 0x80070643 when attempting to download and install updates on the PC.
- Third-party antivirus software — There have been instances when Windows is unable to properly process updates for the operating system due to installed third-party antivirus software.
- Damaged System File — This error may appear on your computer if the system files or drivers have been wrongly installed or damaged due to a storage failure.
- Outdated Drivers — It’s also possible that the drivers you’re currently using on your computer are outdated and need to be updated in order for your system to perform properly.
Now we can finally proceed to the steps to get rid of this issue after you have gotten familiar with the causes.
Steps to Fix Install Error – 0x80070643
Try the steps below in the following order until the message disappears and the update is successful:
Step 1: Reboot your computer.
In general, when you install a new update or application on Windows, a prompt displays asking you to restart the computer. If you disregard this request, the system will create certain log files that will cause problems later on.
The majority of issues are resolved by just restarting the computer. Click Start > Power > Restart and see if it helps.
Step 2: Restart the installation.
Attempting the installation of the update again may result in a different outcome, so it’s worth trying at least once more before continuing with any additional troubleshooting.
Step 3: Download the file again.
If you downloaded an update or an app and the (kb3122947) – error 0x80070643 or (kb4023057) – error 0x80070643 appeared, the installation file may have become corrupted during the download process. Download it again to see if that resolves the issue. Make sure you have a stable internet connection when downloading to prevent interruptions that could corrupt the installation files. Also, delete the original files you downloaded first so you don’t install them instead of the new download.
Step 4: Run the SFC/SCANNOW command.

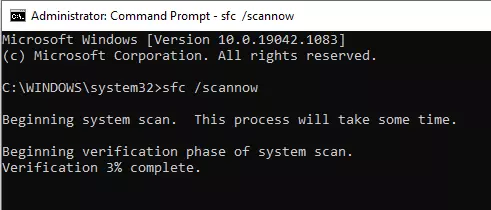
Error 0x80070643 on Windows might be caused by faulty system files. The SFC command scans files for errors and, if possible, repairs them. Here’s how to do it:
- Open the Run dialog box by pressing the Windows key and the R shortcut key.
- Type cmd in the search box and then click Ctrl+ Shift+ Enter. This should open the Command Prompt as administrator.
- Type sfc /scannow into the console window and press Enter.
Running an SFC scan can be a time-consuming process, so please be patient until it is completed. Once the process is finished, try to install the Windows updates to see if the error has been resolved.
An easier way to scan for corrupted system files and deleting junk files from your computer is by using a PC Repair Tool that automatically scans the entire system.
Step 5: Reset the Windows Update components.
If the techniques above do not resolve error 0x80070643 on your PC, try entering the following commands on Command Prompt:
- To begin, open the Run dialog box by pressing the Windows key and the R shortcut key.
- Type cmd in the search box and then click Ctrl+ Shift+ Enter. This should open the Command Prompt as administrator.
- Type in the following commands in the CP window one by one and then hit Enter.
- net stop wuauserv
- net stop cryptSvc
- net stop bits
- net stop msiserver
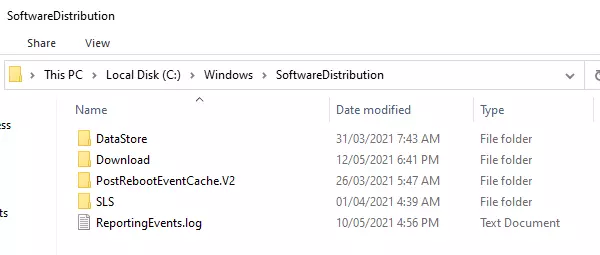
- Ren C:\Windows\SoftwareDistribution SoftwareDistribution.old
- Ren C:\Windows\System32\catroot2 Catroot2.old
- net start wuauserv
- net start cryptSvc
- net start bits
- net start msiserver
- Type exit and press the Enter key to close the window.
Finally, close the current command prompt session and retry installing the Windows update again.
Step 6: Rename the SoftwareDistribution folder.

Error 0x80070643 can occur as a result of a corrupted MSI software update registration or a faulty .NET Framework installation on your PC.
To resolve this, rename the SoftwareDistribution folder by executing the following instructions:
- Open the Run dialog box by pressing the Windows key and the R shortcut key.
- Type cmd in the search box and then click Ctrl+ Shift+ Enter. This should open the Command Prompt as administrator.
- Type in the following commands in the CP window one by one and then hit Enter.
- net stop wuauserv
- net stop bits
- rename c:\windows\SoftwareDistribution SoftwareDistribution.bak
- net start wuauserv
- net start bits
Step 7: Clear the Catroot folders.
The Catroot and Catroot2 folder are two crucial Windows OS directories required throughout the Windows Update process. So, if you have difficulty updating Windows and get error code 0x80070643, you need to reset the Catroot2 folder.
To do this, here are the steps:
- Open the Run dialog box by pressing the Windows key and the R shortcut key.
- Type cmd in the search box and then click Ctrl+ Shift+ Enter. This should open the Command Prompt as administrator.
- Type in the following commands in the CP window one by one and then hit Enter.
- net stop cryptsvc
- md %systemroot%\system32\catroot2.old
- xcopy %systemroot%\system32\catroot2 %systemroot%\system32\catroot2.old /s
- Then, delete everything in the catroot2 folder.
- After that, in the CMD window, type this command and press Enter after:
net start cryptsvc
- When you restart Windows Update, your catroot folder will be reset.
Step 8: Manually install the updates.

If you can’t get the updates automatically, try installing them manually. All you have to do is follow the steps below:
- On the Taskbar, select File Explorer and then This PC.
- Right-click anywhere on the screen and pick Properties from the context menu.
- After that, look into the system’s characteristics, such as whether the installed OS is 32-bit (x86-based) or 64-bit (x64-based).
- Look for the available update in the Settings window once more. It should begin with KB.
- Copy the cumulative update identifier.
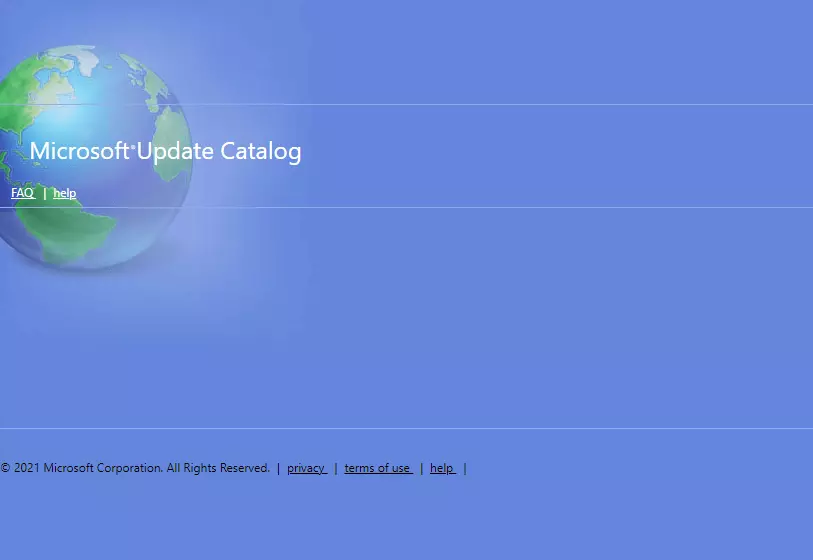
- Visit the Microsoft Update Catalog and paste the cumulative update in the search box.
- Click the correct result and make sure to choose the version that is appropriate for your system (x86 or x64).
- Download and install the update on your computer.
Step 9: Manually update Windows Defender Antivirus.
In some cases, Windows Update error 0x80070643 is caused by Windows Defender not being activated. The best option in this case is to upgrade your Windows security software. To manually update Windows Defender, follow the steps outlined below:
- First, determine whether your system architecture is 32-bit or 64-bit.
- Now, depending on your system processor, download the Windows Defender update file.
- If you are using a different version, you can go to the Microsoft Website and download the file directly.
- Once you’ve downloaded the program, run it to activate Windows Defender.
- Lastly, reboot your PC and try to reinstall the Windows update again.
Check to see if the problem has been resolved. If not, use the next solution.
Step 10: Install the latest .NET Framework.
.Net Framework is required for Windows Update to function properly. The install error – 0x80070643 might occur if the .NET file becomes corrupted or is missing in some way. If this is the case, you must download and install the most recent version of .NET Framework on your computer. If you’re unsure how to begin, these are the steps:
- Go to Microsoft’s official website and download the .NET Framework.
- Choose the most recent .NET Framework file from this list and download it.
- Simply double-click the downloaded file to install it.
- To finish the setup, follow the on-screen directions.
This should resolve error 0x80070643 caused by an outdated .NET framework. But if the .NET Framework file has become corrupted, you can repair it using the.NET Framework Repair Tool.
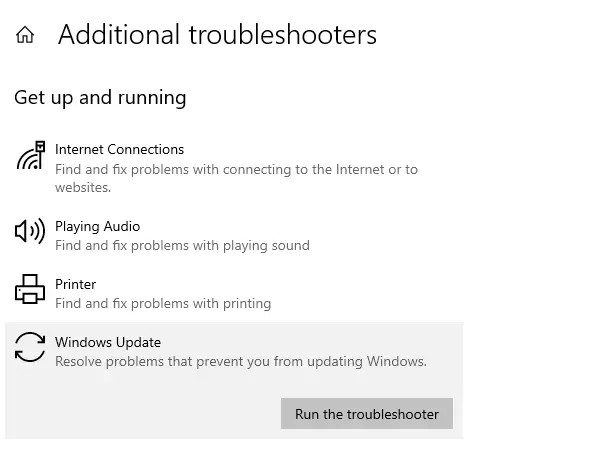
Step 11: Launch the Windows Update Troubleshooter.

When Windows users attempt to install the most recent updates from Windows Update, they may obtain an error message – 0x80070643. Run the Windows Update Troubleshooter to see if it fixes any of these issues.
Finally: Install updates during a clean boot.
Installing Windows updates in a clean boot state is an excellent option because all non-Microsoft programs and services are inactive in this state. There won’t be any third-party interference that will cause Windows Update to fail.
